
Canva is an Australian graphic design platform used to create social media graphics, presentations, posters, documents, logos, and other visual content. Over 75 million people use Canva monthly to unlock their creativity and achieve their goals.
A Canva Publish Extension adds a publish destination to Canva. This destination appears in the Publish menu. Users can use publish extensions to seamlessly bridge the gap between Canva and third-party platforms.
Creating a Cloudinary Canva Publish Extension allows your designs to be published to a Cloudinary account. Cloudinary provides Programmable Media APIs and Digital Asset Management to developers and content managers– allowing sharing, collaboration, management, and a wide array of creative transformations along with efficient delivery via global CDNs. There are many instances when publishing your Canva creations to a Cloudinary account is useful. For example, if you need to collaborate with website creators and content managers that use Cloudinary as a single source of truth for images and videos – saving the need to download, upload, email, and/or Slack media files.

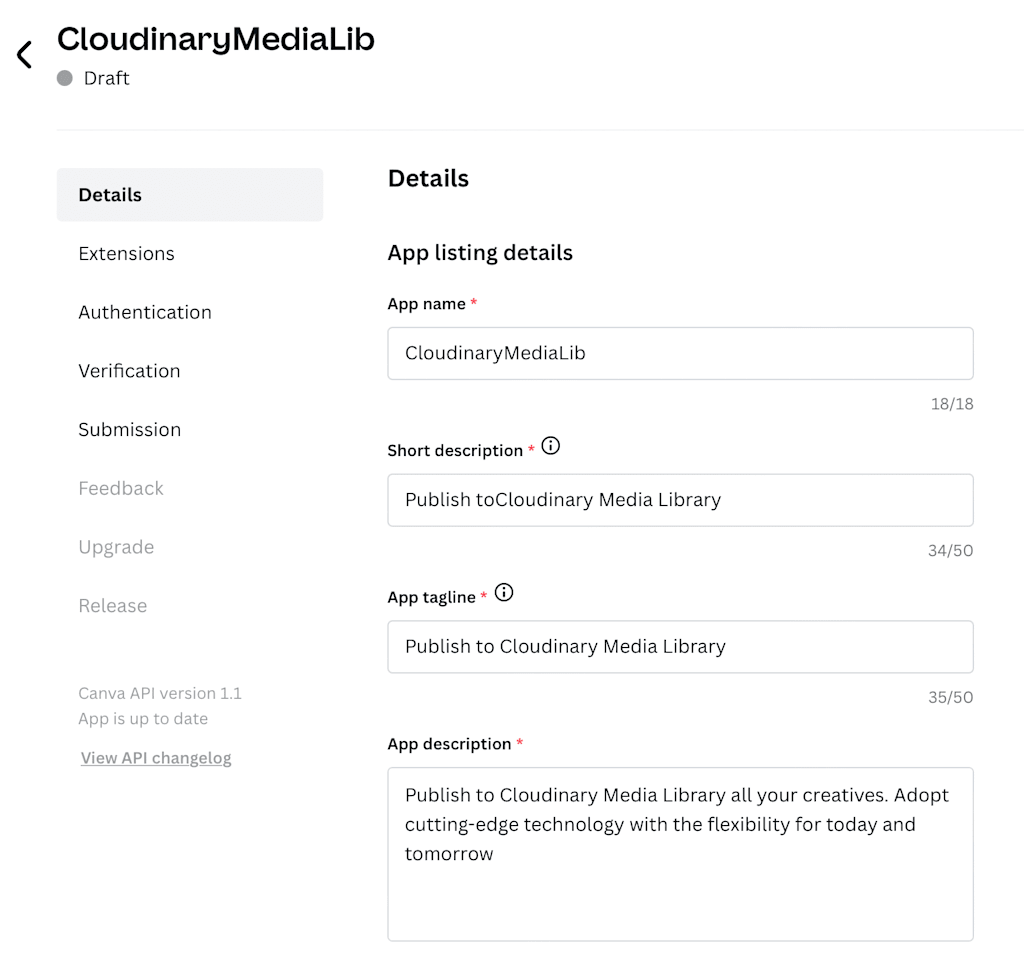
In this article you will learn how to create a Canva Publish Extension that allows Canva users to publish their content in Cloudinary and create optimized delivery URLs within Canva. This project implements a set of simple RESTful APIs endpoints based on Canva Publish Extension documentation. It uses Express, a minimal and flexible Node.js framework that includes a number of HTTP utility methods for quickly using Cloudinary APIs via the Cloudinary Node.js SDK.
This project uses Glitch where millions of creators, professionals, and educators build and host dynamic websites. The extension is a private, team-level one. This post is educational in focus and is intended to explain how to customize and extend Cloudinary’s integration with Canva.
Building the app is a two-stage process. First, create the Glitch backend to integrate with Cloudinary. Second, create the Canva app that connects the Canva UI to the Glitch backend via a publish app.
If you don’t already have a Glitch account – sign up, it’s free.
Once you’re signed up, Remix our Cloudinary Canva Sample Publish Extension project on Glitch to create a copy of an existing project. From there, you can customize the project and make other changes.
For this integration, you will use your existing Cloudinary account or create a free account if you don’t already have one. (For more information on how to open Cloudinary’s Programmable Media account please review our documentation.)
In Glitch, create a .env file with 2 variables:
CANVA_CLIENT_SECRET
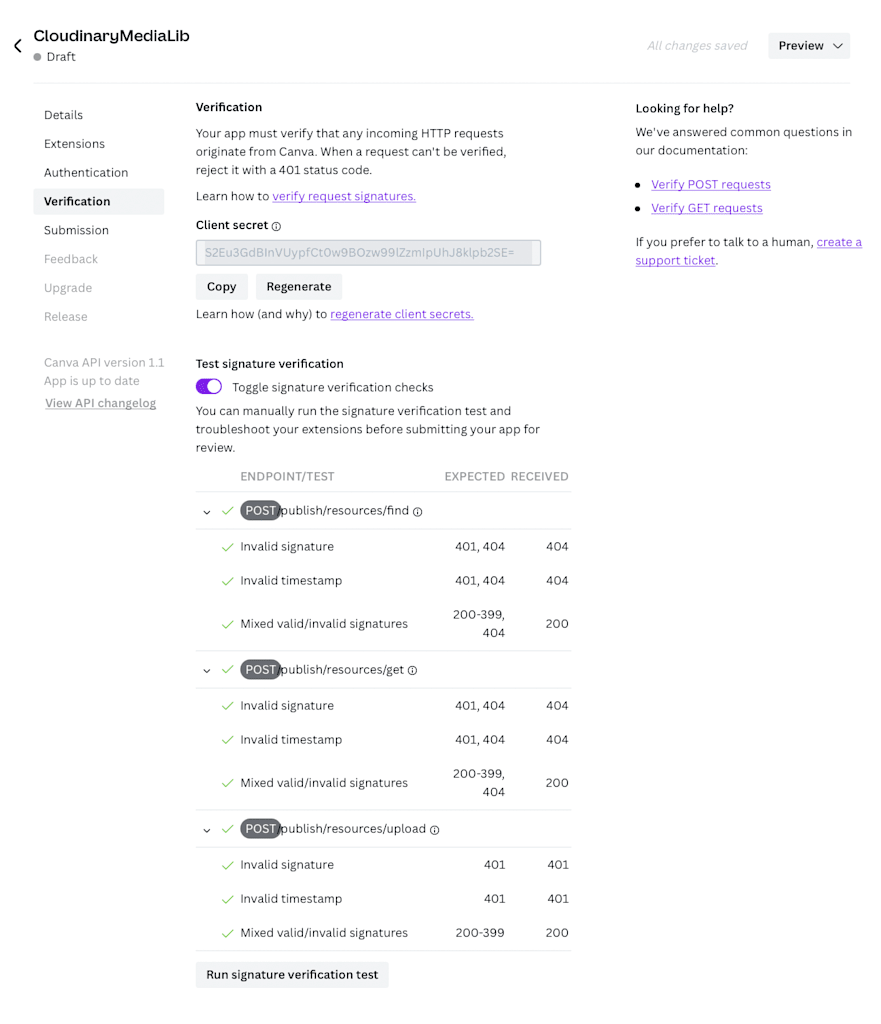
Your app must verify that any incoming HTTP requests originate from Canva. When a request can’t be verified, reject it with a 401 status code. In the second stage, when your Canva app is created, you will Generate Client Secret and paste it here.
CLOUDINARY_URL
Setting the CLOUDINARY_URL environment variable You can configure the required cloud_name, api_key, and api_secret by defining the CLOUDINARY_URL environment variable. The CLOUDINARY_URL value is available on the Dashboard page of the Cloudinary Console.

You can use console.log for debugging purposes.
Canva expects REST API to implement find, get and upload endpoints. We implemented all 3 endpoints in our sample project, plus verification.
Find and Get endpoints are using Cloudinary Admin API get subfolders method. If your organization has a large number of folders and subfolders you may need to improve our code and increase max_results and use next_cursor.
- /publish/resources/upload endpoint using Cloudinary Upload API and Cloudinary URL helper method to upload and return optimized transformation URL to Canva end users.
Canva makes developing apps easy and straightforward, for more information follow the Canva App Development Documentation
- Log in to the Developer Portal.
- Create an app.
- Choose a way to distribute the app. Public or Team App. You can’t change a public app into a team app (or vice-versa), in this project we will use a Team App distribution App. For the most part, creating a team app is the same as creating a public app. The main difference is that Canva doesn’t review team apps before they’re released. Instead, an owner or administrator of the team must review the app. This gives the owners and administrators a chance to verify that the app meets their organization’s guidelines. Choose extension type, an app can support multiple extensions, but only one extension of the same type. Each extension adds a distinct behavior to the app and requires a different sequence of steps to get it up and running. In our project, we will use Publish Extension Type.
- Develop the extension. We provide a sample project with all you need and implemented signature verification requirements to verify that requests received by the application are from Canva.
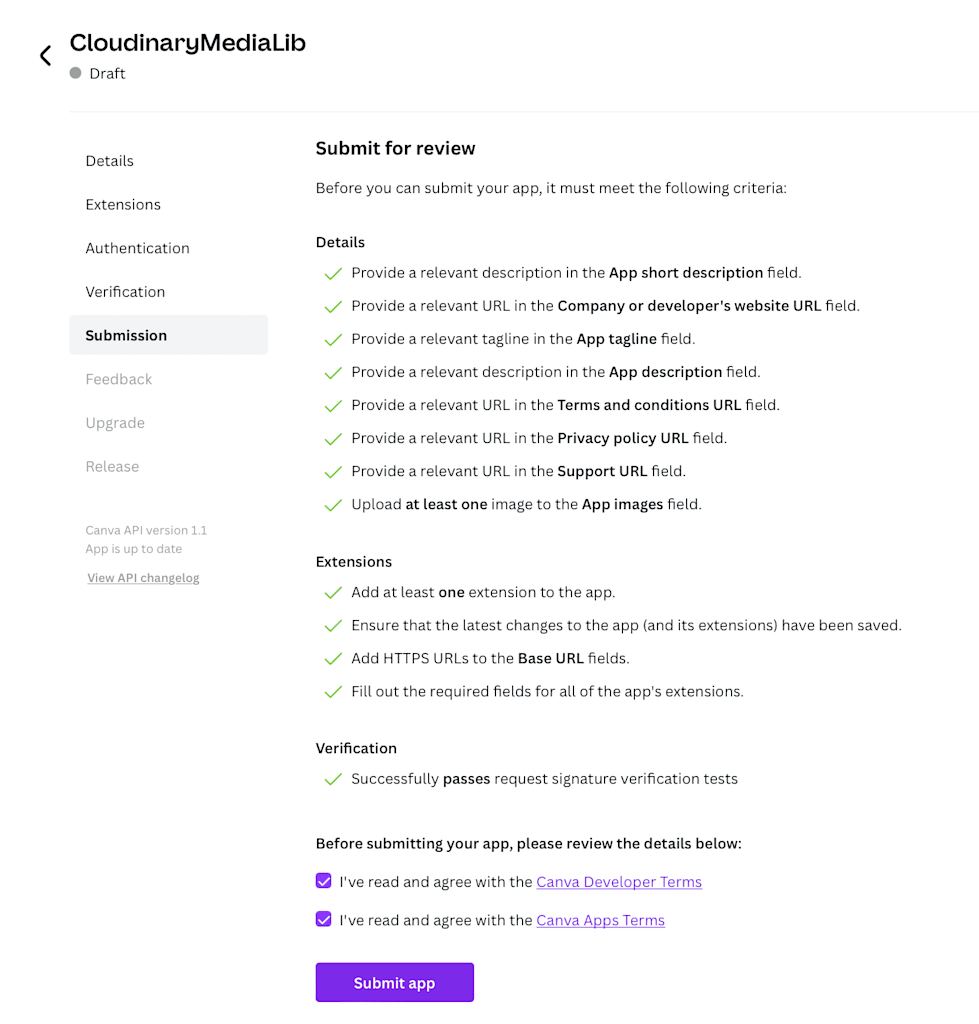
- Prepare for the app review, and verify that your app meets the required quality standards before submitting it for review. The review criteria for a team app are at the discretion of the team and the reviewer.
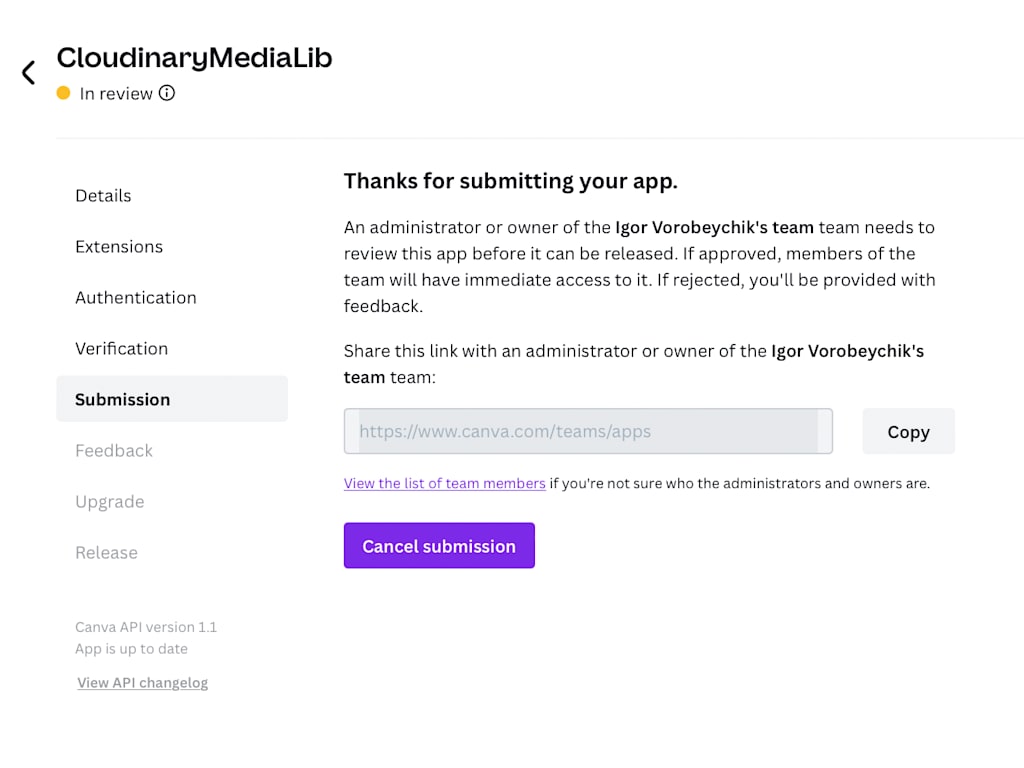
- Submit a team app for review to your team admin. Canva only gets involved when approving publicly available apps.
- Review and Approve your App.
- Release the app. For a Team app, Canva sends an email to the creator of the app and immediately makes the app available to members of the team.
To Create a Sample Publish Extension App using Cloudinary Node JS SDK please follow our simple steps or follow Quick Start For Publish Extension
We provide a sample code that allows end users to select a folder within Cloudinary DAM to publish their design. That is why we select the “Nested list” layout option. Point your Canva publish Extension to your Glitch project by setting the Base URL to your https://{{Project_name}}.glitch.me hostname created in stage 1.

For that sample integration, we are going to hardcode Cloudinary authentication within our application. We will not provide user authentication since our assumption is that you will use this integration within your organization as a team app that points to your organization’s Cloudinary account.

Signature verification is a security mechanism that verifies the authenticity of HTTP requests. Once set up, it guarantees that all requests received by an app originate from Canva and haven’t been tampered with. We implemented verification within our sample project. For more information please visit signature verification. The Client secret created in this stage should be pasted into the .env file of your Glitch project – go back to Glitch and paste it there (CANVA_CLIENT_SECRET).
Click Preview and select the extension from the dropdown list. When a user publishes their design by clicking the extension’s Save button, Canva sends a POST request to the following endpoint: <base_url>/publish/resources/upload. This endpoint uploads the user’s design to the Cloudinary server and responds with a URL that lets users view the published design. We added f_auto, and q_auto within our implementation to deliver optimized media.


Once you’ve developed an app, the next step is to submit it for review. A team app is an app that can only be made available to members of a specific team. This is in contrast to public apps, which can be made available to all of Canva’s users.
Team app administrators can approve or reject an application. The developer can modify and submit a new version for review.

With your added Cloudinary Canva Publish Extension you bridge the gap between Canva and Cloudinary platforms allowing your designs to publish their creatives to Cloudinary. Cloudinary will transcode those assets to the most efficient format based on the content and viewing context and adjust the quality based on the most optimal compression without visual degradation.


