
The paradigm shift in the digital landscape is moving from static to dynamic content, making CMS-driven photo galleries more essential. What makes this dynamic? It stems from personalization, automatic image resizing, and the ability to change text, colors, and more elements within an image programmatically — possibilities that many might not be aware of.
This dynamism highlights the importance of integrating robust technologies like Cloudinary, Sanity, and Svelte, key players that significantly impact modern web development.
Cloudinary is a media management platform for image and video handling. Sanity, meanwhile, enables structured content architectures and real-time collaboration, while Svelte offers an innovative approach to building web-based user interfaces.
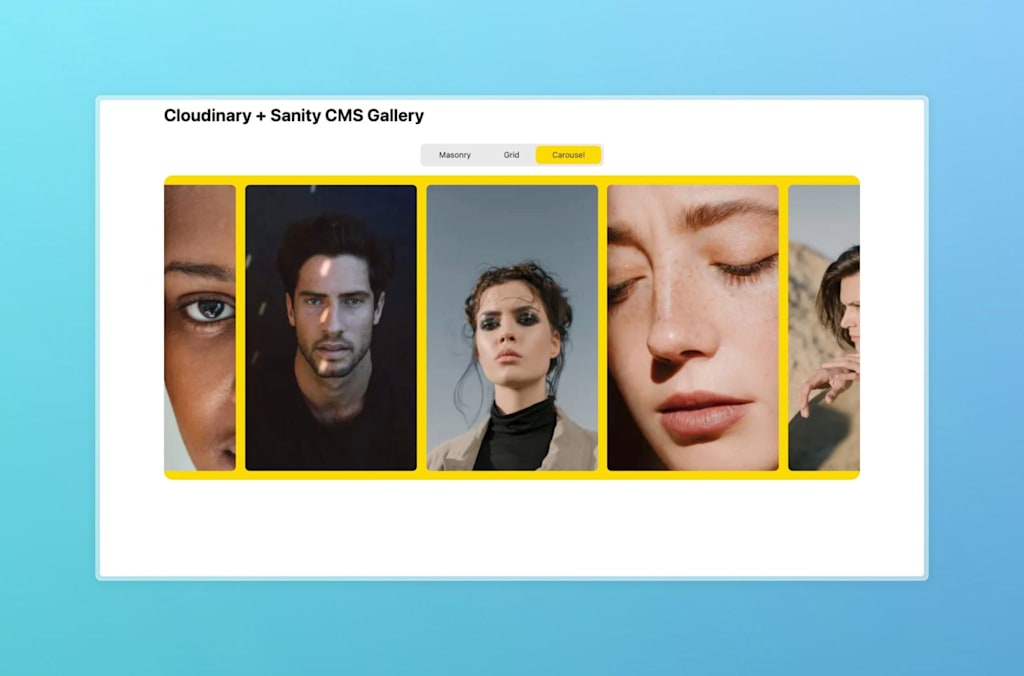
Together, these technologies transform CMS-driven galleries into dynamic, responsive experiences. Merging Cloudinary’s media capabilities with Sanity’s content management in a Svelte application lets developers create truly immersive, CMS-driven galleries. Through this article, we explore this integration and a demo implementation.
Jump right into the action with hands-on examples present in our GitHub Repo, or explore these techniques live here.
The Sanity Cloudinary Plugin provides easy access to Cloudinary’s images and videos within Sanity Studio. It consolidates the functionality of sanity-plugin-cloudinary and sanity-plugin-asset-source-cloudinary, offering secure API credential storage, easy configuration, and handy video player preview. Notably, it allows the creation and preview of transformations and incorporates Cloudinary’s media library, optimizing your media management efficiency within Sanity Studio.
This blog post assumes you already have a sanity project setup. You can also set up a new Sanity project by running the following command in the terminal.
```
npm create sanity@latest
```Code language: JavaScript (javascript)
You can read more about installing and setting up a Sanity Studio project here.
To get started with the Sanity plugin, run the following commands in your Sanity studio project to install sanity-plugin-cloudinary.
```
npm i sanity-plugin-cloudinary
```Code language: JavaScript (javascript)
The sanity-plugin-cloudinary comes with two exports:
- cloudinaryAssetSourcePlugin – serves Cloudinary images from the Sanity CDN
- cloudinarySchemaPlugin – serves Cloudinary images from the Cloudinary CDN
In this example, we will use cloudinarySchemaPlugin to serve the images from Cloudinary CDN.
Update the sanity.config.js file to include the plugin.
```
import {defineConfig} from 'sanity'
import {deskTool} from 'sanity/desk'
import {visionTool} from '@sanity/vision'
import {schemaTypes} from './schemas'
import {cloudinarySchemaPlugin} from 'sanity-plugin-cloudinary'

export default defineConfig({
  name: 'default',
  title: 'studio',

  projectId: YOUR-SANITY-PROJECT-ID,
  dataset: YOUR-SANITY-DATASET',

  plugins: [deskTool(), visionTool(), cloudinarySchemaPlugin()],

  schema: {
	types: schemaTypes,
  },
})

```Code language: PHP (php)
Next, create a schema named gallery like this.
```js
import {defineField, defineType} from 'sanity'

export default defineType({
  name: 'gallery',
  title: 'Gallery',
  type: 'document',
  fields: [
	defineField({
  	    name: 'title',
  	    title: 'Title',
  	    type: 'string',
	}),

	defineField({
  	    name: 'images',
  	    title: 'Images',
  	    type: 'array',
  	    of: [{type: 'cloudinary.asset'}],
	})
  ],
  preview: {
	select: {
  	    title: 'title',
	},
  },
})

```Code language: PHP (php)
In the above schema, we defined a field named images, an array of type cloudinary.asset.
In the Sanity Studio, this field allows you to select a singular Cloudinary asset or multiple assets in one go.

It opens the Cloudinary media library for selecting assets. You can also apply transformations while selecting the asset.

Here’s what an asset of the type cloudinary.asset looks like.
```
{
  "created_at": "2023-12-13T06:22:11Z",
  "format": "jpg",
  "resource_type": "image",
  "access_mode": "public",
  "width": 2132,
  "secure_url": "https://res.cloudinary.com/singhashutoshk/image/upload/v1702448531/eb8y43ervardt38bqsyz.jpg",
  "id": "85a8909674e300ab9e6709b47df7dd45",
  "metadata": [],
  "_key": "0834b0b79241",
  "bytes": 443351,
  "_type": "cloudinary.asset",
  "type": "upload",
  "tags": [],
  "access_control": [],
  "height": 2299,
  "public_id": "eb8y43ervardt38bqsyz",
}
```Code language: PHP (php)In this section, we’ll integrate Sanity with our Svelte app. We’re using a skeleton Svelte app, which can be set up by running the following command in the terminal:
```
npm create svelte@latest cloudinary-sanity-example
```Code language: JavaScript (javascript)
You can choose the following configuration and tooling when prompted.
```
┌  Welcome to SvelteKit!
│
◇  Which Svelte app template?
│  SvelteKit demo app
│
◇  Add type checking with TypeScript?
│  No
│
◇  Select additional options (use arrow keys/space bar)
│  none
│
└  Your project is ready!

```Code language: JavaScript (javascript)
You can read more about creating a Svelte project here.
Next, run the following command to install Sanity Client and Svelte Cloudinary.
```
npm i @sanity/client groq svelte-cloudinary
```Code language: JavaScript (javascript)
Add the following environment variables to your .env file.
```
PUBLIC_SANITY_PROJECT_ID=YOUR-SANITY-PROJECT-ID
PUBLIC_SANITY_DATASET=YOUR-SANITY-DATASET


VITE_PUBLIC_CLOUDINARY_CLOUD_NAME=YOUR_CLOUDINARY_CLOUD_NAME
```Code language: JavaScript (javascript)
Create a file named lib/sanityClient.js where we’ll initialize the Sanity Client. A Sanity Client interacts with your Sanity project’s Content Lake to perform operations like fetching documents, creating/replacing documents, uploading assets, etc. Our primary use case in this tutorial is fetching the data from the Content Lake.
```
import { createClient } from '@sanity/client';
import groq from 'groq';
import { PUBLIC_SANITY_DATASET, PUBLIC_SANITY_PROJECT_ID } from '$env/static/public';

export const client = createClient({
    projectId: PUBLIC_SANITY_PROJECT_ID,
    dataset: PUBLIC_SANITY_DATASET,
    useCdn: false,
    apiVersion: '2023-03-20'
});

export async function getGallery() {
    return await client.fetch(groq`*[_type == "gallery"] | order(_createdAt desc)[0]`);
}

```Code language: PHP (php)
The next step is to create a file named +page.js and define a load function to return the data from Sanity to the page (+page.svelte) via the data prop. You can read more about loading data in Svelte here.
```
import { getGallery } from '$lib/sanityClient';
import { error } from '@sveltejs/kit';

export const load = async () => {
    const galleryData = await getGallery();

    if (galleryData) {
   	 return galleryData;
    }

    throw error(404, 'Not found');
};

```Code language: PHP (php)
Update +page.svelte like this to access the data from Sanity via data prop and render the gallery images using CldImage from svelte-cloudinary.
```
<script>
    import { CldImage } from 'svelte-cloudinary';

    export let data;
</script>

<section class="py-4">
    {#if data}
   	 <div class="grid grid-cols-1 md:grid-cols-2 lg:grid-cols-3 gap-4 max-w-fit mx-auto">
   		 {#each data.images as picture}
   			 <div key={picture._key}>
   				 <CldImage
   					 src={picture.public_id}
   					 height="400"
   					 width="600"
   					 crop="fill"
   					 class="rounded hover:transform hover:scale-105 transition duration-300 ease-in-out"
   				 />
   			 </div>
   		 {/each}
   	 </div>
    {/if}
</section>

```Code language: HTML, XML (xml)
This will render a dynamic gallery like this:
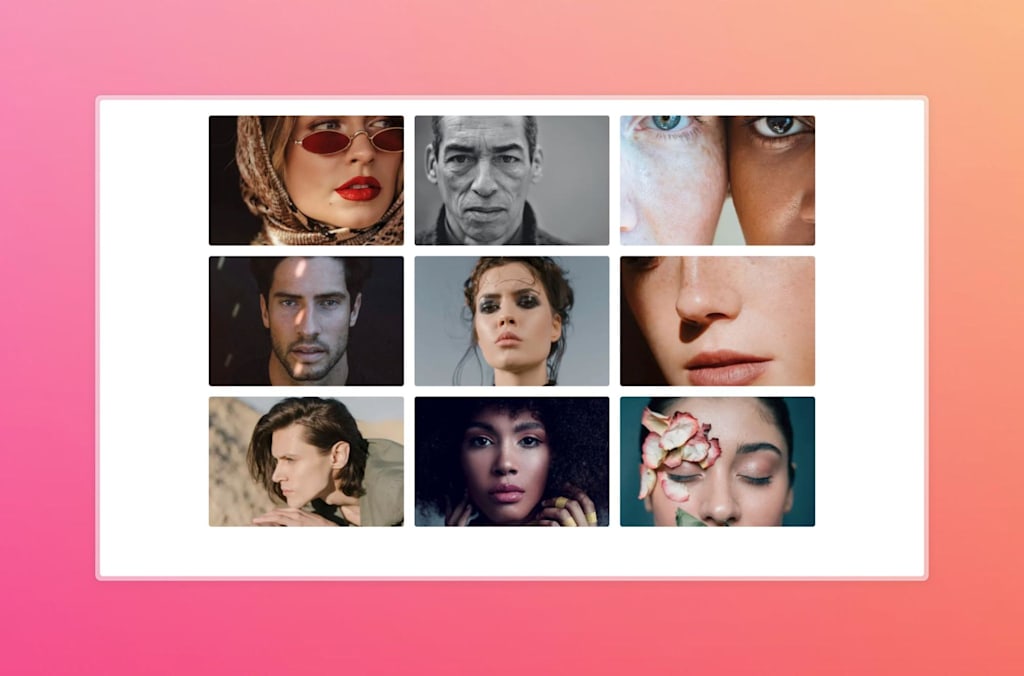
You can use the combined strength of Svelte, Sanity, and Cloudinary to build different dynamic galleries, satisfying users’ growing appetite for engaging and elegantly managed visual content. Having multiple images and media assets can impact a site’s performance. However, this can be effectively addressed with Svelte Cloudinary’s CldImage component, which can be used to optimize images and boost the overall site’s performance. You can learn more about boosting performance by optimizing the gallery images here.
The combined strength of Svelte, Sanity, and Cloudinary brings forth a new era of dynamic online galleries, satisfying users’ growing appetite for engaging and elegantly managed visual content.
The CldImage component provides access to Cloudinary’s full range of transformations, offering an alternative to the native image capabilities of Sanity for more dynamic and configurable image galleries.
Here are some additional resources:
If you found this article helpful and want to discuss it in more detail, head over to Cloudinary Community forum and its associated Discord.


