
If your website has slow-loading images, visitors are more likely to click off, increasing bounce rates and negatively impacting search engine ranking. Read how you can optimize, transform, and deliver your images with Cloudinary to improve user engagement and site performance.
To get started, we’ll need an account. You can sign up for a free account with Cloudinary to give you access to everything you need to follow along. After signing up, you’ll have access to your Cloudinary Console, which serves as your media asset control center. It’ll look like this:

To integrate Cloudinary into your web applications, you’ll need API and secret keys. You only need your Cloud Name for front-end applications. These credentials can be found in the “Product Environment Credentials” section of your Cloudinary Dashboard.
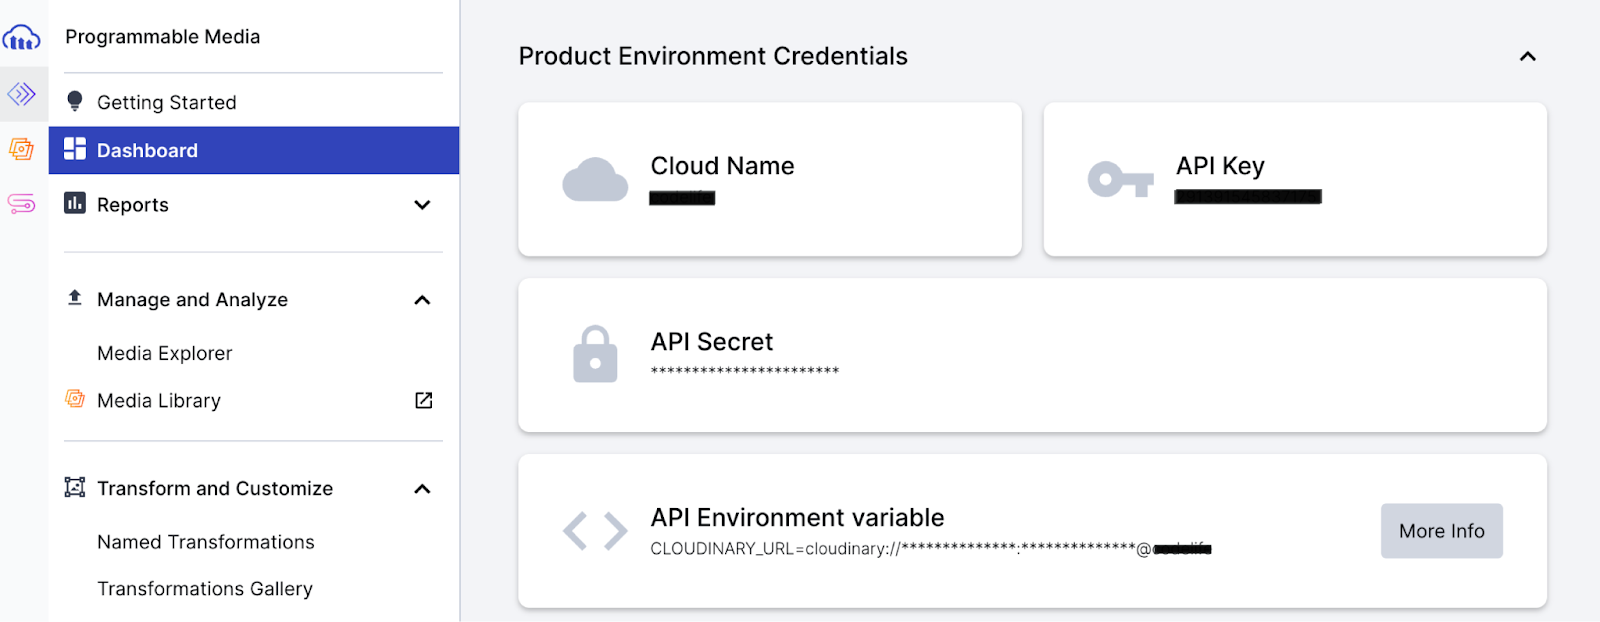
These keys serve as the bridge between your application and Cloudinary, facilitating secure and efficient communication.
Cloudinary provides software development kits (SDKs) to provide a seamless integration experience. These kits support a range of programming languages and frameworks, providing a solid basis for implementing Cloudinary’s Programmable Media into server and client-side applications.
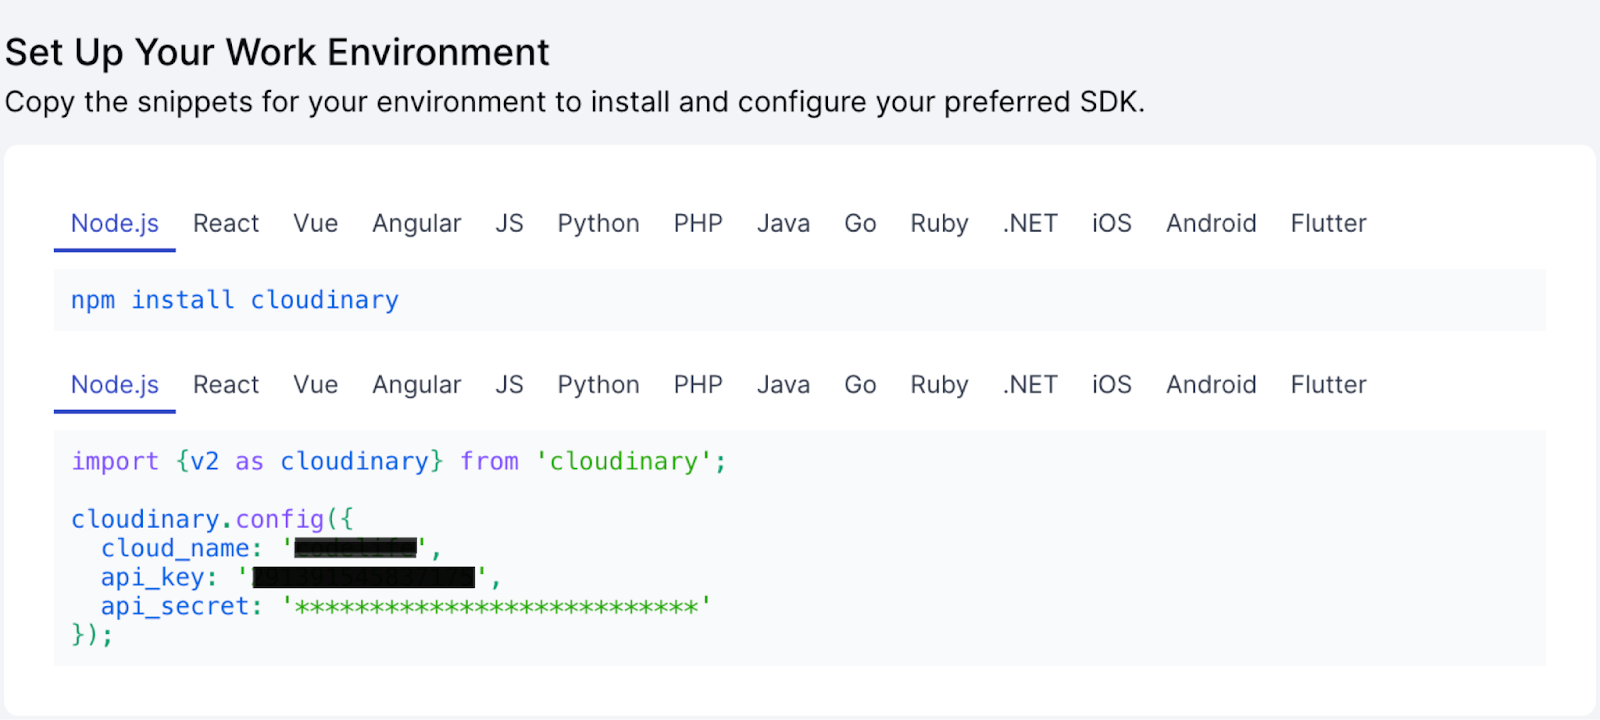
After you’ve obtained your API credentials, the next step is to integrate Cloudinary into your project. Cloudinary provides comprehensive documentation and code samples for numerous programming languages, whether you’re using a web framework or starting from scratch.
When embedding images in HTML, Cloudinary’s URL-based method provides a seamless way to manipulate and optimize images on the fly. These URLs contain the specified asset’s public ID and optional transformation parameters. The public ID is an identifier that Cloudinary assigns automatically or is defined during the asset upload process.
The following is the default Cloudinary asset delivery URL structure:
https://res.cloudinary.com/<cloud_name>/<asset_type>/<delivery_type>/<transformations>/<version>/<public_id>.<extension>Code language: HTML, XML (xml)While we won’t be going over everything here, you can check out their documentation on image transformations for more information.
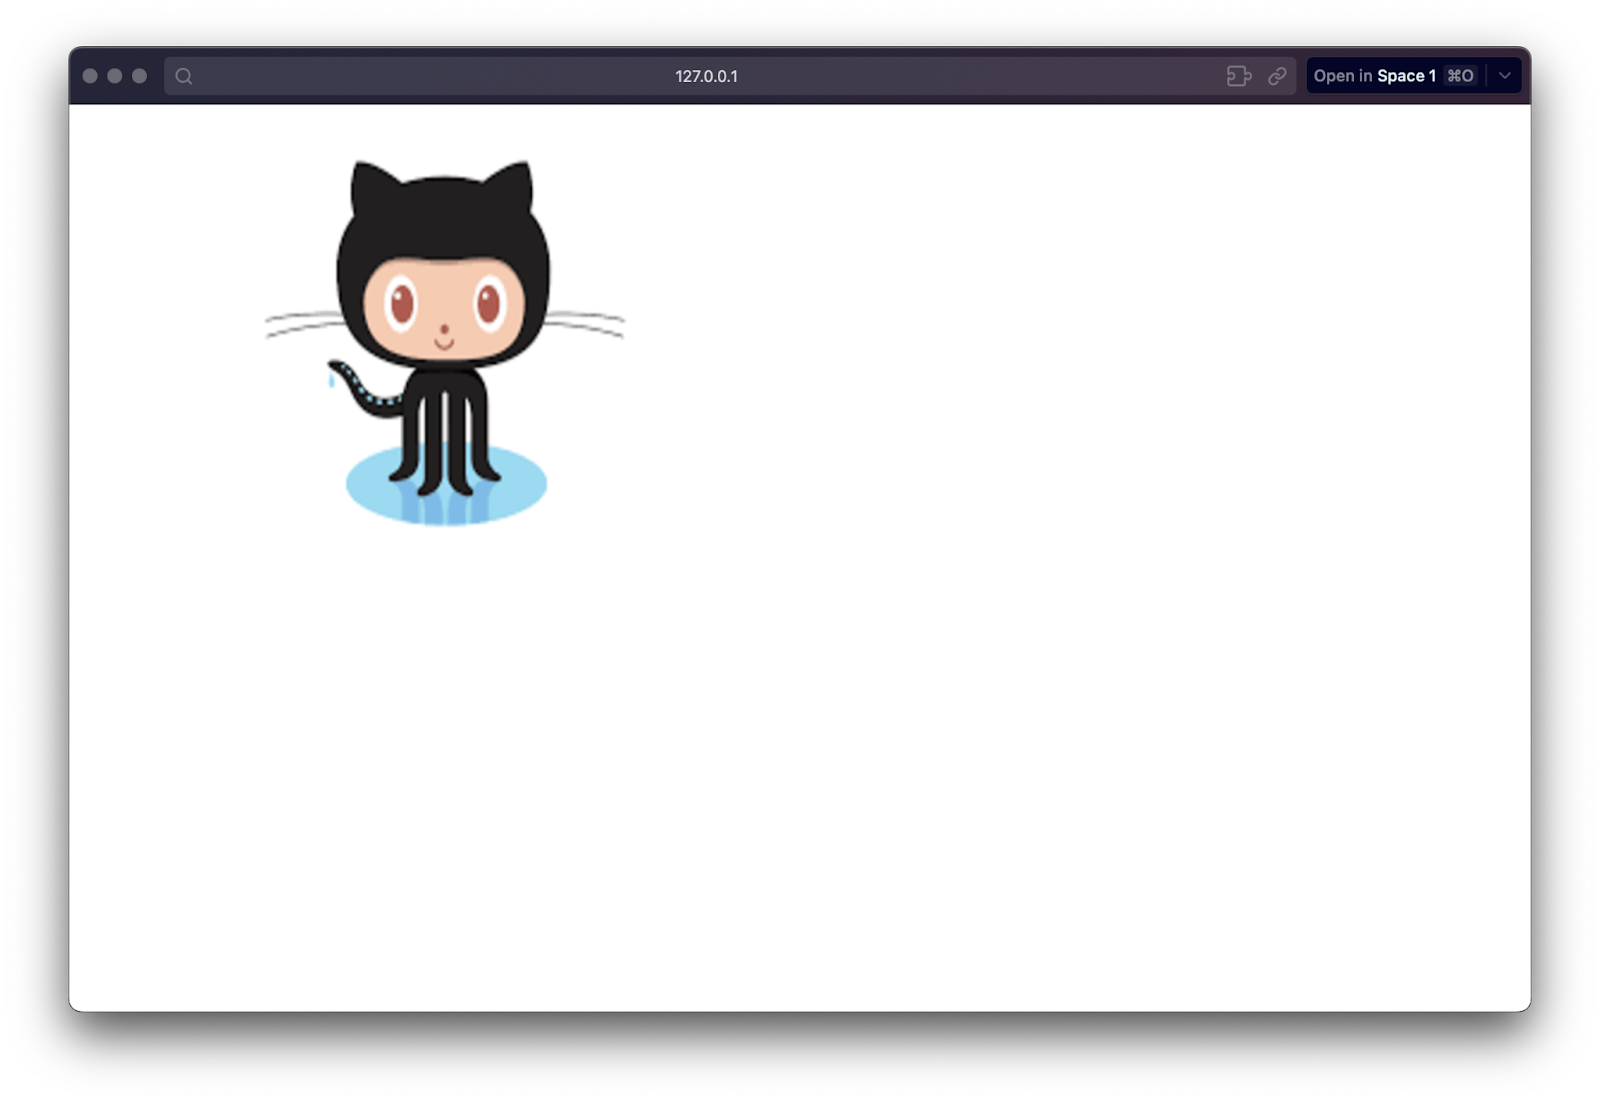
To embed a basic image in HTML, you can use the <img> tag with the src attribute set to the Cloudinary URL of the image.
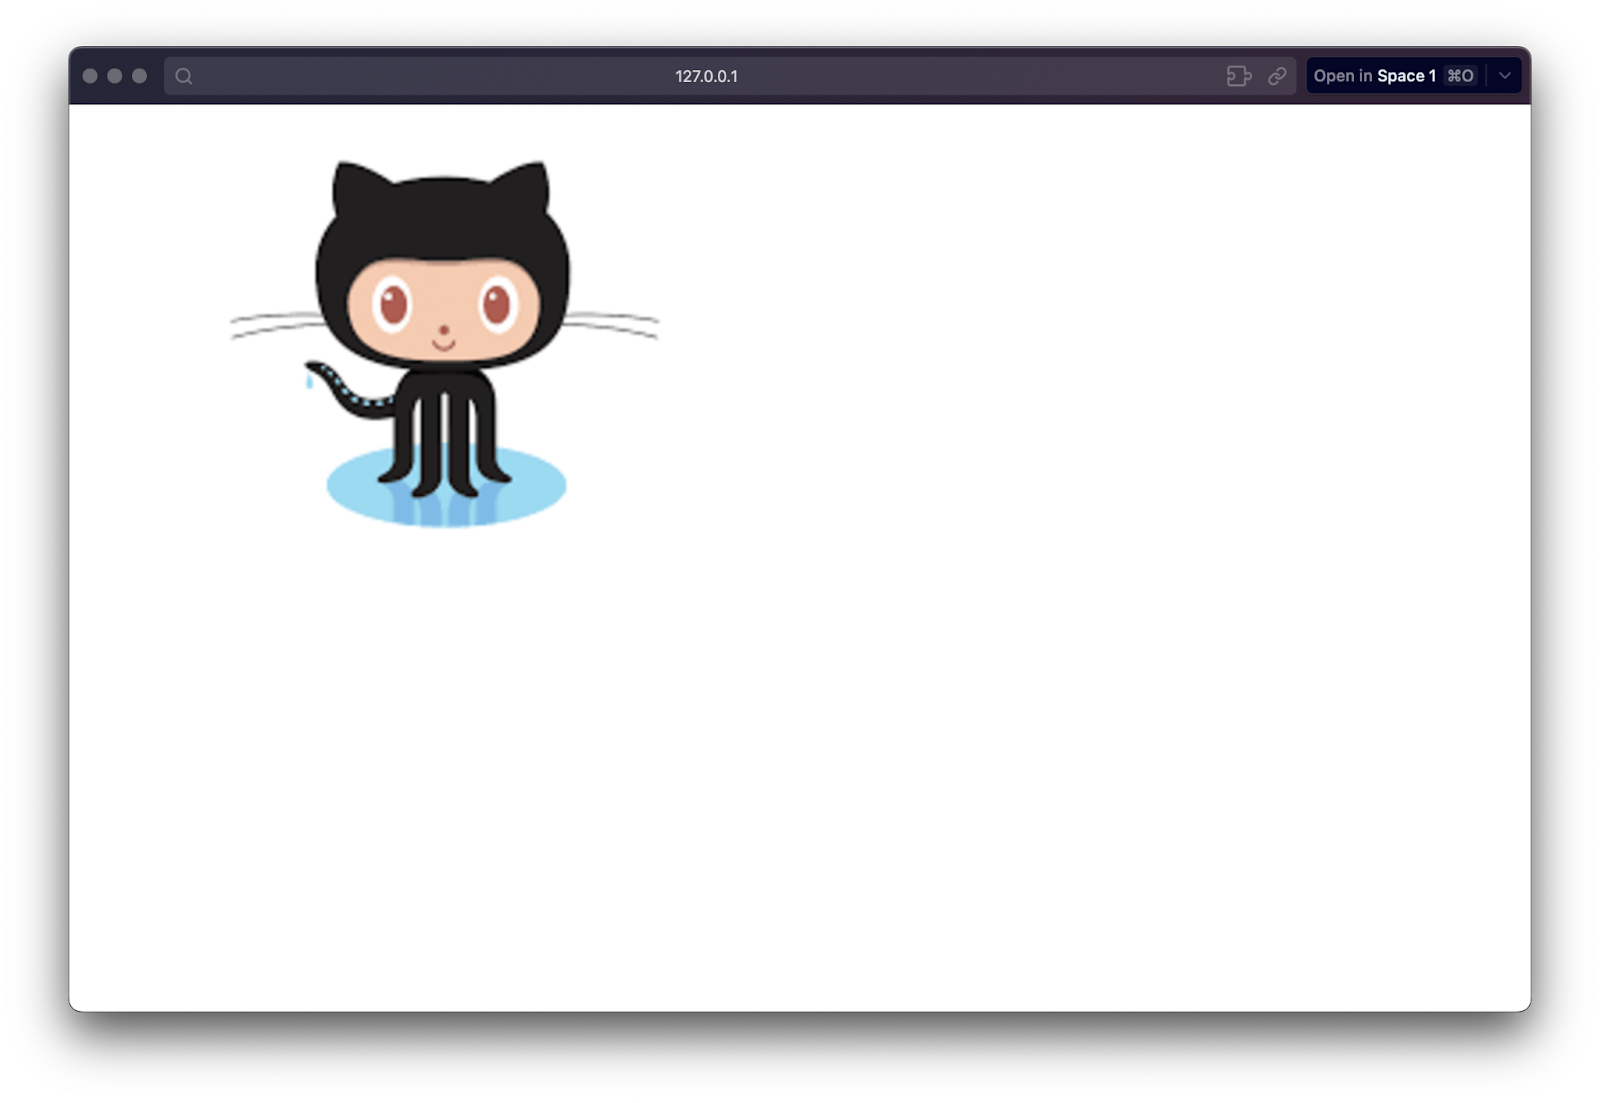
<img src="https://res.cloudinary.com/codelife/image/upload/v1621712847/octocat.png" alt="Sample Image">Code language: HTML, XML (xml)In this example, the Cloudinary URL structure can be divided into:
https://res.cloudinary.comis the base URL.codelife/is my product environment name, and it should be replaced with your actual cloud name.image/is the asset type.upload/indicates the delivery or storage method. In this case, I uploaded the image to Cloudinary.v1702248521/is a version parameter that ensures the correct version of the specific image you want to embed.sample.jpgis the name of the image file.
Here’s what the image looks like in the browser:
Cloudinary allows dynamic image transformations by appending transformation parameters to the image URL. For example, you can resize an image using the w (width) and h (height) parameters:
<img src="https://res.cloudinary.com/codelife/image/upload/w_800,h_500/v1621712847/octocat.png" alt="Resized Image">Code language: HTML, XML (xml)In this code snippet, we included a new URL parameter:
w_800,h_500/sets the width and height of the image to 800 and 500 pixels, respectively. These are transformation parameters that dynamically resize the image.
Here’s what the image looks like in the browser:
Adjusting the gravity parameter helps control the cropping focus. This is useful when resizing images to ensure the most essential elements are retained.
<img src="https://res.cloudinary.com/codelife/image/upload/w_800,h_500,c_fill,g_face/v1621712847/octocat.png" alt="Cropped Image with Face Gravity">Code language: HTML, XML (xml)In this code snippet, we included a new URL parameter to crop the image:
c_fillindicates a crop operation, filling the specified dimensions while maintaining the image’s aspect ratio.g_facesets the gravity to the face, ensuring that important facial features are preserved during cropping.
Here’s the output:
Aside from transformation and optimization, there are other ways to improve your user experience and your site’s overall performance with Cloudinary, such as lazy loading and compression.
Lazy loading is a method that defers image loading until the image is about to be displayed on the user’s screen. Web developers may speed up the initial page load time by implementing lazy loading, which is especially useful for content-heavy websites.
This method prioritizes image loading within the user’s viewport, resulting in a faster and more seamless browsing experience. Other images are loaded on-demand as users scroll through a page, optimizing performance and bandwidth usage.
To implement lazy loading with Cloudinary, you can use the loading attribute in the img tag:
<img loading="lazy" src="https://res.cloudinary.com/<cloud_name>/image/upload/<public_id>.<extension>" alt="Description">Code language: HTML, XML (xml)The loading="lazy attribute tells the browser to load the image lazily, improving initial page load performance.
Another way to optimize your images is through compression methods, which Cloudinary can perform by default. Web developers can significantly reduce file sizes by converting photos to WebP or other optimal formats without sacrificing visual quality. End users benefit from faster loading times and decreased bandwidth usage.
Cloudinary makes it simple to deliver images in several formats, including WebP. The f_auto argument can be used to choose the best possible format based on the user’s browser. To deliver images in WebP format, you can use:
<img src="https://res.cloudinary.com/<cloud_name>/image/upload/f_auto,fl_awebp/<public_id>.webp" alt="Description">Code language: HTML, XML (xml)In the example above, f_auto determines the best format automatically, and fl_awebp ensures that Cloudinary delivers the image in WebP format if the browser supports it. Cloudinary does on-the-fly format conversion, optimizing the image for better compression and faster loading.
To prevent unwanted access and secure sensitive content, embedding images in HTML requires careful consideration of security measures. When dealing with user data, adhering to best security practices is critical. Here are some best practices you can adopt when using Cloudinary to embed images in your web application:
- Access control policies. Create strict access control policies based on user roles and permissions to limit image access. Cloudinary gives you complete control over who can see the images you upload.
- Authentication tokens. Implement authentication tokens via the server application to validate user identity before serving images to prevent unauthorized users from accessing sensitive content.
- Using signed URLs. Signed URLs are a powerful security feature provided by Cloudinary, enhancing the protection of embedded images. A signed URL includes a signature that verifies the request’s authenticity, ensuring that only authorized users can access the requested image.
Here’s an example of how to use Cloudinary to generate a signed image URL:
const cloudinary = require('cloudinary').v2;

// Configure Cloudinary with your credentials
cloudinary.config({
  cloud_name: '<your_cloud_name>',
  api_key: '<your_api_key>',
  api_secret: '<your_api_secret>'
});

// Generate a signed URL for an image
const signedUrl = cloudinary.url('<public_id>', {
  secure: true,
  signature: cloudinary.utils.api_sign_request({ public_id: '<public_id>' }, '<your_api_secret>')
});

// Use the signed URL in your HTML
console.log(signedUrl);Code language: JavaScript (javascript)- Private CDNs. Consider using a private CDN with Cloudinary for extra security. A private CDN allows you to customize the domain name used for delivery URLs, which improves security by concealing the source of the images.
You can use private CDN distribution instead of using the default, Cloudinary shared CDNhttps://res.cloudinary.com/…. For example:https://prod-res.cloudinary.com/…. Alternatively, Cloudinary allows you to use a custom CNAME. So you can use a format like this:https://<your custom domain name>/image/upload....
Developers can create faster, more efficient websites by leveraging Cloudinary’s advanced features like automatic image optimization, responsive design support, and intelligent format selection. This leads to improved user experiences, higher engagement rates, and better SEO rankings.
Start optimizing and transforming your website’s images with Cloudinary today for a notable improvement in your site’s performance.
If you found this blog post helpful and want to discuss it in more detail, head over to Cloudinary Community forum and its associated Discord.

