
According to one of the leading companies specialized in market and consumer data, statista; the global film industry is more than a 42 billion U.S. dollar business. This projection has brought about the invention of new software, jobs, and specialized personnel to help improve the quality of videos and audio within movies.
In this post, we will discuss how to achieve better video sound quality using Dolby, Cloudinary, and Next.js. At the end of this tutorial, we will learn how to upload video to Cloudinary, process the audio with Dolby, and then re-upload the enhanced video to Cloudinary.
By way of introduction, Dolby is an API platform for transforming media and communications. It offers sets of reach APIs for enhancing, analyzing, diagnosing, and analyzing media data.
Next.js is a React-based front-end development framework that enables functionalities like server-side rendering, static site generation, file-system routing (with no need to manually configure react-router-dom), and API endpoints for backend features.
Cloudinary is a platform on which you can quickly and easily upload, store, manage, transform, and deliver images and videos for websites and apps. The platform also offers a vast collection of SDKs for frontend frameworks and libraries.
We completed this project in a Codesandbox, and you can “fork” it to run the code. Ensure you update the Sandbox with your Cloudinary and Dolby API keys before using it. Also, disable CORS in your browser, preferably in Safari.
The next steps in this post require JavaScript and React.js experience. Experience with Next.js isn’t a requirement, but it’s nice to have.
We also need the following:
- A Cloudinary account for video upload. Signup is completely free.
- A Dolby account for audio processing. Signup is completely free.
We need to create a Next.js starter project by navigating to the desired directory and running the command below in our terminal:
npx create-next-app video-enhancer && cd video-enhancer
This command creates a Next.js project called video enhancer and navigates into the project directory.
We proceed to install the required dependencies with:
npm install react-helmet
react-helmet is a library that takes plain HTML tags and adds them to the <head/> element of a web page. It will help us avoid the Reference error: Window is not Defined error when using client-side only packages in Next.js.
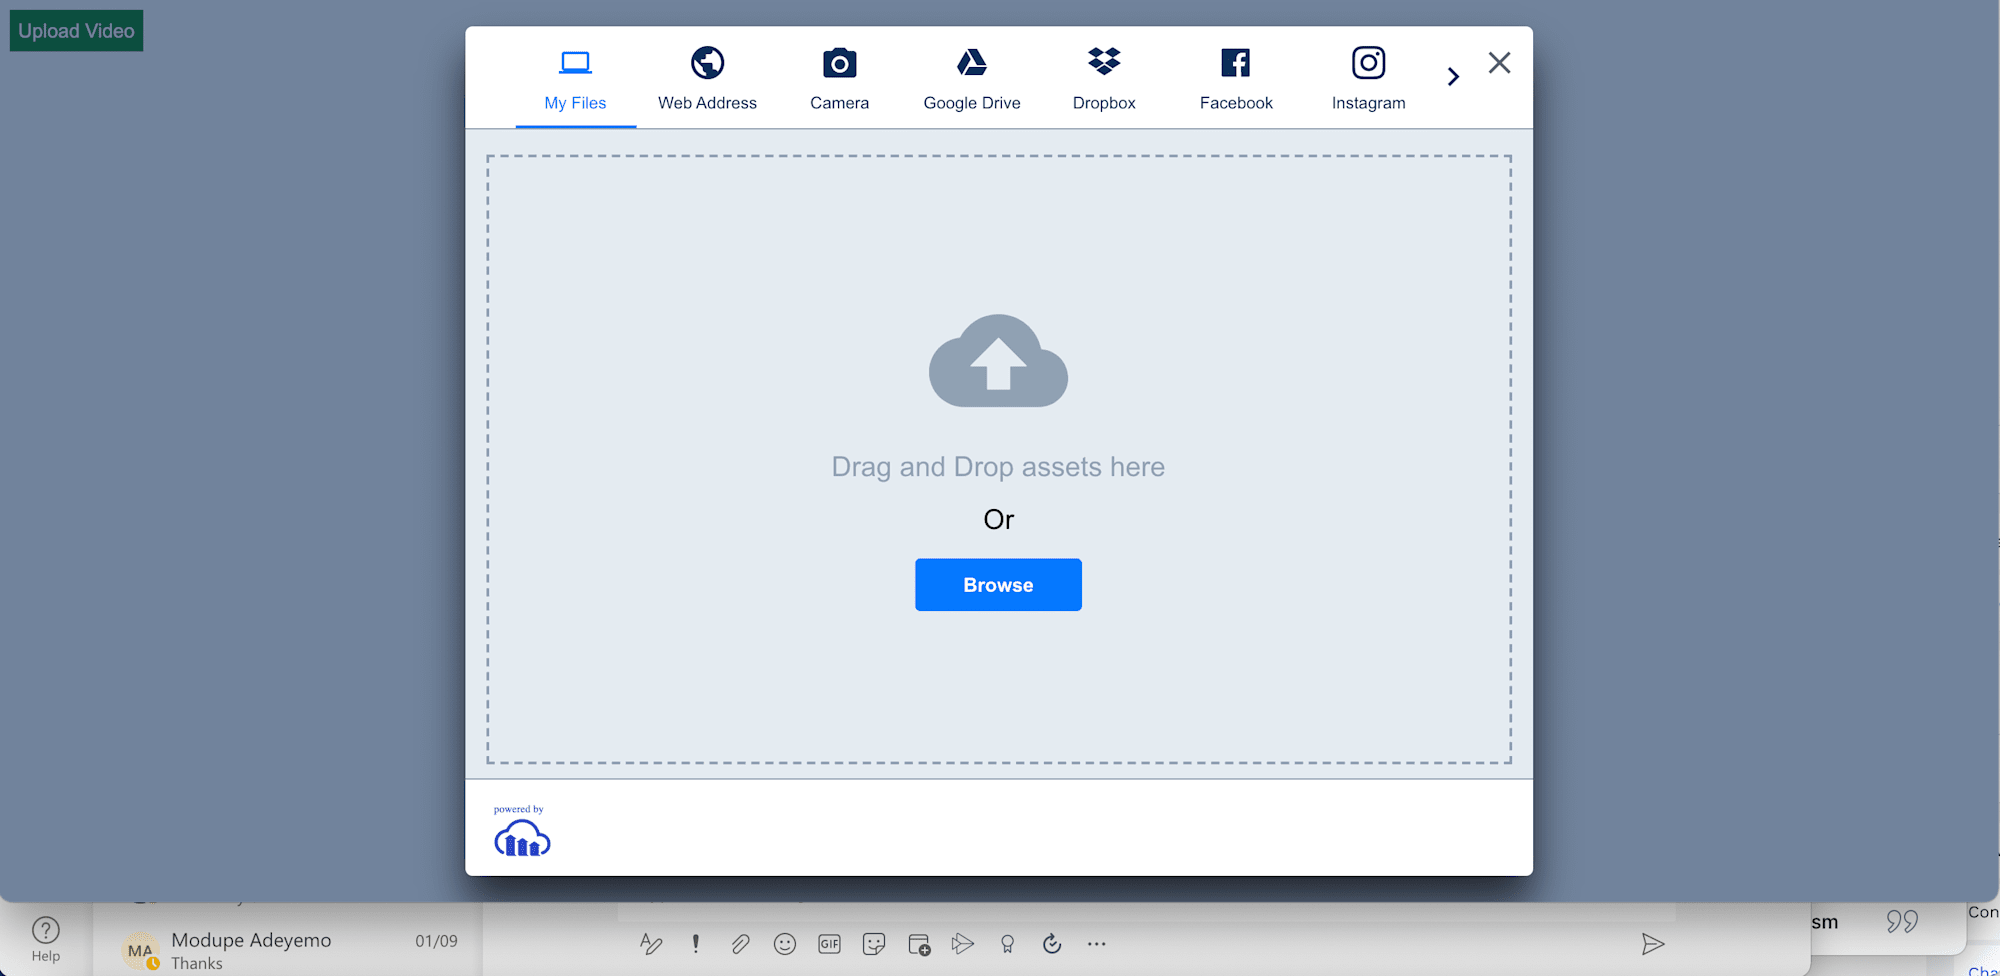
With the project dependencies installed, we can now set up our application to use the Cloudinary Upload Widget. To use the Cloudinary Upload Widget in our application, we need to include the script from a CDN in our application using react-helmet, a package we installed earlier.
Add the script from a CDN to index.js file in pages folder to use Cloudinary Upload Widget:
import { Helmet } from "react-helmet"
export default function IndexPage() {
return (
<div>
<Helmet>
<script src="https://upload-widget.cloudinary.com/global/all.js" />
);
}
Code language: JavaScript (javascript)Next, we need to start a development server using the command below:
npm run dev
Next.js will start a development server on http://localhost:3000.
With our application up and running, we can leverage Next.js CSS Module support to style our page. First, we need to create a components folder in project root directory and, in that folder, create a Style.module.css file.
Next, we need to add the code snippet as shown below:
    .upload {
      height: 30px;
      color: white;
      font-size: 14px;
      background-color: green;
      border: none;
    }

    .input {
      display: block;
      height: 30px;
      border-radius: 5px;
      width: 80%;
      margin-bottom: 20px;
    }

    .button {
      height: 30px;
      color: white;
      font-size: 14px;
      background-color: rgb(22, 22, 177);
      border: none;
    }
Code language: CSS (css)
With that done, we can update index.js file with the styles created and configure Cloudinary Upload Widget to upload videos to Cloudinary. We also include state variables to handle state for upload and enhancement of videos.
import { Helmet } from "react-helmet";
import { useState } from "react"; //add
import Style from "../components/Style.module.css";
export default function IndexPage() {
const [urlLink, setUrlLink] = useState(null); //add
//add
const openWidget = () => {
window.cloudinary
.createUploadWidget(
{
cloudName: <REPLACE WITH YOUR CLOUDNAME>,
uploadPreset: <REPLACE WITH YOUR UPLOADPRESET>
},
(error, result) => {
if (!error && result && result.event === "success") {
setUrlLink(result.info.url);
}
}
)
.open();
};
return (
<div>
<Helmet>
<script src="https://upload-widget.cloudinary.com/global/all.js" />Code language: HTML, XML (xml)<!— Is cloud name intentionally suppose to have special characters ? COMMENT-WILLIAM: No those are just dummy values. —>
The Cloudinary Upload Widget also configures cloudName and uploadPreset. The cloudName is the name of our Cloudinary account while uploadPreset is a parameter that enables us to centrally define a set of asset upload options instead of specifying them in each upload call.
Find out more about Cloudinary Upload Widget here.
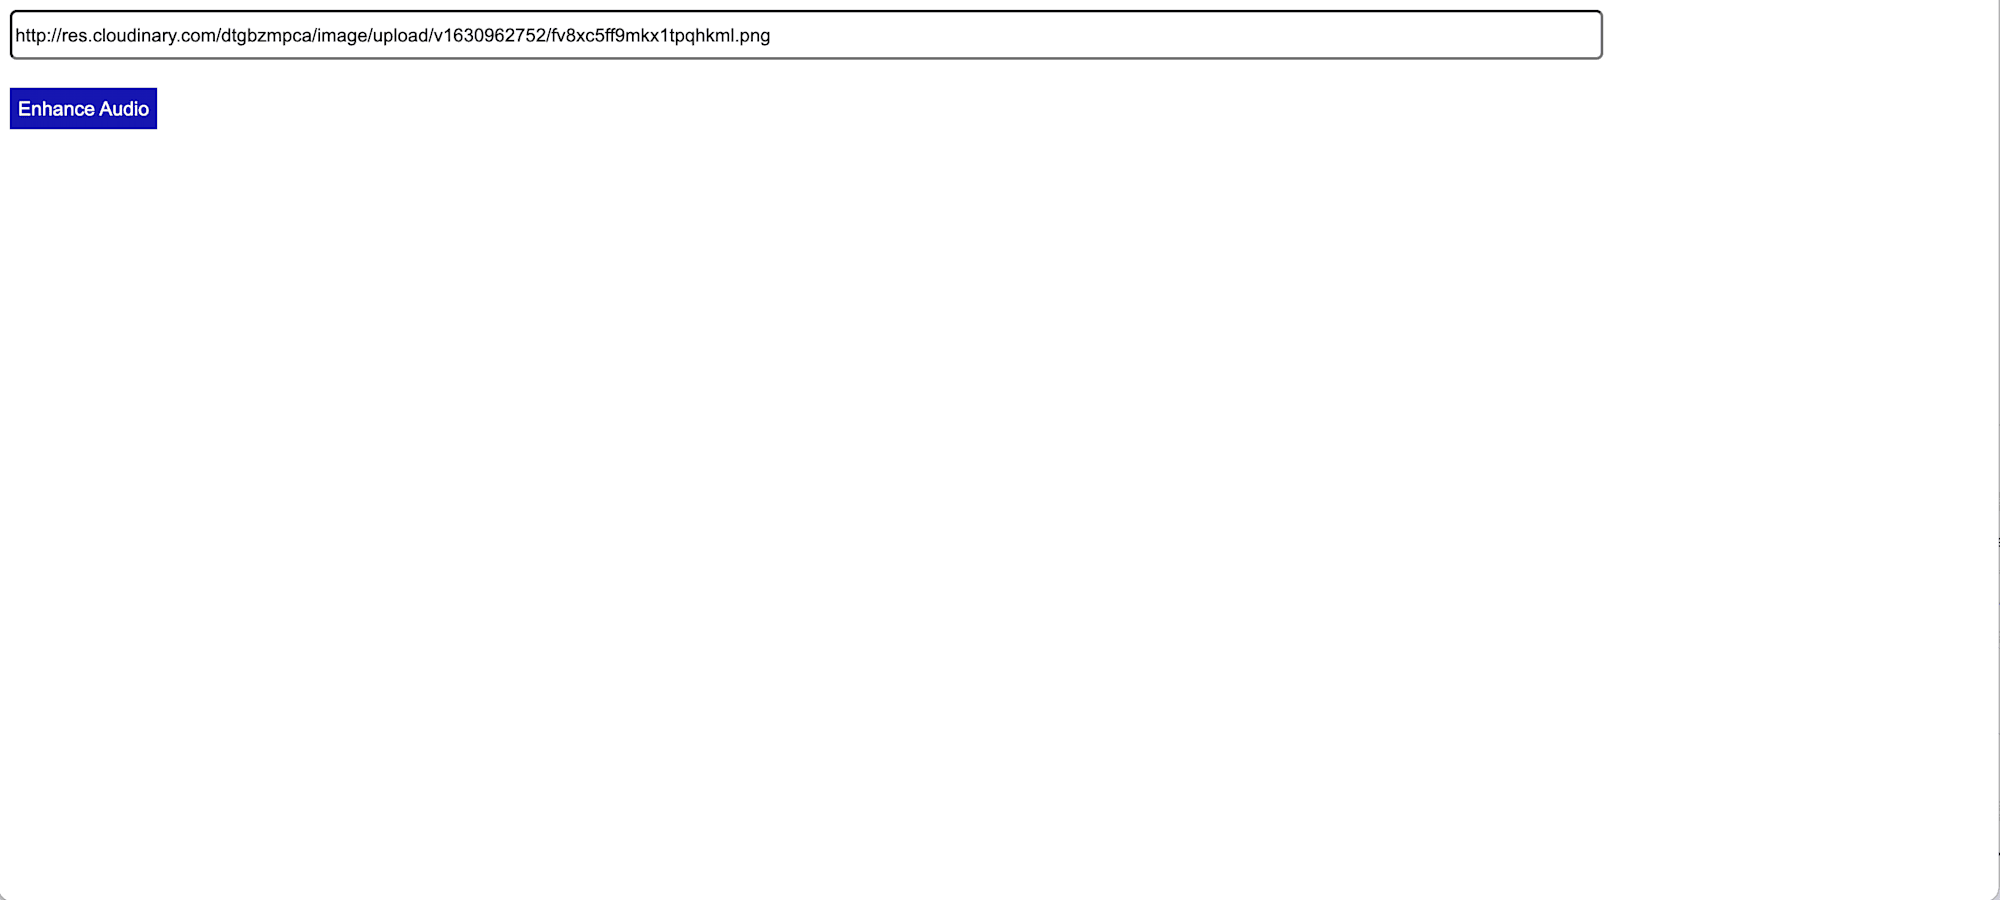
With this, we can now test the application by uploading video, get the URL, and then populate our form input field with the URL.
To get started, we need to create an account with Dolby. Creating an account is completely free.
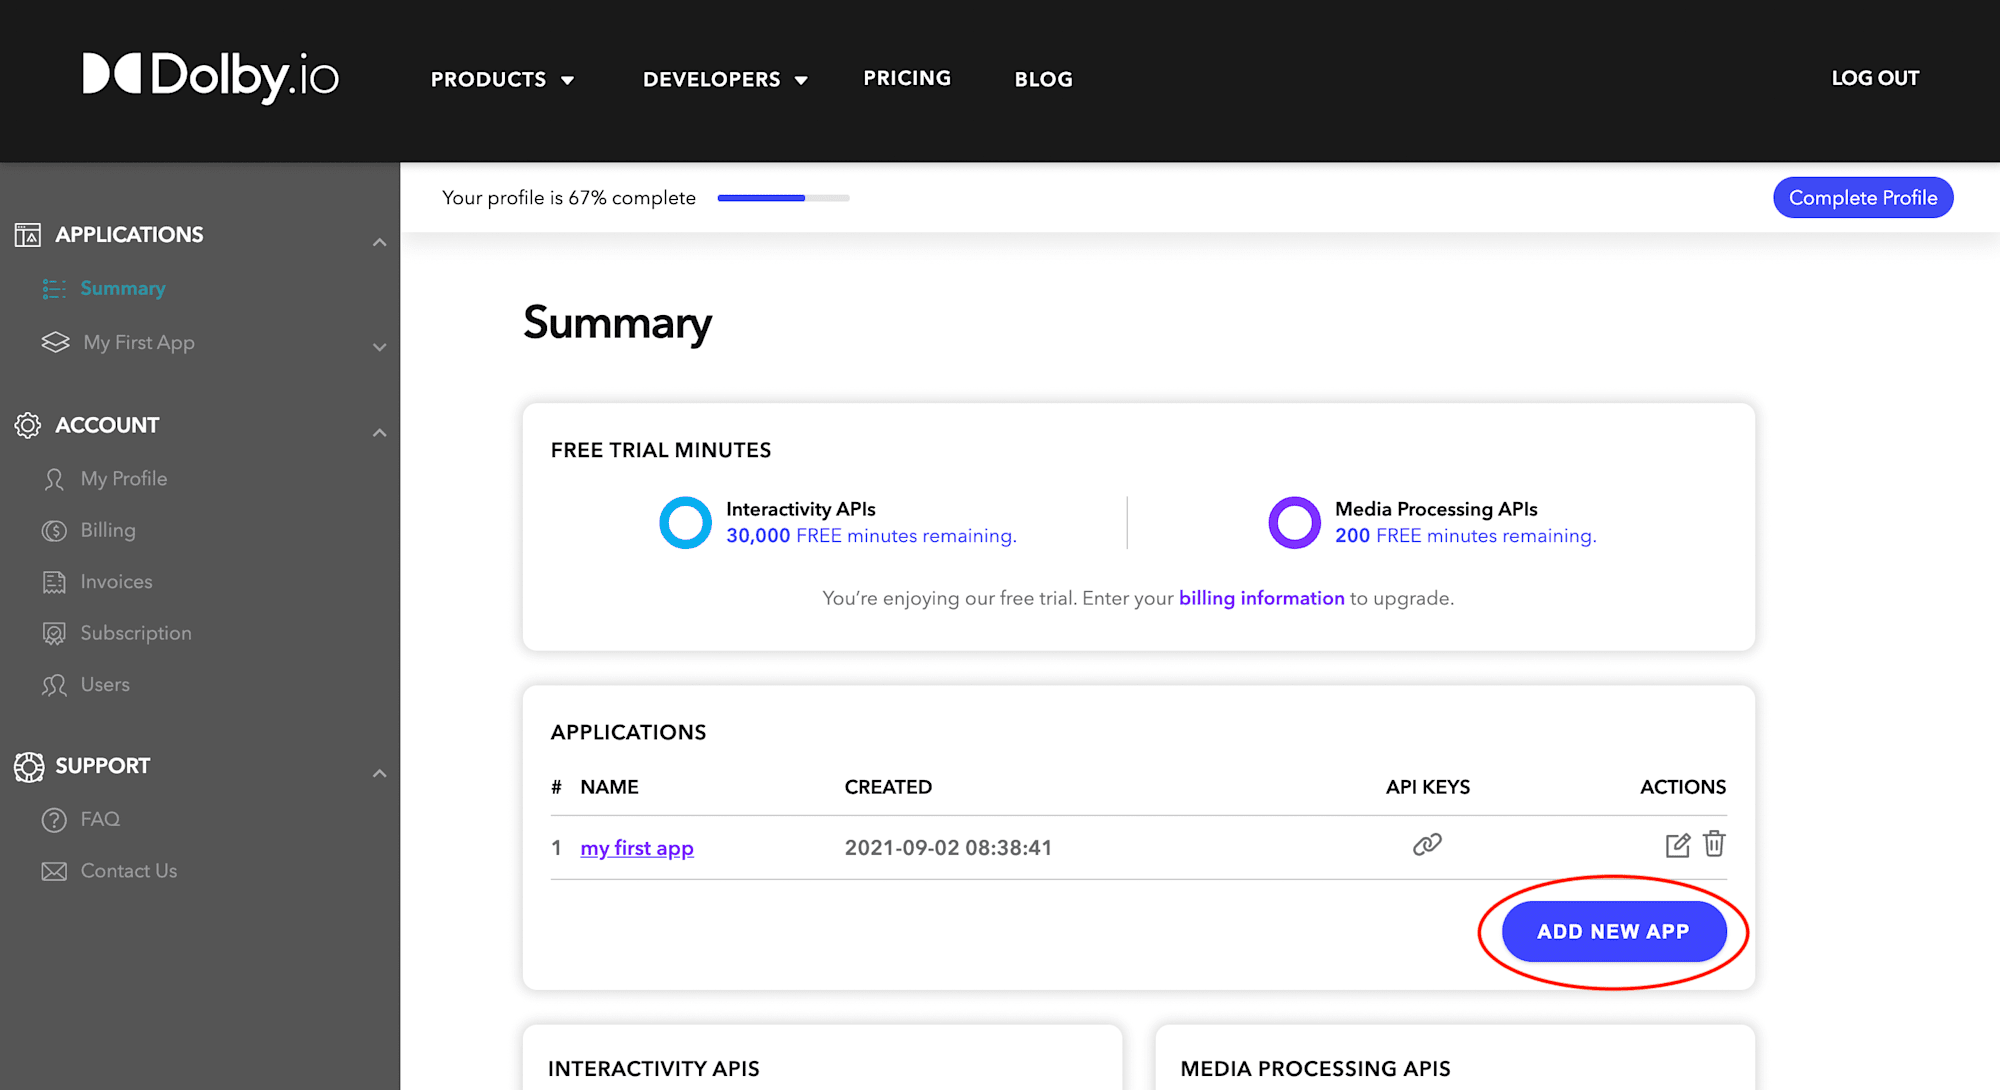
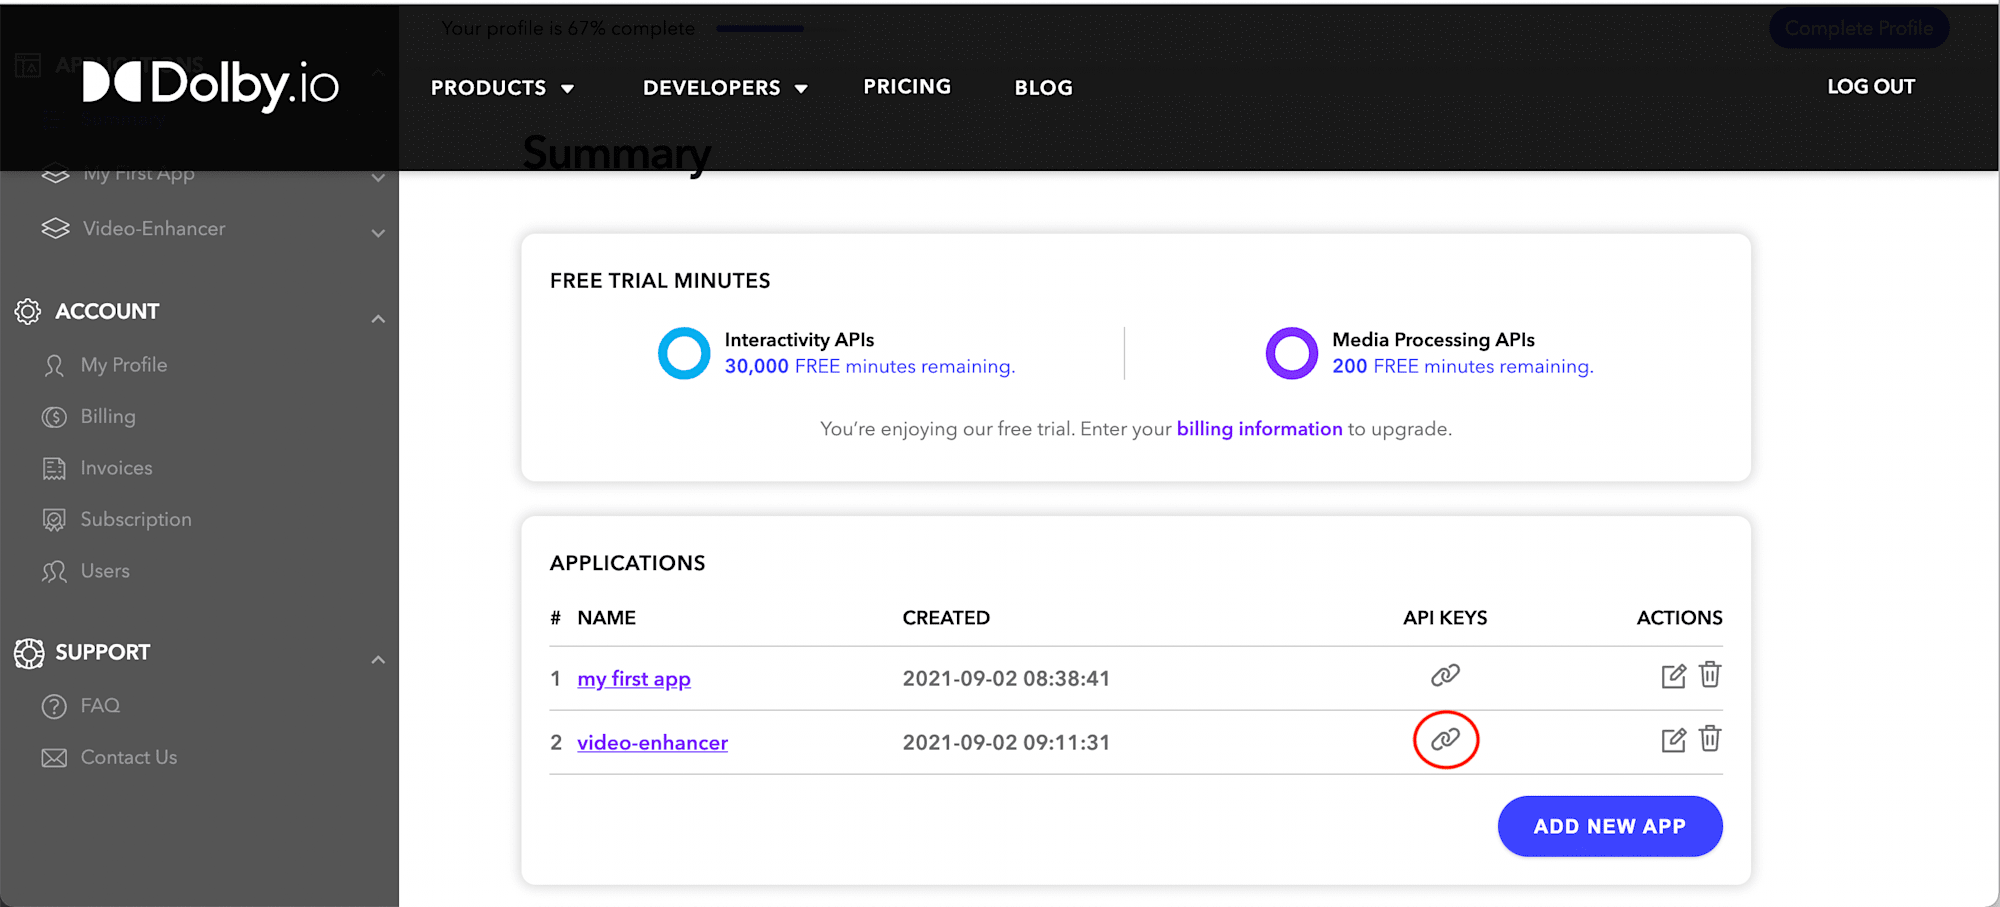
In the summary view, click ADD NEW APP, enter video-enhancer as the app name and then click on CREATE
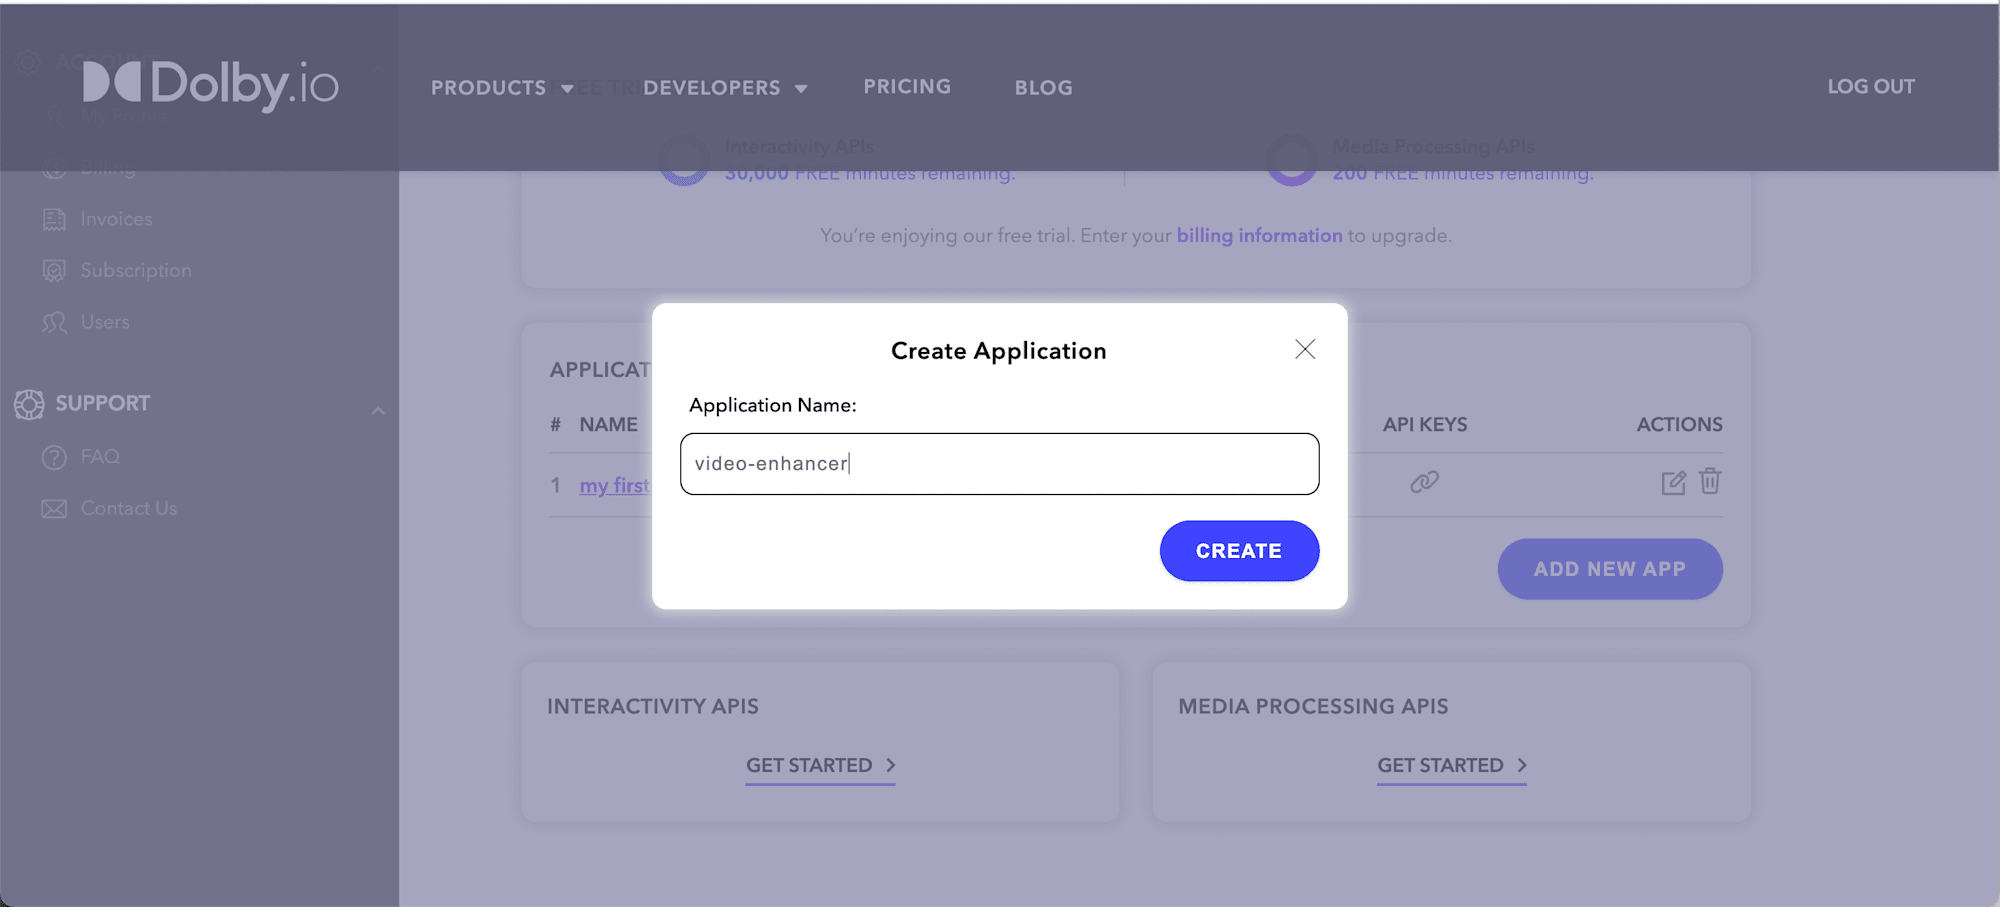
In the Applications section, click on the LINK ICON to reveal the API Key for **the video-enhancer app we created.
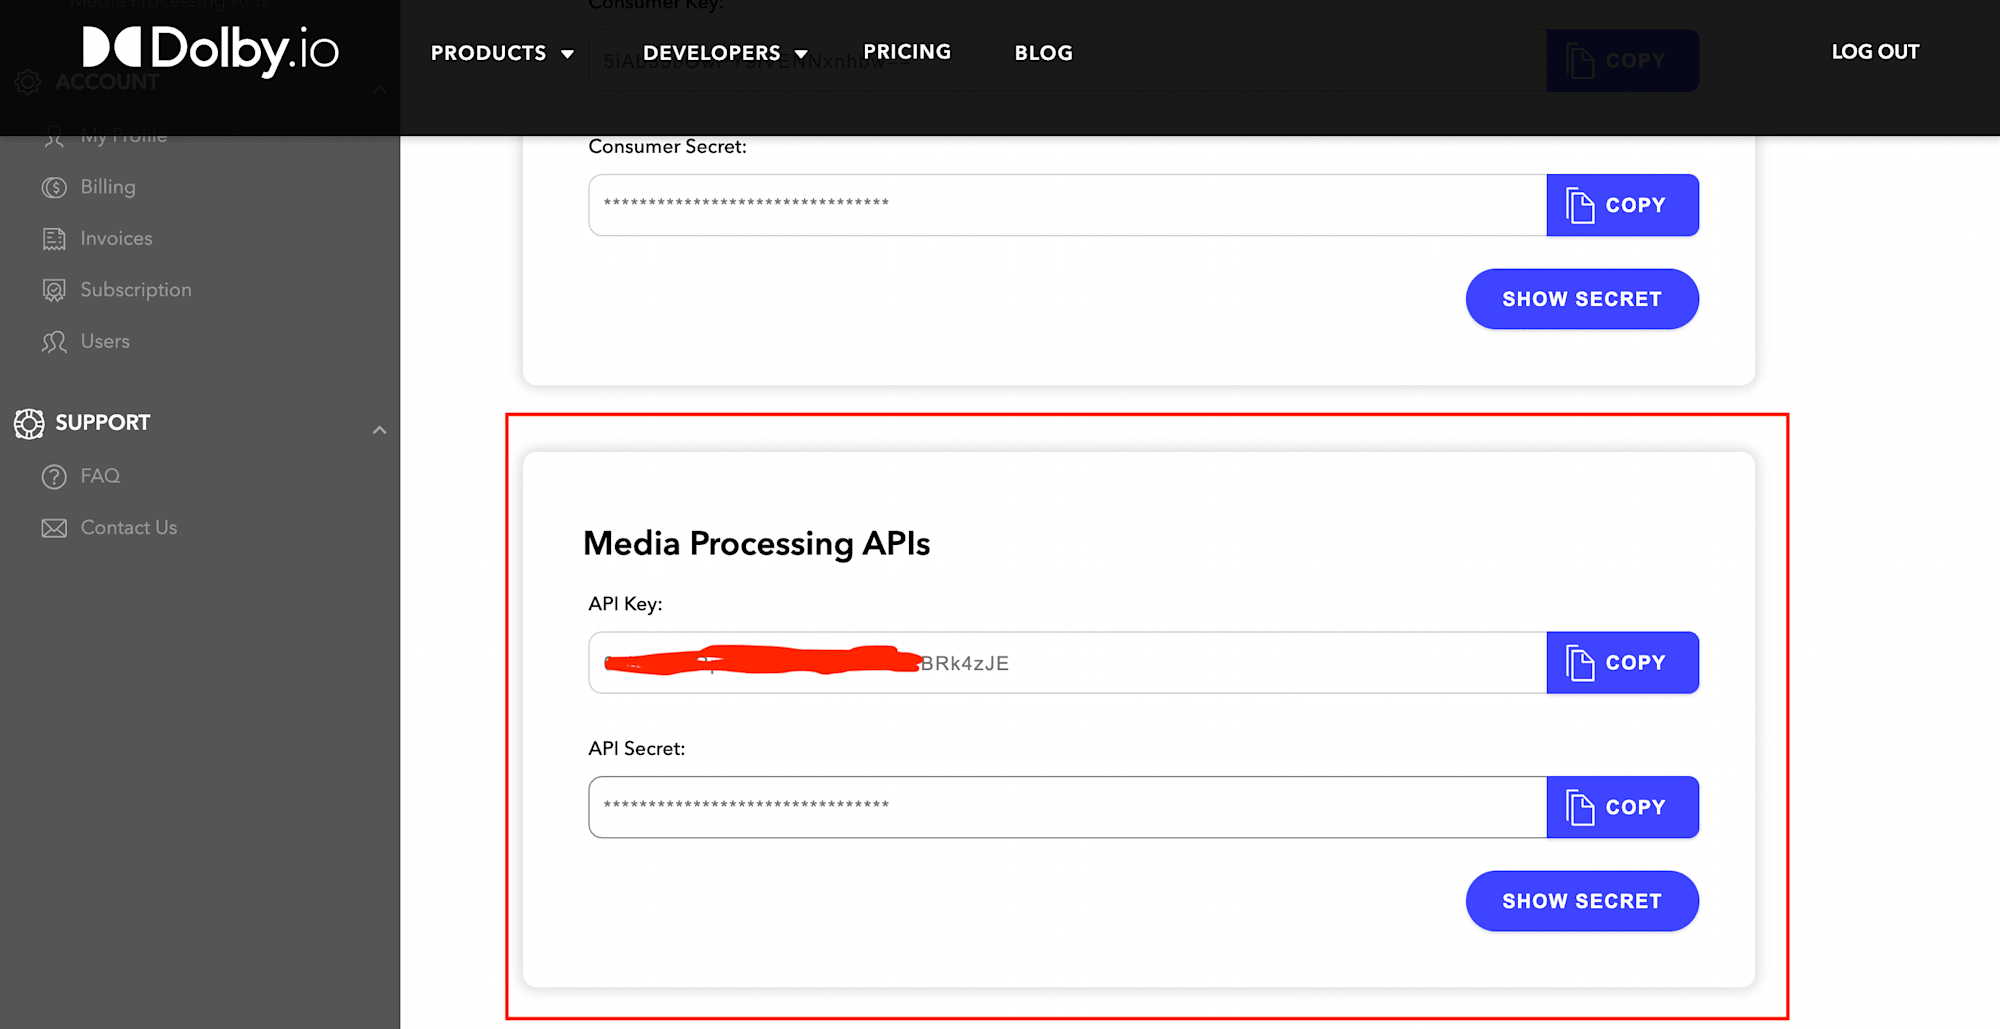
Setup Environment Variable
To integrate Dolby into our app, we need to include the API Key ****generated above ****into the application. In the project directory, we will create a next.config.js file and add the code snippet
<!— Would it be more safe to use a .env ? —>
    module.exports = {
      env: {
        customKey: <REPLACE WITH OUR API KEY>
      }
    };
Code language: JavaScript (javascript)
Typically, you want to have this environment variable in a private .env file. You can look up how to do this with Dotenv
Enhancing our Uploaded Video Sound Quality To enhance video sound, Dolby provides us with three APIs to work with:
- An API to make a media enhancement request. This API takes in input URL (video to be enhanced), output URL (for downloading enhanced video), and returns a
job_id-
[https://api.dolby.com/media/enhance](https://api.dolby.com/media/enhance)
-
- An API to check the status of uploaded video
-
[https://api.dolby.com/media/enhance?job_id=<Our job_id comes here>](https://api.dolby.com/media/enhance)
-
- An API to download enhanced media
-
[https://api.dolby.com/media/output](https://api.dolby.com/media/output).
-
First, in pages/index.js, we need to create states to store required variables
<!— Is this code snippet to be added in pages>index.js ? —>
    import { useState } from "react";
    import { Helmet } from "react-helmet";
    import Style from "../components/Style.module.css";

    export default function IndexPage() {
      const [urlLink, setUrlLink] = useState(null);
      //add
      const [cloudName] = useState("dtgbzmpca");
      const [uploadPreset] = useState("tca2j0ee");
      const [dolbyURL] = useState("dlb://out/video-enhanced.mp4");
      const [uploadURL] = useState("https://api.dolby.com/media/enhance");
      const [downloadURL] = useState("https://api.dolby.com/media/output");
      const [cloudinaryURL] = useState(
        `https://api.cloudinary.com/v1_1/${cloudName}/auto/upload`
      );

      const openWidget = () => {
        //Cloudinary upload widget code goes here
      };

      return (
          <div>
            {\* JSX goes here*\}
          </div>
        )
    }
Code language: JavaScript (javascript)
Next, we need to create a function that gets the returned video URL on upload to Cloudinary, sends the URL to Dolby for enhancement, checks enhanced videos’ status periodically, gets the downloadable link of enhanced video, and then uploads the enhanced video to Cloudinary.
Polling in Computer Science Before creating the function to handle uploads, we must understand what Polling is. Polling is the continuous checking of other programs or devices by one program or device to see what state they are in, usually to see whether they are still connected or want to communicate. We need to periodically check the status of our video before initiating a download. In this post, we will use a while loop and nested fetch API to achieve this.
We also have methods like Event Emitter and Webhooks to achieve this exact purpose.
https://gist.github.com/Mr-Malomz/a8193124c00ab02c574b3d03257450c7
https://gist.github.com/Mr-Malomz/a8193124c00ab02c574b3d03257450c7
In the gist above, we created an handleSubmit function, prevented the default form behaviour and options (optionRequest, optionCheck, and optionDownload) as second parameters for making API calls. We also included the API key we generated from Dolby as part of the header.
The optionRequest takes in a request body object of input and output. The input key takes the urlLink returned by the Cloudinary Upload Widget, and the output takes in URL – dolbyURL that Dolby can write.
Find out more about how Dolby processes Media Input and Output here.
We can also modify the request body to include content and audio object to improve the quality of the video. In this post, we won’t change any of the above and automatically let Dolby take care of the processing.
Next, we created a wait function to set a delay of 2 seconds when running the while loop and a state variable as conditions to stop the while loop.
Next, we made the first API call to Dolby to enhance the returned video URL, created a while loop using the state variable as a condition and called the wait function asynchronously.
Then, we used the returned job_id response from the API call to periodically (2 seconds interval) make another API call to check the status of the video and update the state variable with the current status.
Next, we checked for when the video status is successful, got the downloadable URL from Dolby, and then uploaded the enhanced video to Cloudinary.
PS: We need to disable CORS on the browser to test the application as Dolby expects downloading of the enhanced video to be a server-side operation. An alternative is to write the Dolby enhance function in a serverless function.
Finally, we need to include the handleSubmit function in our form and test the application by uploading the video to Cloudinary and enhancing with Dolby. We can check the browser console to see the log of the various operations.
To test the video outputs, we can log in to our Cloudinary account, navigate to the Media Library tab, and play both original video and enhanced video to see audio quality differences.
Here’s a Google drive link to a video of the final build. https://drive.google.com/file/d/1uSKZvH6B58t8DKiNd6hgbKuxH77BS3y-/view?usp=sharing
This post discussed how to enhance video sound quality using the Dolby API platform. Try out different videos and content types to see how robust the Dolby platform is.
You may find these resources useful: