
Almost every web page contains images, many of which have text we don’t always want to display. Optical character recognition (OCR) is a technology that helps extract text programmatically from images or other media.
Cloudinary is an image and video management solution with a built-in OCR feature that offers options such blurring out text on an image using URL parameters.
We completed this project in a CodeSandBox. Fork and run it to quickly get started.
Check out the complete source code here:
https://github.com/shosenwales/OCR-image
To follow along with this tutorial, the following is required:
- Basic understanding of Nuxt.js.
- A Cloudinary account — create a free account here.
We’ll start by creating a new Nuxt project by running the following command:
npx create-nuxt-app <project-name>

Code language: HTML, XML (xml)
After successfully creating a project, we need to navigate into the project directory and start our development server by running the following command:
  cd <project-name>  #changing directory
    npm run dev        #starting development server
Code language: CSS (css)
Nuxt.js will start a development environment, which can be accessed at http:localhost:3000.
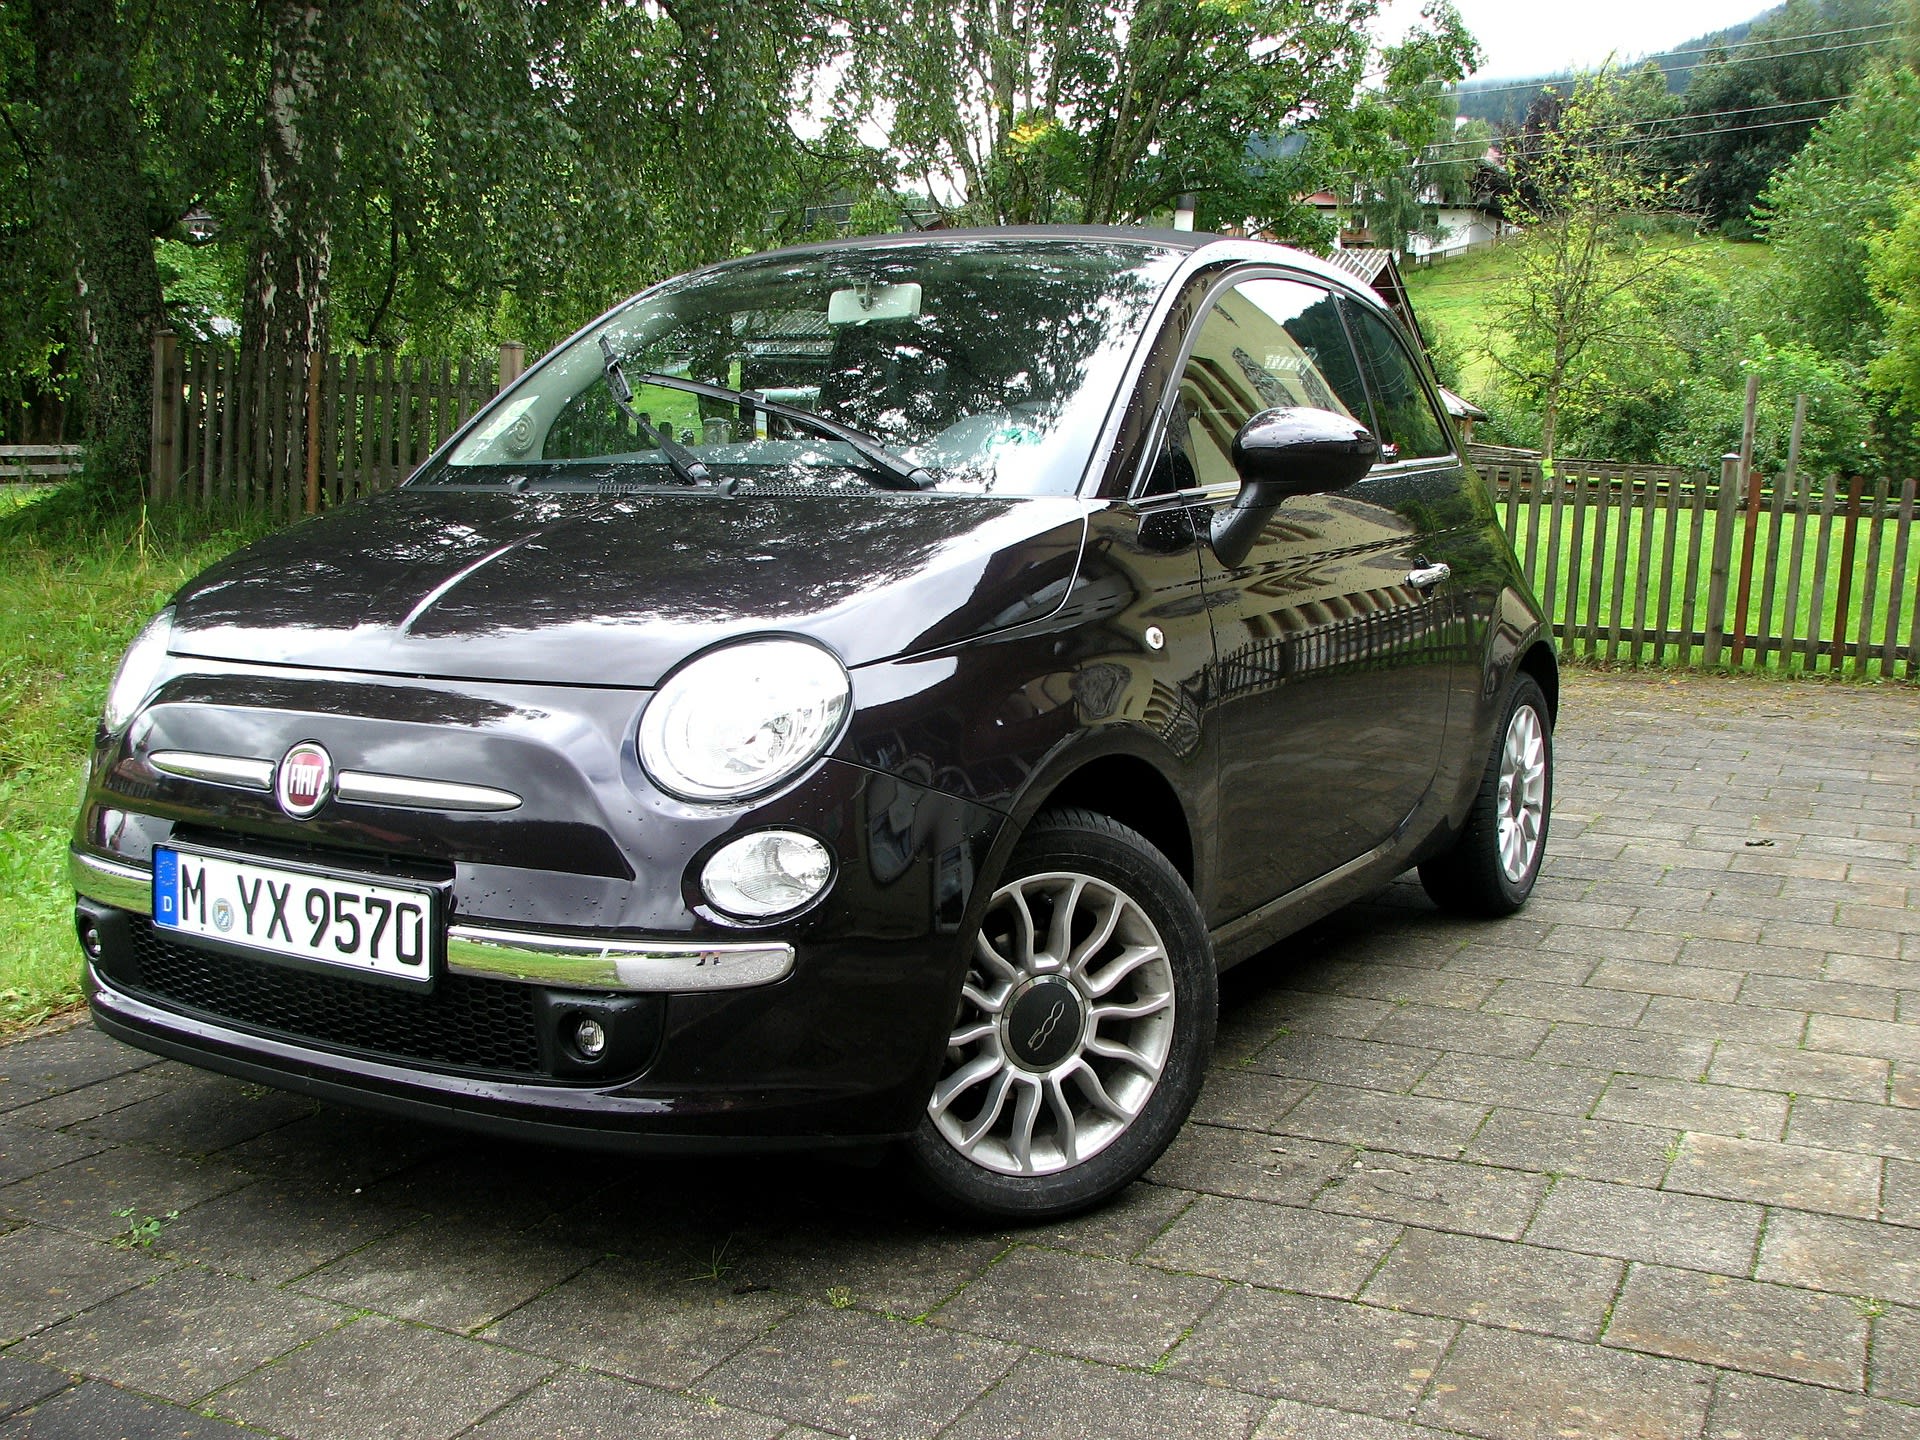
We will be using one of the images from the Cloudinary demo accounts for this project. Below is an image with text attached to it.
The image shows a car with a registration number; we can find the image here.
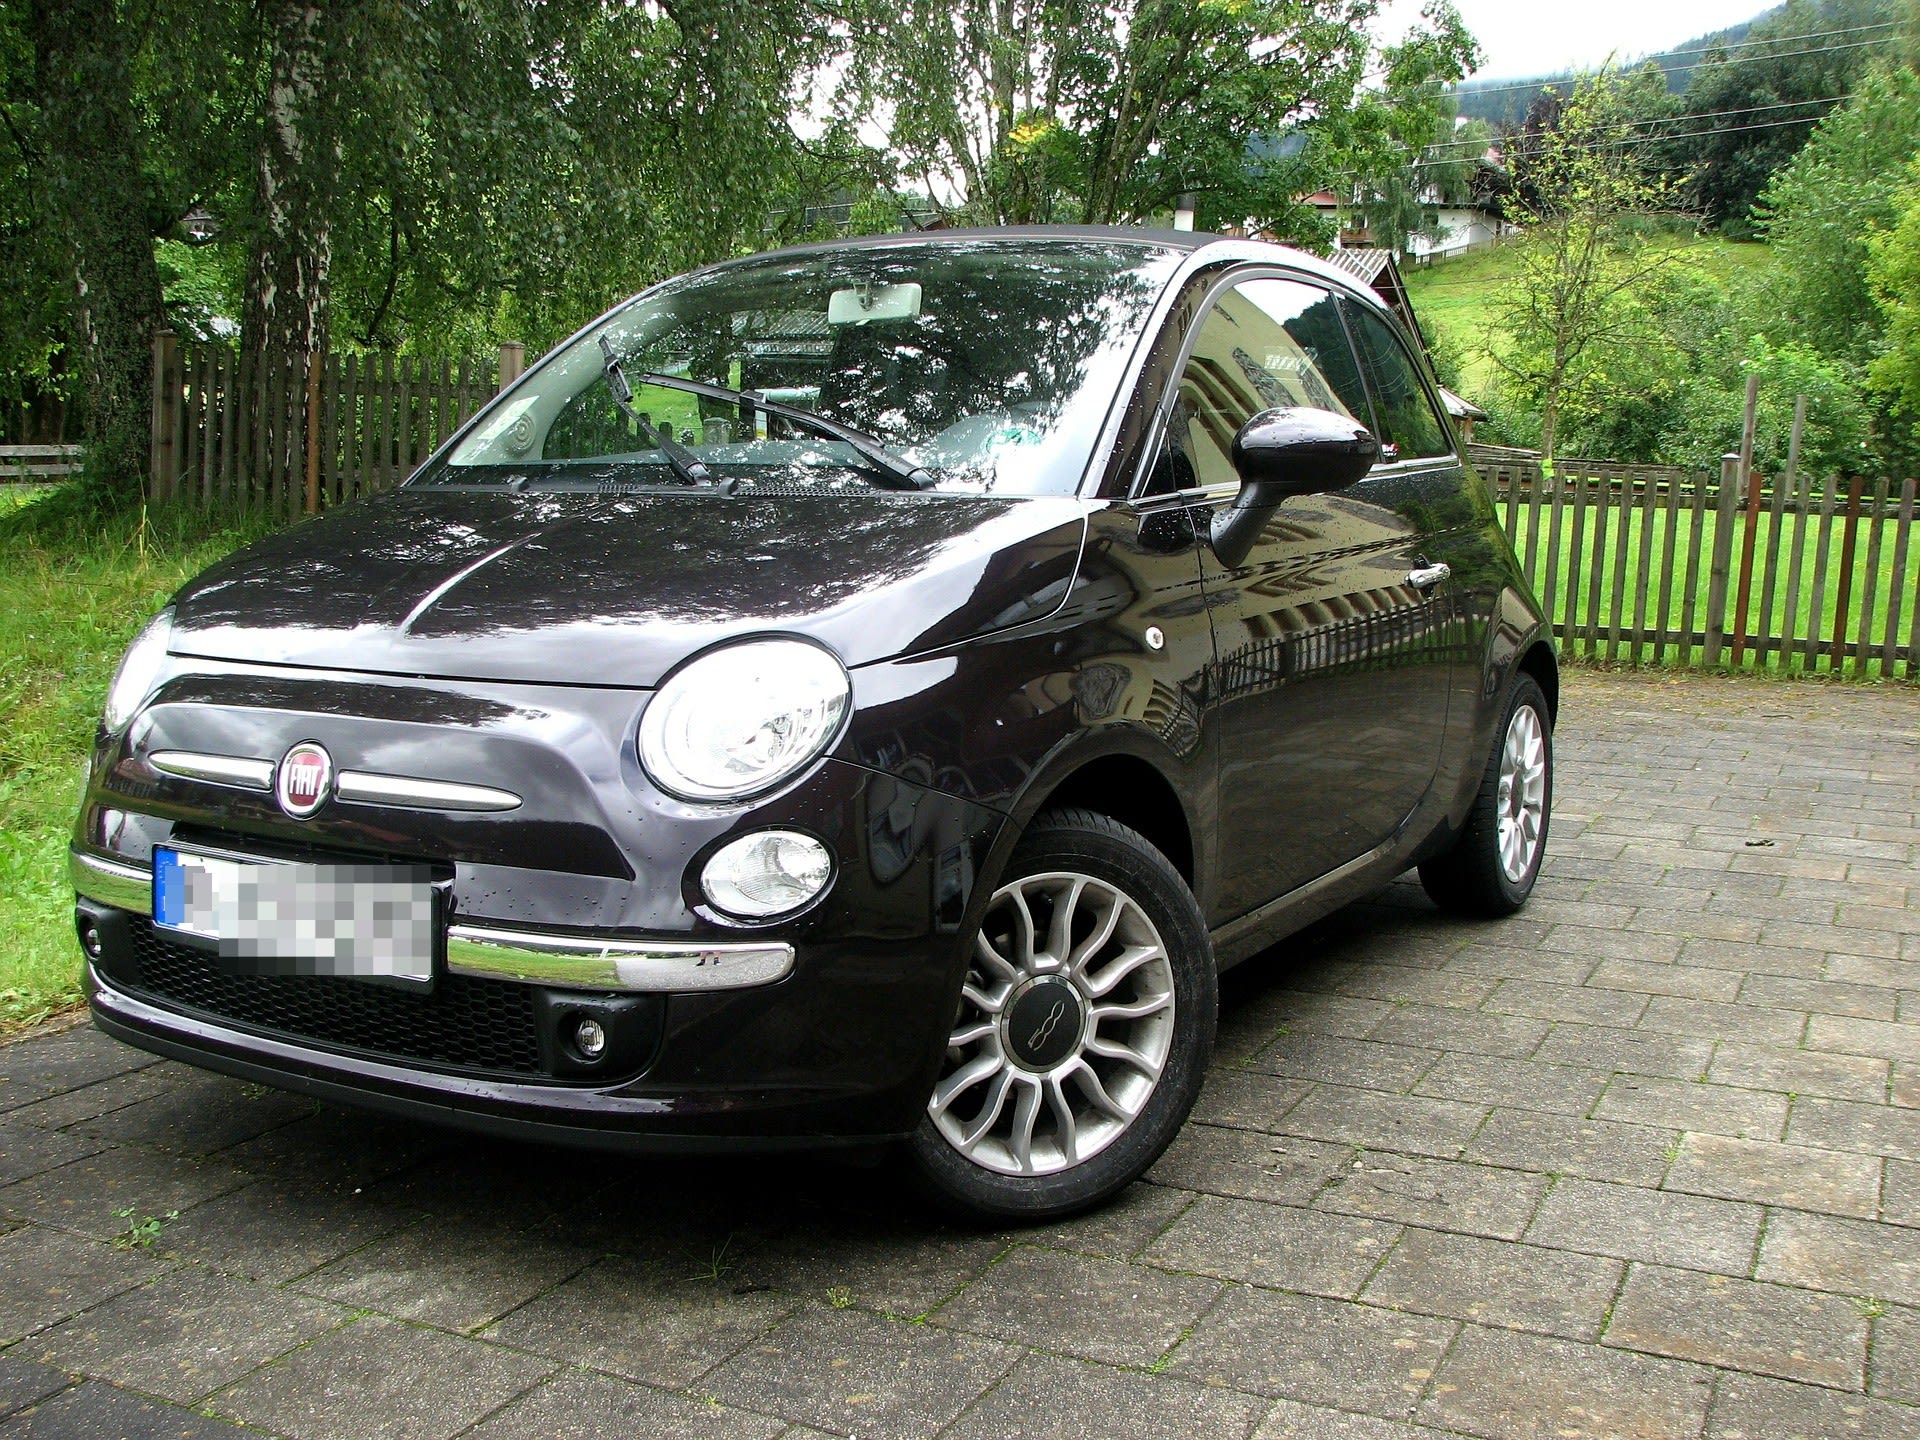
To blur out the text on our image, we’ll use the Cloudinary URL parameters e_pixelate_region:20,g_ocr_text. These parameters are placed in between the upload/ and /image_name.jpg path, as shown below:
url: "https://res.cloudinary.com/demo/image/upload/e_pixelate_region:20,g_ocr_text/black_car.jpg"
Let’s take a closer look at the URL.
-
e_pixelatecreates a pixel effect for the whole image. - Adding
_region:20toe_pixelatehelps specify the region and value on the image. -
g_ocr_textdetects text on images. - All togtether, these parameters will blur out the text detected on the image by pixelating the area in which the text is located.
Cloudinary also allows us to customize the square pixel size and make them bigger:
c_fill,e_pixelate_region:30,h_80,w_200,x_170,y_260
url: "https://res.cloudinary.com/demo/image/upload/c_fill,e_pixelate_region:30,h_80,w_200,x_170,y_260,g_ocr_text/black_car.jpg"

In our index.vue file, let’s create an array to store the image URLs by adding the following code snippet.
    <script>
    export default {
      data(){
        return{
          images: [
            {
              id: 1,
              name: 'car with registeration number',
              url: 'https://res.cloudinary.com/demo/image/upload/black_car.jpg',
            },
            {
              id: 2,
              name: 'car with blurred registeration number',
              url: 'https://res.cloudinary.com/demo/image/upload/e_pixelate_region:20,g_ocr_text/black_car.jpg',
          },
          ]
        }
      }
    }
    </script>

Code language: HTML, XML (xml)
name is used in the code snippet above to describe the image; url is the link to the original and blurred image.
Next, we add the following code snippet to our index.vue file to display the images.
    <template>
      <div>
        <h1>OCR IMAGE</h1>
        <div v-for="image in images" :key="image.id">
          <h2>{{image.name}}</h2>
          <img :src="image.url" alt="image of a black car" width="400" height="200">
        </div>
      </div>
    </template>

Code language: HTML, XML (xml)
Now, our index.vue file should be similar to this.
    <template>
      <div>
        <h1>OCR IMAGE</h1>
        <div v-for="image in images" :key="image.id">
          <h2>{{image.name}}</h2>
          <img :src="image.url" alt="image of a black car" width="400" height="200">
        </div>
      </div>
    </template>
    <script>
    export default {
      data(){
        return{
          images: [
            {
              id: 1,
              name: 'car with registeration number',
              url: 'https://res.cloudinary.com/demo/image/upload/black_car.jpg',
            },
            {
              id: 2,
              name: 'car with blurred registeration number',
              url: 'https://res.cloudinary.com/demo/image/upload/e_pixelate_region:20,g_ocr_text/black_car.jpg',
          },
          ]
        }
      }
    }
    </script>
Code language: HTML, XML (xml)
Let’s open our browser, and we should have two images: one with a clear registration number and one with a blurred registration number.

This post discussed how to blur our text in an image using OCR in Nuxt.js.