
Static sites (or Jamstack sites) are great in many ways, from performance to scalability. Instead of creating and maintaining a massive monolith web server, we now can easily split it to directly dealing with microservices APIs from the client-side only. While it is more straightforward working with APIs, there is one challenge – security. Since there is no back-end support for front-end needed, everything, including sensitive information such as authentication credentials, will be exposed to the HTTPS request for a specific API call, either on the request body or in the code itself. For example, using Cloudinary signed upload service for Node.js. The authentication for a signed (secured) upload is a secure protocol created based on user’s API key, API secret key, and cloud name. And you’re not supposed to expose these on the client-side.
To solve that, we use a serverless function.
A serverless function is a method that we can trigger using an HTTPS request and does not tie specifically to any web servers. It is hosted and managed by any cloud computing companies (hosting platforms) such as Digital Ocean, Netlify, Vercel, Google Cloud, AWS, etc…
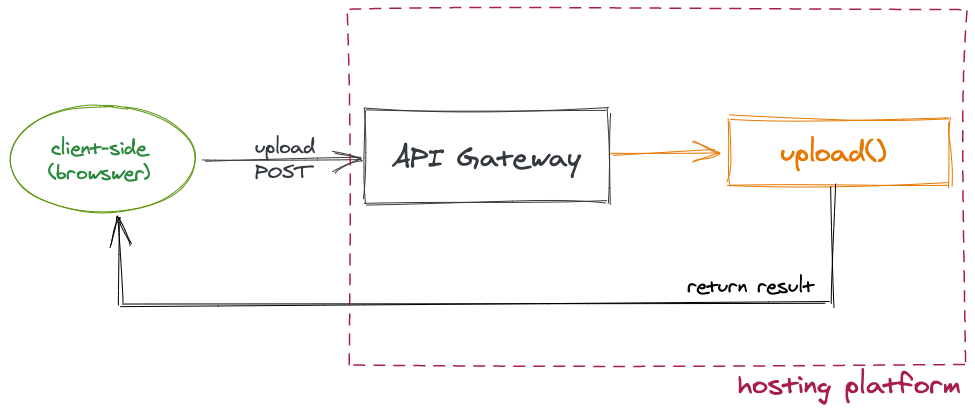
Depending on the hosting platform you are using, you can write a server-function in Node.js, Golang, Java, and so on.
This tutorial will create a secured upload application with a serverless function using Cloudinary, Vercel, and Nuxtjs.
The first step is to make sure Vercel CLI is installed. Vercel CLI allows us to develop and test our serverless functions locally.
npm i -g vercel #or yarn global add vercel
Code language: CSS (css)
Next, let’s put together a basic Nuxt application scaffold by executing the following command on your terminal:
#Using npm (v6.1 onwards)
npm init nuxt-app cloudinary-upload-app


#Or using YARN
yarn create nuxt-app cloudinary-upload-app


#Or using npx
npx create-nuxt-app cloudinary-upload-app
Code language: CSS (css)
And select the configuration options accordingly. You can choose anything to suit your needs, but I recommend the following for our starter application:
- UI framework: Tailwind CSS – we use TailwindCSS to provide a basic beautiful CSS setup without extra configuration.
- Axios – we use this module to send API requests to the serverless function.
- Linting tools: Prettier, Lint staged files.
- Rendering mode: Universal (SSR/SSG) – we want Nuxt to act as a Static site generator for our application during development. This mode is required to turn on the static deployment static.
- Deployment target: Static – this is important as we want to deploy our application as static site.
Once it’s ready, we can navigate to the project directory and have it connected to Vercel using:
cd cloudinary-upload-app && vercel
and set up your project linking accordingly. See Vercel’s project settings for more information.
⚠️ You may need to login using vercel login to connect to your Vercel account.
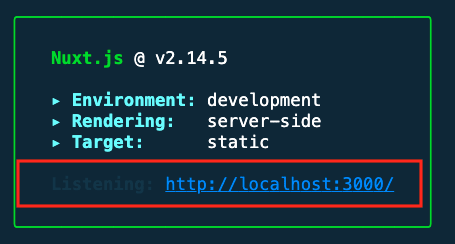
Then run the following to have the app up and running:
vercel dev
You can see how the app looks on the browser by holding CMD (Mac) or Ctrl and clicking on the port link displayed in the terminal:
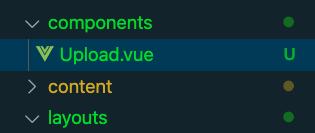
Now we can start to create our upload component.
In the app directory, create a new file Upload.vue under components directory with the following skeleton code:
This is our Upload component.
Next we will create the component skeleton by adding the following code:
<template>
   <div class="p-4 w-full">
     <h1 class="text-xl font-semibold text-blue-700 text-center">
     Upload with Cloudinary Demo
     </h1>
  <div class="my-4 mx-auto text-center">
<!--This is our upload component-->
<upload />
</div>
</div>
</template>
Code language: HTML, XML (xml)To allow user to select a local file for uploading, we use input element with the following attributes:
-
type="file"– indicate this input field is meant to let users choose a file from their device storage. -
accept=".jpeg,.jpg,.png,image/png,image/png,.svg,.gif"– indicate the target file type the input element should accept. By setting it to accept only image types, we make sure users will only select the right file format for our component to handle. - A bit of CSS styling by assigning Tailwind class names to
class
In template section of Upload.vue, our code looks like:
<input
type="file"
accept=".jpeg,.jpg,.png,image/jpeg,image/png,.svg,.gif"
class="p-3 border cursor-pointer"
aria-label="upload image button"
/>
Code language: JavaScript (javascript)
The output in browser becomes:

Now we need to declare a method selectFile in methods fields of the component’s JavaScript logic located in <script> section:
export default {
methods: {
selectFile(e){}
}
}
Code language: CSS (css)
Then bind that method as a listener to change event in the input field
<input
type="file"
accept=".jpeg,.jpg,.png,image/jpeg,image/png,.svg,.gif"
class="p-3 border cursor-pointer"
@change="selectFile"
/>
Code language: JavaScript (javascript)
Once a user clicks on Choose File and selects a file, selectFile will be triggered with e representing the event change’s data as a parameter.
We can get the list of selected files by accessing e.target.files, which contains File objects. Since we allow users to upload a single file, we only need to care about the first file on the list – files[0]
const file = e.target.files[0]
Code language: JavaScript (javascript)
To upload using HTTPs, we first need to read and convert the received file’s data to base64 format. For that, we use the built-in FileReader of the File API for the web and perform the following:
- Load the file data using
FileReader - Translate its data as base64 using
FileReader.readAsDataURLmethod
Since these processes are asynchronous, we will use Promise API to wrap around them:
const readData = (f) =>
new Promise((resolve) => {
const reader = new FileReader()
reader.onloadend = () => resolve(reader.result)
reader.readAsDataURL(f)
})
Code language: JavaScript (javascript)
And use await/async to make sure we get the output data before moving on to the next step.
const data = await readData(file)
Code language: JavaScript (javascript)
To this point, we get our data ready to be sent and upload. And our implementation code for selectFile() becomes:
async selectFile(e) {
const file = e.target.files[0]

/* Make sure file exists */
if (!file) return;

const readData = (f) =>
new Promise((resolve) => {
const reader = new FileReader()
reader.onloadend = () => resolve(reader.result)
reader.readAsDataURL(f)
})
const data = await readData(file)
}
Code language: JavaScript (javascript)
So far, so good? The next step is to build a serverless function for uploading.
Vercel provides excellent support for serverless functions written in different backend languages. In our demo app, we use Node.js and Cloudinary Node.js SDK to write our upload serverless function.
We add the api folder to the root of the project. By default, Vercel will detect the serverless functions based on this directory and deploy them accordingly.
Let’s add an upload.js file to the api folder, with the following content:
module.exports = async (req, res) => {
/* logic implementation here */
}
Code language: JavaScript (javascript)
Great. Now we need to install Cloudinary Node.js SDK as project dependency and start using it:
npm i cloudinary #OR yarn add cloudinary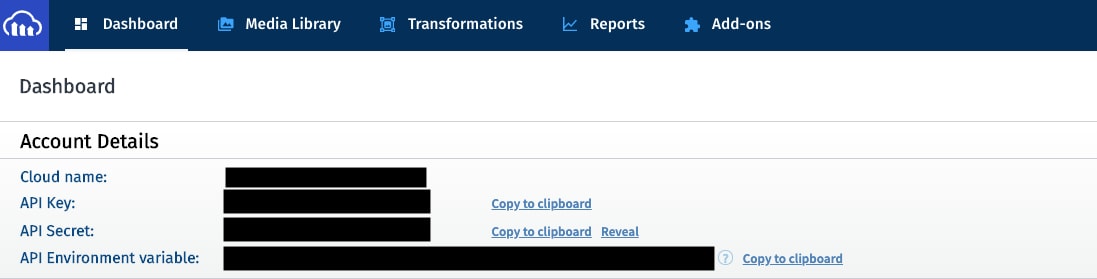
Code language: CSS (css)To have the Cloudinary upload service working, we need to config it with cloudName, api_key and api_Secret:
const sdk = require('cloudinary').v2


sdk.config({
cloud_name: 'your-cloud-name',
api_key: 'your-api-key',
api_secret: 'your-api-secret',
})
Code language: JavaScript (javascript)
You can find these keys at the your Cloudinary Dashboard page or Settings page:
Then we can execute an upload under the registered Cloudinary account based on the req.body.file received from the HTTPs request:
module.exports = async (req, res) => {
const body = req.body
const uploader = sdk.uploader


const resource = await uploader.upload(body.file)

return res.json(resource)
}
Code language: JavaScript (javascript)
Our complete code for upload.js will be:
const sdk = require('cloudinary').v2


sdk.config({
cloud_name: 'your-cloud-name',
api_key: 'your-api-key',
api_secret: 'your-api-secret',
})


module.exports = async (req, res) => {
const body = req.body
const uploader = sdk.uploader


const resource = await uploader.upload(body.file)

return res.json(resource)
}
Code language: JavaScript (javascript)
That’s it. Let’s go back to our Upload component and connect its selectFile to this serverless function, shall we?
Inside selectFile() implementation of Upload.vue, we call the serverless function through a HTTPS POST request using $axios
const resource = await this.$axios.$post('/api/upload', {
file: data
})
Code language: JavaScript (javascript)
And if the upload is completed successfully, we will receive a JSON object containing all relevant data for the uploaded image. Otherwise, it will return a JSON object containing error with msg field indicating the error.
To make our UI be more informative during the uploading process, let’s add a loading , image and error variables to data section of the component.
data() {
return {
loading: false,
error: null,
image: null, //contain the uploaded image
}
},
Code language: JavaScript (javascript)
And assign values them accordingly during selectFile() execution:
async selectFile(e) {
const file = e.target.files[0]

/* Make sure file exists */
if (!file) return;


this.loading = true //Start loading

const readData = (f) =>
new Promise((resolve) => {
const reader = new FileReader()
reader.onloadend = () => resolve(reader.result)
reader.readAsDataURL(f)
})
const data = await readData(file)
const resource = await this.$axios.$post('/api/upload', {
file: data
})

this.loading = false //End loading

if (resource.error) {
this.error = resource.error
return
}

this.image = resource
}
Code language: JavaScript (javascript)
Then add the HTML code to handle the following:
- Disable the input field when an upload is going on.
- Display an “Uploading…” message when an upload is going on
- Display an error message when something is wrong.
- Display the uploaded image otherwise.
<div class="upload-comp">
<input
type="file"
accept=".jpeg,.jpg,.png,image/jpeg,image/png,.svg,.gif"
class="p-3 border cursor-pointer"
@change="selectFile"
:disabled="loading"
/>
<div class="m-5 text-lg font-thin italic" v-show="loading">
Uploading...
</div>
<div v-if="error && !loading" class="m-5">{{ error.msg }}</div>
<img
v-if="!loading && image"
:src="image.secure_url"
class="m-5"
>
</div>
Code language: JavaScript (javascript)
Now our complete code for Upload.vue is:
-
templatesection:
<template>
<div class="upload-comp">
<input
type="file"
accept=".jpeg,.jpg,.png,image/jpeg,image/png,.svg,.gif"
class="p-3 border cursor-pointer"
@change="selectFile"
:disabled="loading"
/>
<div class="m-5 text-lg font-thin italic" v-show="loading">
Uploading...
</div>
<div v-if="error && !loading" class="m-5">{{ error.msg }}</div>
<img
v-if="!loading && image"
:src="image.secure_url"
class="m-5"
>
</div>
</template>
Code language: HTML, XML (xml)-
scriptsection
<script>
export default {
data() {
return {
loading: false,
error: null,
image: null,
}
},
methods: {
async selectFile(e) {
const file = e.target.files[0]

/* Make sure file exists */
if (!file) return;


this.loading = true

const readData = (f) =>
new Promise((resolve) => {
const reader = new FileReader()
reader.onloadend = () => resolve(reader.result)
reader.readAsDataURL(f)
})
const data = await readData(file)
const resource = await this.$axios.$post('/api/upload', {
file: data
})

this.loading = false


if (resource.error) {
this.error = resource.error
return
}

this.image = resource
}
}
}
</script>
Code language: HTML, XML (xml)
And finally, you can simply run the following to have your application deploy to Vercel on production.
vercel --prod
At this point you have a functional application from front-end to back-end to securely upload an asset with the least set up required. The next step is to play around with the upload configurations from Cloudinary to pre-generate transformations, or getting smart color detection, and so on. And then using the Cloudinary module for Nuxt to dynamically display the uploaded asset with optimization on the client-side.