Playlists and recommendations
Last updated: Aug-27-2025
You can expose your viewers to other videos in your collection by creating video playlists and using video recommendations.
Creating a playlist
Use the video player's playlist method to create a set of videos to play in your video player. You can define a list of public IDs to include, and optionally set transformations for each source. Alternatively, you can generate a playlist based on all videos in your Cloudinary product environment with a specified tag.
After you have defined a playlist, you can use playlist methods to control the list. For example, you can jump to the next or previous video, jump to a specific video in the playlist by index, determine whether to auto-advance to the next video when the previous one ends, retrieve the total number of videos in the list, and more.
Create a fixed source playlist
The following example creates a playlist with the videos IDs: book, ocean, and dog. The book video plays with a transformation that overrides the default player settings. The next video in the list automatically begins 10 seconds after the previous, and then repeats the playlist from the beginning after the last video ends.
See playlist.html in the sample CodePen to see a sample video player with a play list, including Next and Previous buttons.
For details on all available playlist methods, see Playlist operations in the Video Player API Reference.
Create a playlist for a specified tag
The playlistByTag method performs a call to the client-side asset list operation and returns a promise object that when fulfilled, returns the player with the playlist.
The playlistByTag method receives the tag to use and a set of options. In addition to setting the autoAdvance, repeat, and presentUpcoming parameters, you can also optionally provide a sorter (receives the name of a function that determines the sort order of the retrieved set of videos) and a sourceParams object (enables you to set transformations that will be applied to all the retrieved videos in the playlist).
When creating a playlistByTag with the presentUpcoming parameter or when autoShowRecommendations is true, the titles, subtitles, and descriptions are automatically taken from the title entry of the resource's contextual metadata data if it exists. Otherwise the public ID is used instead. You can add a video title (as well as a subtitle and description) to the asset's contextual metadata using the upload or context methods of the Upload API or via the Media Library.
title, subtitle, or description. The default Title (Caption) and Description (Alt) fields shown in the Metadata tab aren't used by the video player.The following example generates (the promise of) a playlist from all videos with the tag, demo. It will deliver all retrieved sources with a 10 degree angle rotation transformation. The playlist is set to play each video in succession with no delay and then reloop to the beginning of the playlist, and the upcoming video thumbnail will display 5 seconds before the end of each video. When the promise is fulfilled, the console log displays a message:
See playlistByTag.html in the sample CodePen to see a playlist generated by tags, including a sorter function.
You can also use the sourcesByTag method to retrieve the sources for a specified tag without actually creating the playlist. This method has the same syntax and supports the same options as the playlistByTag.
The example below retrieves (the promise of) the sources data from all videos with the tag, "demo". When the promise is fulfilled, it passes the sources to the playlist method.
For details on all available playlist methods, see Playlist operations in the Video Player API Reference.
Present the upcoming videos
When using playlists, you have two options for showing users what video(s) are coming next:
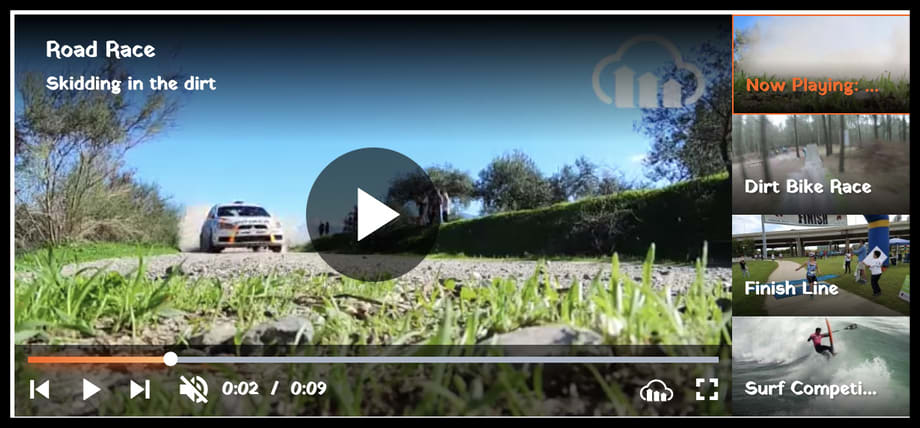
playlist widget - A scrollable list of the upcoming videos in the form of clickable thumbnails with titles. You can set the widget to display either vertically to the right of your video player, or horizontally below your player when viewed in a full screen web browser.
Next up preview - A small clickable thumbnail with a title overlay (or text title in responsive view) that pops up in the corner of the player a few seconds before the current one ends.
To add a playlist widget:
Add the playlistWidget as a constructor parameter when instantiating your video player. You can set the following options:
-
direction: Determines the scroll direction and location of the widget when viewed in a non-responsive display.-
horizontal: Displays the thumbnails of upcoming videos horizontally. The widget is located below the player and is in addition to the dimensions defined for the player. -
vertical(Default): Displays the thumbnails of upcoming videos horizontally. The widget is located to the right of the player and is displayed inside the dimensions defined for the player (the video is resized accordingly).
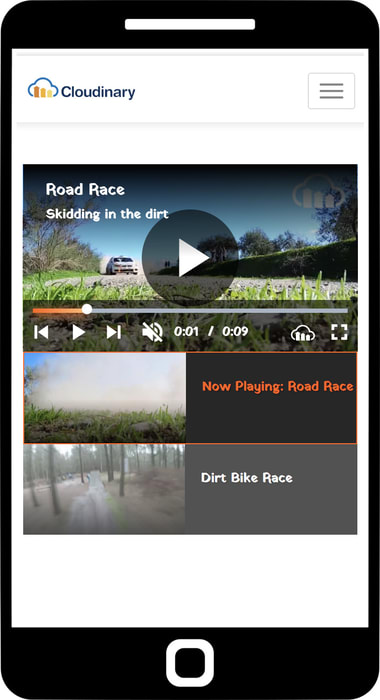
NoteIn responsive/mobile view, the widget always adjusts to a single column vertical scrolling list below the player. -
total: The number of upcoming videos to include in the widget (may be less than the number of videos in the actual playlist). Keep in mind that regardless of the number specified here, a maximum of four thumbnails can be displayed on screen at once. If a larger number is specified fortotal, the widget enables the user to scroll to view the rest.
For example, this code adds a vertical playlist widget with a total of 5 upcoming videos included:
Below are examples of a video player using the above-defined playlist widget in web and responsive/mobile views:
To add 'Next up' previews:
Set presentUpcoming to true, to display the upcoming video at the default time of 10 seconds before the end of the video. Alternatively, specify how many seconds before the end of the video the preview should display.
For example:
- If your playlist is set to repeat, then the upcoming video thumbnail shows the first video when the last video nears the end. Otherwise, no upcoming video is displayed at the end of the list.
- If you have not set a title for a particular source in your playlist, either in the asset's contextual metadata or in the
<video>tagsourcedefinitions, then the source's public ID is displayed instead of the title. For details, see title values.
Showing video recommendations
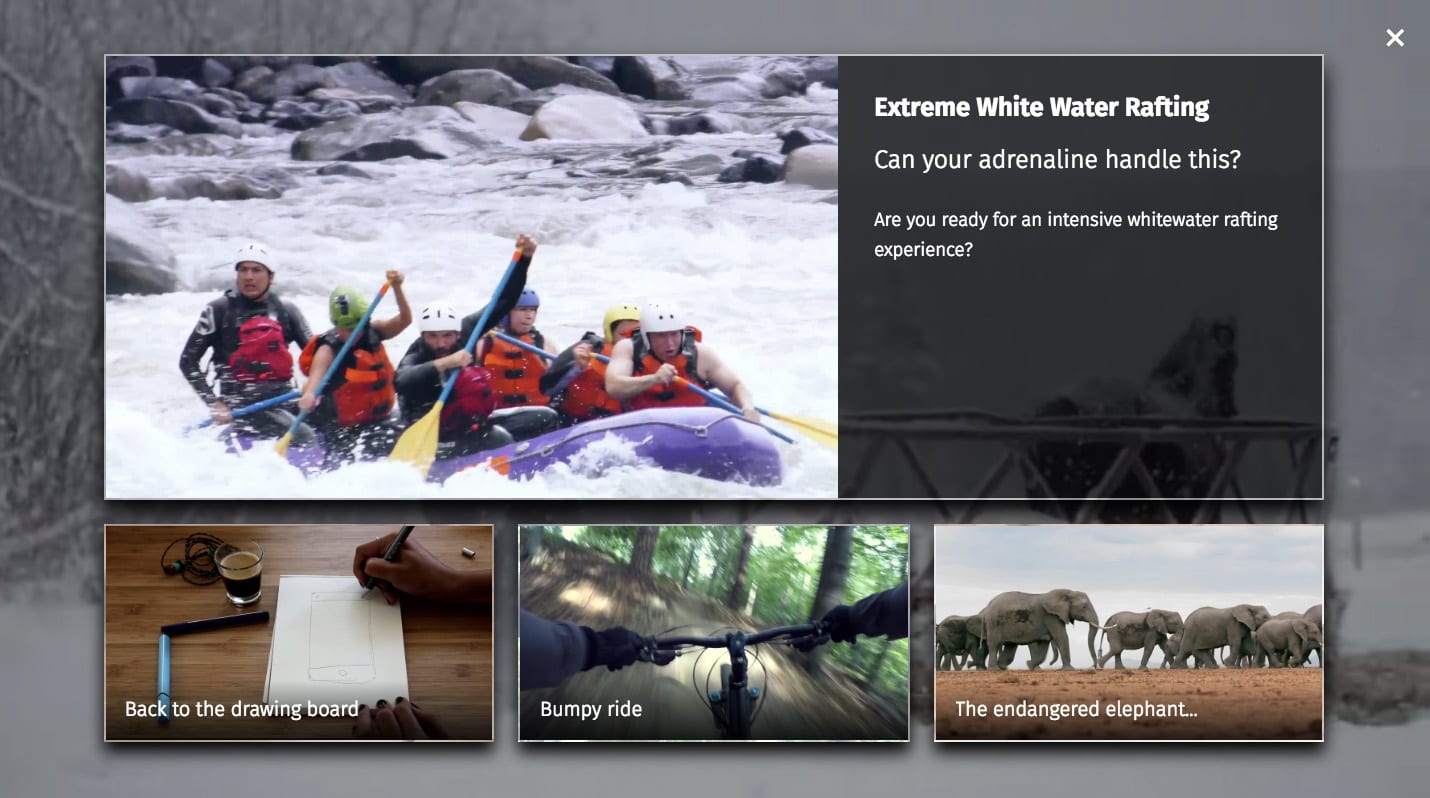
You can set your video player to show up to four video recommendations in a recommendations overlay pane when a video finishes playing. This can be for an individual video, or at the end of each video in a playlist as long auto-advance is disabled (autoAdvance: false). The recommendations pane displays one primary recommendation including large thumbnail, title, subtitle, and description (if they are defined for the relevant source), followed by up to three secondary recommendations, with a smaller thumbnail and the video title or public ID.
To include recommendations at the end of a video, you need to:
- Pass
autoShowRecommendations: truewhen creating the player, or triggerplayer.autoShowRecommendations(true)at a later time. - Add a
recommendationsparameter to each video source for which you want to show recommendations after it. The parameter value is an array of videosourceobjects (or a function or Promise that resolves into an array of videosourceobjects).
For best results, make sure that each source you define as a recommendation has a title, sub-title, and description defined, either in the source definition or in the context of the resource itself.
For example:
- If you create a playlist with auto-advance disabled (
autoAdvance: false) andautoShowRecommendations: true, then by default, the next videos in the playlist are automatically displayed as the recommendations. In this case, if a viewer selects one of the recommendations, they remain within the context of the playlist. - If you explicitly specify
recommendationsfor the sources in your playlist, those are displayed in the recommendations pane. In this case, if a viewer selects one of the recommendations, they exit the playlist.
Playlist live example
Here's a live example of the video player with an automatically generated playlist (based on a specified tag). Upcoming videos are displayed to the right of the video and in the form of 'Next up' previews, and all videos that play in the player have a semi-transparent logo overlay transformation.
- Deliver your videos using HLS or DASH adaptive bitrate streaming formats
- Register to events to further customize your player or for analytics tracking
- Check out all the video player options in the Video Player API Reference
- Learn more about the video effects and transformations you can apply to your videos
 Ask AI


