As the volume of your visual data grows, so does a need for an effective, efficient way to categorize and find that information on demand and at scale. With automatic image tagging, you can eliminate the manual process of categorization, saving valuable time and money. Keywords are automatically assigned to digital images, which can then be organized and retrieved from your database. If you’re considering enhancing your digital asset management with auto tagging, Cloudinary has many add-ons available. In this blog post, we’ll compare the add-ons and highlight the benefits of each to help you decide which is the best fit for your use case. The three add-ons that we’ll be comparing are Amazon Rekognition Auto Tagging, Google Auto Tagging, and Imagga Auto Tagging. These are three separate service providers, each with its own usage allotments, depending on your Cloudinary plan. We’ll first look at what these are to get an idea of how they compare with each other when considering each add-on in depth for their features.
This table will be a good reference point. We’ll break down the practical meaning of the feature comparisons afterwards.
| Provider | Amazon Rekognition Auto Tagging | Google Auto Tagging | Imagga Auto Tagging |
|---|---|---|---|
| Image Recognition Type | Object and scene recognition | Scene classification with rich contextual understanding | Object & scene recognition |
| Tagging Method | Automatic tags with confidence scores | Automatic tags with confidence scores | Automatic tags with confidence scores |
| Confidence Scoring | Yes (0.0 – 1.0 scale) | Yes (0.0 – 1.0 scale) | Yes (0.0 – 1.0 scale) |
| Multi-Language Support | Yes (via Google Translation add-on) | Yes (via Google Translation add-on) | Yes (native support with language codes) |
| Facial Recognition / Detection | Coordinates of detected faces | No | No |
| Fine-grained Categorization | Moderate (objects & some contextual analysis) | High (detailed scene understanding) | High (detailed object & scene recognition) |
| Integration with Cloudinary | Upload API, update API | Upload API, update API | Upload API, update API |
As we can see they’re all similar in a lot of ways, but there are some important differences to take note of.
- Facial recognition:
- Only Amazon Rekognition supports coordinates of automatically detected faces, color histograms, and predominant colors
- Google and Imagga focus on general object and scene classification.
- Multi-language tagging:
- Imagga Auto Tagging has native multi-language support with language codes.
- Google and Amazon Rekognition Auto Tagging support multiple languages using the Google Translate add-on.
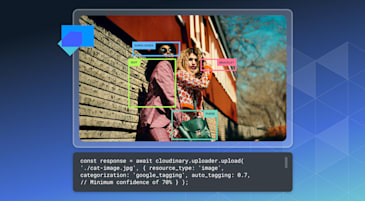
For all three add-ons, you specify the categorization provider when uploading an image using Cloudinary’s Upload API. The syntax is straightforward and consistent:
cloudinary.uploader.upload("image.jpg", {
  categorization: "aws_rek_tagging | google_tagging | imagga_tagging",
}
Code language: CSS (css)
The key difference lies in language support:
- Imagga allows you to specify a language code (e.g.,
categorization: "imagga_tagging:es" for spanish) for native multi-language tagging, giving it an edge in localization scenarios. - Google and Amazon Rekognition Auto Tagging can leverage the Google Translate add-on for multi-language support, but this requires additional configuration. Each provider returns a similar JSON response structure, but there are notable differences in the granularity and features of the output.
Tags are grouped by categories such as objects and scenes, and the add-on even supports advanced metadata like facial and color detection.

   "aws_rek_tagging": {
        "status": "complete",
        "data": [
         [{"tag": "People", "confidence": 0.9922},
          {"tag": "Person", "confidence": 0.9922},
          {"tag": "Human", "confidence": 0.9921},
          {"tag": "Electric Guitar", "confidence": 0.7046},
          {"tag": "Guitar", "confidence": 0.7046},
          {"tag": "Musical Instrument", "confidence": 0.7046},
          {"tag": "Musician", "confidence": 0.5754},
          {"tag": "Performer", "confidence": 0.5754}]}}
Code language: JavaScript (javascript)Emphasizes scene context and detailed categorization with additional focus on hierarchical classification (e.g., “footwear” → “ice skating”).

  {"google_tagging":
      {"status": "complete",
       "data":
        [{"tag": "skating", "confidence": 0.9689},
         {"tag": "footwear", "confidence": 0.9587},
         {"tag": "ice skating", "confidence": 0.9513},
         {"tag": "ice rink", "confidence": 0.9469},
         {"tag": "ice skate", "confidence": 0.9271},
         {"tag": "winter", "confidence": 0.911},
         {"tag": "fun", "confidence": 0.8944},
         {"tag": "girl", "confidence": 0.8183},
         {"tag": "ice", "confidence": 0.8045},
         {"tag": "winter sport", "confidence": 0.7912},
         {"tag": "recreation", "confidence": 0.7568},
         {"tag": "child", "confidence": 0.7532},
         {"tag": "leisure", "confidence": 0.7076},
         {"tag": "play", "confidence": 0.6854},
         {"tag": "snow", "confidence": 0.6167},
         {"tag": "road", "confidence": 0.5823},
         {"tag": "sports", "confidence": 0.5223}]}
Code language: JSON / JSON with Comments (json)Similar to Google, tags are generated with a confidence score and can include multi-language results when a language code is specified. The tags focus heavily on objects and scenes with detailed visual recognition.

      "imagga_tagging": {
        "status": "complete",
        "data": [
          {  "tag": "sea turtle",  "confidence": 1.0 },
          {  "tag": "loggerhead",  "confidence": 1.0 },
          {  "tag": "turtle",  "confidence": 0.8903 },
          {  "tag": "crab",  "confidence": 0.3089  },
          {  "tag": "king crab", "confidence": 0.2722 },
          {  "tag": "crustacean", "confidence": 0.1587 },
          {  "tag": "dungeness crab", "confidence": 0.1102 },
          {  "tag": "sea", "confidence": 0.1049 },
          {  "tag": "water", "confidence": 0.0986 },
          {  "tag": "ocean", "confidence": 0.0849 },
          {  "tag": "arthropod", "confidence": 0.0764 },
          {  "tag": "fish", "confidence": 0.0755 }]}
Code language: JavaScript (javascript)
So we can see they’re all very similar with some subtle differences worth noting.
Comparing the three options, it may not be a clear choice on which is best for general image tagging purposes.
- If you’re processing some advanced image metadata, Amazon Rekognition will be the best fit.
- If you require multi-language support, Imagga is the best choice for general tagging. If either of these don’t apply, picking one and testing it out for a while may be the best option. If you’re unhappy with the tag results, give one of the other ones a try and see if there’s an improvement for the types of images that you’re classifying.
Overall, the above auto tagging options are viable depending on your needs: Amazon Rekognition for facial detection; Google Auto Tagging for its broad scene analysis and multi-language support via the Translate add-on, which works well for managing large media libraries; or Imagga for detailed object tagging with built-in multi-language support.
Contact us today to learn more about how leveraging Cloudinary and image tagging add-ons for more effective digital asset management can help make your visual media workflows easier.