
Videos are an integral aspect of success in ecommerce, as they help drive sales and revenue. Shoppable videos is an interactive marketing tool that features products available for purchase.
In this article, we will learn how to add videos in a Blitz app using Cloudinary’s Shoppable Video and Video Player.
The completed project is on CodeSandbox. Fork it and run the code.
The source code is also available on GitHub.
Knowledge of React, Blitz, and a Cloudinary account is required to get the most out of this article.
Run any of the commands below in the terminal to install Blitz.
yarn global add blitz
or
npm install -g blitz --legacy-peer-deps
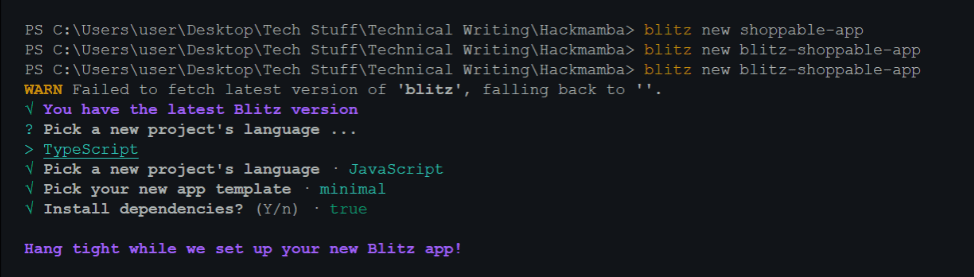
Code language: PHP (php)Next, scaffold a new Blitz.js project with the command below:
blitz new brand-visualizer
Code language: JavaScript (javascript)
The command will trigger a command-line interface (CLI) where we can configure the application. The images below show the configuration options the CLI provides:
Next, navigate into the project directory.
cd blitz-shoppable-app
Then, run the command below to start the application at http://localhost:3000.
blitz dev
Next, we need to create the ShoppableVideo component, which will hold the video player. Create a components/ShoppableVideo.js file inside app “ folder and paste the code below.
import { useEffect } from "react"
import { Cloudinary } from "cloudinary-core"
import "cloudinary-video-player/dist/cld-video-player.min.js"
import "cloudinary-video-player/dist/cld-video-player.min.css"

const ShoppableVideo = () => {
  const cld = new Cloudinary({ cloud_name: "nefejames" })
  useEffect(() => {
    const videoplayer = cld
      .videoPlayer("video-player", {
        controls: true,
      })
      .width(600)
    videoplayer.source(
      "https://res.cloudinary.com/nefejames/video/upload/v1657587018/Hackmamba/house%20videos/production_ID_4301618_gxbqe7.mp4"
    )
  }, [])
  return (
    <div className="container">
      <h1>Blitz.js Shoppable Video</h1>
      <video controls autoPlay id="video-player"></video>
    </div>
  )
}
export default ShoppableVideo
Code language: JavaScript (javascript)
The code above does the following:
-
Imports
useEffectfrom React. -
Imports the required dependencies from
blitz,cloudinary-coreandreact. -
Imports the video player’s CSS stylesheet and JavaScript bundle.
-
Creates a
cldvariable and sets it to a newCloudinaryinstance. -
Instantiates the video player using the
videoPlayermethod. The method takes two parameters; the first is the ID of the video element, and the second is a configuration object. -
Set the width of the video player to 600px.
-
Pass in the URL of the video we want to play to the
cld.source()method.
Having created the ShoppableVideo component, let’s integrate it into the app. Update the pages/index.js file with the code below.
import { Head, dynamic } from "blitz"

const DynamicShoppableVideo = dynamic(() => import("app/components/ShoppableVideo"), {
  ssr: false,
})
const Home = () => {
  return (
    <div className="container">
      <Head>
        <title>Blitz App</title>
        <meta name="viewport" content="initial-scale=1.0, width=device-width" />
      </Head>
      <main>
        <DynamicShoppableVideo />
      </main>
    </div>
  )
}
Home.suppressFirstRenderFlicker = true
export default Home
Code language: JavaScript (javascript)
Here, we import dynamic from Next.js and use that to dynamically import ShoppableVideo with SSR turned off. This is because the Cloudinary video player package works only on the client-side and needs the window object.
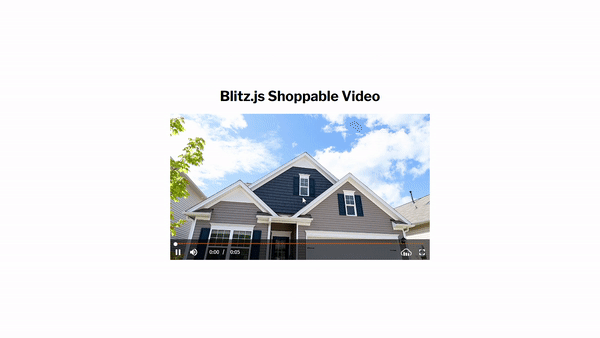
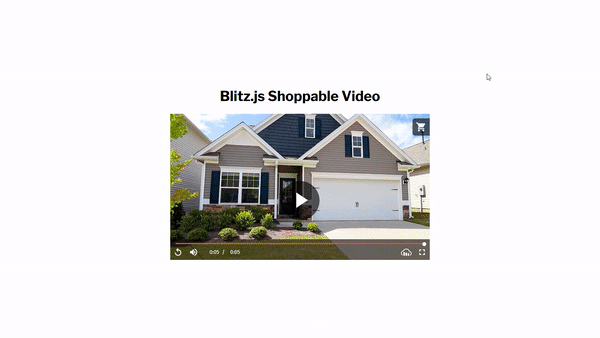
With that, the video player renders in the browser.
Now, we’ll add the shoppable video to the player. To do that, we need to update the components/ShoppableVideo.js file and pass one more parameter to the cld.source() method.
However, we first need to define the data of the product we want to display in the shoppable feature.
Create an app/data/index.js file and update it with the code below.
const shoppable = {
  products: [
    {
      productId: 1,
      productName: "A Dog",
      publicId:
        "https://res.cloudinary.com/nefejames/image/upload/v1632500955/Hackmamba/Images/pet9.jpg",
      onClick: {
        action: "goto",
        pause: true,
        args: {
          url: "/product/1",
        },
      },
    },
  ],
}

export default shoppable
Code language: JavaScript (javascript)
Let’s break down the code above:
-
We defined and exported an object called
shoppable. Theproductsarray contains the configuration for the products we want to display. -
productIdis the ID of the product. -
productNameis the name of the product. -
publicIdis the ID of the product image; in this case, it is the URL of the product image. -
onClickdefines what happens when a user clicks on a product in the products bar. -
We set the
actiontogoto, which will open a URL in a new tab. -
pausewill pause the videoonClick. -
We define the URL for the action in
args.
Next, we’ll add the shoppable object we defined to the cld.source() method. Update the components/ShoppableVideo.js file with the code below.
import { useEffect } from "react"
import shoppable from "app/data" //added
import { Cloudinary } from "cloudinary-core"
import "cloudinary-video-player/dist/cld-video-player.min.js"
import "cloudinary-video-player/dist/cld-video-player.min.css"

const ShoppableVideo = () => {
  const cld = new Cloudinary({ cloud_name: "nefejames" })
  useEffect(() => {
    const videoplayer = cld
      .videoPlayer("video-player", {
        controls: true,
      })
      .width(600)
    videoplayer.source(
      "https://res.cloudinary.com/nefejames/video/upload/v1657587018/Hackmamba/house%20videos/production_ID_4301618_gxbqe7.mp4",
      {
        shoppable: shoppable, //added
      }
    )
  }, [])

  return (
    <div className="container">
      <h1>Blitz.js Shoppable Video</h1>
      <video controls autoPlay id="video-player"></video>
    </div>
  )
}

export default ShoppableVideo
Code language: JavaScript (javascript)
With this, the shoppable video displays on the browser.
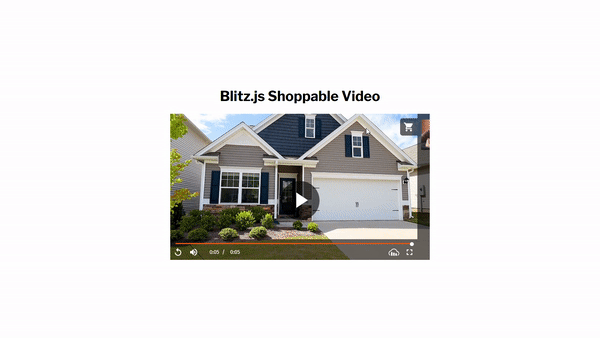
When a user clicks on a product, we want to redirect them to the product’s page, where they can make a purchase. That’s why we defined the action as goto in the shoppable data.
Create a pages/product/[id].js file and paste the code below to make the page.
import Cart from "app/components/Cart"
import shoppable from "app/data"
import { useState } from "react"

const Product = () => {
  const [cartItem, setCartItem] = useState(null)
  const addToCart = () => {
    setCartItem({
      imgUrl: shoppable.products[0].publicId,
      name: shoppable.products[0].productName,
    })
  }
  return (
    <div className="product-container ">
      <div className="product">
        <img src={shoppable.products[0].publicId} alt="a product" />
        <span>$20:00</span>
        <span>{shoppable.products[0].productName}</span>
        <button onClick={addToCart}>Buy</button>
      </div>
      <Cart cartItem={cartItem} />
    </div>
  )
}

export default Product
Code language: JavaScript (javascript)
Above, we did the following:
-
Imported the required dependencies.
-
Created a
cartItemstate that will hold the data of the product in the cart. -
Created an
addToCartfunction, which is an object containing the product’s name and image. Then we passedaddToCartto the button. -
Accessed the product’s data from shoppable and displayed it.
-
Passed the
cartItemstate to theCartcomponent. TheCartcomponent will show the items the user bought.
Let’s define the Cart component.
const Cart = ({ cartItem }) => {
  return (
    <div className="cart-box">
      <div className="cart">
        <h2>Cart</h2>
        {cartItem ? (
          <div>
            <img src={cartItem.imgUrl} alt="a product" />
            <span>{cartItem.name}</span>
          </div>
        ) : (
          <span>Cart is empty</span>
        )}
      </div>
    </div>
  )
}

export default Cart
Code language: JavaScript (javascript)
Here, we check to ensure an item is in the cart and display that item. With that, we have successfully added the product page.
Here’s a gif of the working demo.
This article demonstrated how to add videos in a Blitz app using Cloudinary’s Shoppable Video and Video Player.