
The Jamstack architecture has revolutionized how E-commerce platforms are built. It leverages technologies like Pre-rendering, Markups (HTML), and API economy to build platforms that are fast, secure, and easier to scale.
As the popular saying goes, “With great power comes great responsibility”. Jamstack offers a variety of APIs to build different features of an E-commerce platform, and developers are burdened with constant context switching when using and managing the provided APIs.
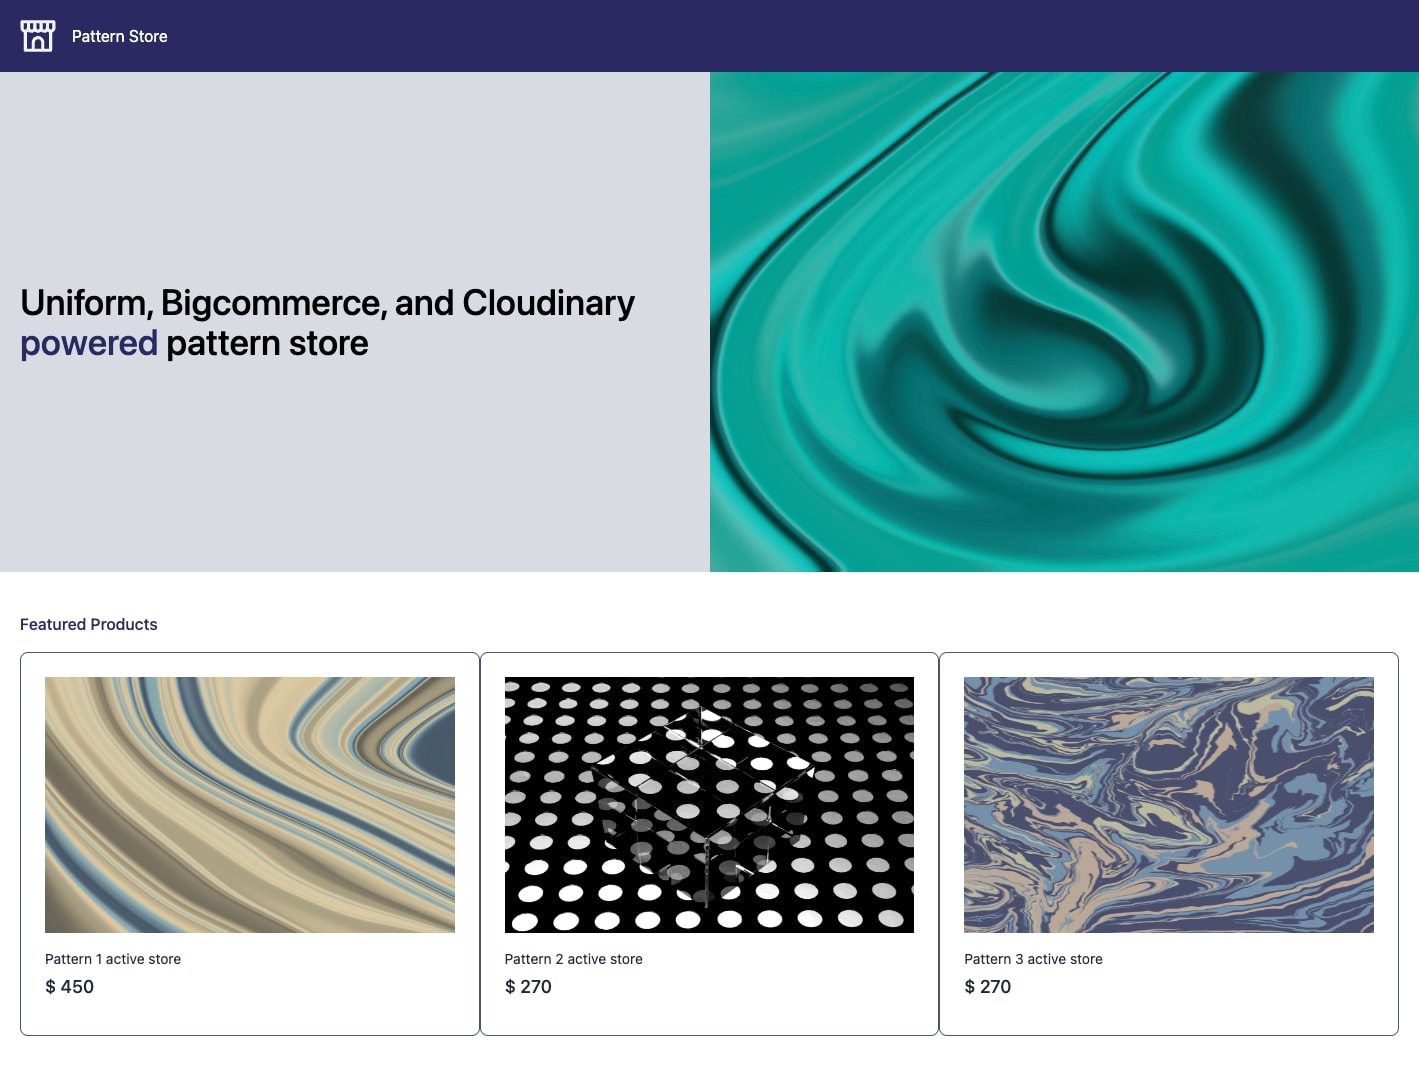
In this post, we will learn how to deliver composable commerce images in a Next.js application using Cloudinary, BigCommerce, and Uniform.
Cloudinary is a visual media service we use to upload, store, manage, transform, and deliver images and videos for websites and applications.
BigCommerce is a software as a service company offering retailers and developers a platform to build e-commerce applications.
Uniform is a digital experience platform that supports the composition, delivery, and management of building blocks required to build an application. It allows developers to seamlessly adapt and manage Jamstack technologies like headless content management systems, commerce APIs, and CDNs and deliver it as a single source of truth instead of making multiple requests.
The source code is on Github.
To fully grasp the concepts presented in this tutorial, the following requirements apply:
- Basic understanding of JavaScript and React
- Cloudinary account (Create an account here)
- BigCommerce account. BigCommerce offers a 15-day trial we can leverage
- Uniform account (Create an account here)
In this post, we will focus on implementations only. The project UI has already been set up.
To get started, we need to clone the project by navigating to the desired directory and running the command below:
    git clone https://github.com/Mr-Malomz/commerce-img.git && cd commerce-img
Code language: PHP (php)First, we need to install the project dependencies by running the command below:
npm i
Then run the project using the command below:
npm run dev
With our application up and running, we need to upload sample images for our e-commerce products.
Sample Images
- hero – https://bit.ly/3SzKUAK
- 1 – https://bit.ly/3SJ4Y3S
- 2 – https://bit.ly/3Qf1gxi
- 3 – https://bit.ly/3P9Jjic
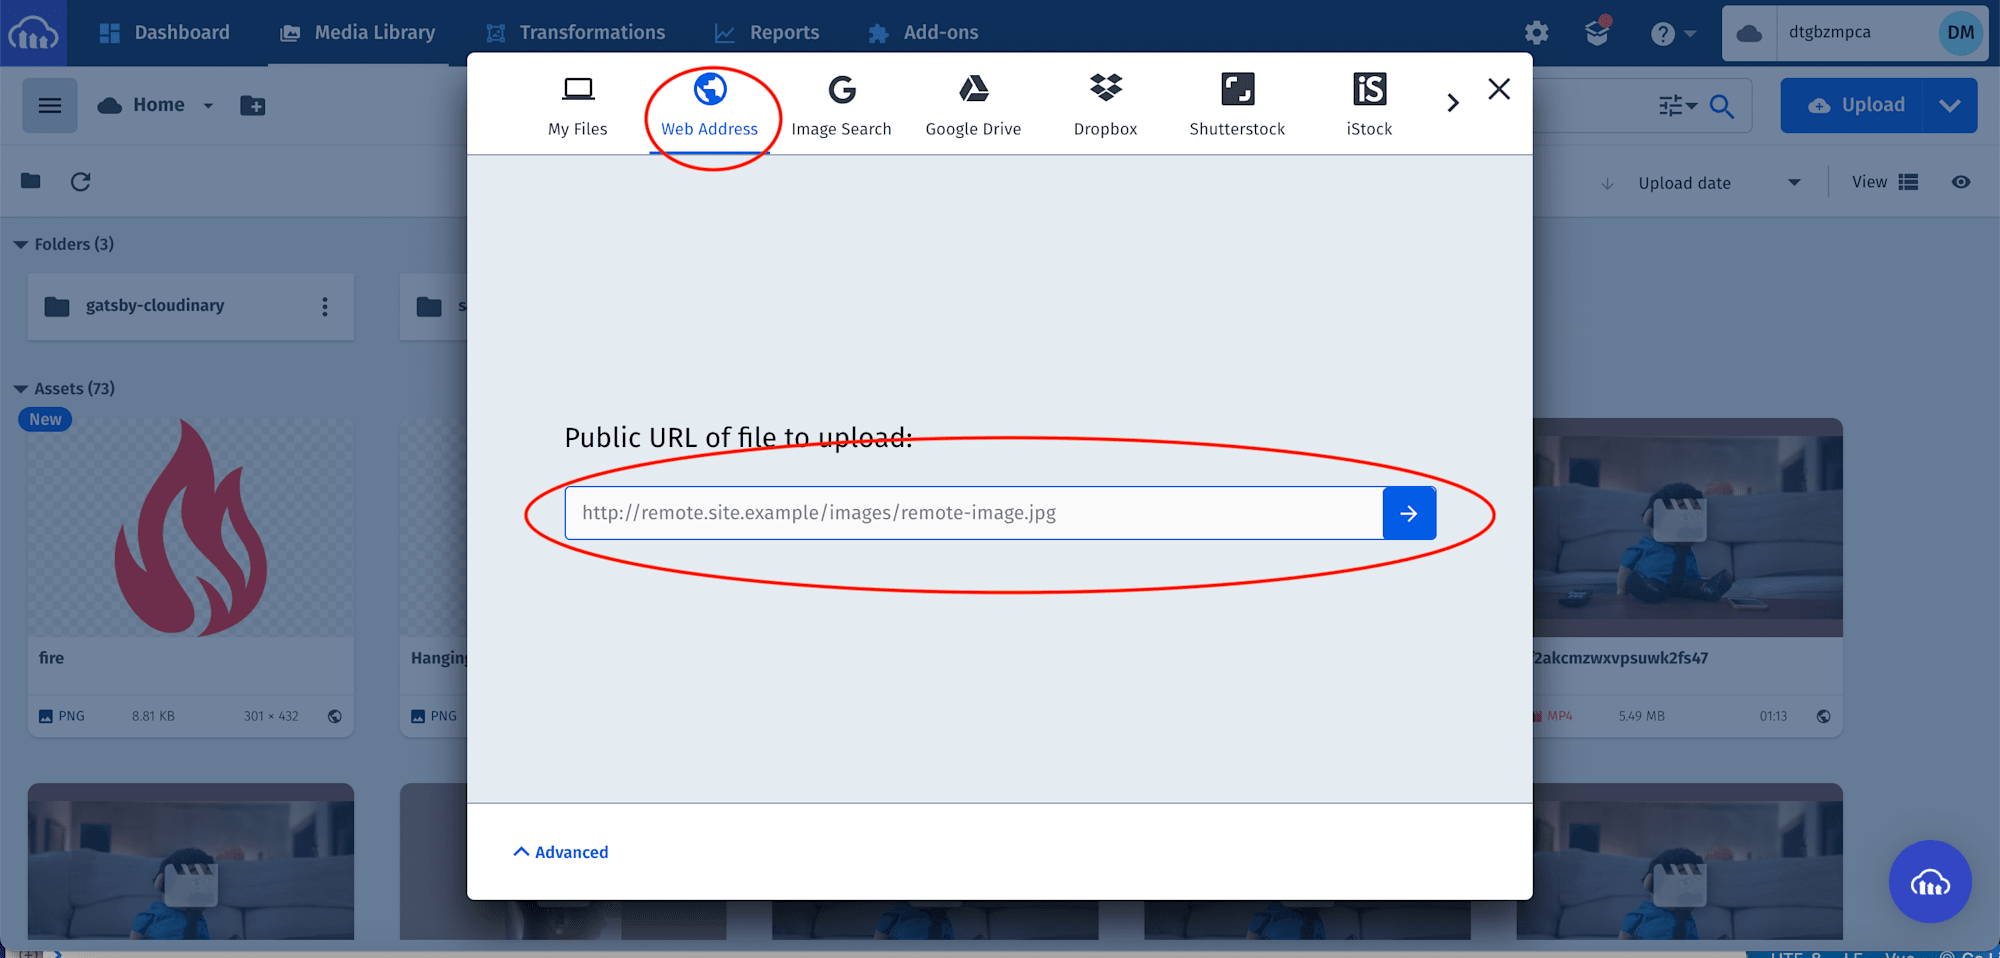
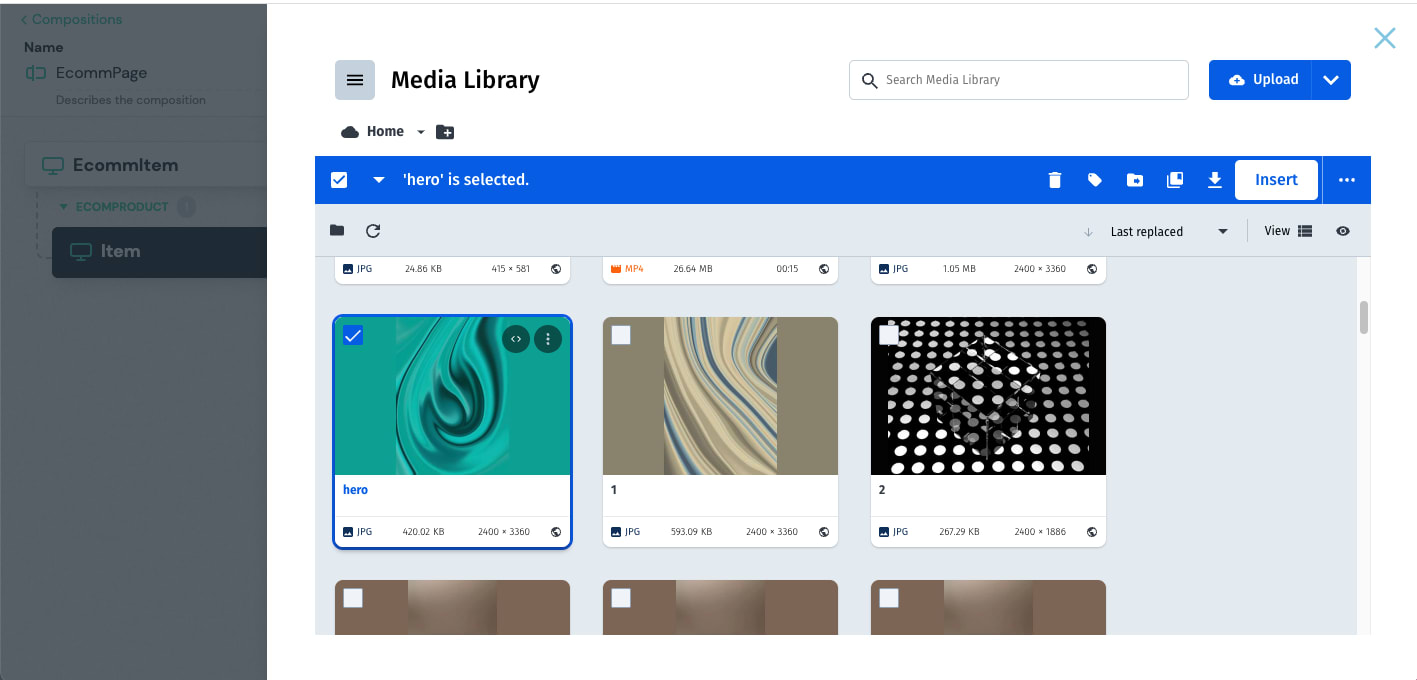
In our Cloudinary dashboard, we uploaded the image by clicking on the Media Library tab, clicking on Upload, selecting the Web Address option, inputting the URL, and finally clicking on the Arrow Button to upload.

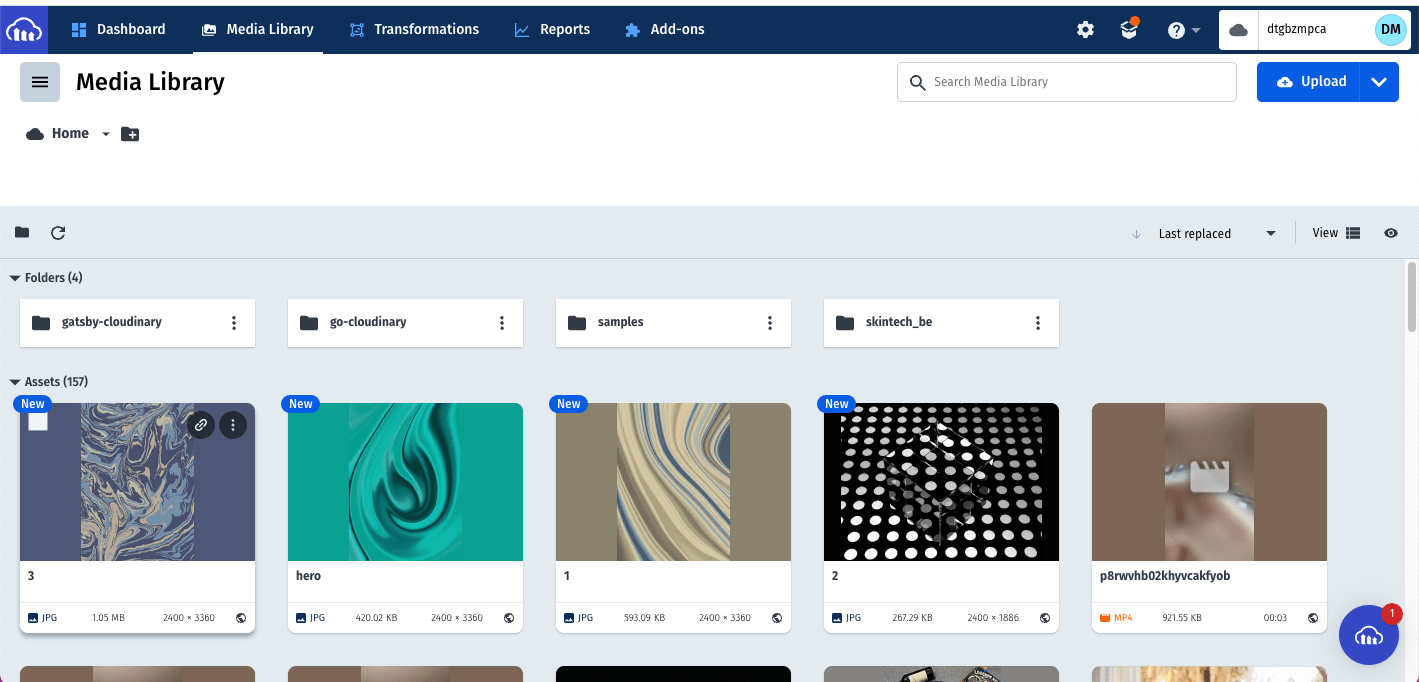
After uploading the images, we will see them displayed on the console.
Product data upload to BigCommerce Next, we need to upload sample data for our e-commerce products.
| Product Name | Default Price | Weight |
|---|---|---|
| Hero | 500 | 2 |
| Pattern 1 active store | 450 | 2 |
| Pattern 2 active store | 270 | 2 |
| Pattern 3 active store | 270 | 2 |
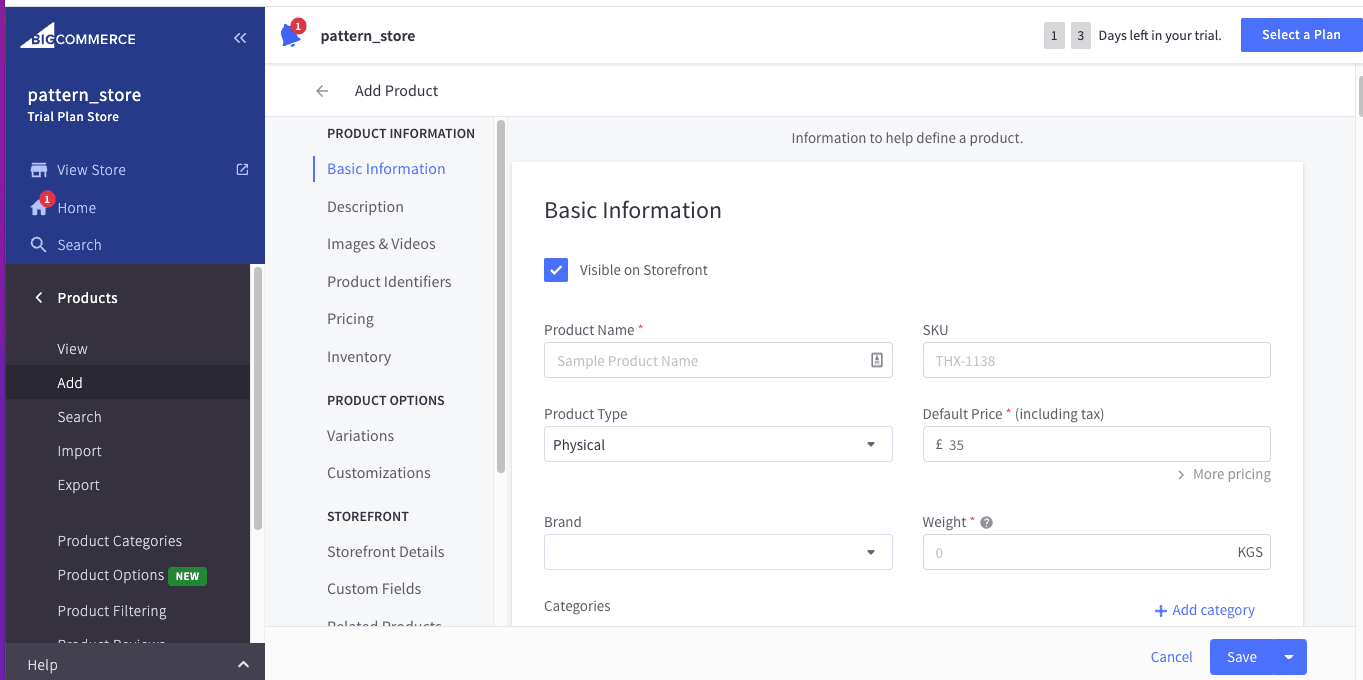
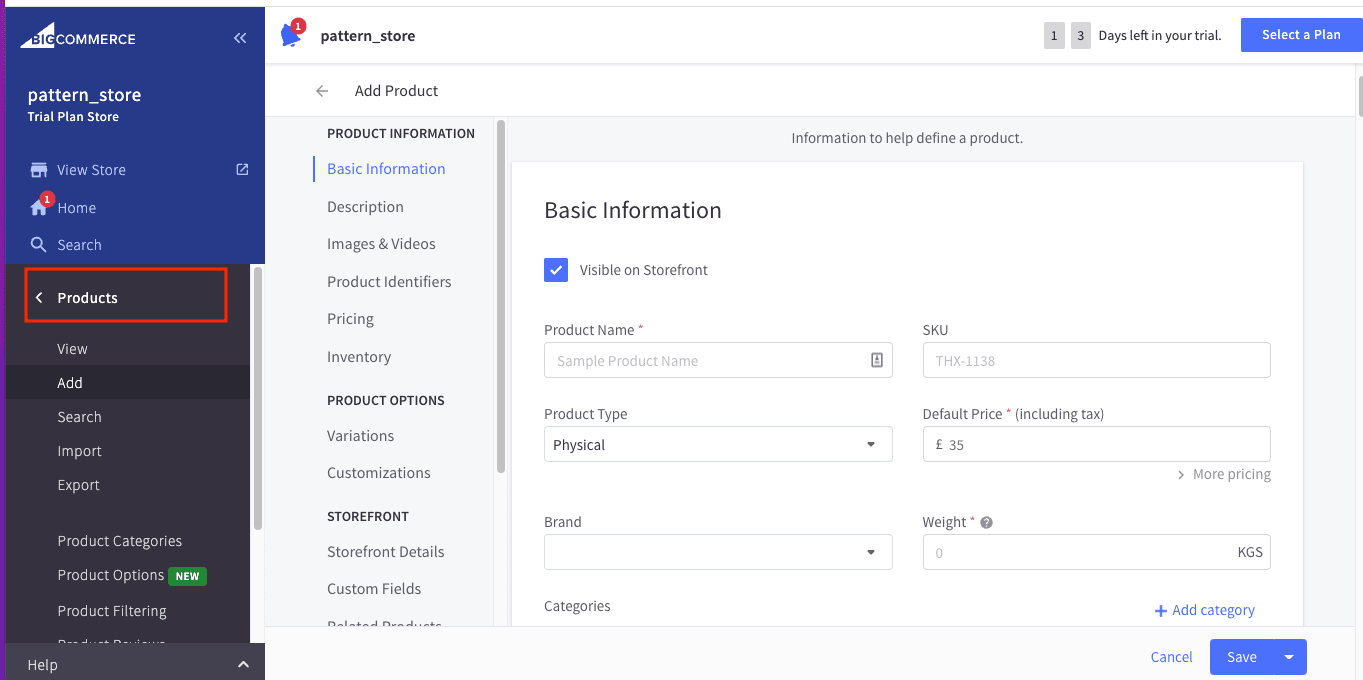
On the homepage, navigate to the Products menu and click on Add; input the Product Name, Default Price, and Weight, then Save.
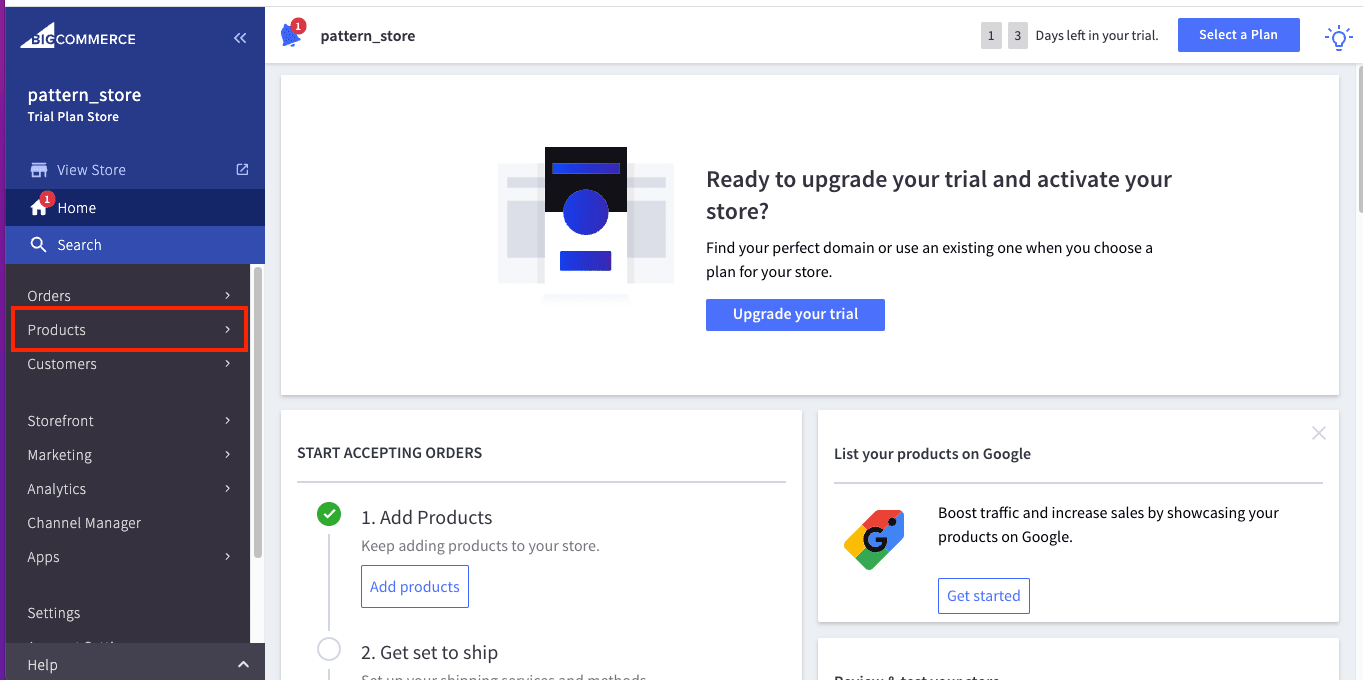
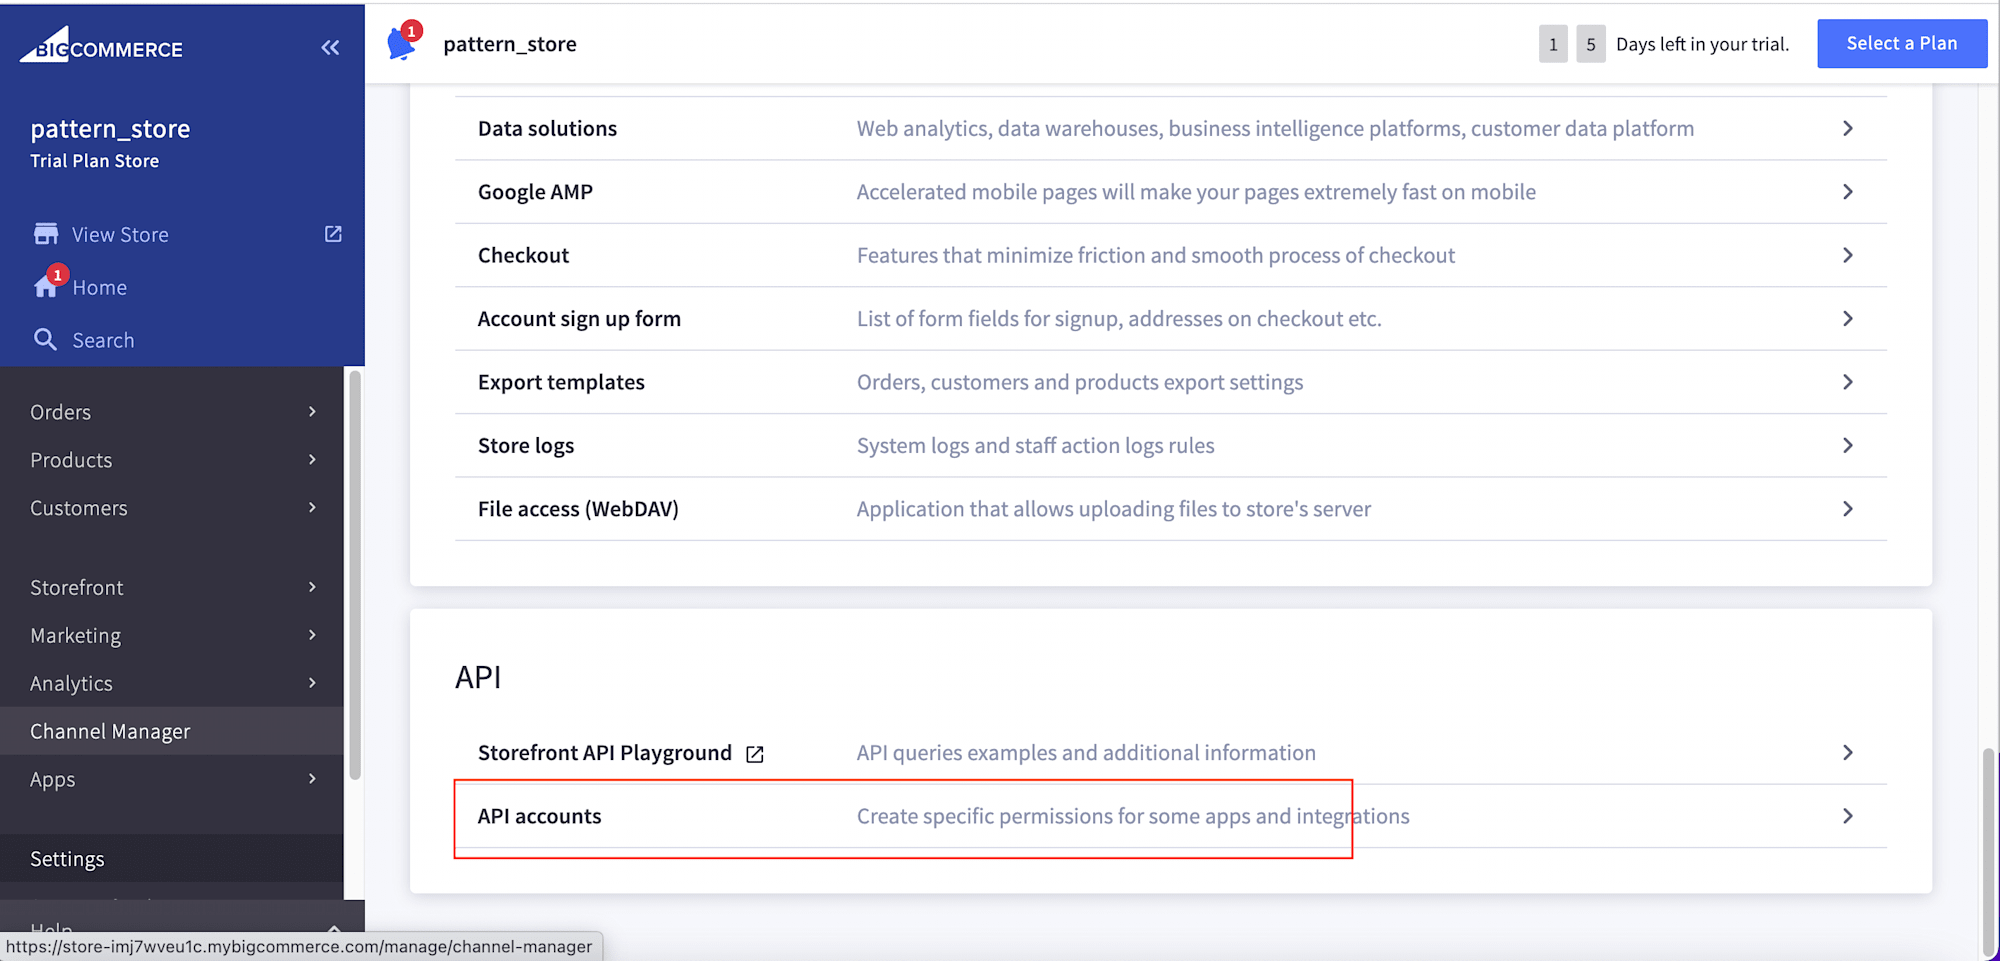
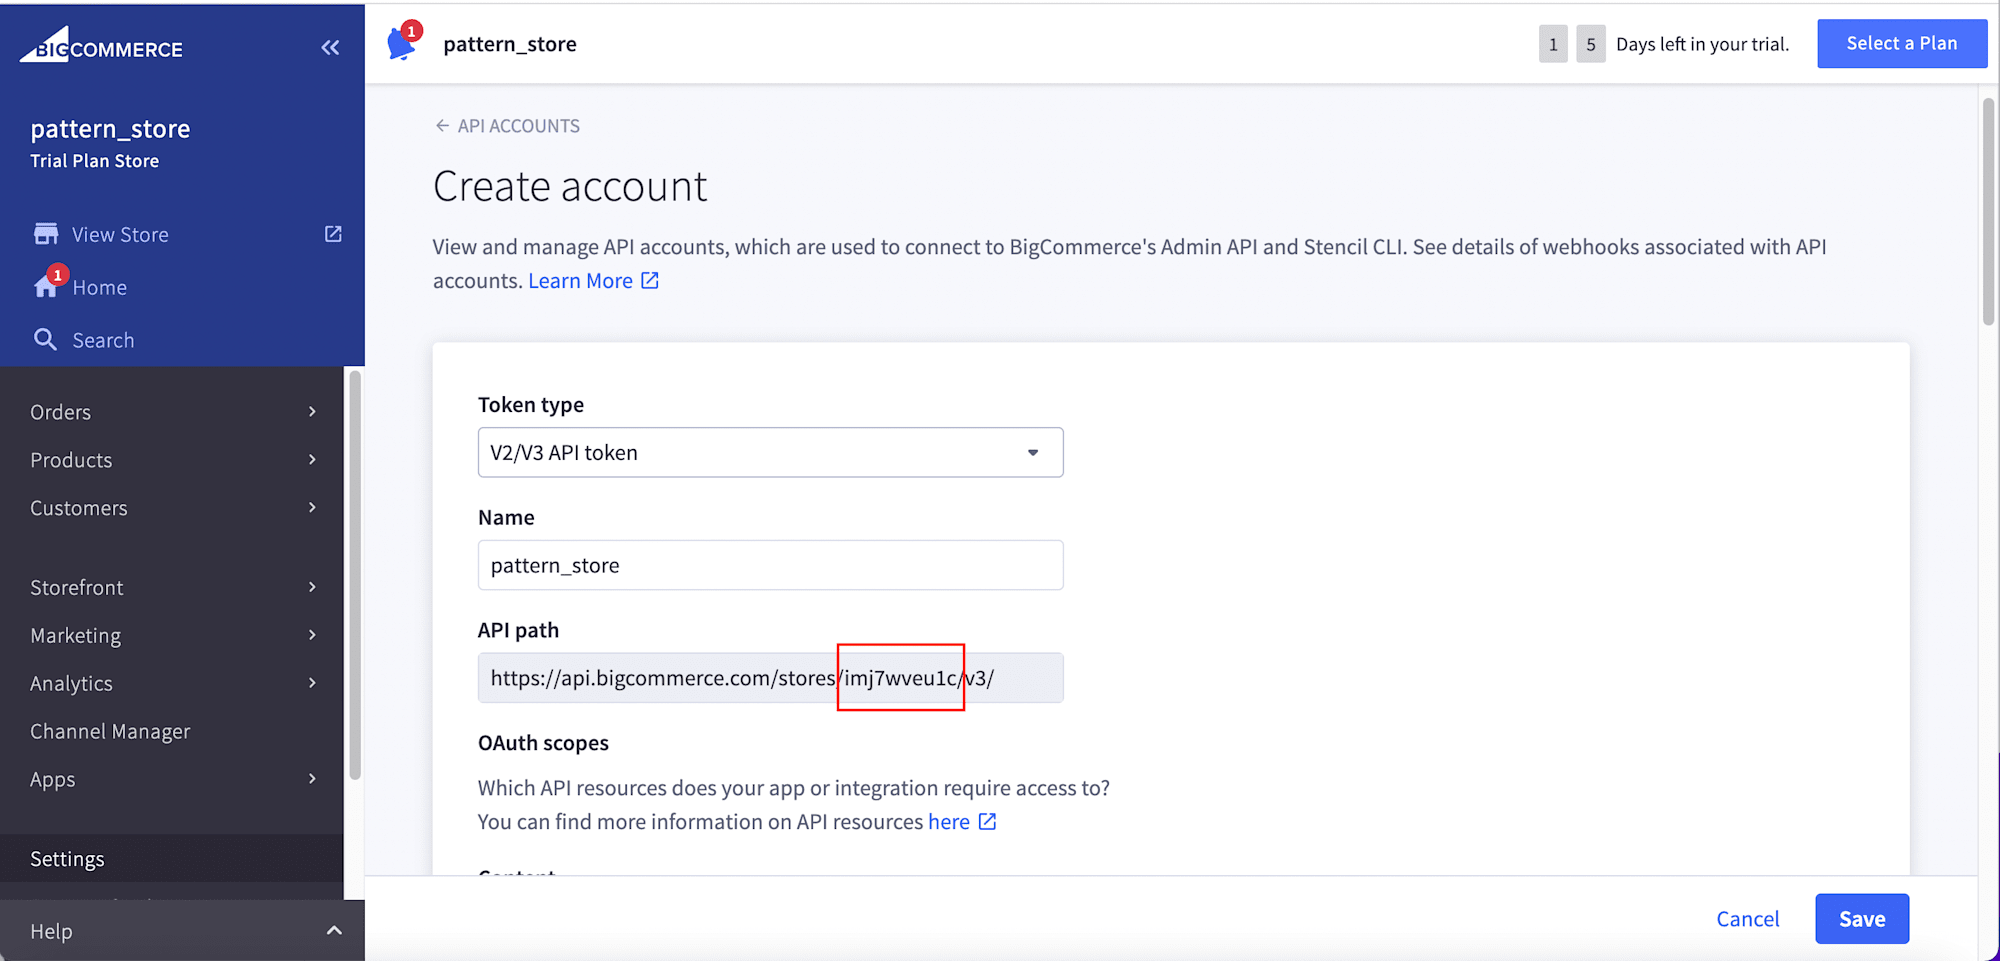
Create an API A****ccount Next, we need to create an API account that exposes our products to 3rd party applications. To do this, navigate back to the main menu by clicking on the Product menu, navigate to the Settings menu, scroll to the API section and click on API accounts.
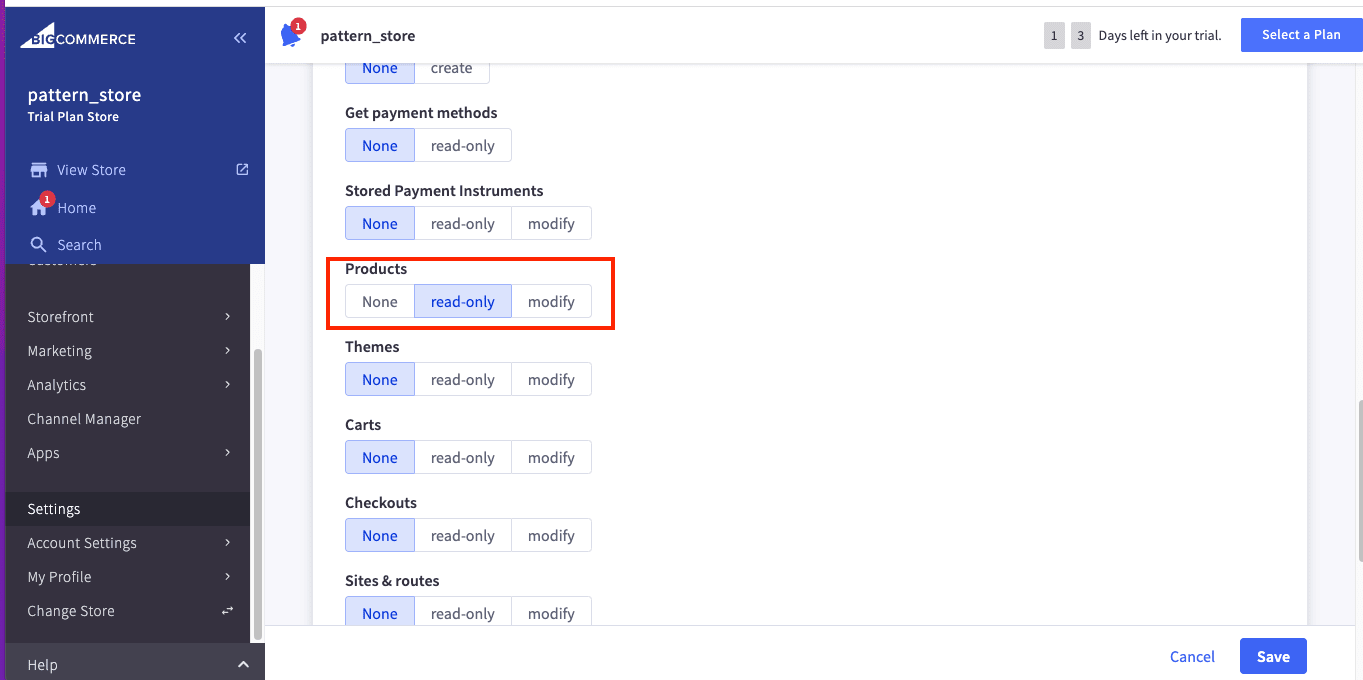
Click on the Create API account button, input pattern_store as the name, scroll down to the Product section, and select read-only. The permission selected will give 3rd party applications read-only access to our products.

Before we save the settings, we need to create a .env file in the root directory of our application and add the snippet below:
NEXT_PUBLIC_BIGCOMMERCE_STORE_HASH=/YOUR STORE HASH HERE/
NEXT_PUBLIC_BIGCOMMERCE_TOKEN=/YOUR ACCESS TOKEN HERE/
Code language: JavaScript (javascript)
By scrolling up to the API path and copying the characters after /stores/ and before the /v3/ , we can get our Store Hash.
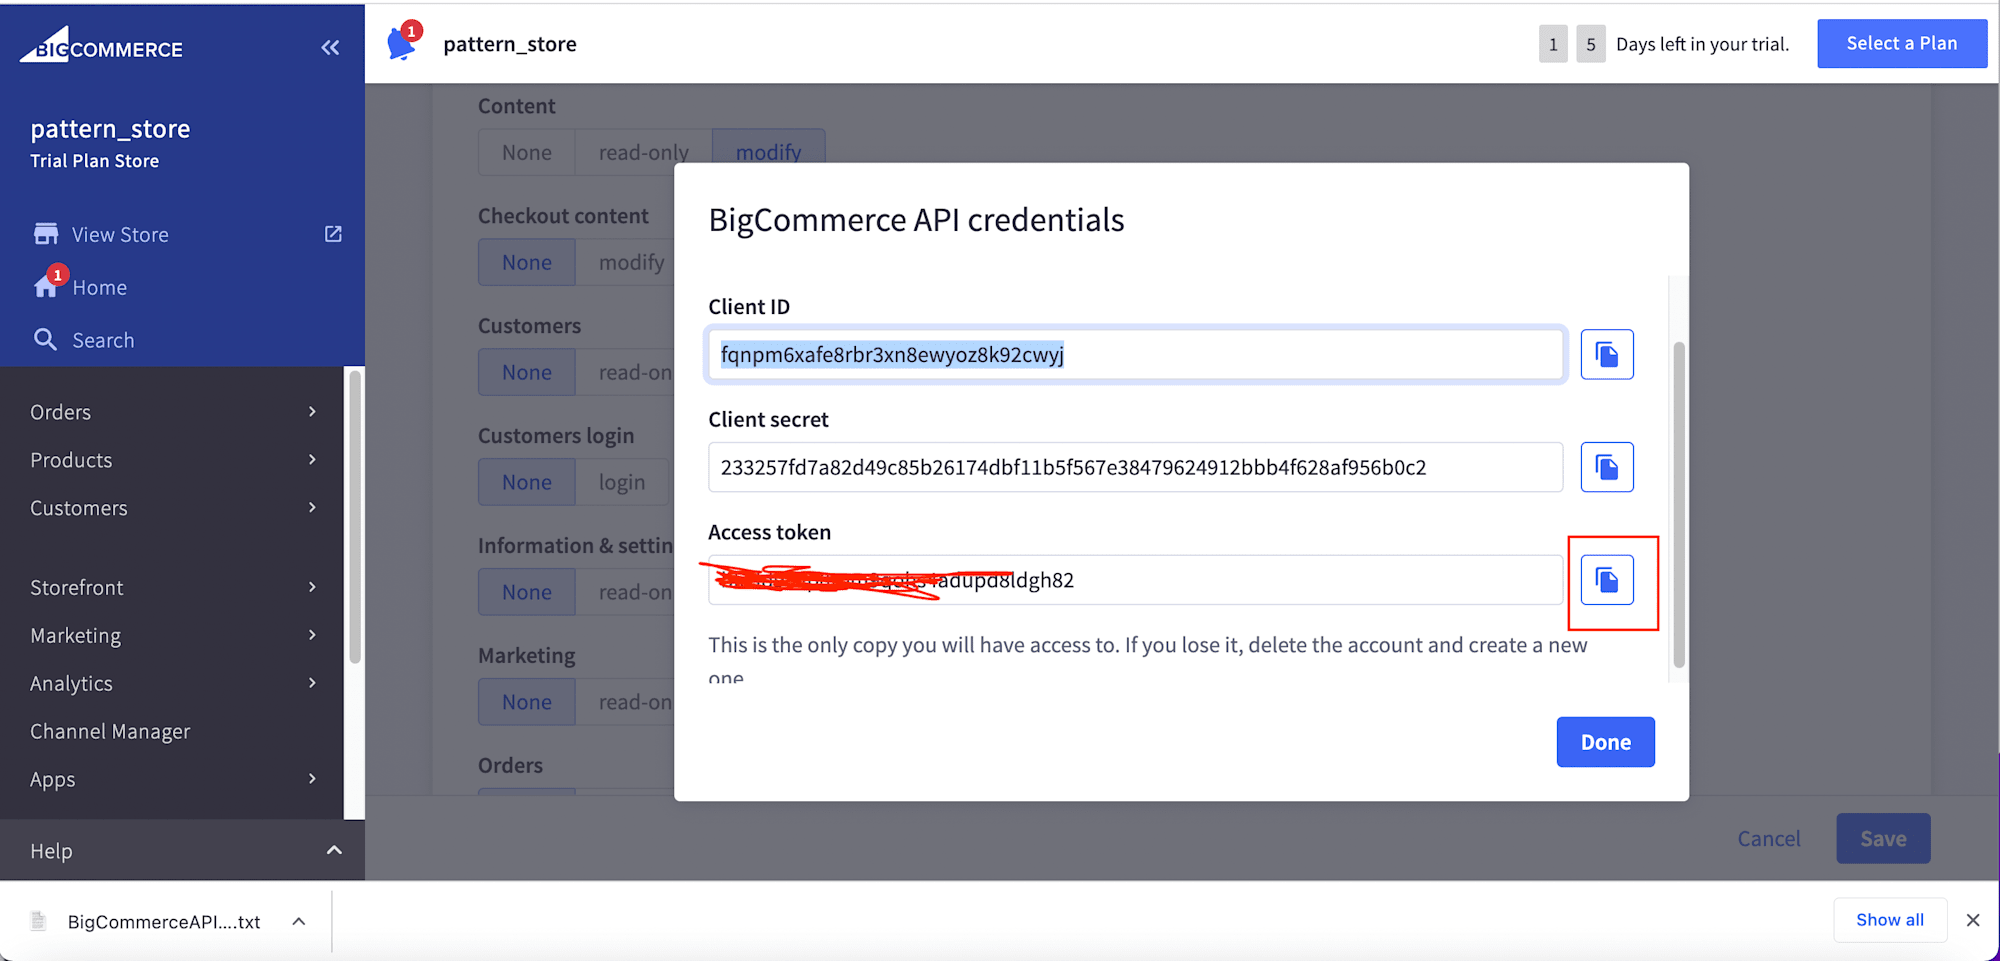
Finally, we can click on the Save button. The application will reveal and download our Access Token and other credentials on save. We can copy the Access Token and update the .env file.
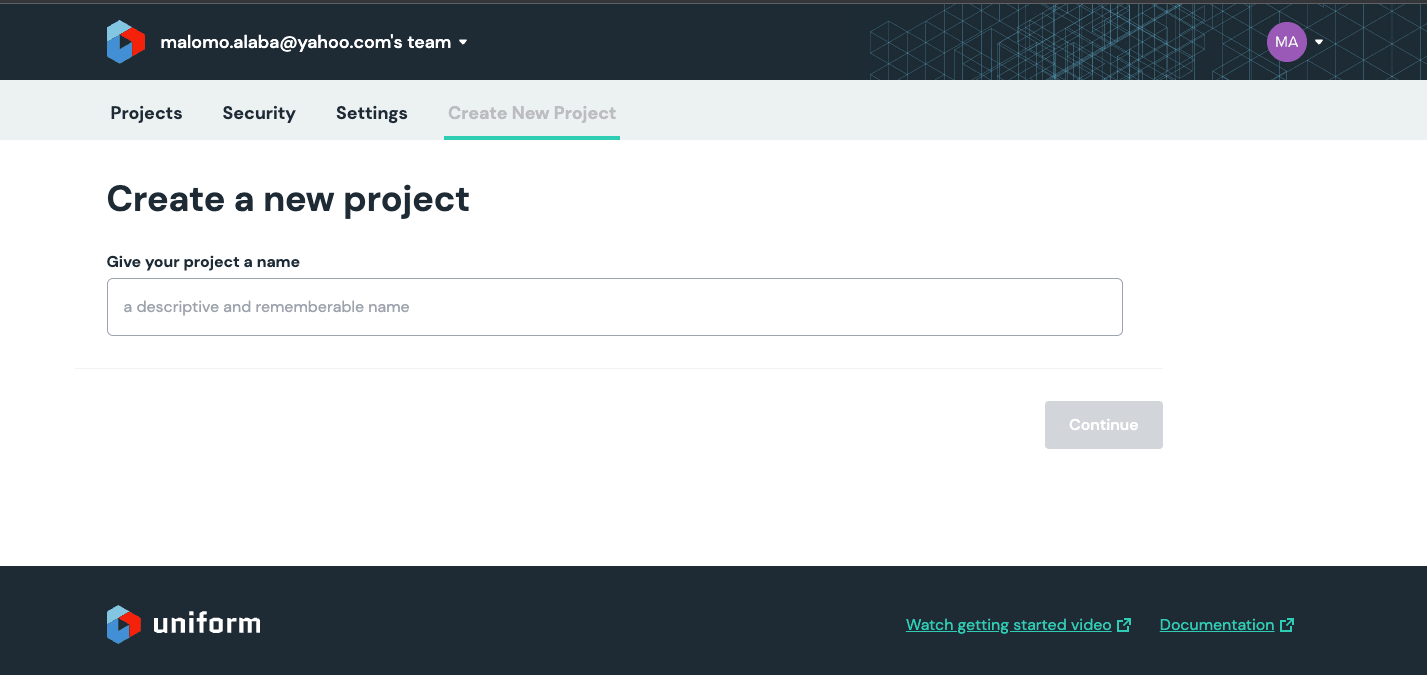
With our images and product data uploaded, we need to unify them and create a seamless digital experience using Uniform. To do this, we must sign up and fill in the required information.
Next, input commerce_image as the project name and click Continue.
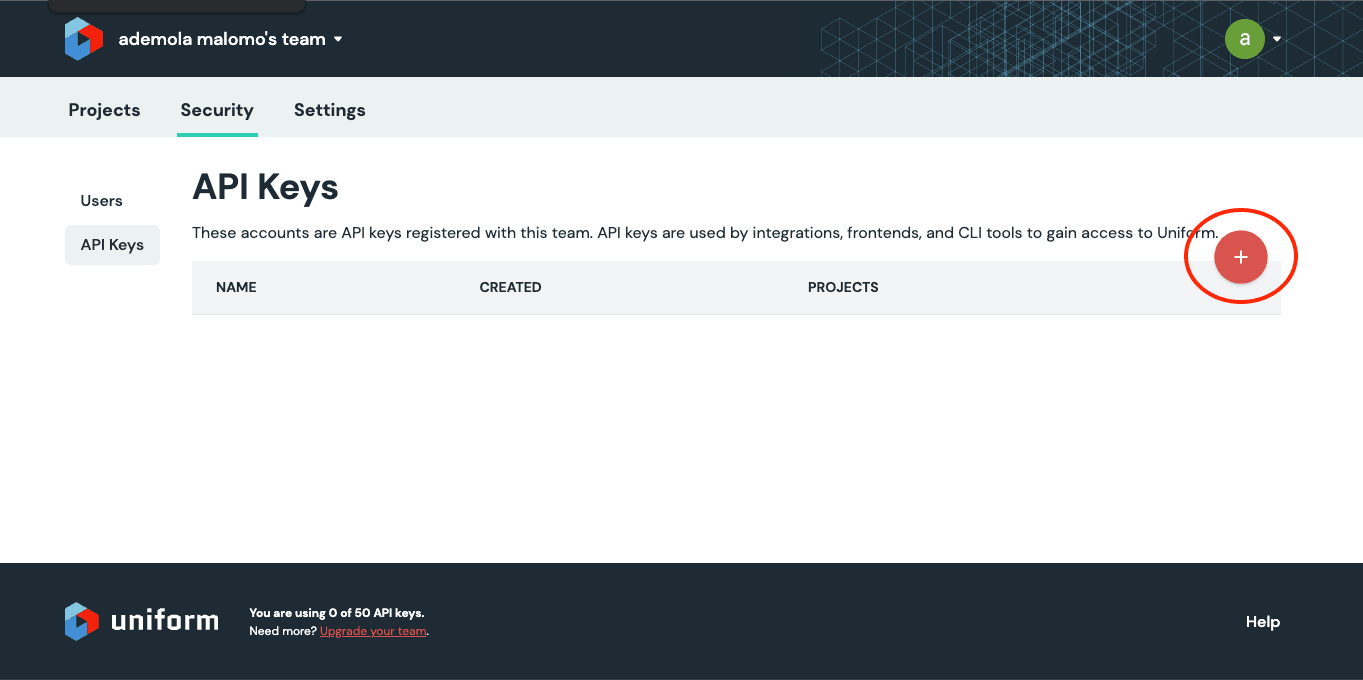
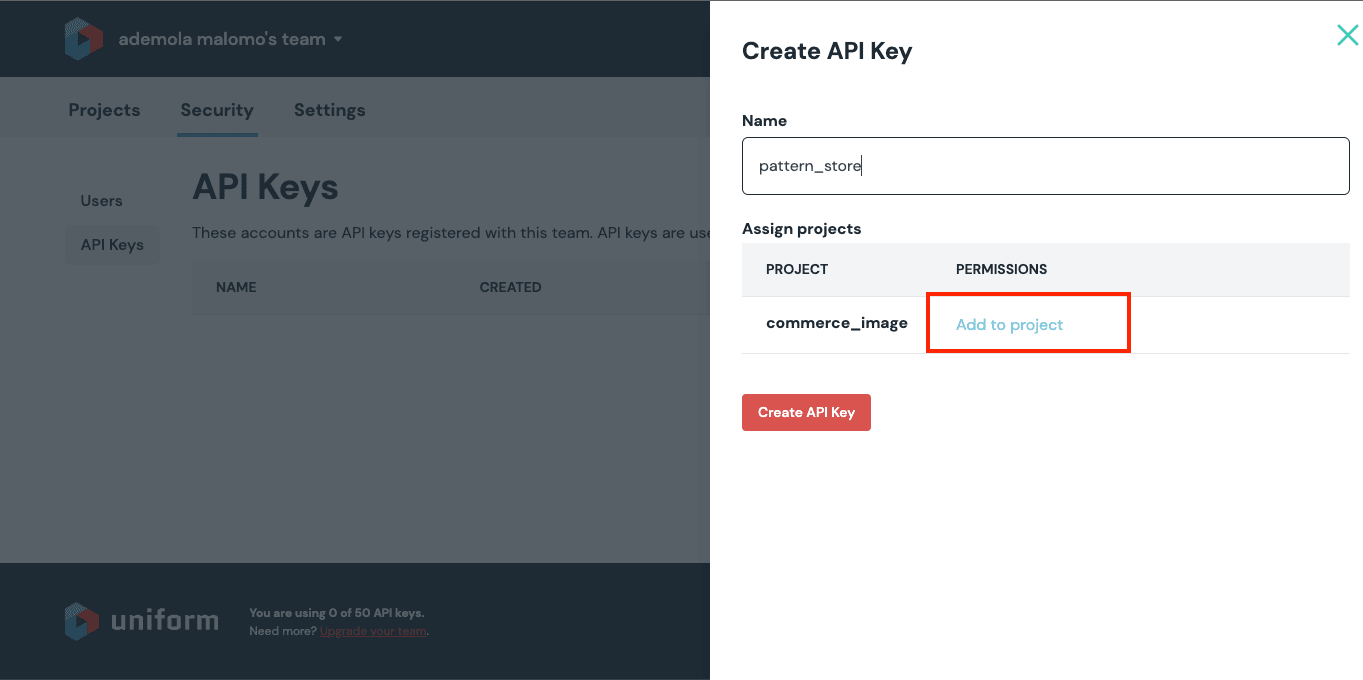
Next, navigate to the Security tab, select the API Keys, and click on the rounded Plus Icon to create one. Input patter_store as the API name, click on Add to Project, mark all the permissions, and click on Set Permissions. Then click on the Create API Key to create the API key

With this done, we should see a screen containing our API Key and Project ID. The .env file needs to be updated with these parameters, as shown in the screenshot below.
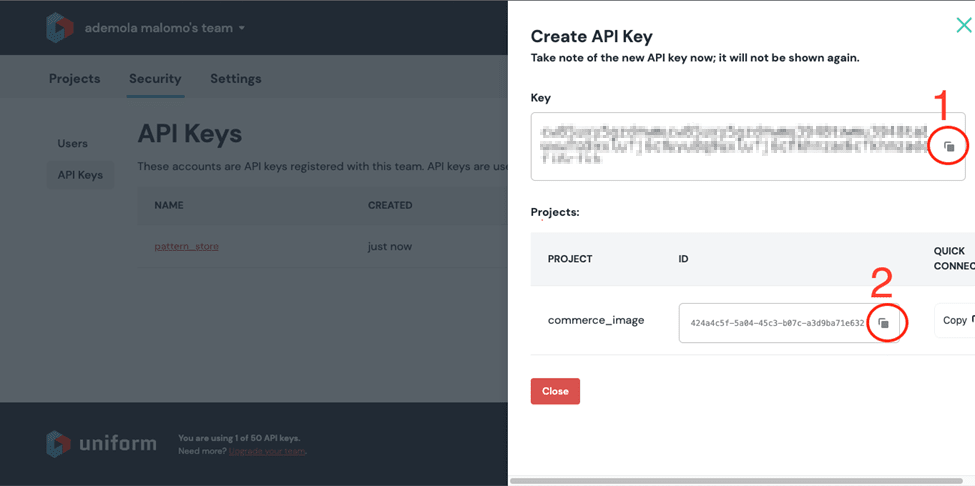
Updated .env
NEXT_PUBLIC_BIGCOMMERCE_STORE_HASH=/YOUR STORE HASH HERE/
NEXT_PUBLIC_BIGCOMMERCE_TOKEN=/YOUR ACCESS TOKEN HERE/
NEXT_PUBLIC_API_KEY=/YOUR API KEY GOES HERE/
NEXT_PUBLIC_PROJECT_ID=/PROJECT ID GOES/
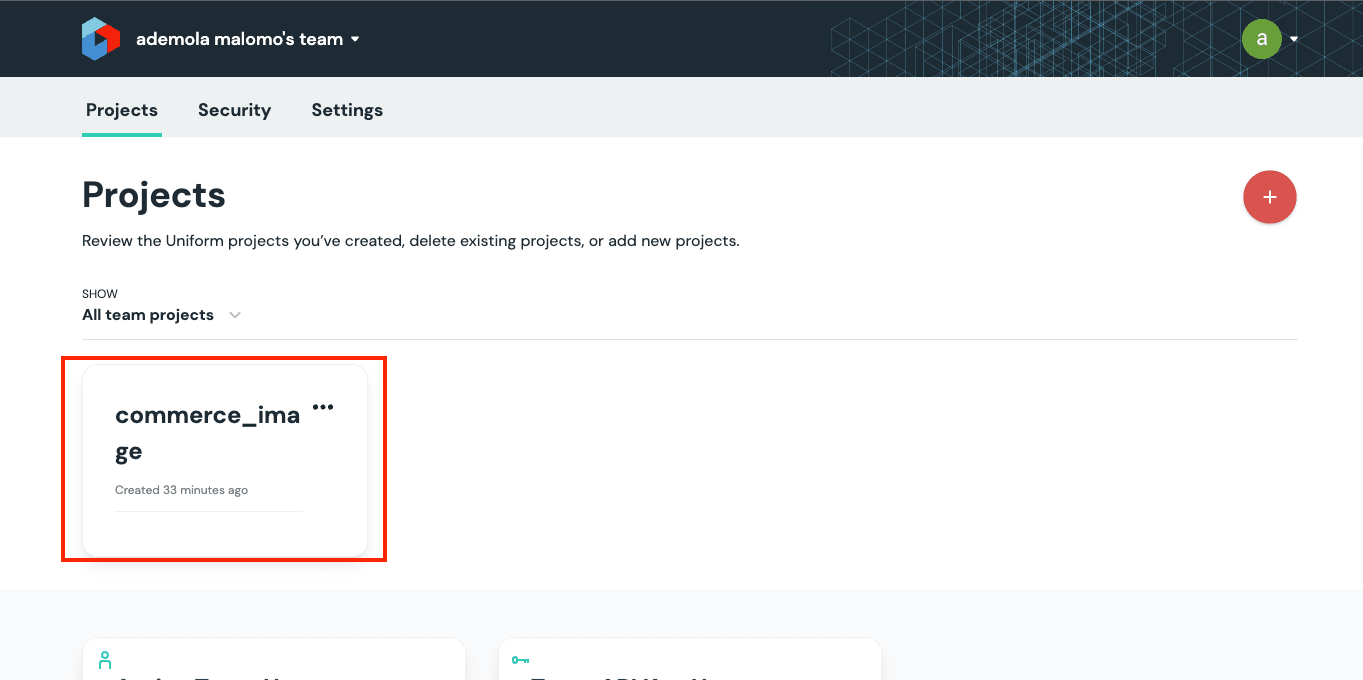
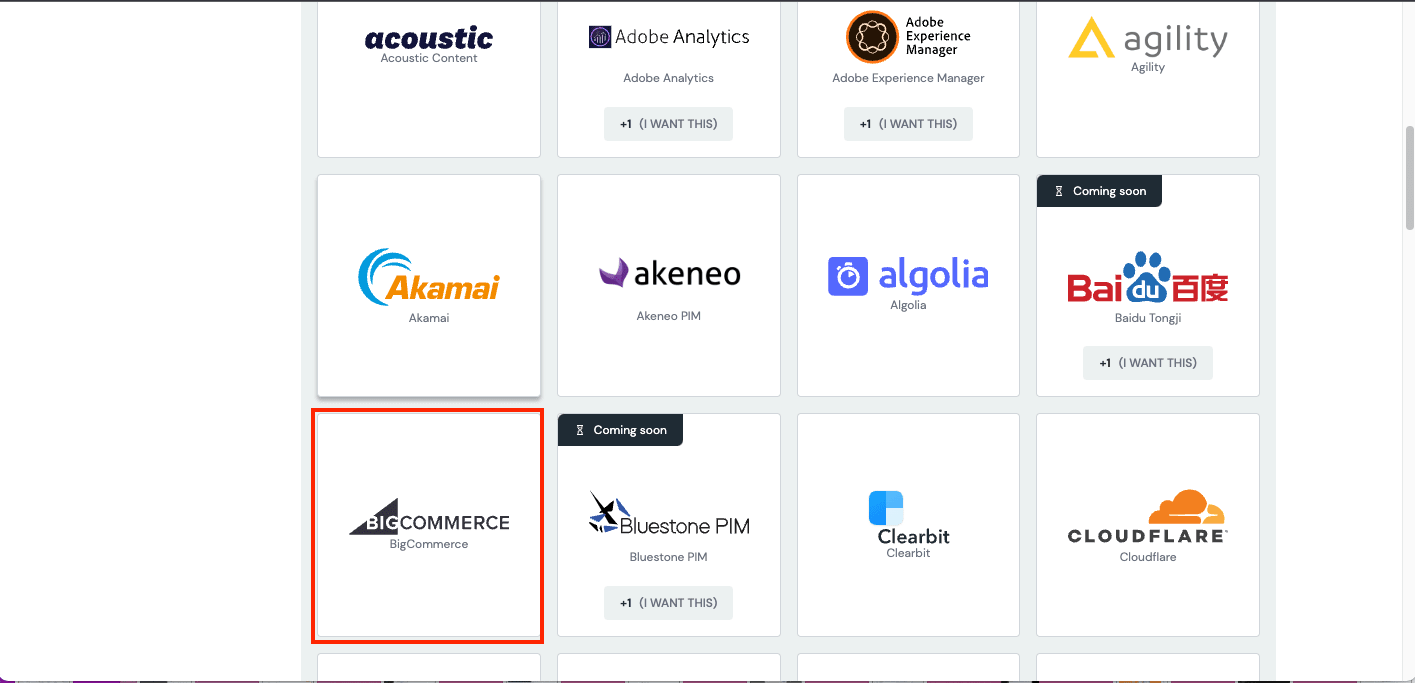
Code language: JavaScript (javascript)Add BigCommerce and Cloudinary I****ntegration S****upport Uniform improves the product’s digital experience through integration with an existing system. To connect BigCommerce and Cloudinary to our project, we need to navigate to the Projects tab, click on the project, and click on any of the highlighted sections to add integrations to our project.
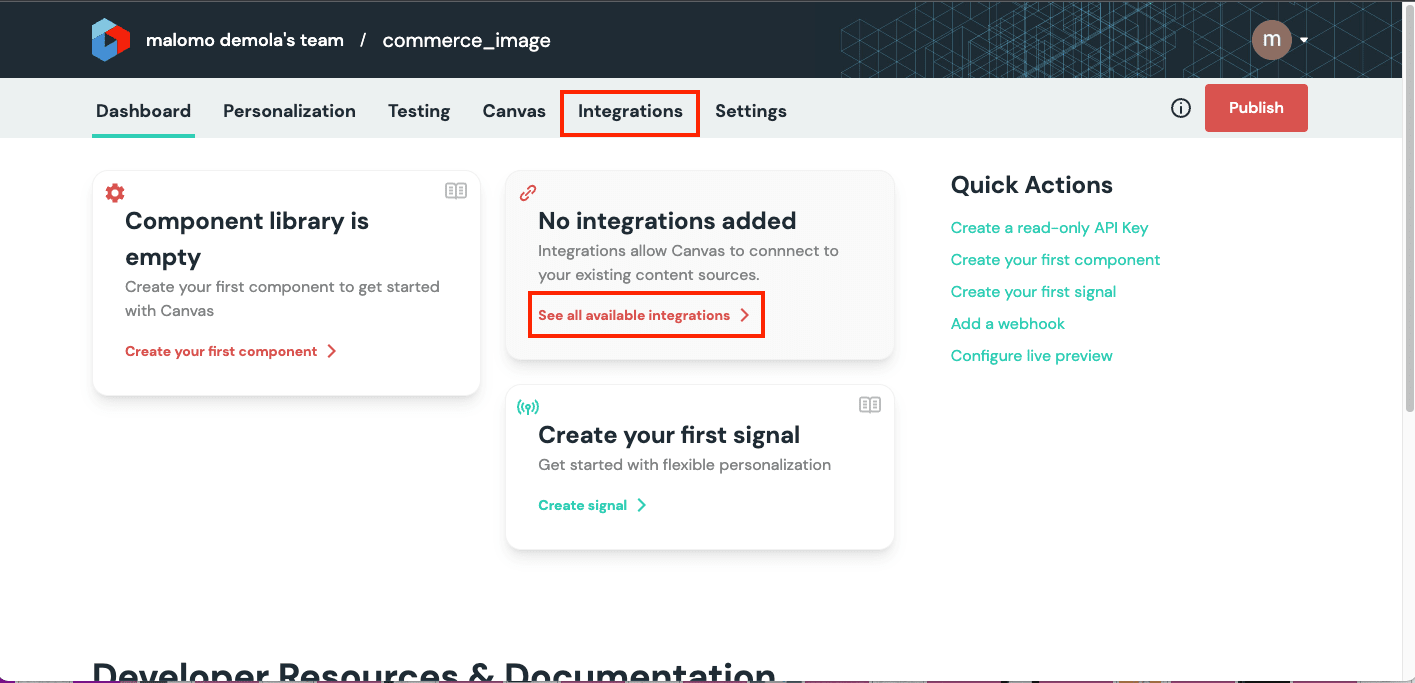
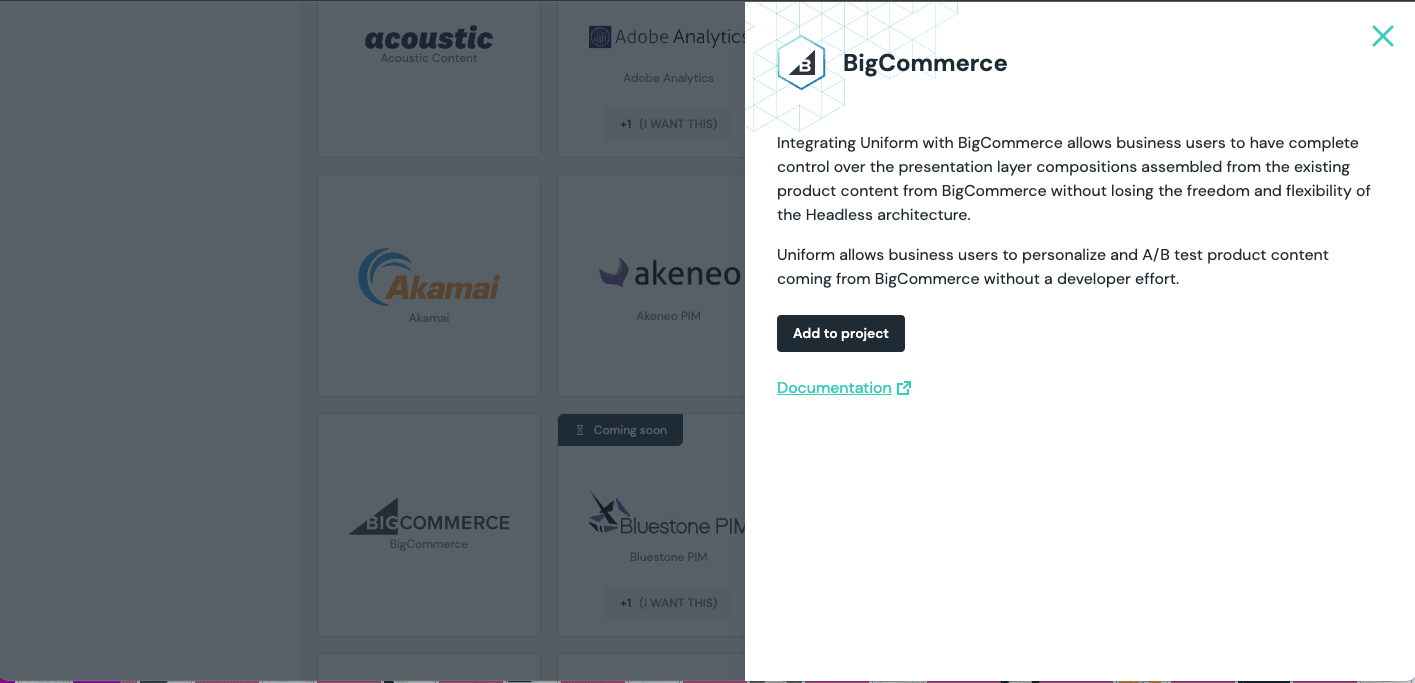
Search or browse through the available integrations, select the BigCommerce integration, click on the Add to project button, input the Store Hash and API Token we added to our .env file earlier, and Save.

Following the same step as above, we must navigate to the All Integration tab, and add Cloudinary to our project.
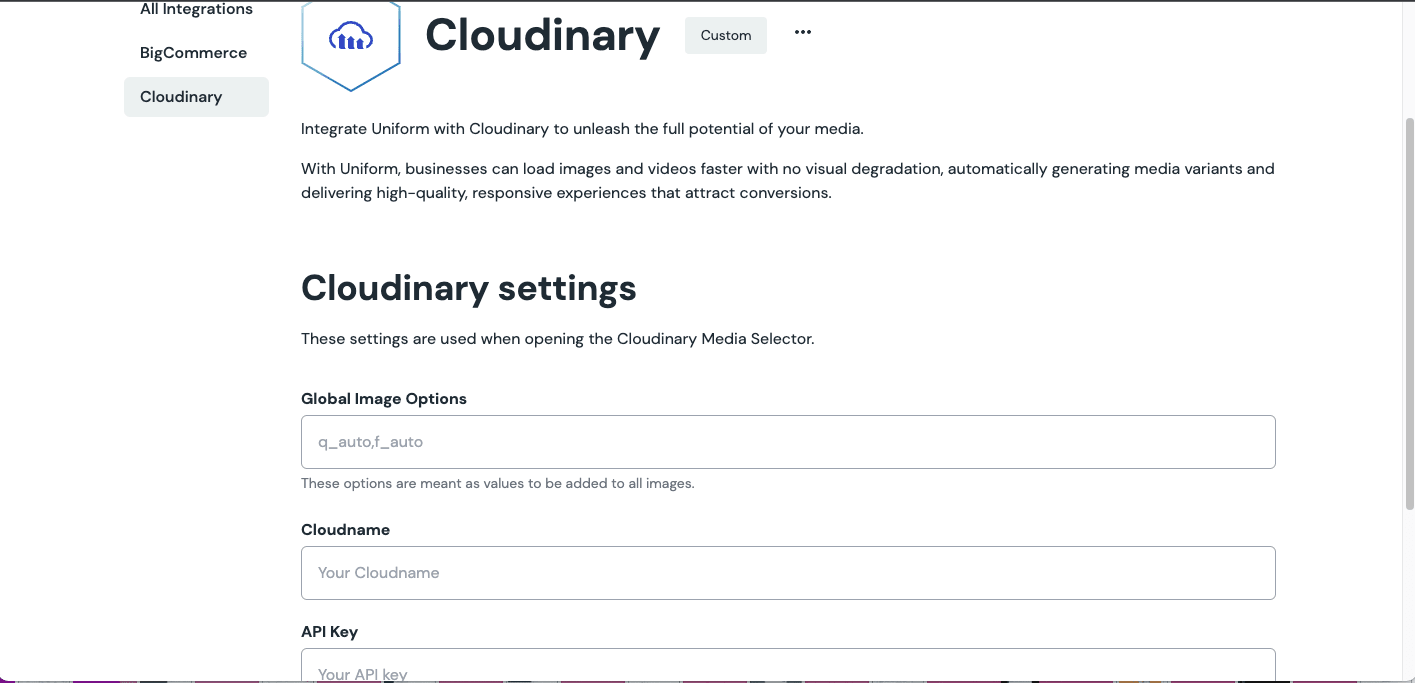
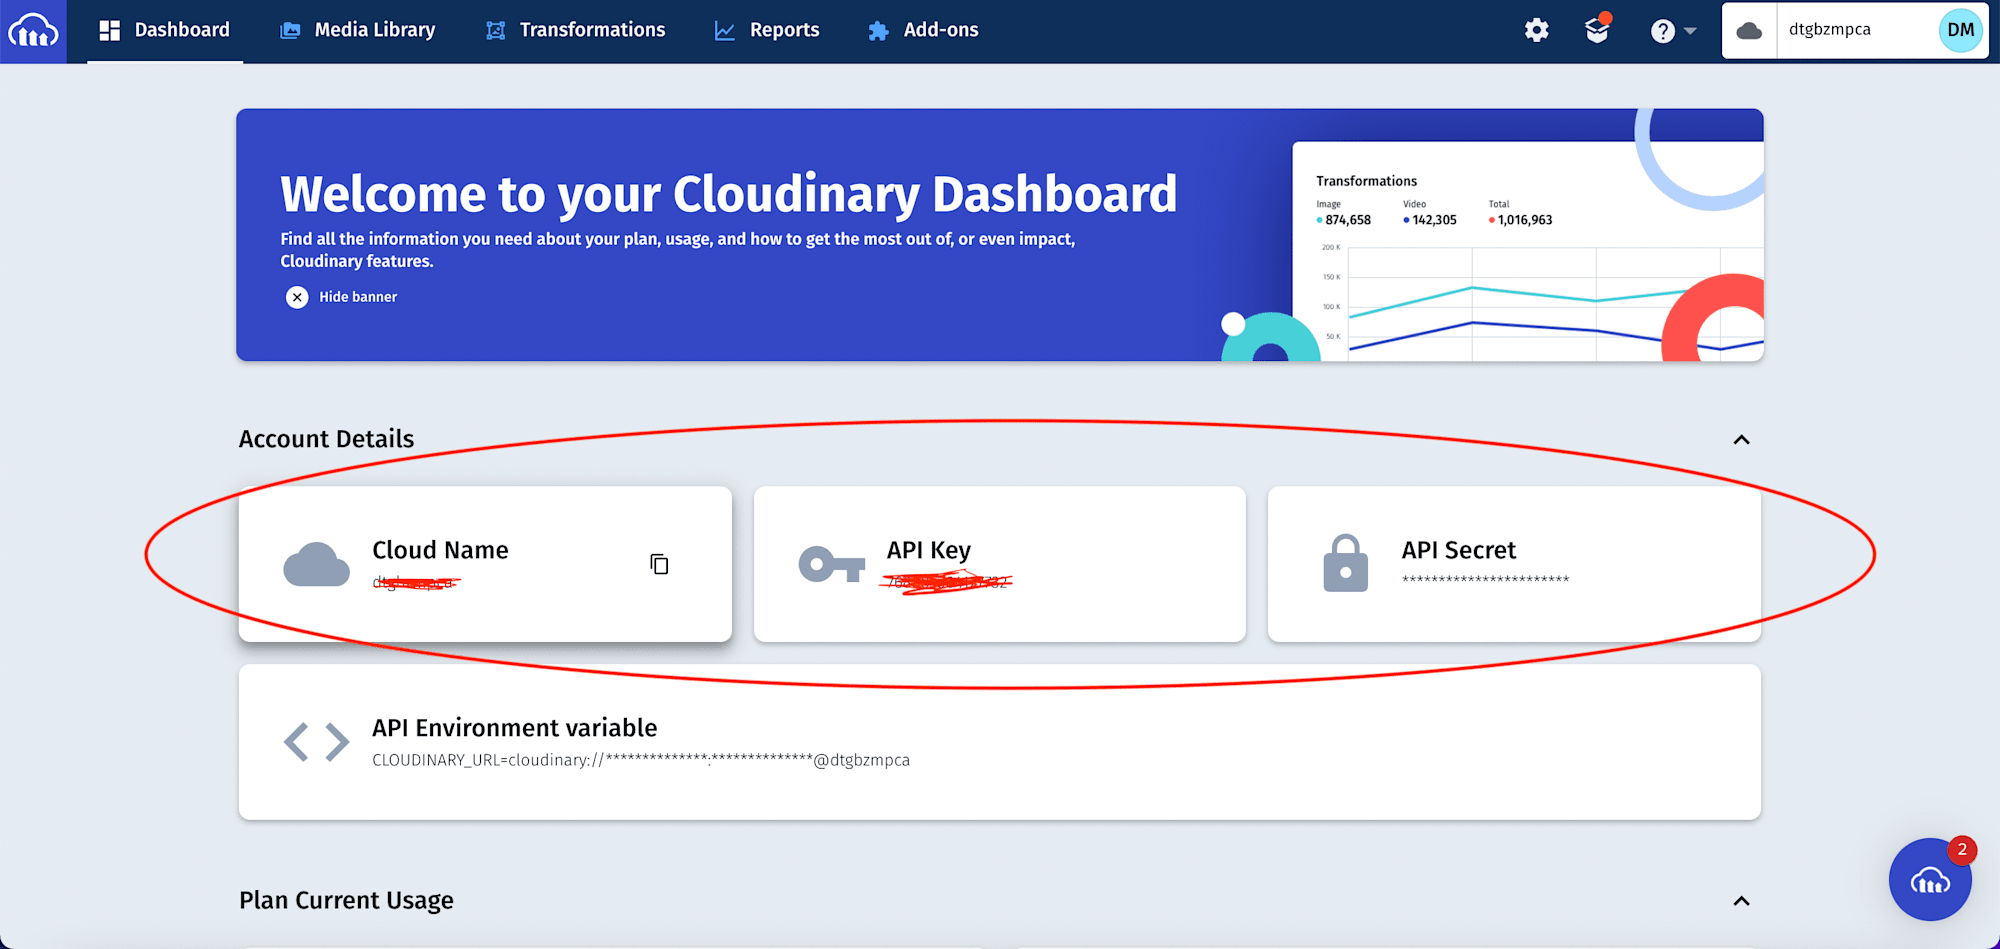
We can get our Cloud Name ****and API Key from our Cloudinary dashboard.
Understanding Components and Compositions on Uniform
Before we start modeling our project on Uniform, it’s paramount we understand the features we will be leveraging to achieve this. Components in Uniform application work similarly to those in a React application; it lets us break our application into smaller reusable building blocks with properties, while a Composition is the combination of one or more components. For our project, we will create an Item component with an img and details properties.
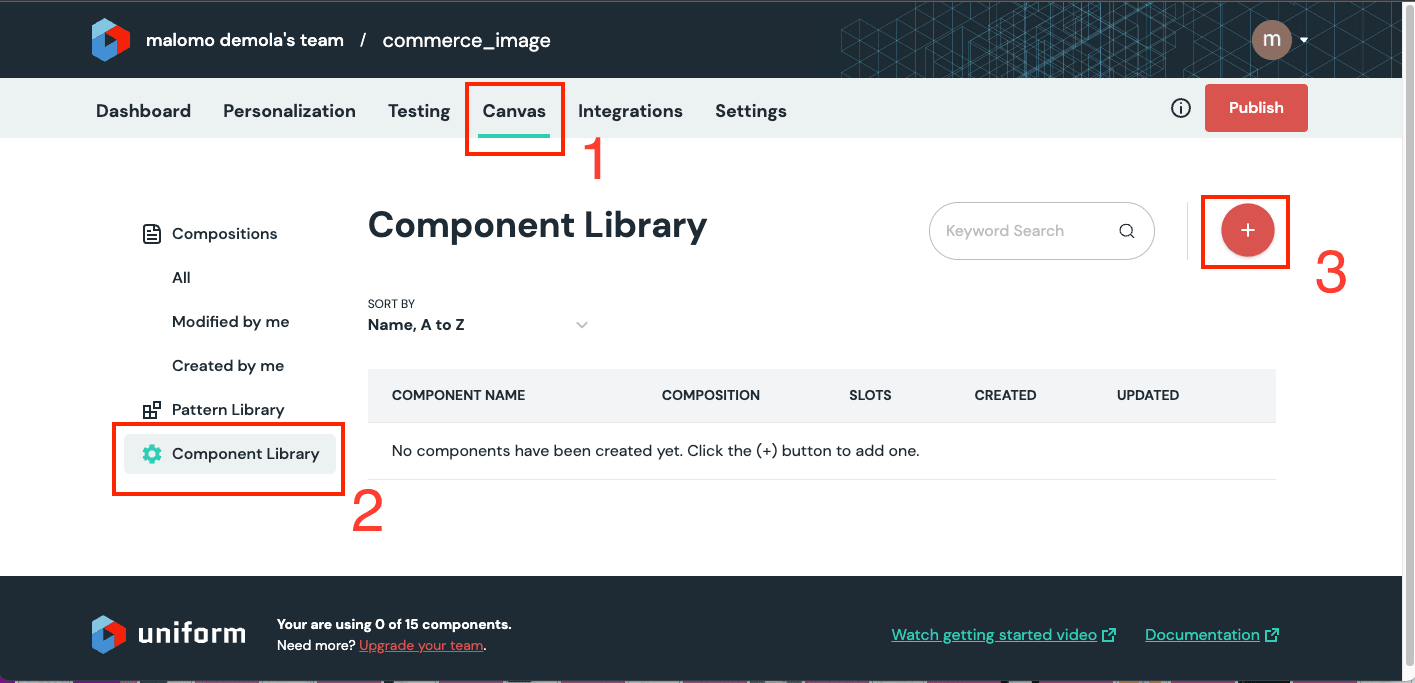
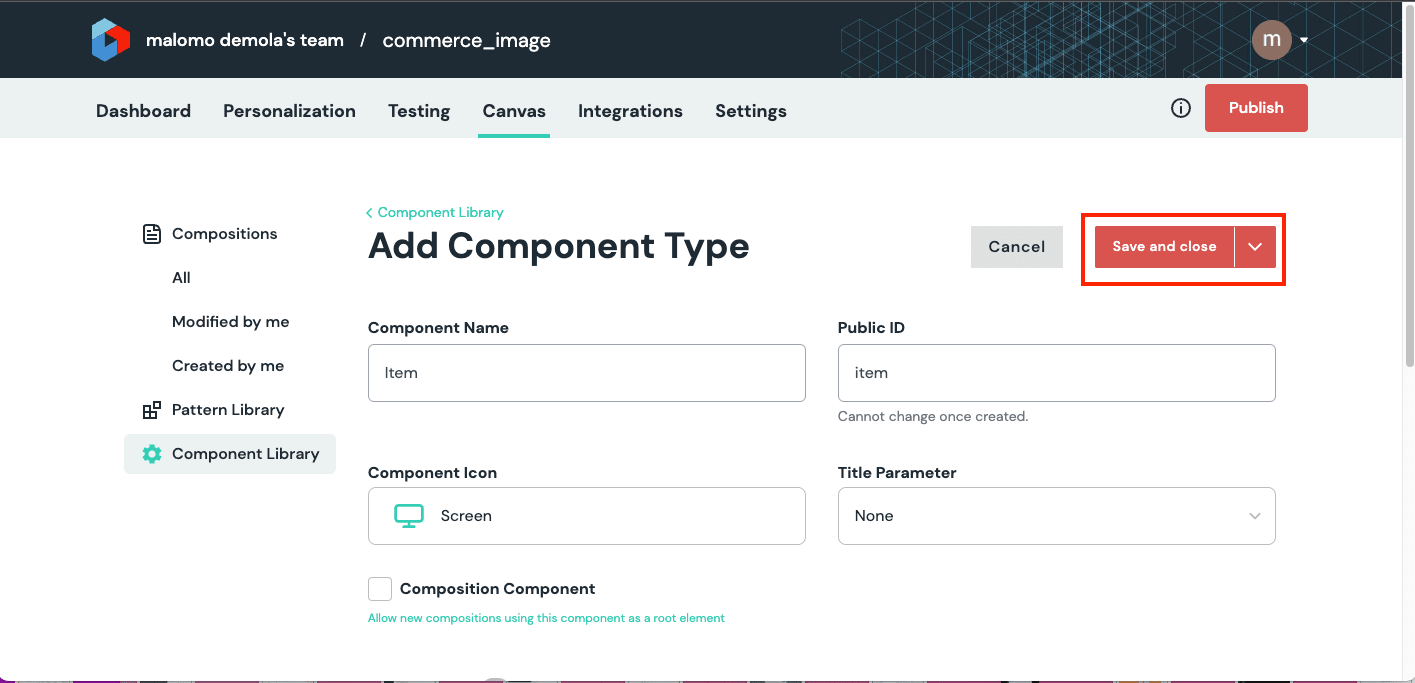
To get started, navigate to the Canvas tab, select the Component Library, and click on the Plus Icon.
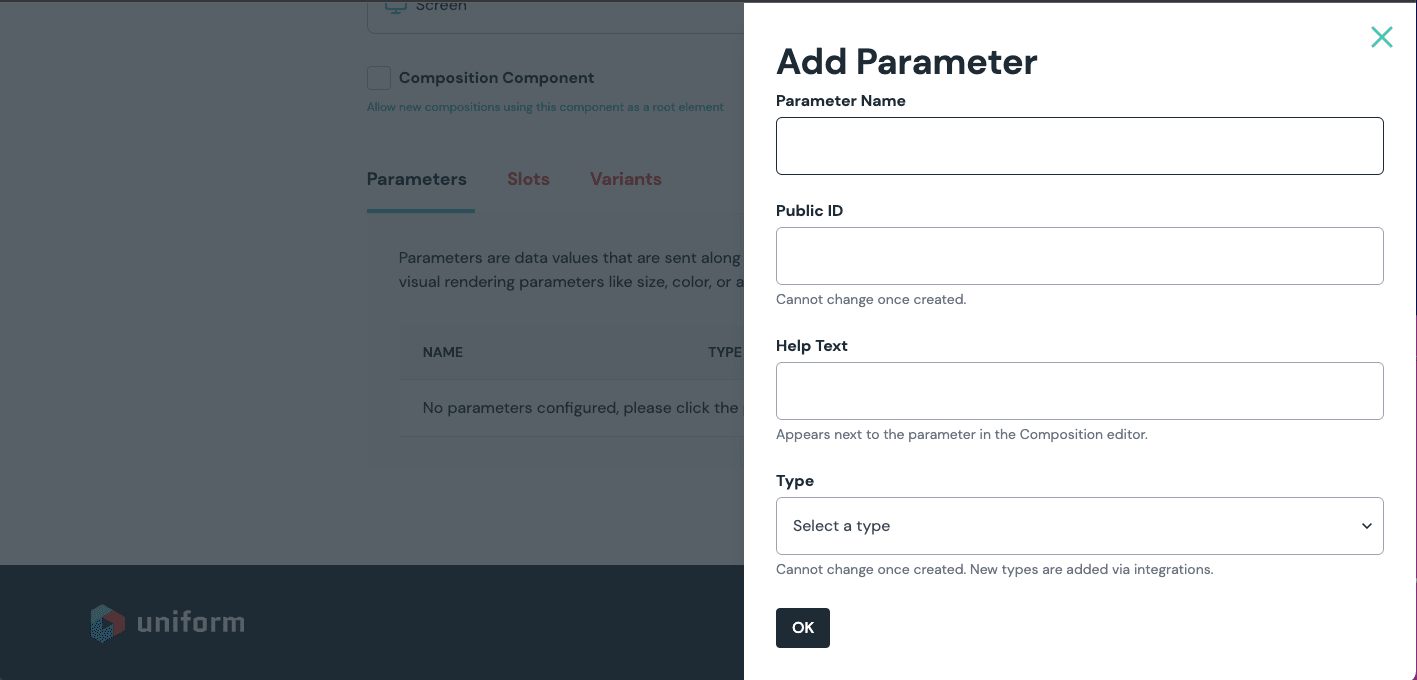
| Parameter Name | Help Text | Type |
|---|---|---|
| img | item image | Cloudinary |
| details | item details | BigCommerce Product |
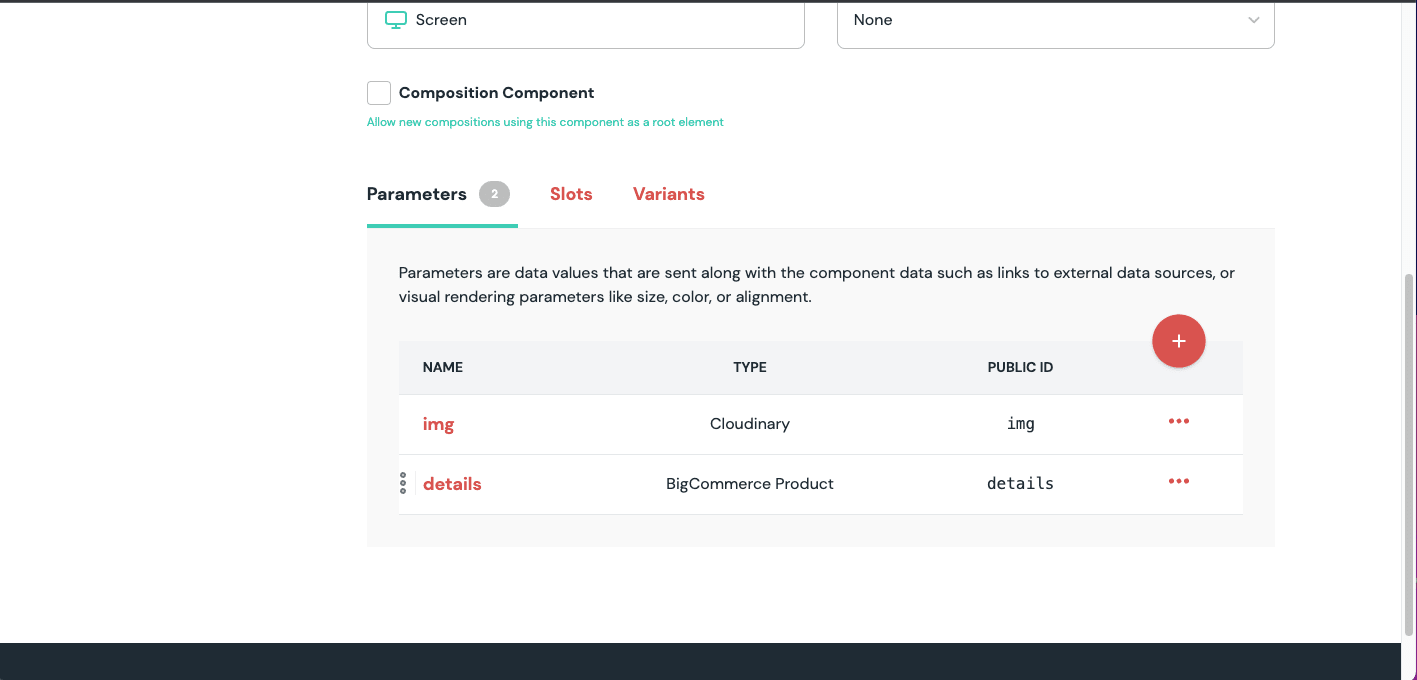
Input Item as the component, Add properties of img and details as shown above, and then click on OK.
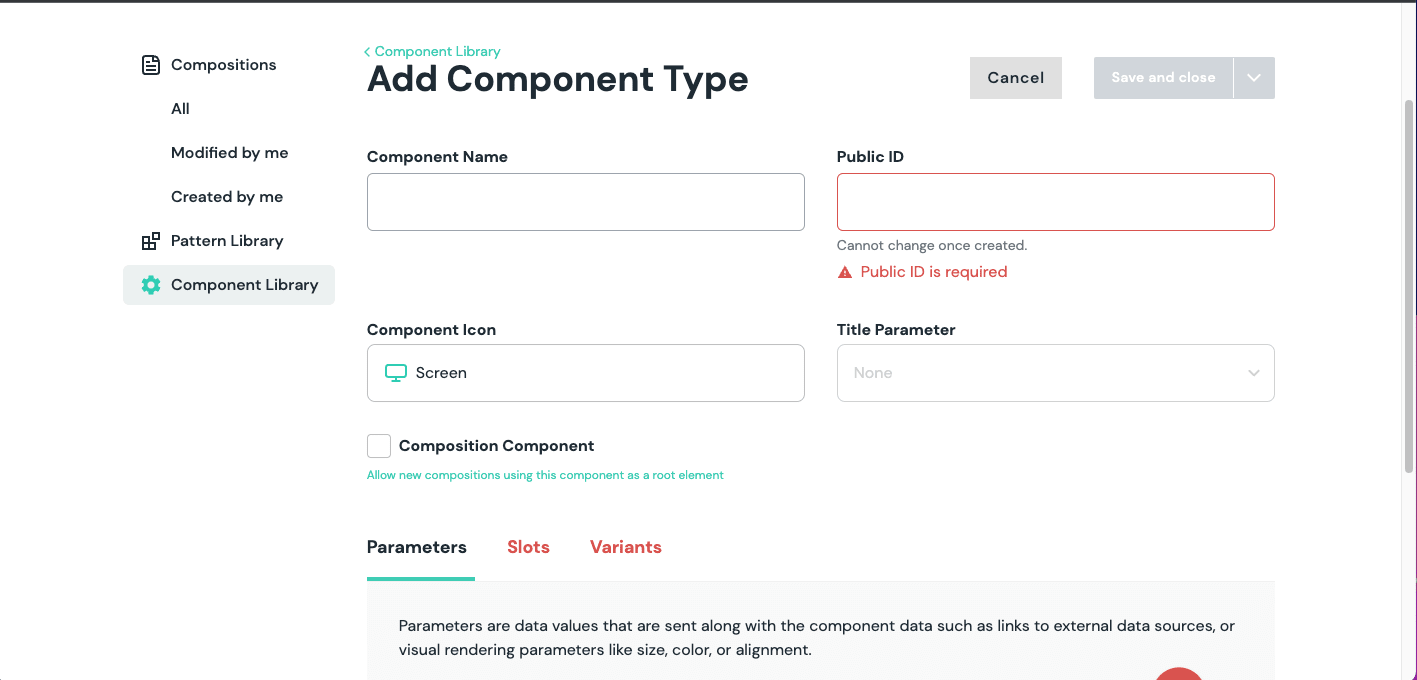
Then click on the Save and Close button.
Now that we have created the Item Component, it will serve as a blueprint for creating other components for our e-commerce product.
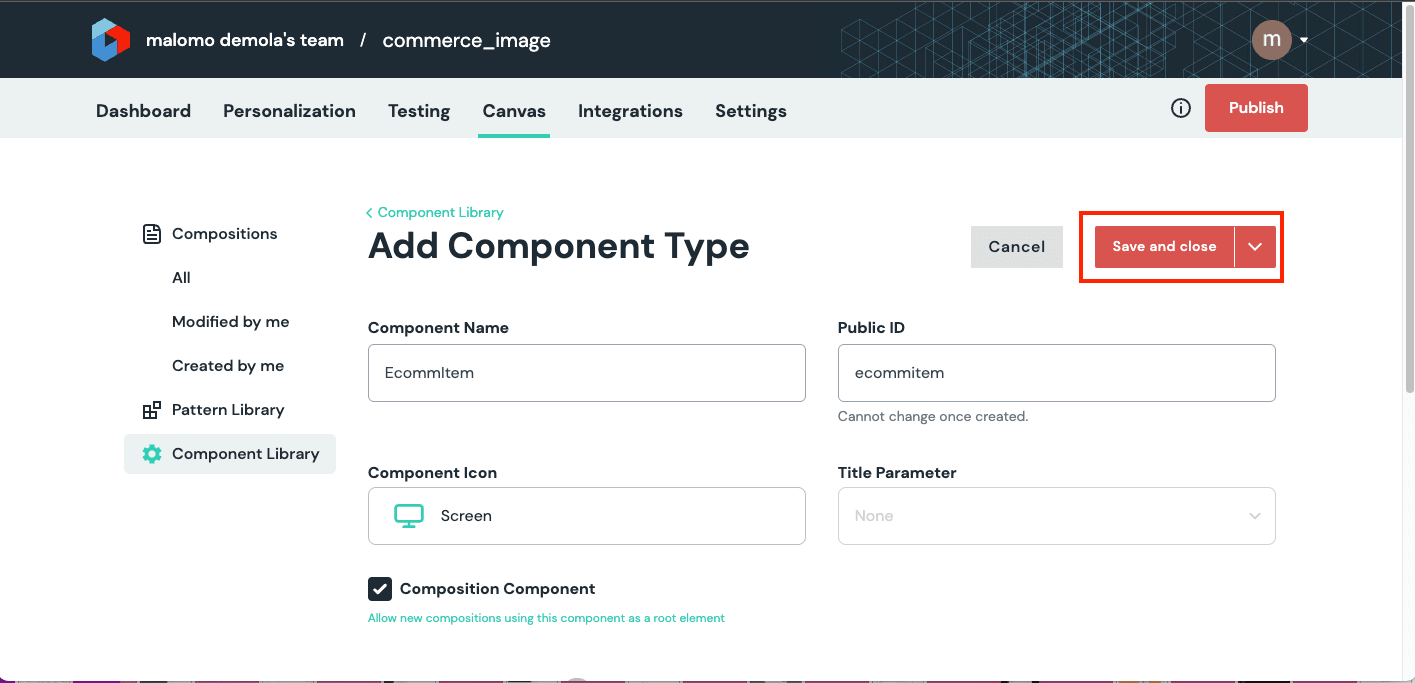
With that done, we can leverage the Item blueprint component to create our e-commerce landing page component. To get started, click on the Plus Icon, input EcommItem as the component name, check the Composition Component, navigate to the Slots section, and click on the Plus Icon to create a slot.
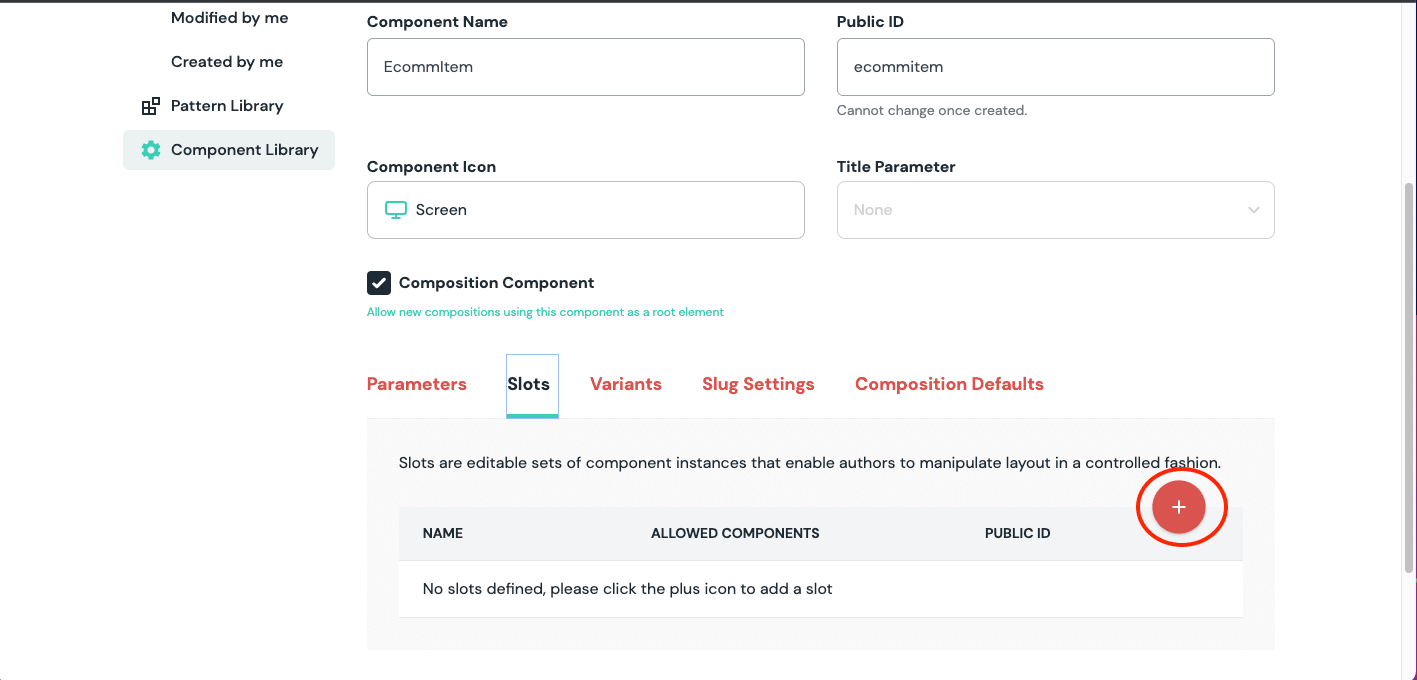
PS*: Slots help us create instances of our component (4 in our case) and allow them to accept data dynamically.*
Input EcomProduct as the Slot Name, 0 as the Minimum, 4 as the Minimum (The hero section and the remaining 3 product features), select the Item component as the allowed component, and click OK.
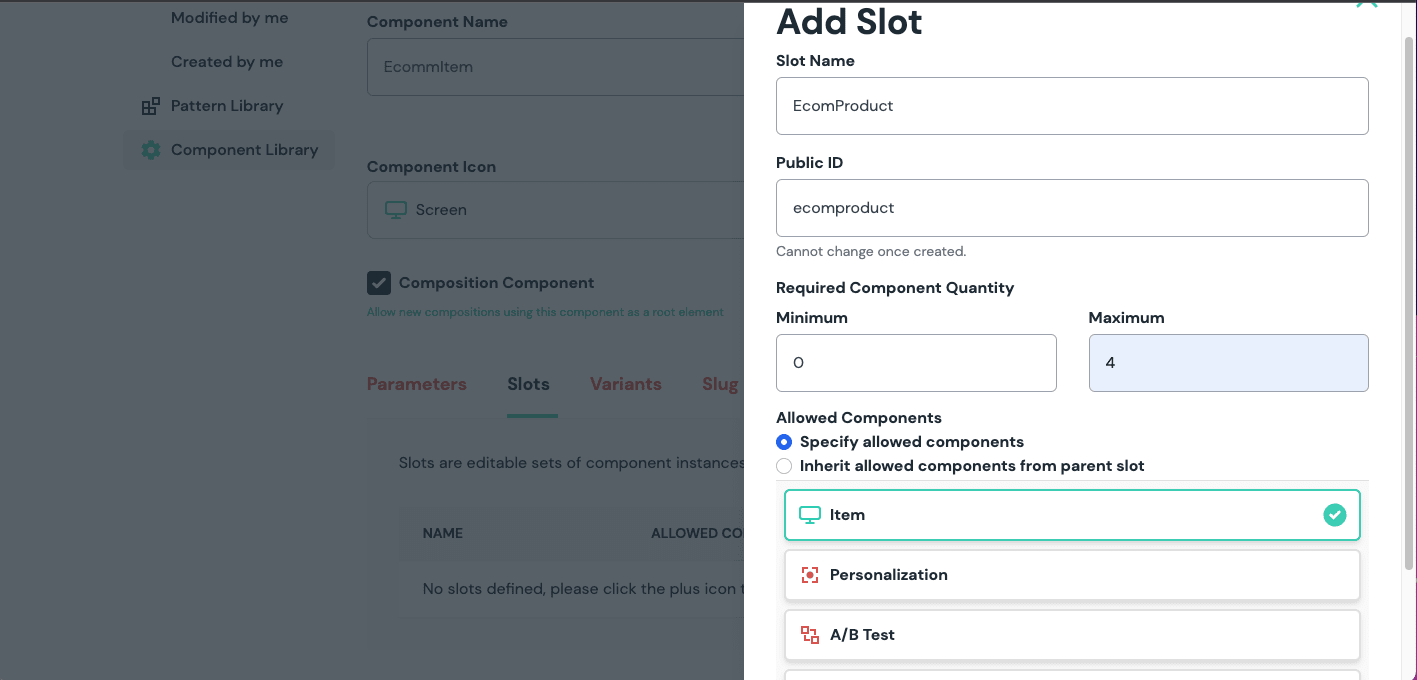
Then click on the Save and Close button.
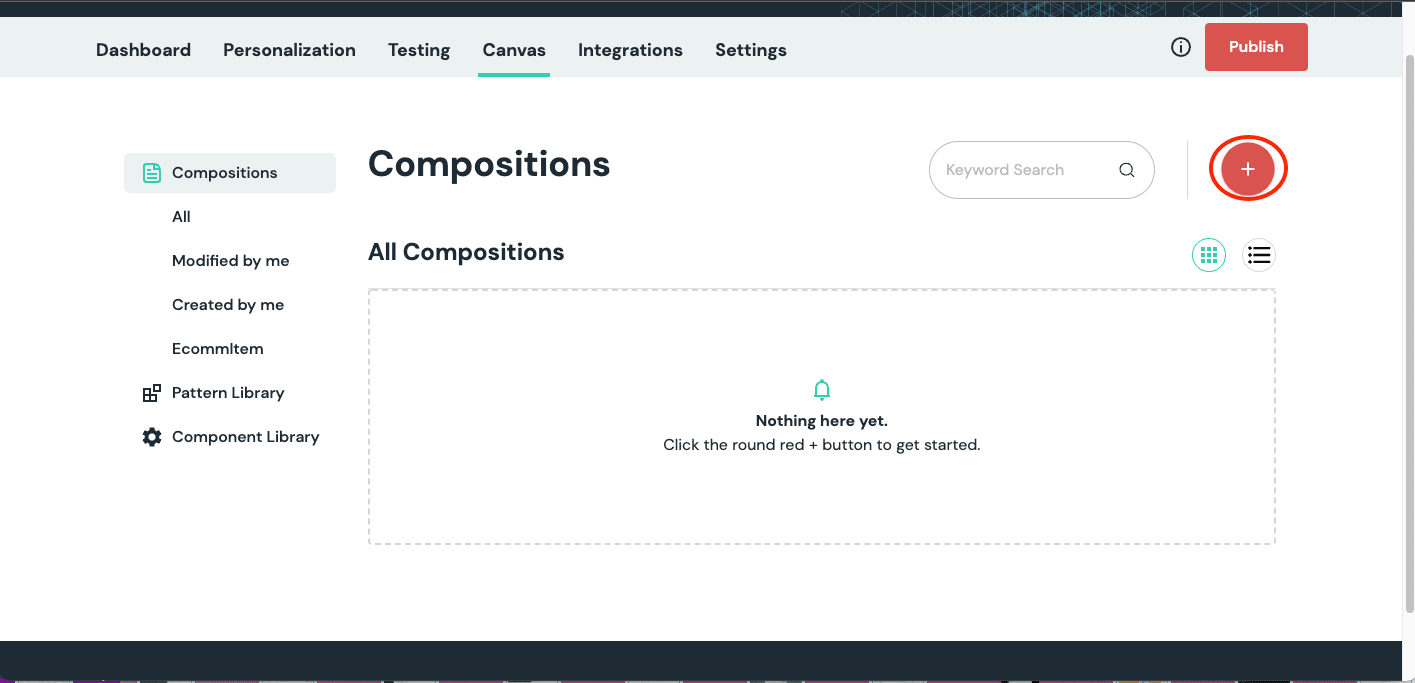
With that done, we can start using the EcommProduct component to compose our e-commerce landing page. To do this, navigate to the Composition tab, and click on the Plus Icon to create a composition.
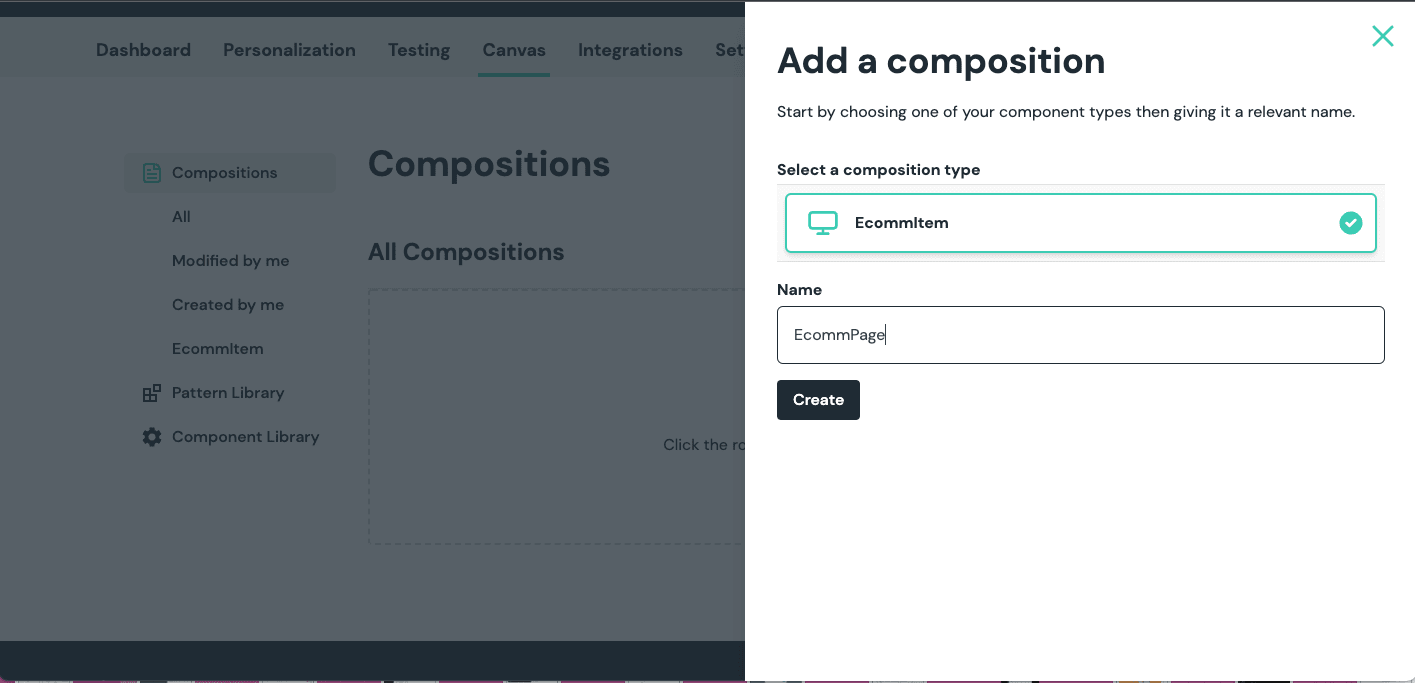
Select the EcommItem as the composition type, input EcommPage as the name, and Create.
Input homepage as the slug and click on the Plus Icon to add a component to our EcommPage
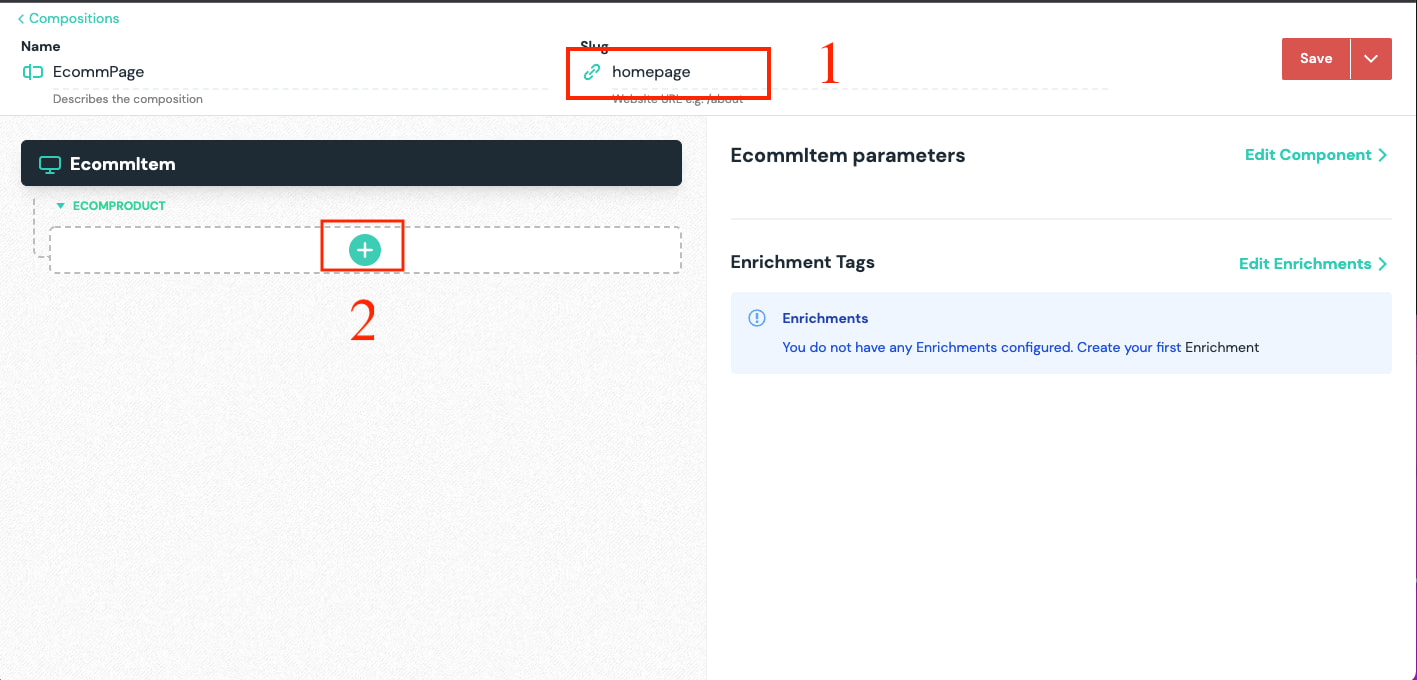
PS*: The slug inputted will come in handy when searching for our composition.*
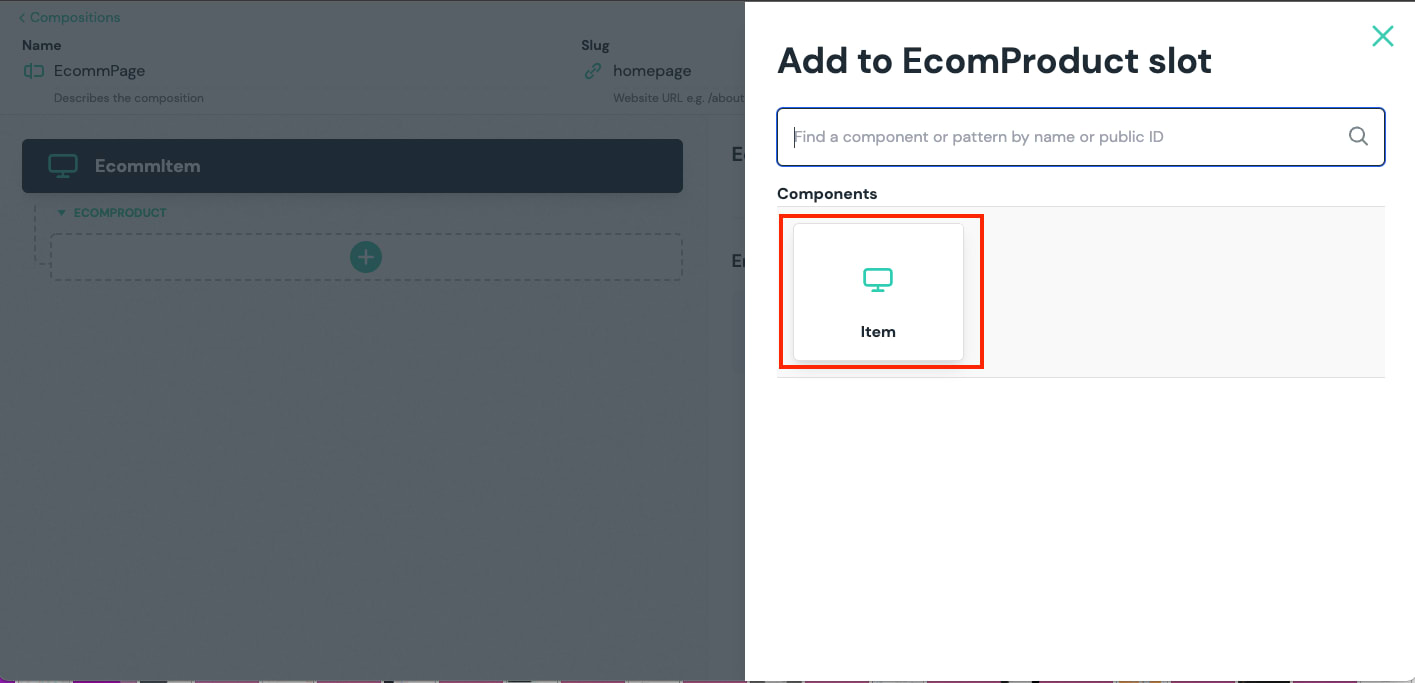
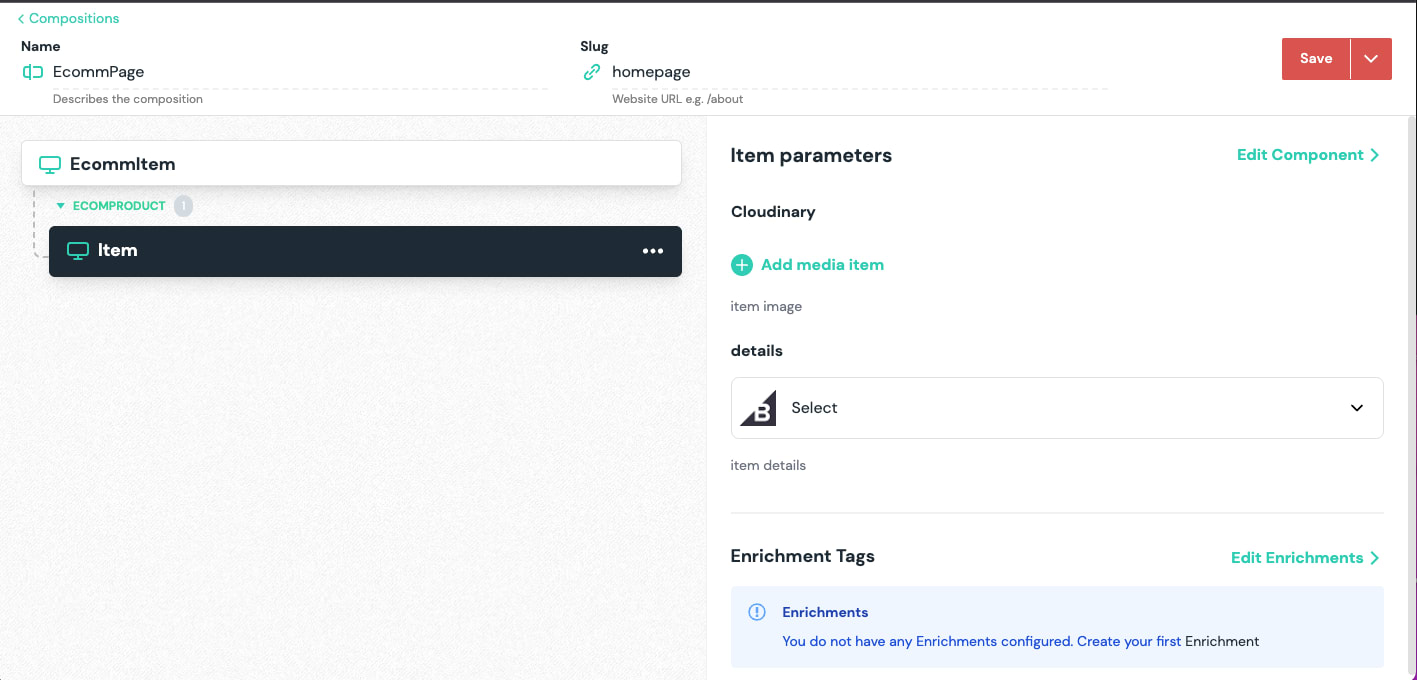
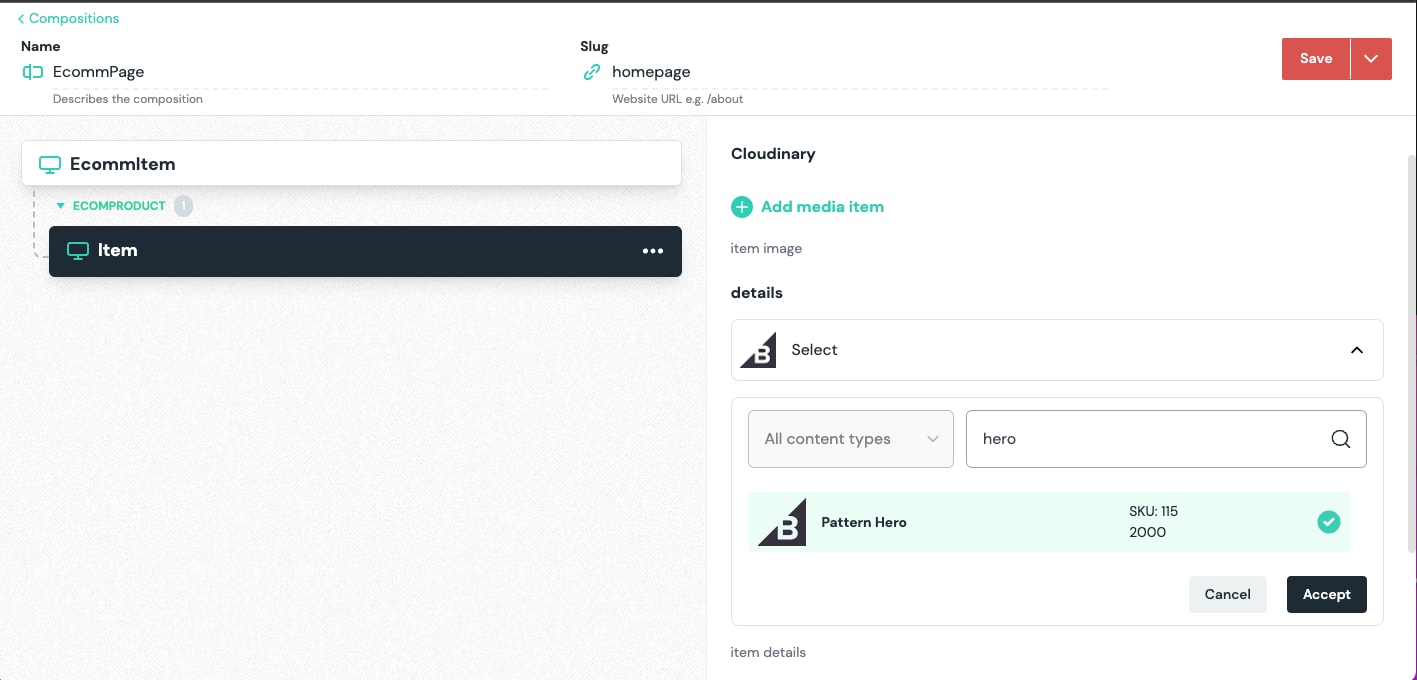
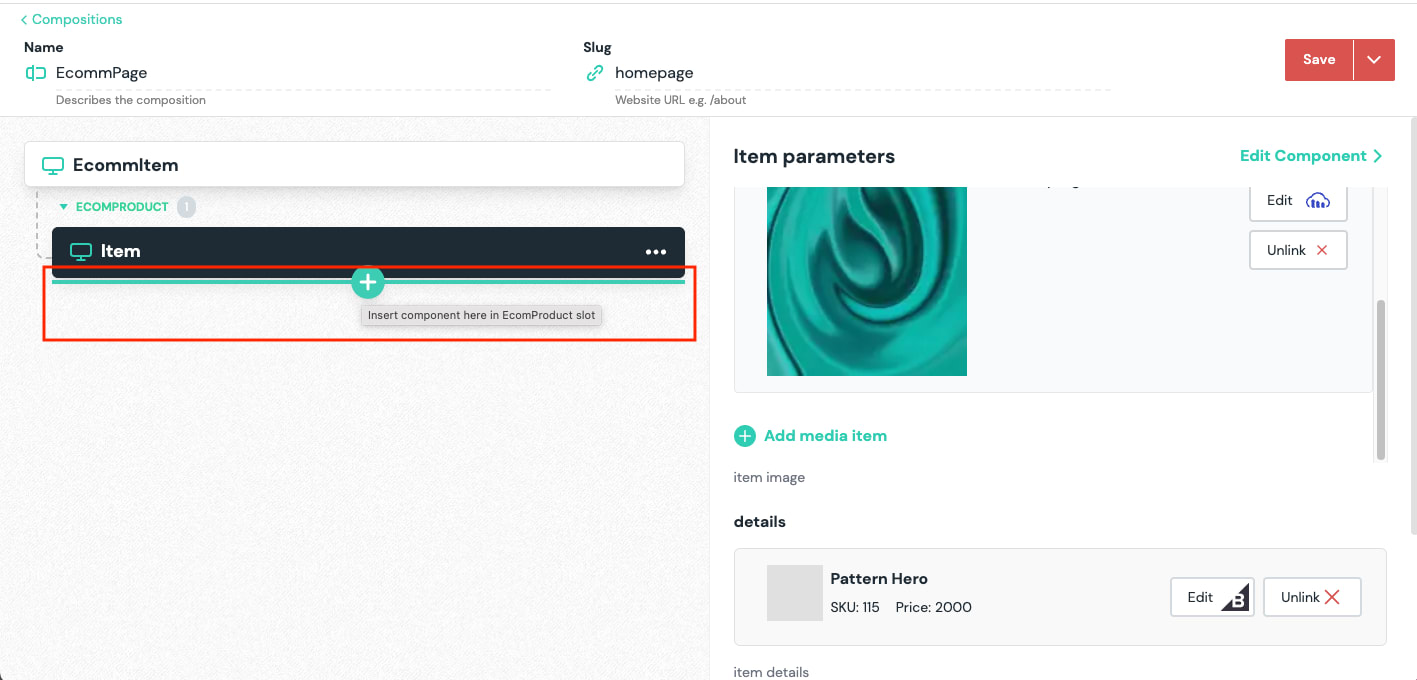
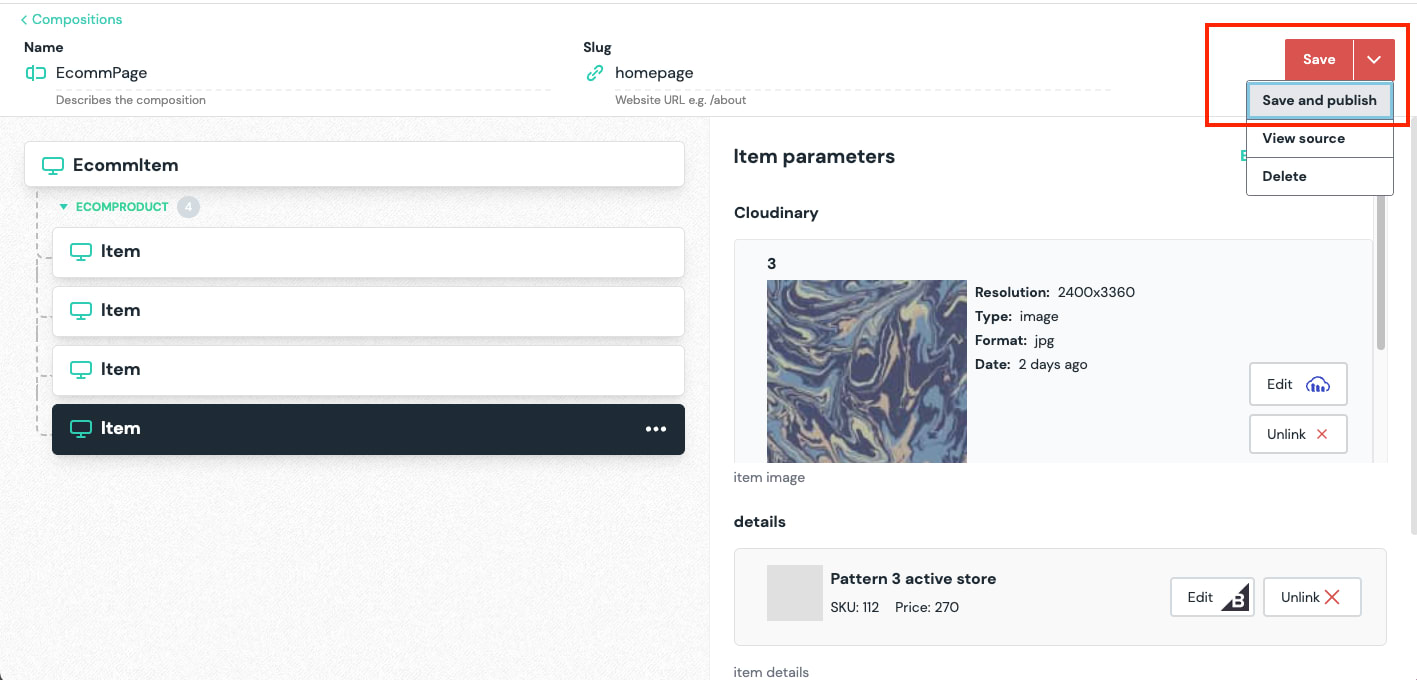
Select the Item component, add the matching image from Cloudinary, and the product data from BigCommerce.
We need to repeat the steps above to add the remaining products. Then click on Save and Publish option.
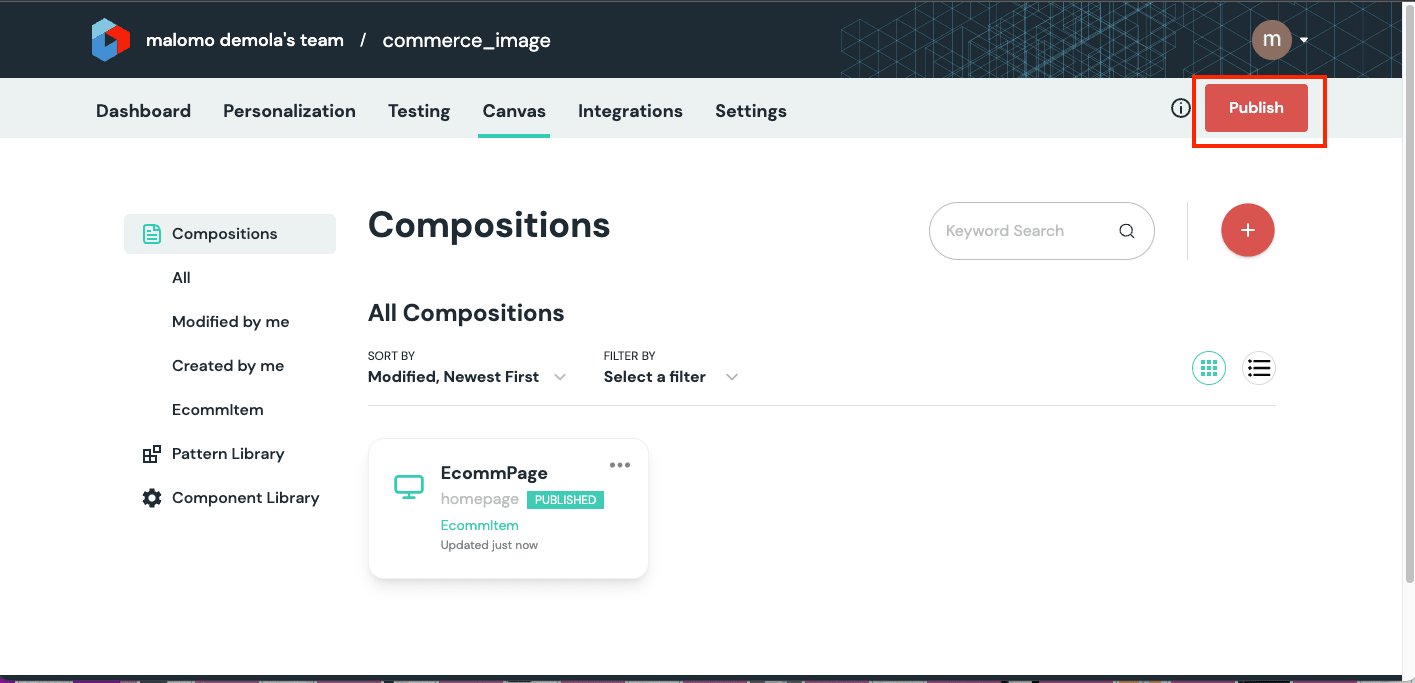
Finally, we need to navigate back to the Canvas tab and click on the Publish button. This makes our composition available to third-party applications.
First, we need to install the required dependencies by running the command below:
    npm i @uniformdev/canvas @uniformdev/canvas-bigcommerce
Code language: CSS (css)
Add an Enhancer
Enhancers in Uniform are a system used to control the layout of data sent through compositions. Basically, it gives us the power to ask for the exact data needed. To do this, we need to create a utils.js file inside the components folder and add the snippet below:
import {
  createBigCommerceClient,
  createBigCommerceEnhancer,
} from '@uniformdev/canvas-bigcommerce';

export const bigCommerceEnhancer = createBigCommerceEnhancer({
  client: createBigCommerceClient({
    storeHash: process.env.NEXT_PUBLIC_BIGCOMMERCE_STORE_HASH,
    token: process.env.NEXT_PUBLIC_BIGCOMMERCE_TOKEN,
  }),
  createProductOptions: () => {
    return {
      include_fields: ['id', 'name', 'price'],
    };
  },
});
Code language: JavaScript (javascript)
The snippet above does the following:
- Imports required dependencies
- Creates a
bigCommerceEnhancerusing thecreateBigCommerceEnhancerfunctions that also configures theclientusing the Store Hash and Token we saved earlier. Uses thecreateProductOptionsto specify required product fields (id,name, andprice)
Getting composable data from Uniform
With that done, we can use the bigCommerceEnhancer to enhance returned data from Uniform. To do this, we need to modify the index.js file inside the pages folder as shown below:
import Head from 'next/head';
import { Item } from '../components/Item';
import LogoIcon from '../components/LogoIcon';
import { CanvasClient, EnhancerBuilder, enhance } from '@uniformdev/canvas'; //add
import { CANVAS_BIGCOMMERCE_PARAMETER_TYPES } from '@uniformdev/canvas-bigcommerce'; //add
import { bigCommerceEnhancer } from '../components/utils'; //add

export default function Home({ composition }) { //modify
  const {slots} = composition //add
  return (
    <div>
      <Head>
        <title>Commerce IMG</title>
        <meta name='description' content='Commerce Landing Page in Nextjs' />
        <link rel='icon' href='/favicon.ico' />
      </Head>
      <main>
        <header className='p-5 bg-[#292961] shadow-slate-400'>
          <div className='flex items-center'>
            <LogoIcon />
            <p className='text-white ml-4'>Pattern Store</p>
          </div>
        </header>
        <section className='flex h-[500px]'>
          <div className='w-1/2 bg-[#d8dbe2] h-full flex justify-center items-center'>
            <h1 className='text-4xl px-4 lg:px-5 font-medium'>
              {' '}
              Uniform, Bigcommerce, and Cloudinary{' '}
              <span className='text-[#292961]'>powered</span> pattern store
            </h1>
          </div>
          <div className='w-1/2 h-full'>
            <img
              alt='hero'
              src={slots.ecomproduct[0].parameters.img.value[0].url}
              className='h-full w-full object-fit'
            />
          </div>
        </section>
        <section className='px-5 py-10'>
          <h3 className='mb-4 font-medium capitalize text-[#292961]'>
            featured products
          </h3>
          <div className='grid grid-col-1 lg:grid-cols-3 w-full h-96'>
            {slots.ecomproduct.slice(1).map((item, i) => (
              <Item
              key={i}
              img={item.parameters.img.value[0].url}
              title={item.parameters.details.value.name}
              price={item.parameters.details.value.price}
            />
            ))}
          </div>
        </section>
      </main>
    </div>
  );
}

//add
export async function getStaticProps() {
  //fetching data from uniform
  const client = new CanvasClient({
    apiKey: process.env.NEXT_PUBLIC_API_KEY,
    projectId: process.env.NEXT_PUBLIC_PROJECT_ID,
  });

  const { composition } = await client.getCompositionBySlug({
    slug: 'homepage',
  });

  //enhancing with bigcommerce
  const enhancers = new EnhancerBuilder().parameterType(
    CANVAS_BIGCOMMERCE_PARAMETER_TYPES,
    bigCommerceEnhancer
  );

  await enhance({ composition, enhancers, context: {} });

  return {
    props: {
      composition,
    },
  };
}
Code language: JavaScript (javascript)
The snippet above does the following:
- Imports the required dependencies
- Gets data from Uniform using the
getStaticPropsfunction. The function also does the following:- Creates a
CanvasClientinstance using the API key and Project ID we saved earlier. - Uses the instance to get
compositionby passing in thehomepage(we configured this on the Uniform platform) as a slug. - Uses the
bigCommerceEnhancerto filter the data returned by the composition.
- Creates a
- Updates the UI to show data dynamically from the
composition
With that done, we can restart our development server using the command below:
npm run dev
This post discussed creating a composition on Uniform with product data from BigCommerce and a Product image from Cloudinary. With Uniform, we can improve our digital experience, personalize our data, and improve application performance (single API call).
These resources might be helpful: