
A collage is a combination of multiple pictures combined into a single image. They’re useful in various applications from presenting memories to summarizing events. Instead of exploring multiple applications to generate collages, let’s explore how we can build a simple Nuxt.js app to generate them.
The completed project is available on Codesandbox.
You can find the full codebase on my Github.
We’ll use Nuxt.js for this tutorial. It’s an intuitive Vue.Js framework designed for simplicity and productivity.
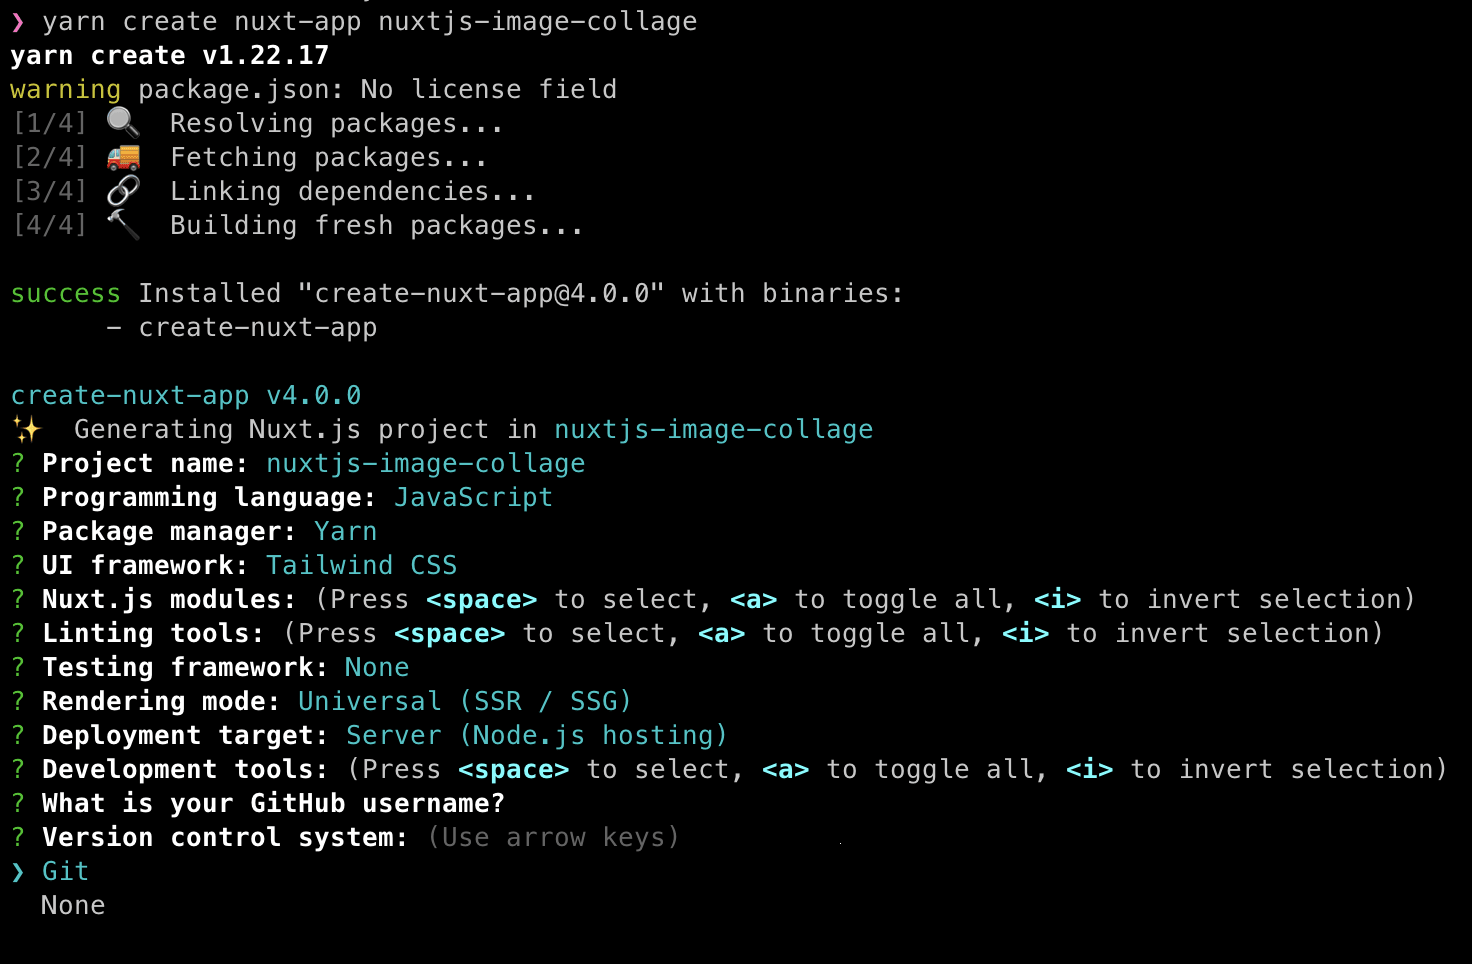
To set up our project, we’ll use the create-nuxt-app utility. Ensure you have Yarn or NPM v5.2+ or v6.1+ installed and open your terminal in your preferred working directory.
yarn create nuxt-app nuxtjs-image-collage
# OR
npx create-nuxt-app nuxtjs-image-collage
# OR
npm init nuxt-app nuxtjs-image-collage
Code language: PHP (php)
The above will trigger a set of setup questions. Here are our recommended defaults:
You may now run the project on http://localhost:3000:
cd nuxtjs-image-collage

yarn dev
# OR
npm run dev
Code language: PHP (php)We’ll use Cloudinary to generate the image collage. It’s a powerful media management platform with a comprehensive set of APIs and SDKs.
Let’s install the recommended Nuxt.js plugin: @nuxtjs/cloudinary.
yarn add @nuxtjs/cloudinary
# OR
npm install @nuxtjs/cloudinary
Code language: CSS (css)
Register the plugin to the modules section of our nuxt.config.js file:
// nuxt.config.js
export default {
 ....
 modules: [
 '@nuxtjs/cloudinary'
 ]
 ...
}
Code language: JavaScript (javascript)
Once the above is done, let’s configure our Cloudinary instance by adding a cloudinary section in our nuxt.config.js file:
// nuxt.config.js
export default {
 ...
 cloudinary: {
 cloudName: process.env.NUXT_ENV_CLOUDINARY_CLOUD_NAME,
 useComponent: true,
 }
}
Code language: JavaScript (javascript)
The NUXT_ENV_CLOUDINARY_CLOUD_NAME variable we see above is an environmental variable. These are values we configure outside of our project code. Let’s create our ENV file:
touch .env
Code language: CSS (css)
To obtain your Cloudinary cloud name, check the Account Details section on your account dashboard. If you don’t have an account, you may register here.
Add your cloud name to your ENV file:
<!-- .env -->
NUXT_ENV_CLOUDINARY_CLOUD_NAME=<your-cloud-name>
Code language: HTML, XML (xml)Before we start, we need to set up the template. Upload this template to the nuxtjs-image-collage/templates folder.
We want to allow our users to select the images they want to be displayed in the collage. Let’s set up an HTML form to do this.
 <!-- pages/index.vue -->
 ...
   <form @submit.prevent="upload">
          <div>
            <label for="file"> Images </label>
            <div class="mt-1">
              <input @change="handleImagesChanged" id="file" name="file" type="file" accept="image/*" required  multiple />
            </div>
          </div>

          <div>
            <div v-if="uploading" class="text-center">Please wait, upload in progress</div>
            <button v-else type="submit" >
              Upload & Generate Collage
            </button>
          </div>
        </form>
 ...
Code language: HTML, XML (xml)
When a file is selected, we trigger the handleImagesChanged method. We also trigger the upload method when the form is submitted.
Let’s add the JavaScript logic to support this.
// pages/index.vue
<script>
export default {
  data(){
    return {
      images:null,
      uploading:false,
      cloudinaryImages:[],
      ...
    }
  },
  methods:{
    handleImagesChanged(e){
     this.images = e.target.files;
    },
    readData : (f) =>
        new Promise((resolve) => {
          const reader = new FileReader();
          reader.onloadend = () => resolve(reader.result);
          reader.readAsDataURL(f);
    }),
    async upload(){
      this.uploading = true;
      for(let image of this.images){
        const data = await this.readData(image);
        const instance = await this.$cloudinary.upload(data, {
          folder: "nuxtjs-image-collage",
          uploadPreset: "default-preset",
        });
        this.cloudinaryImages.push(instance);
      }
      this.uploading = false;
    },
    ...
  }
}
</script>
Code language: HTML, XML (xml)
When the files are selected, we save them to state in the handleImagesChanged method. The upload method iterates through the images uploading them to the uxtjs-image-collage folder while storing the Cloudinary response instances.
The default-preset upload preset will be used for the uploads. Upload presets are rules we configure to be applied to each of our uploads. To create one, proceed to the add upload preset page. Here are our recommended defaults:
Name: default-preset Mode: unsigned Unique filename: true Delivery type: upload Access mode: public
Our app needs to understand which template we’re using and the positions to place the images. For this, let us add the template and coordinates in our state.
// pages/index.vue
<script>
export default {
  data(){
    return {
        ...
        template:'nuxtjs-image-collage/templates/Pink_Handdrawn_Heart_Polaroid_Photo_Collage',
        templateCoordinates: [
            {x:654, y:-20, label:'Center left'},
            {x:-654, y:-20,description:'Center right'},
            {x:0, y:510,description:'Bottom center'},
            {x:0, y:-535,description:'Top center'},
            {x:654, y:-535,description:'Top right'},
            {x:-654, y:510,description:'Bottom left'},
            {x:654, y:510,description:'Bottom right'},
            {x:-654, y:-535,description:'Top left'},
        ],
    }
  },
  ...
}
</script>
Code language: HTML, XML (xml)
We also need a method to get a random image from the Cloudinary image array and process the public_id for usage in our overlay transformation. This is by replacing all \ in the path with :. Let’s add this method.
// pages/index.vue
<script>
export default {
  ...
  methods:{
    ...
    getRandomImageUrl(){
      const randomIndex = Math.floor(Math.random() * this.cloudinaryImages.length);
      const randomImage = this.cloudinaryImages[randomIndex];
      return randomImage.public_id.replace(new RegExp( '/','g'), ':');
    },
  }
}
</script>
Code language: HTML, XML (xml)
With the above method and the above state, our app knows which images to overlay and where to overlay them in the template. Let us now add the final HTML to render the final collage.
<!-- pages/index.vue -->
<template>
<div>
    ...
    <cld-image
        v-if="!uploading && cloudinaryImages.length"
        :public-id="template"
        width="600"
        height="680"
    >
        <cld-transformation
        v-for="(coordinate,index) in templateCoordinates"
        :key="index"
        :overlay="getRandomImageUrl()"
        width="574"
        :y="coordinate.y"
        :x="coordinate.x"
        />
    </cld-image>
</div>
</template>
Code language: HTML, XML (xml)
Thus with the above code, the collage will only be displayed when uploading is complete and there are contents in the cloudinaryImages array. We display the template and in it overlay images at the coordinate locations.
On uploading images, a collage similar to this should be generated.

To learn more about how to apply Cloudinary transformations, feel free to refer to the image transformations documentation.
To implement the above at scale, you may also look to set the image overlay coordinates in the contextual metadata of the template and have multiple templates.
If found this article helpful and want to discuss it in more detail, head over to Cloudinary Community forum and its associated Discord.