
Adding upload support, especially videos to websites and apps, comes with considerable research for new and experienced developers. “How to deal with file size and storage space for videos?”, “What standard video format should the upload support?“are some of the questions that might arise.
This article shows you how to add video upload support to a Gatby.js app using Cloudinary Upload Widget – a complete, interactive user interface that enables file upload from various sources to your website or web application.
Gatsby.js is a React-based front-end development framework used to build rich and optimized website and web applications. It offers features including SEO, security, integrations, and accessibility, without installing additional packages.
Cloudinary is a platform that enables you to upload, store, manage, transform, and deliver images and videos for websites and web applications.
We completed this project in a Codesandbox, and you can fork it to run the code.
We need to install the Gatsby-CLI globally and create a new Gatsby.js project using NPM – a command line package manager. You can also use Yarn.
If you already have a Gatsby project running, you can skip this Gatsby installation step.
In the desired directory for our project, we run:
    npm install -g gatsby-cli && gatsby new upload-widget
Code language: JavaScript (javascript)
This command creates a Gatsby project called upload-widget using the default Gatsby starter.
We proceed to install the required dependencies with:
npm install react-helmet
react-helmet is a library that takes plain HTML tags and outputs plain HTML tags. It will help us avoid the Reference error: Window is not Defined error when using client-side only packages in Gatsby.js.
Find all other methods for using client-side only packages in Gatsby.js here.
With the project dependencies installed, we can now set up our application to use Cloudinary Upload Widget. To use the Cloudinary Upload Widget in our application, we need to include the script from a CDN in our application using react-helmet, a package we installed earlier.
Add the script from a CDN to index.js file to use Cloudinary Upload Widget:
import * as React from "react"
import { Helmet } from "react-helmet"
import Layout from "../components/layout"
const IndexPage = () => {
return (
<Layout>
<Helmet>
<script src="https://upload-widget.cloudinary.com/global/all.js" />
)
}
export default IndexPage
Code language: JavaScript (javascript)With that done, we can update index.js and configure Cloudinary Upload Widget to upload videos to Cloudinary:
import * as React from "react"
import { Helmet } from "react-helmet"
import Layout from "../components/layout"
const IndexPage = () => {
const [url, setURL] = React.useState(null)
const openWidget = () => {
window.cloudinary
.createUploadWidget(
{
cloudName: "dtgbzmpca",
uploadPreset: "tca2j0ee"
},
(error, result) => {
if (!error && result && result.event === "success") {
setURL(result.info.url)
}
}
)
.open()
}
return (
<Layout>
<Helmet>
<script src="https://upload-widget.cloudinary.com/global/all.js" />
)
}
export default IndexPage
Code language: JavaScript (javascript)In the snippet above, we added a state variable to store an uploaded video URL and a function to configure the Cloudinary Upload Widget.
We then use the callback function to check for errors and update the URL based on the returned result.
Finally, we created a button that triggers the widget when clicked and conditionally displays the returned URL.
You also need a Cloudinary account for video upload. Signup is completely free.
The Cloudinary Upload Widget also configures cloudName, which is the name of your Cloudinary account. To get the value of cloudName, log in to your Cloudinary account, navigate to the dashboard, and copy the value, as shown in the highlighted section below.

uploadPreset is a parameter that enables us to centrally define a set of asset upload options instead of specifying them in each upload call. To get your upload preset:
Log in to your Cloudinary account, click on the Settings icon and select the upload tab.
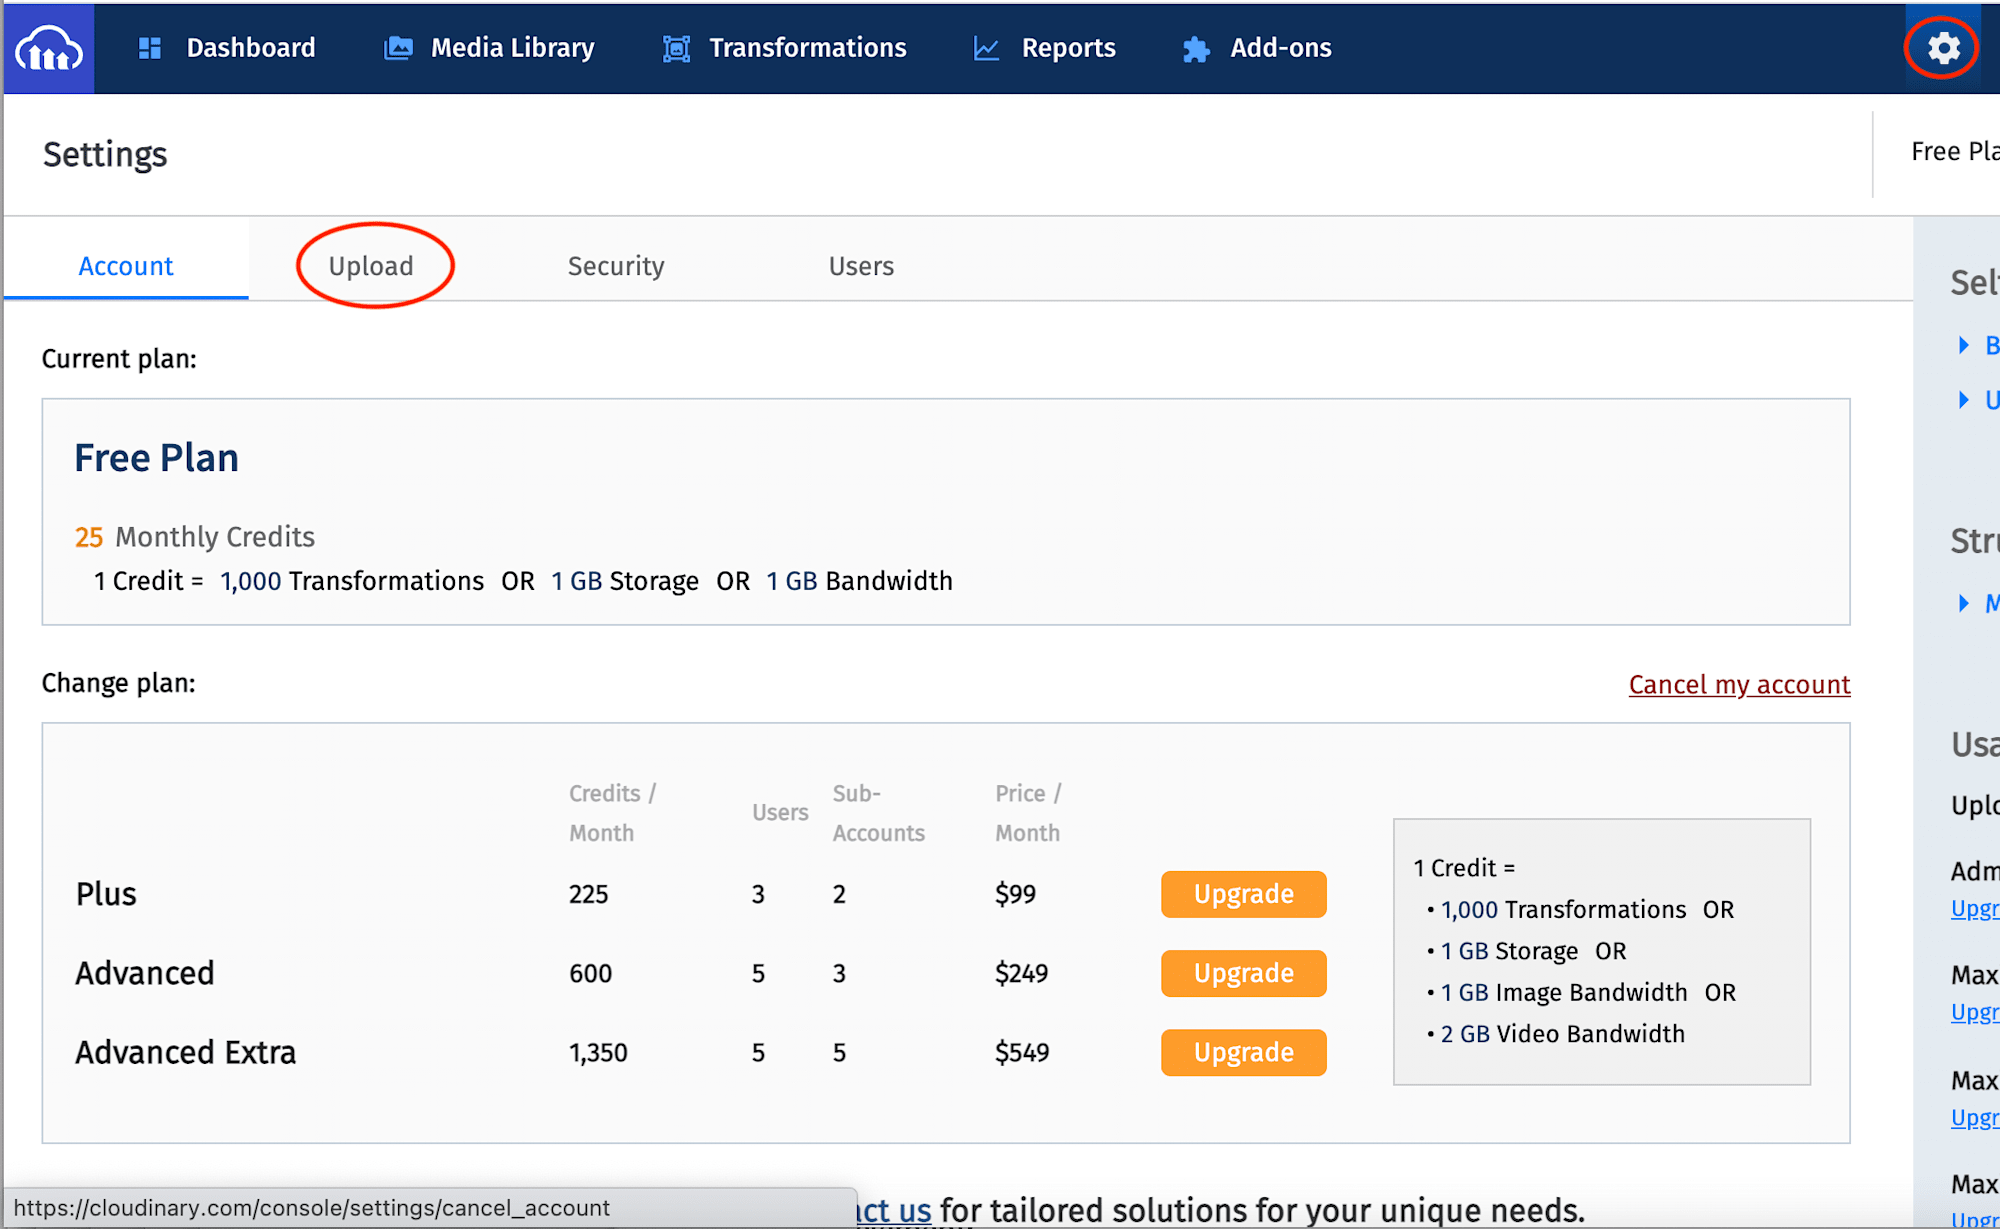
Navigate to the Upload presets section, click on the Add Upload preset if you don’t have one or copy an existing one if you do.
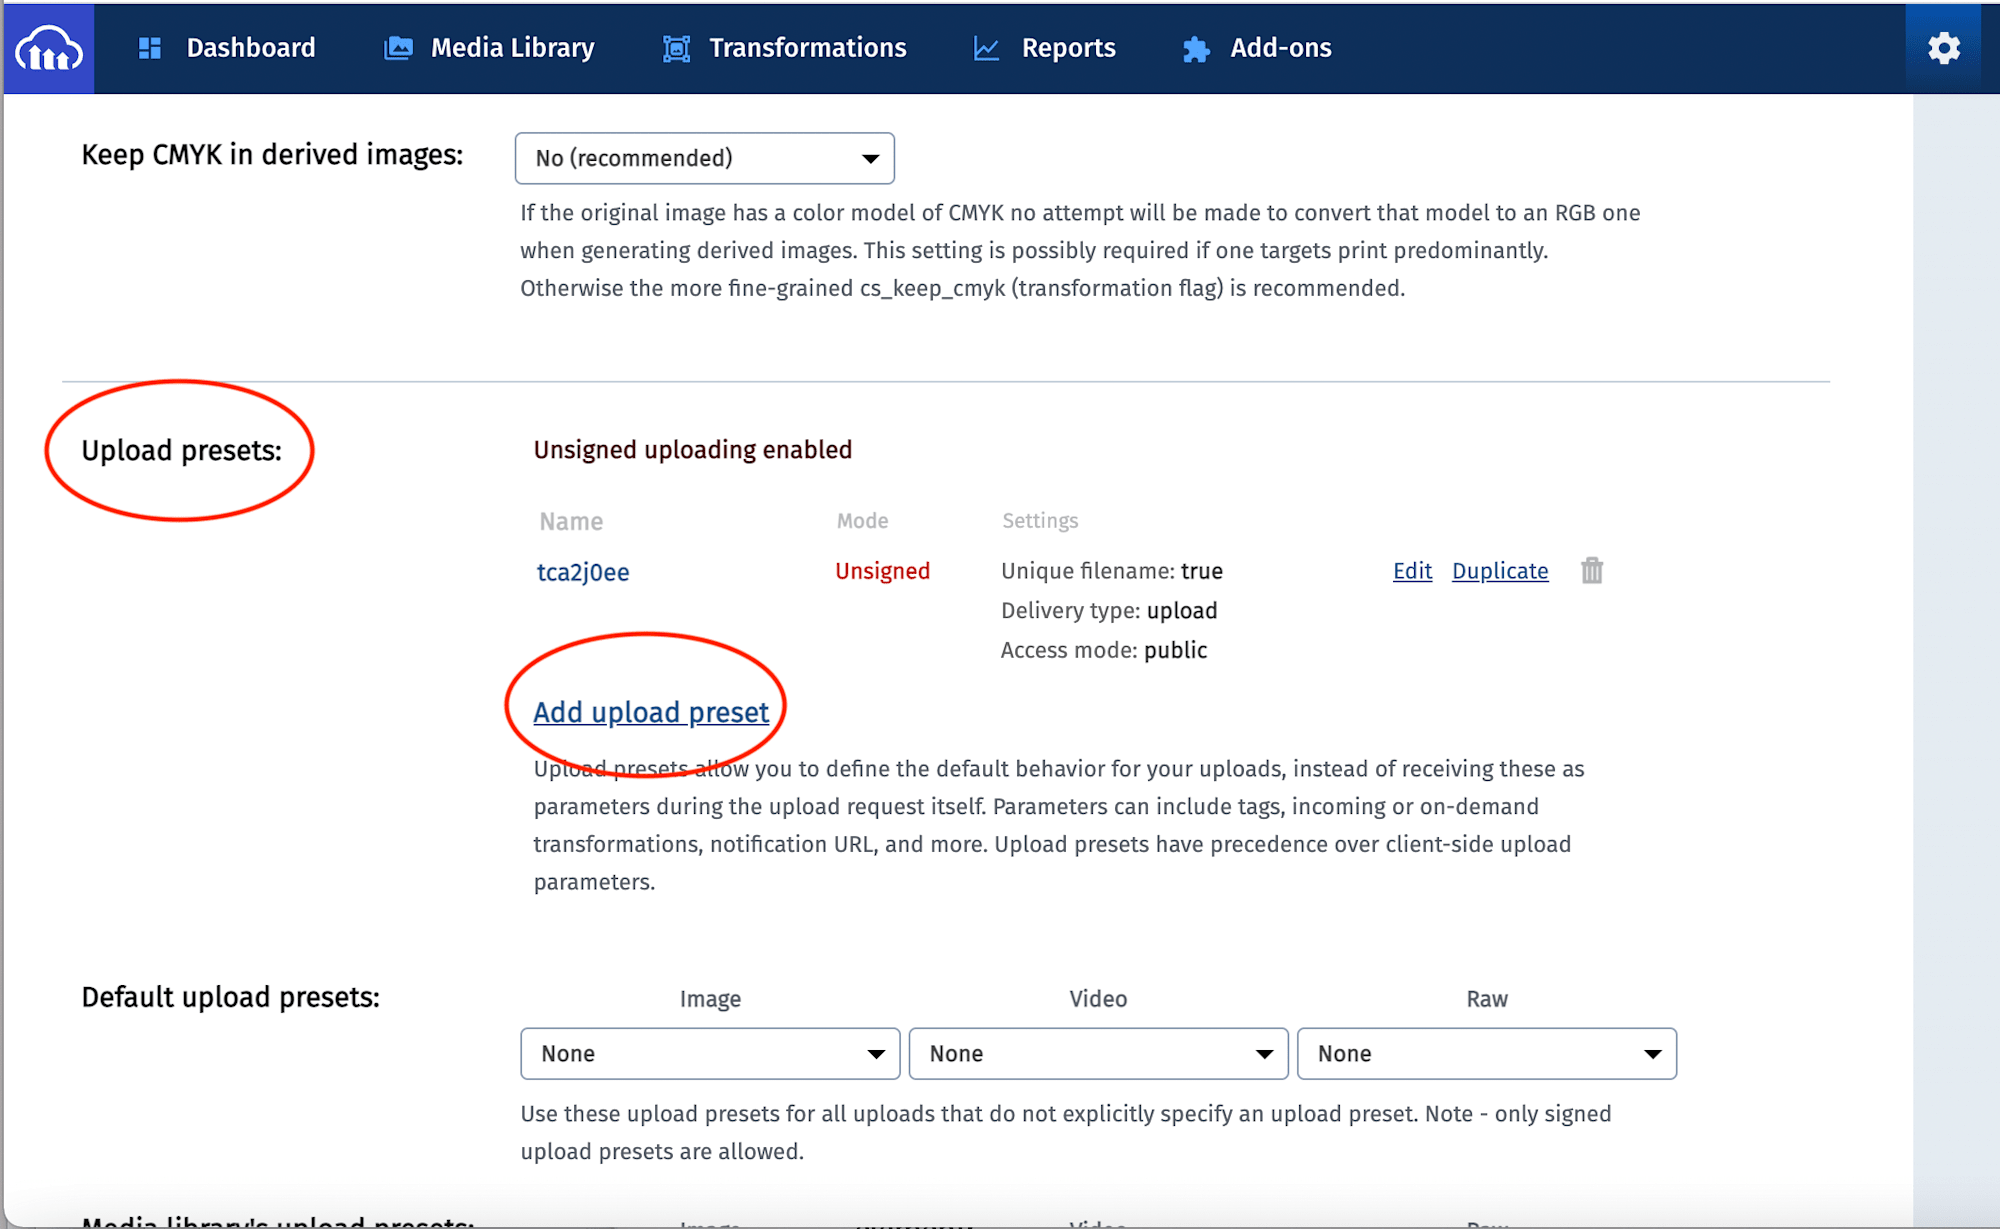
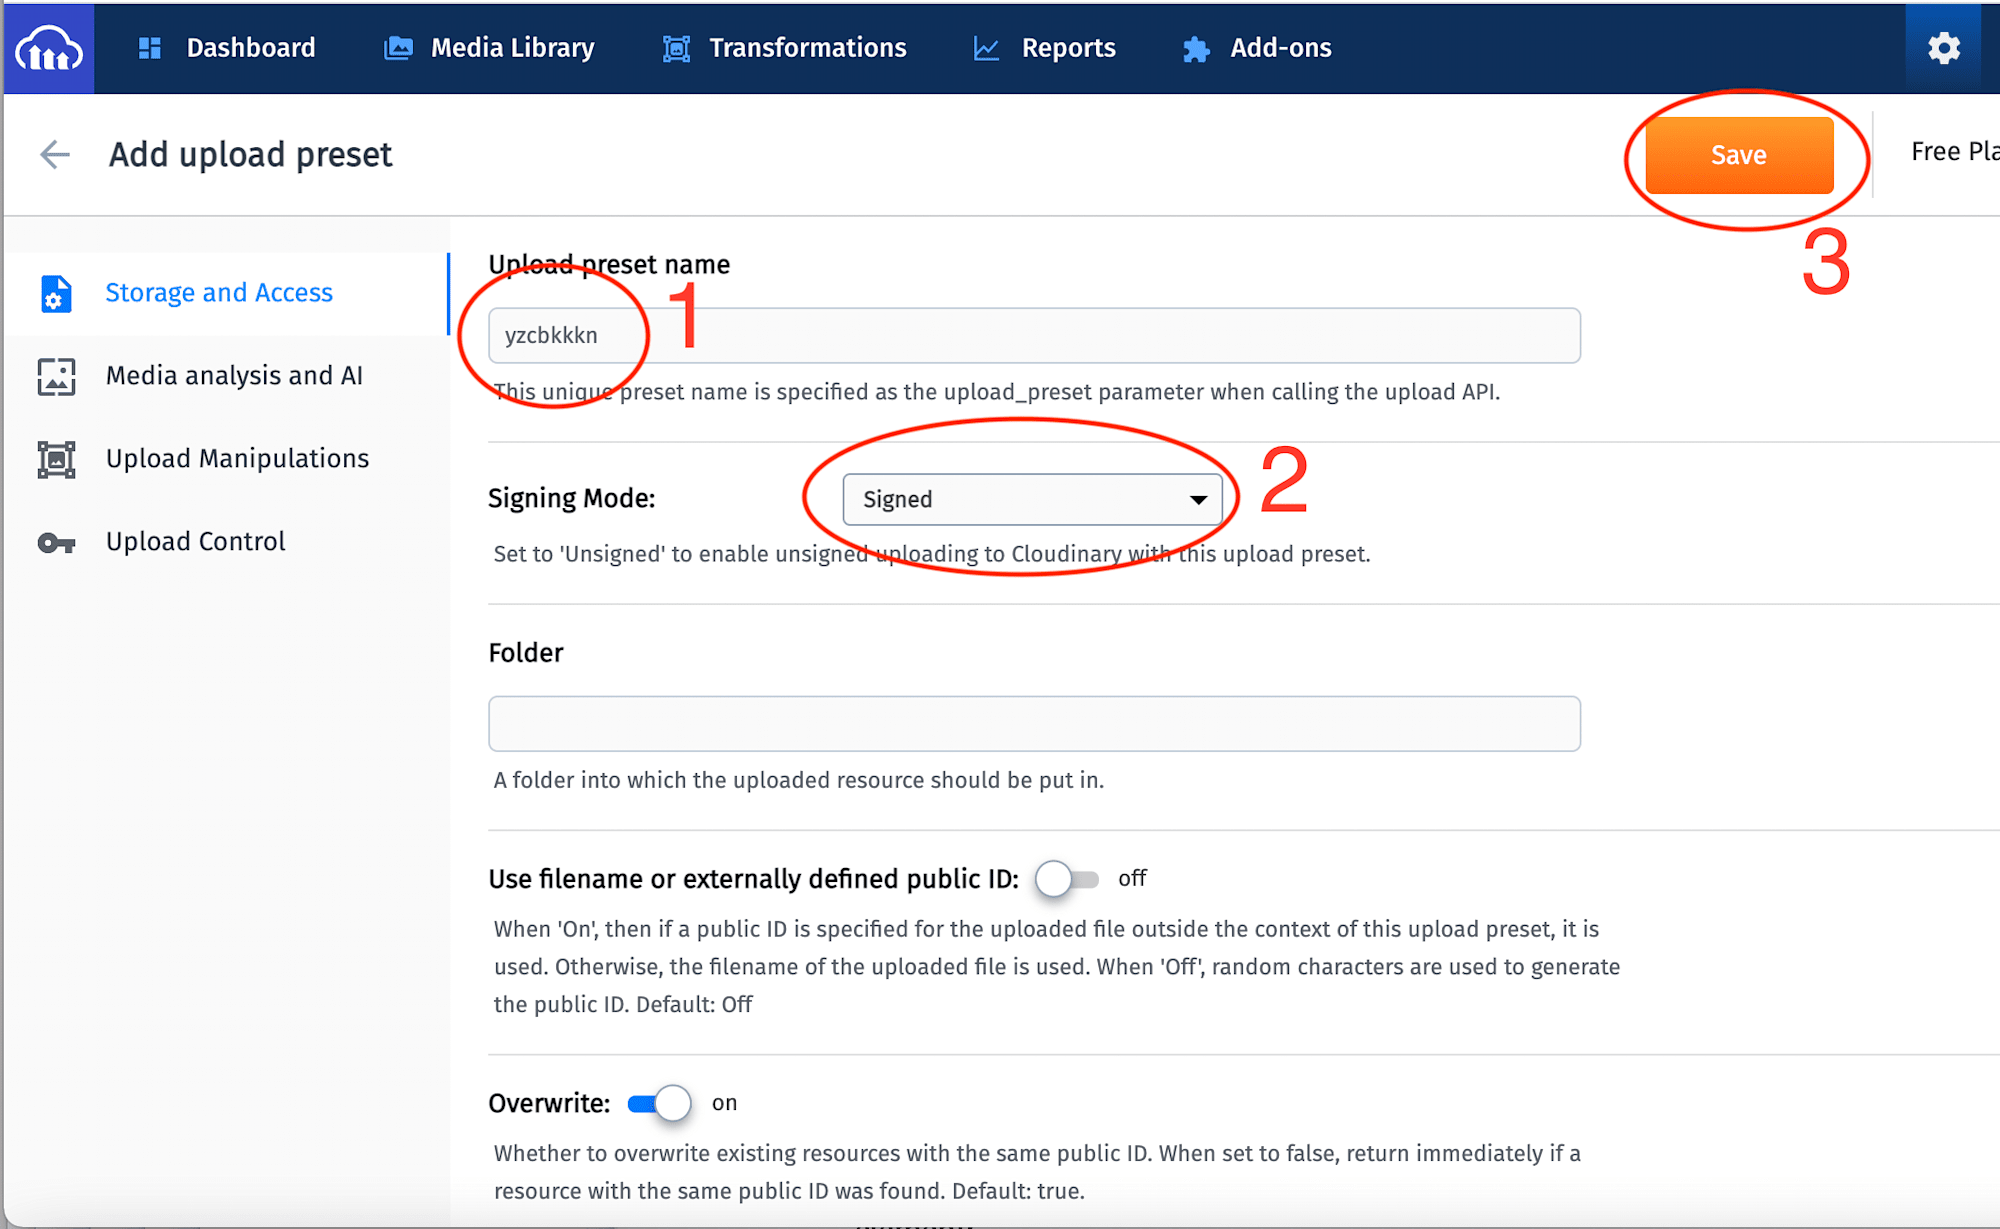
Copy the preset name and change the signing mode to unsigned to enable unsigned uploading to Cloudinary with this upload preset.
Signed and Unsigned Uploads are ways in which Cloudinary Upload Widget support file upload to Cloudinary. The difference is, Signed Upload requires a bit more setup and coding but provide a more secure upload process when required, while Unsigned Upload makes it quick and simple for you to provide a UI where users can upload content, but it is less secure.
For this tutorial, we used the Unsigned Upload.
Then click on the Save button to save the changes.
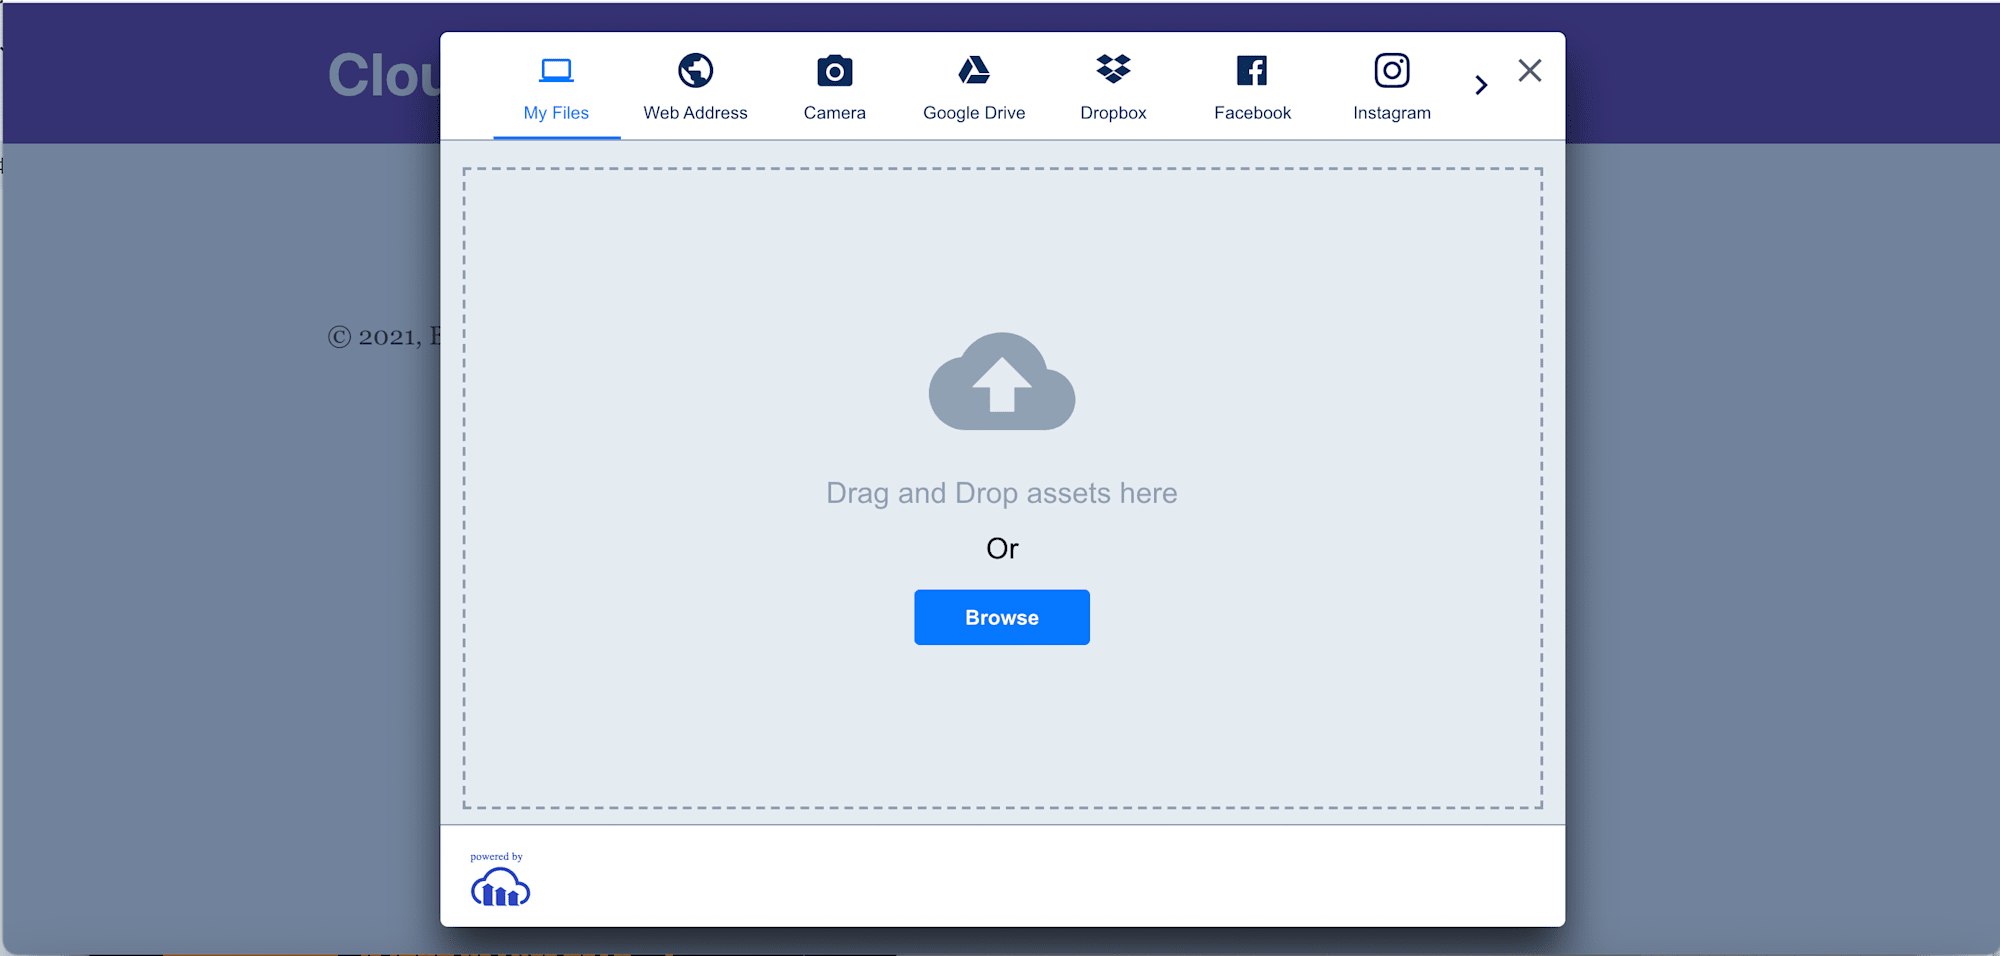
With this, you can now test the application and upload video.
This post discussed how to add video upload functionality to Gatsby.js project using Cloudinary Upload Widget. Try out the various upload options specified in the widget
You may find these resources useful