
Cropping an image is typically done to remove an unattractive subject or extraneous information, adjust the aspect ratio of an image, or sometimes magnify the main topic and reduce the angle of view.
This article will show you how to crop and resize an image in the browser with React.
The completed project is on Codesandbox.
The knowledge of JavaScript and React.js is required to follow through with this article. Also, you need to ensure that you have Node.js and npm installed to follow along.
To Verify the node version installed, use the following terminal command:
node -v && npm -v
The above command should output their respective versions if installed.
To create a new project, use the npx create-react-app <project name> command to scaffold a new project in a directory of your choice.
To install the dependencies, you should use the command below:
cd <project name>
npm install react-cropper
Code language: HTML, XML (xml)
Once the app is created, and the dependencies are installed, you will see a message with instructions for navigating to your site and running it locally. You can do this with the following command.
npm start
React.js will start a hot-reloading development environment accessible by default at http://localhost:3000.
Next, update the src/App.js file with the code snippet below.
#App.js
import React, { useState } from "react";
import "./styles.css";
export default function App() {
return (
<div>
<div className="splitdiv" id="leftdiv">
<h1 className="main-h1">
How to Crop and Resize Image in the Browser using CropperJs
</h1>
<div id="leftdivcard">
<input type="file" />
<button type="button" id="leftbutton">
Use Default Image
</button>
<button type="button" id="leftbutton">
Crop Image
</button>
</div>
</div>
<div className="splitdiv" id="rightdiv">
<div id="itemdivcard">
<h1>Cropped image will apear here!</h1>
</div>
</div>
</div>
);
}
Code language: HTML, XML (xml)The current user interface doesn’t look aesthetically pleasing, so you need to add some styling with CSS. You can update src/styles.css file with the following content in this GitHub Gist.
After adding the styling, your application should look like the image below.

This section will import and setup react-cropper, the JavaScript image cropper you installed earlier, into the src/App.js file.
Import the react-cropper dependency
//...

import Cropper from "react-cropper";
import "cropperjs/dist/cropper.css";

export default function App() {
  return (
    //...
  );
}
Code language: JavaScript (javascript)
Declare state variables, image with a default value of an image url, cropData with a default of an empty string, and cropper with a default of null, respectively.
//...

const defaultSrc ="https://res.cloudinary.com/olanetsoft/image/upload/v1648679302/uploadedFiles/family.jpg";

export default function App() {
  const [image, setImage] = useState(defaultSrc);
  const [cropData, setCropData] = useState("");
  const [cropper, setCropper] = useState(null);

  return (
    //...
  );
}
Code language: JavaScript (javascript)Use the react-cropper dependency installed and set the cropper state variable when the cropper dependency is initialized using the following code snippet.
//...

export default function App() {
  //...

return (
  <div>
    <div className="splitdiv" id="leftdiv">
      //...
      <div id="leftdivcard">
        //...
        <Cropper
          className="cropper"
          zoomTo={0.5}
          initialAspectRatio={1}
          src={image}
          viewMode={1}
          minCropBoxHeight={10}
          minCropBoxWidth={10}
          background={false}
          responsive={true}
          autoCropArea={1}
          checkOrientation={false}
          onInitialized={(instance) => {
            setCropper(instance);
          }}
          guides={true}
        />
      </div>
    </div>
       //...
  </div>
);
}
Code language: JavaScript (javascript)
You should have something similar to what is shown below.

Next, you will implement the image crop functionality using the code snippet below.
//...

export default function App() {
  //...

const getCropData = () => {
  if (typeof cropper !== "undefined") {
    setCropData(cropper.getCroppedCanvas().toDataURL());
  }
};

return (
  <div>
    <div className="splitdiv" id="leftdiv">
      //...
      <div id="leftdivcard">
        //...
          <Cropper
            //...
            onInitialized={(instance) => {
              setCropper(instance);
            }}
            guides={true}
          />
      </div>
    </div>
    <div className="splitdiv" id="rightdiv">
      <div id="itemdivcard">
        {cropData ? (
          <img style={{ height: "50%" }} src={cropData} alt="cropped" />
        ) : (
          <h1>Cropped image will apear here!</h1>
        )}
      </div>
    </div>
  </div>
);
}
Code language: JavaScript (javascript)
In the code snippet above has,
- Created a function
*getCropData*which validates that thecropperstate variable is not undefined, and then set the cropper using*setCropData*to the cropped canvas - Passed the
*getCropData*to theonClickevent of the Crop Image button - Validate the
cropDatais not empty, and then we render the cropped data image as shown below.

A default image url was passed to the image state variable in the previous step. You can explore the upload image functionality by allowing users to upload their images.
You can achieve this action by using the code snippet below.
//...

export default function App() {
  //...

const onChange = (e) => {
  e.preventDefault();
  let files;
  if (e.dataTransfer) {
    files = e.dataTransfer.files;
  } else if (e.target) {
    files = e.target.files;
  }
  const reader = new FileReader();
  reader.onload = () => {
    setImage(reader.result);
  };
  reader.readAsDataURL(files[0]);
};

return (
  <div>
    <div className="splitdiv" id="leftdiv">
            //...
      <div id="leftdivcard">
        <input type="file" onChange={onChange} />
          //...
      </div>
    </div>
      //...
  </div>
);
}
Code language: JavaScript (javascript)
In the code snippet above, you created a function onChange triggered when the input tag event changed and reads the file uploaded as data URL.
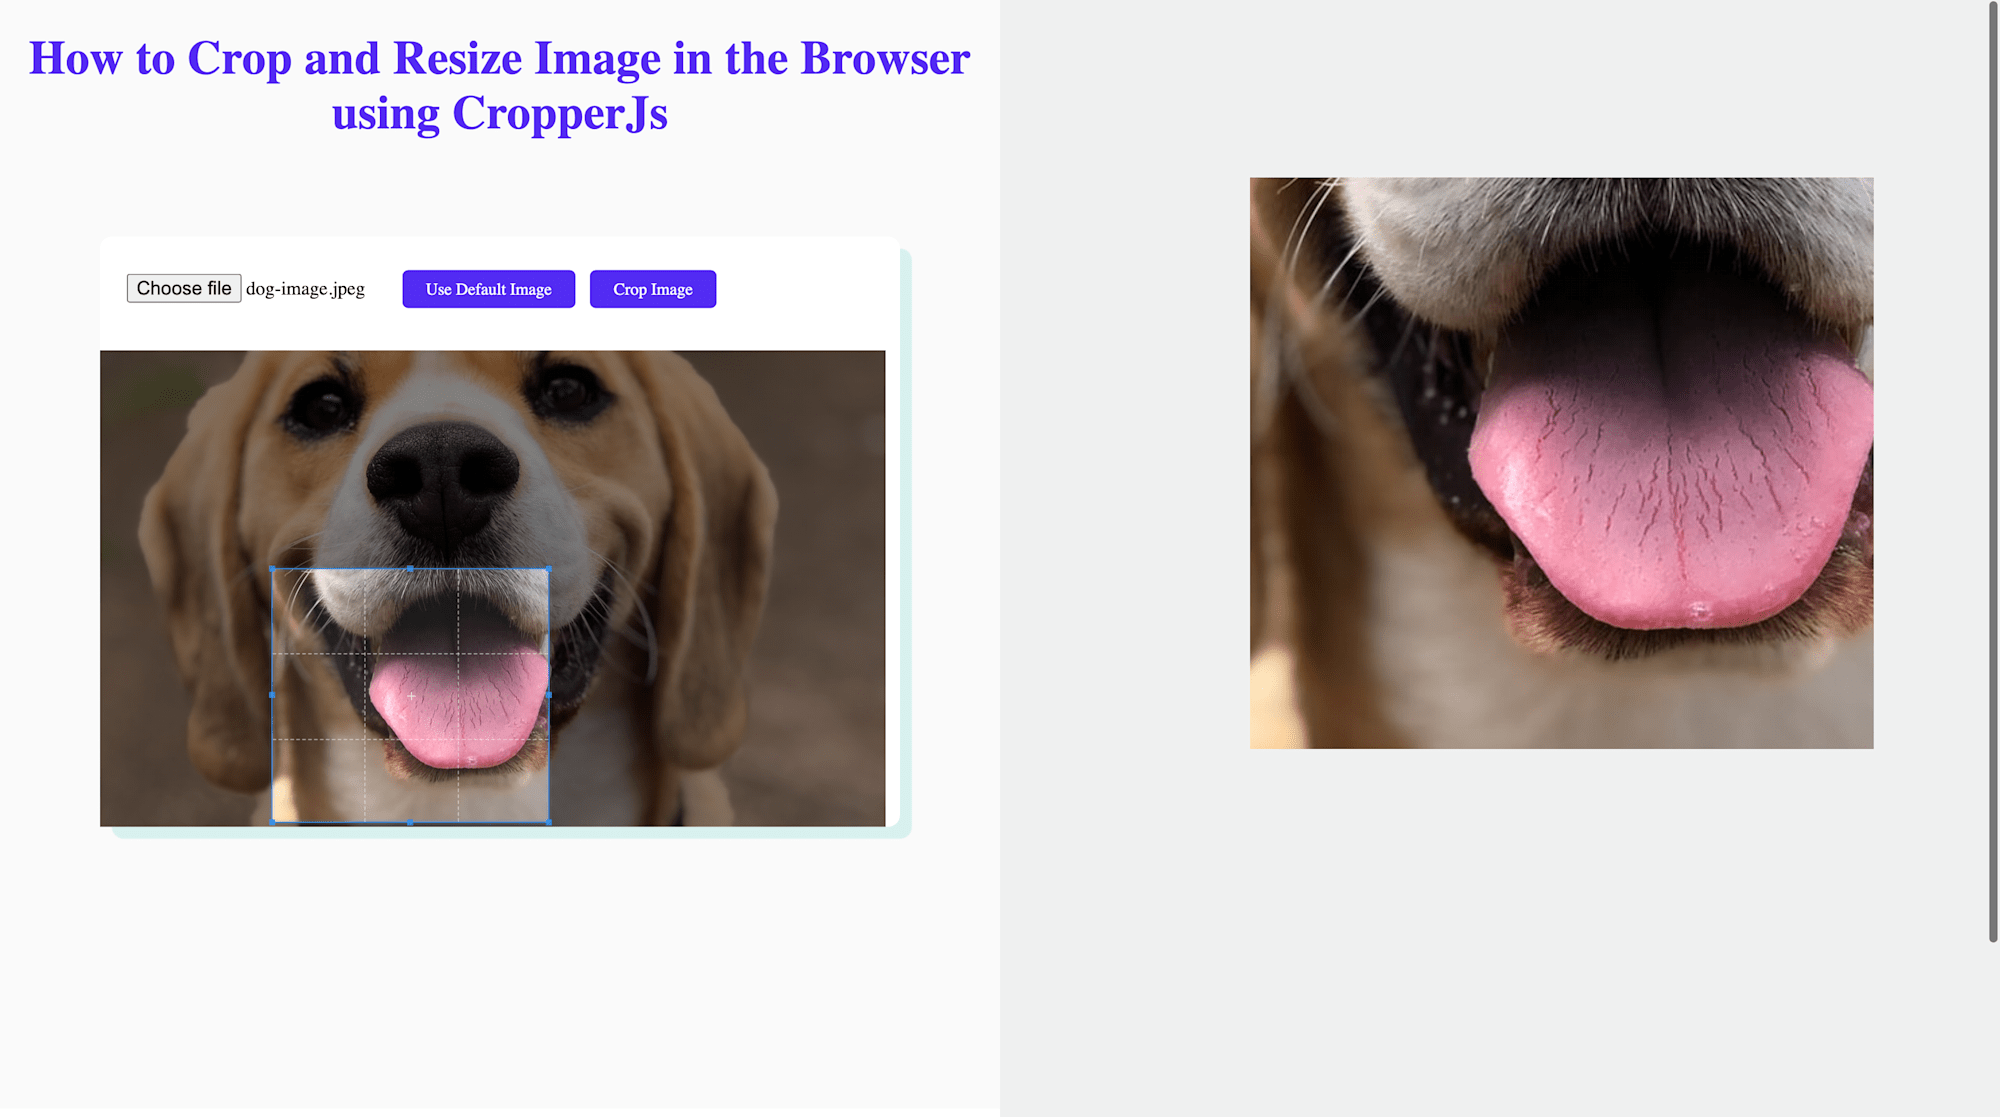
You should have something similar to what is shown below after testing.
Next, you will implement the Use Default Image button functionality by creating a function that sets the image state variable using the code snippet below.
//...
export default function App() {
//...
const reset = () => {
etImage(defaultSrc);
};
return (
<div>
<div className="splitdiv" id="leftdiv">
//...
<div id="leftdivcard">
//...
<button type="button" id="leftbutton" onClick={reset}>
Use Default Image
</button>
//...
</div>
</div>
//...
</div>
);
}
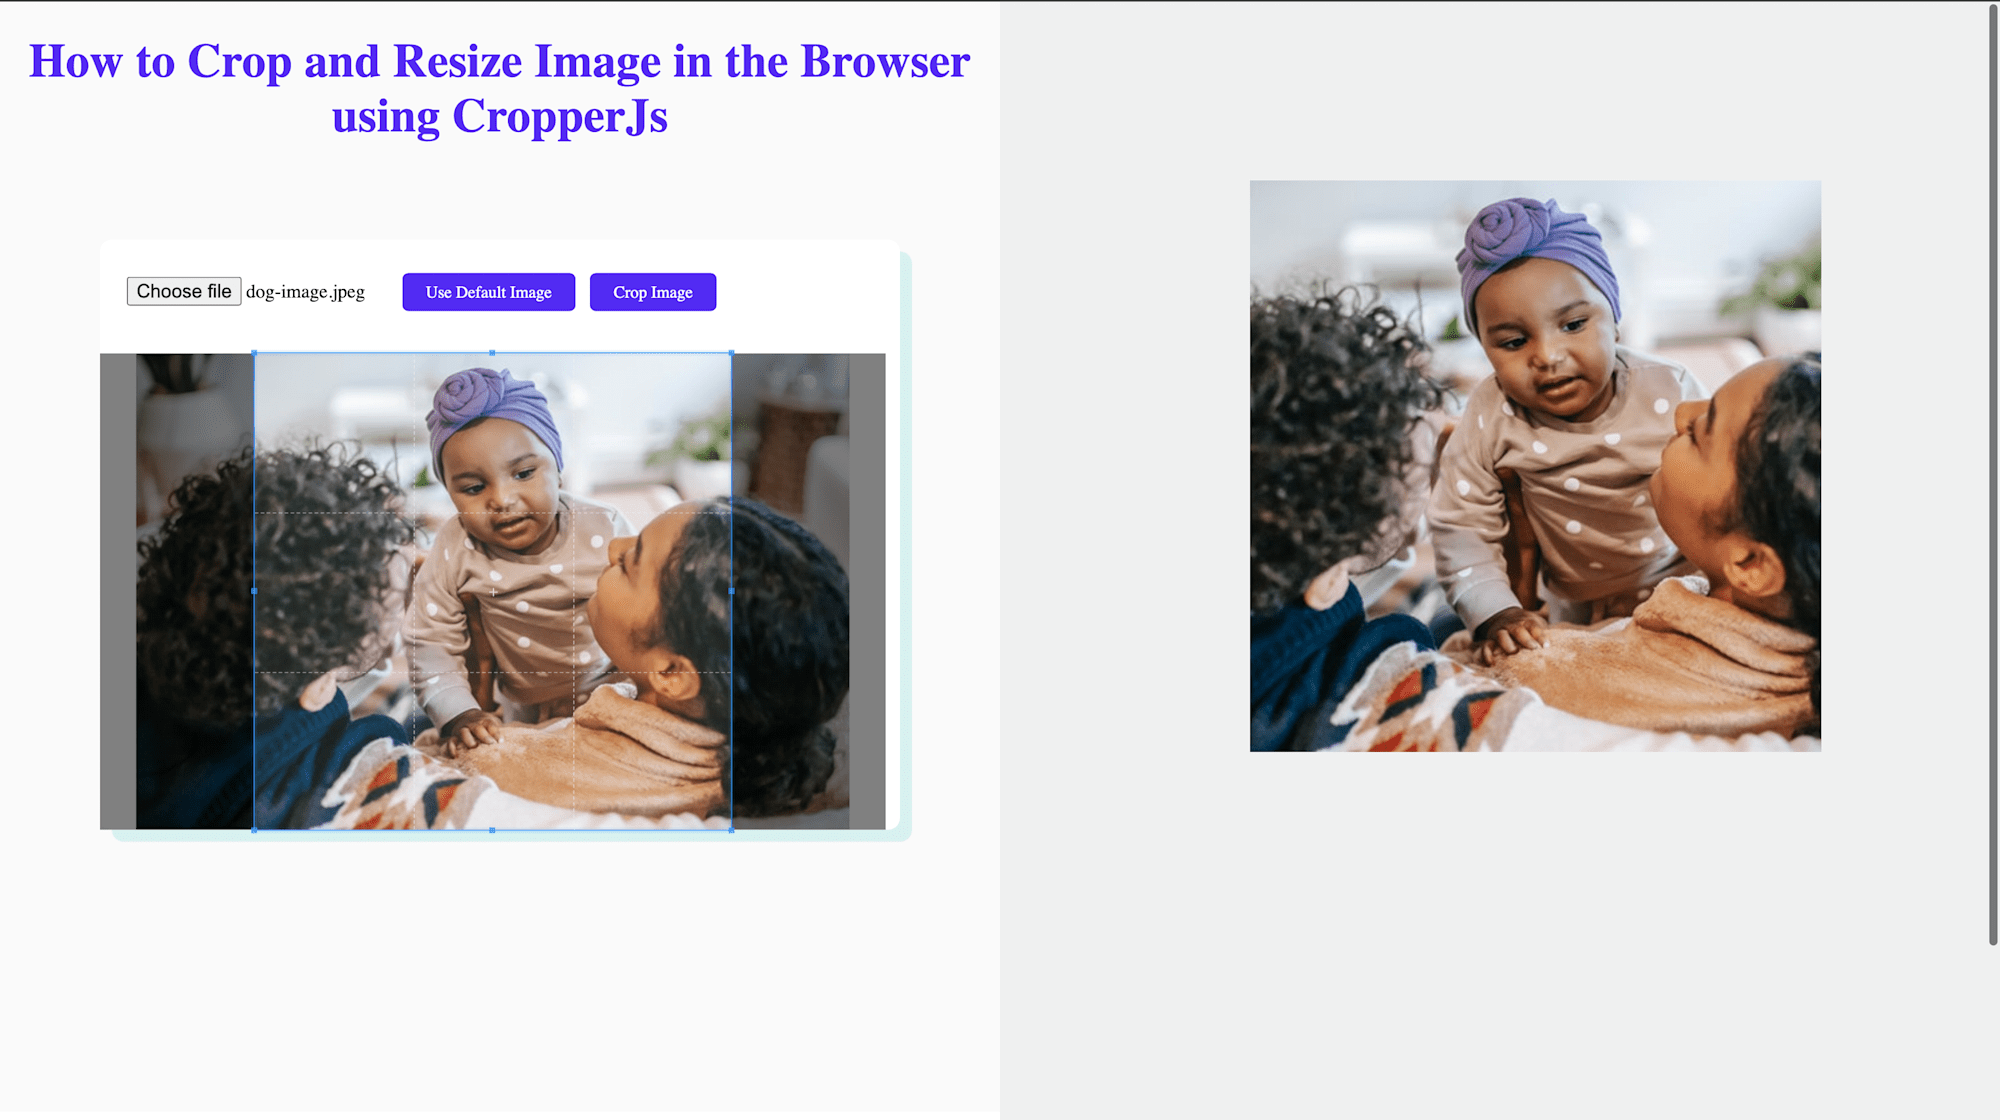
Code language: JavaScript (javascript)After testing your application, you should have something similar to what is shown below.
This article explained how to crop and resize image in the browser