SVG is the world’s most popular vector image format used by designers, developers, and content creators. It is incredibly lightweight and scalable. It is also editable as code, allowing for customizations that improve SEO, design, and accessibility.
Creating an SVG from scratch can be tricky, but in this tutorial, you will learn how to generate SVG images and code from any image.
You will implement Cloudinary’s vectorize effect to create the SVG image and take advantage of Nuxt’s APIs to upload, get, and convert your SVG images to code.
View the complete demo for this tutorial on CodeSandbox:
The source code is also available on GitHub.
To understand the concepts in this tutorial, you should have the following:
- Basic knowledge of Git, JavaScript, and Vue
- A GitHub account (create an account here)
- A Cloudinary account for uploading and converting your images (create an account here)
- Node.js, Yarn, and Git installed on your PC
First, open this starter template URL in your browser to generate a GitHub repo for this project based on a starter template:
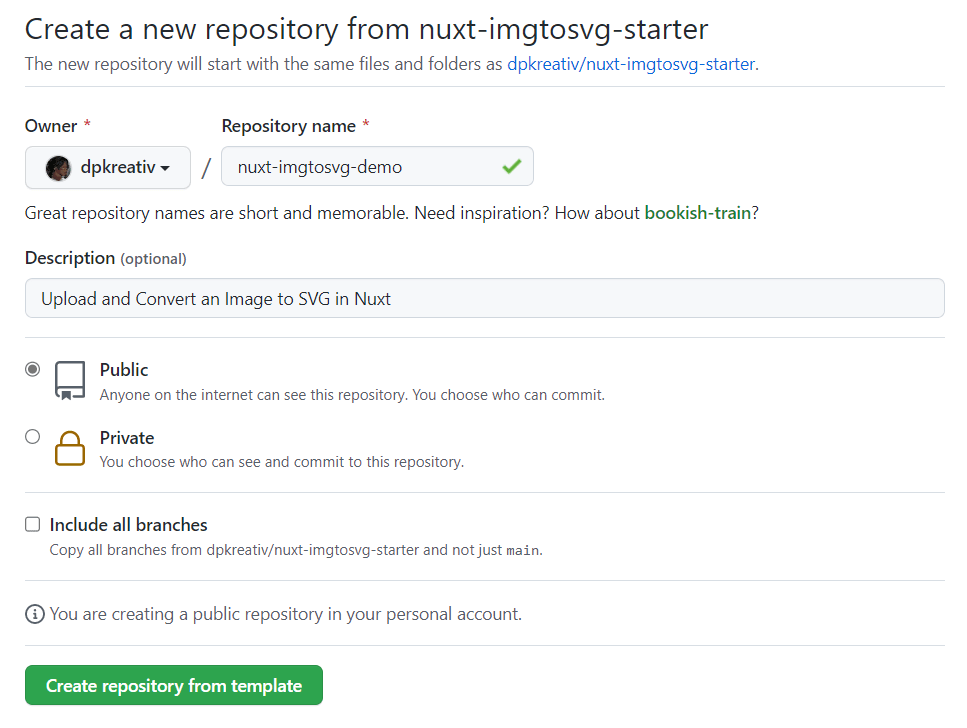
Here, you set nuxt-imgtosvg-demo as the name of your repo.
On your PC, open a terminal window and navigate to your preferred folder, then clone your newly created repo with the command below:
git clone <your-github-repo>
Code language: HTML, XML (xml)
After it has successfully cloned to your PC, navigate into its folder and install its dependencies with yarn:
cd nuxt-imgtosvg-demo
yarn
Or using npm:
cd nuxt-imgtosvg-demo
npm install
After successfully installing its dependencies, open the project in your preferred code editor and run the code below in your terminal to start a development server:
yarn dev
Or using npm:
npm run dev
This command will serve the project with a hot reload on localhost:3000, which you can view in your browser:
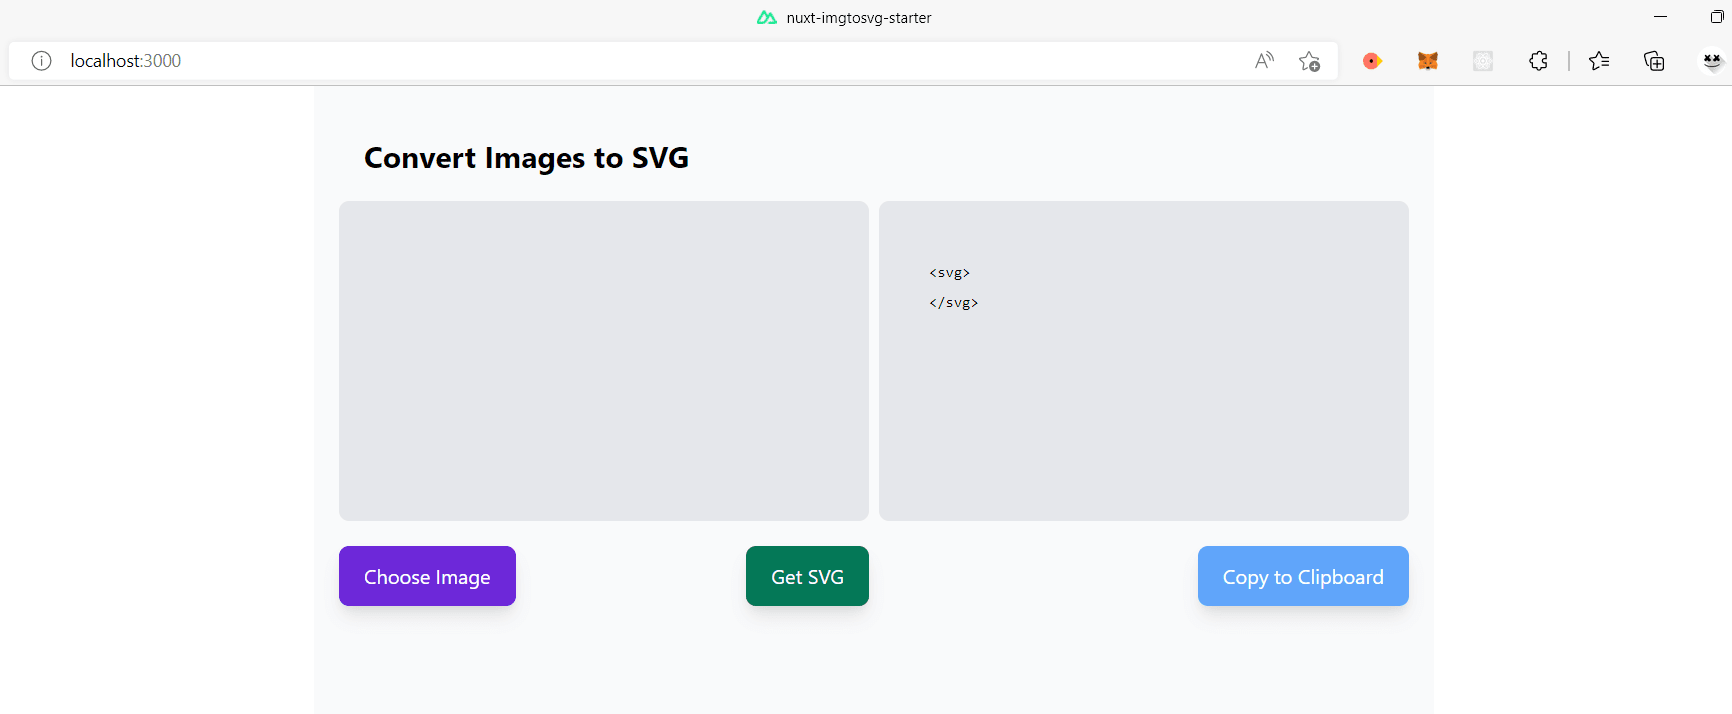
Get Cloudinary Cloud Name
In a new browser tab open your Cloudinary dashboard and copy your “Cloud Name”:
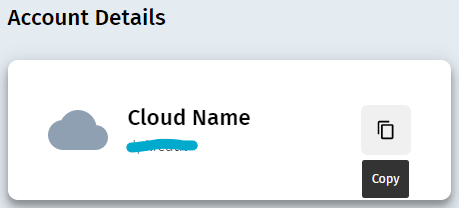
In the root directory of your project, create a .env file and update it with the code below:
CLOUDINARY_CLOUDNAME=your-cloudinary-cloud-name
Enable Client-side Uploads
To enable client-side uploads on Cloudinary, you will need an “unsigned upload preset”. In your browser, navigate to Cloudinary’s settings and click on the “Upload” tab, then scroll down to “Upload Presets”:
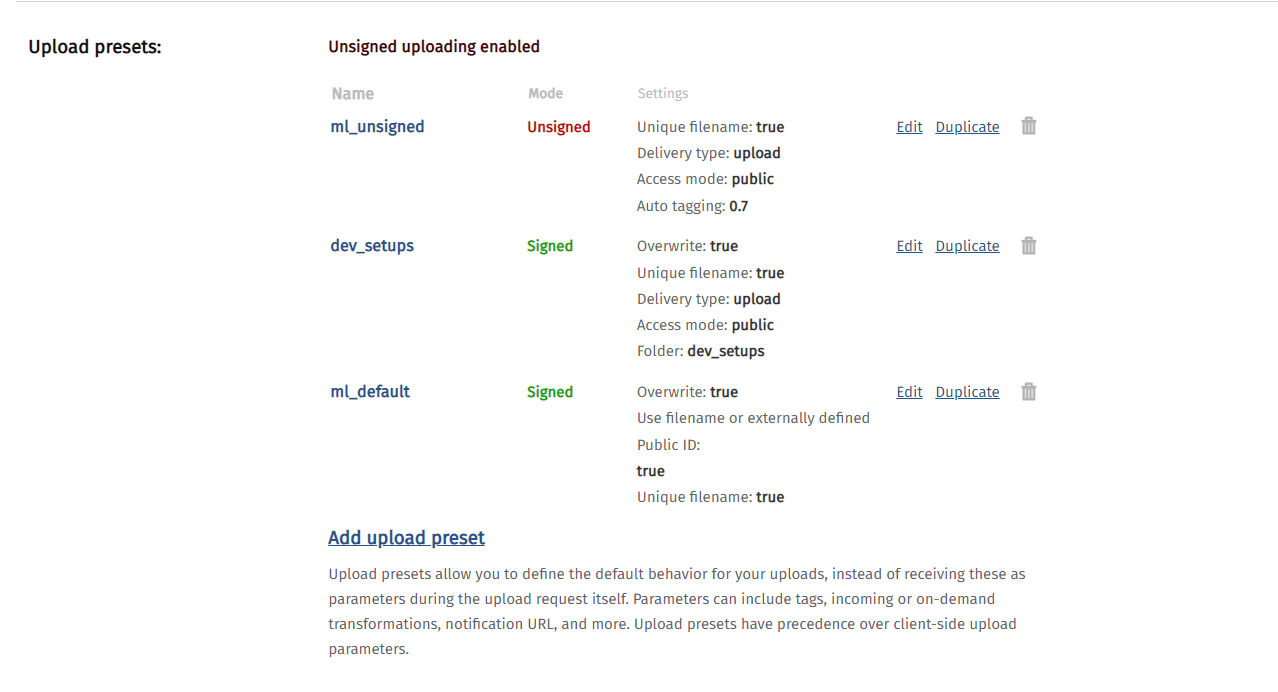
Click on “Add upload preset”, specify the name of your new preset, and change “Signing Mode” to “Unsigned”, then save the preset:
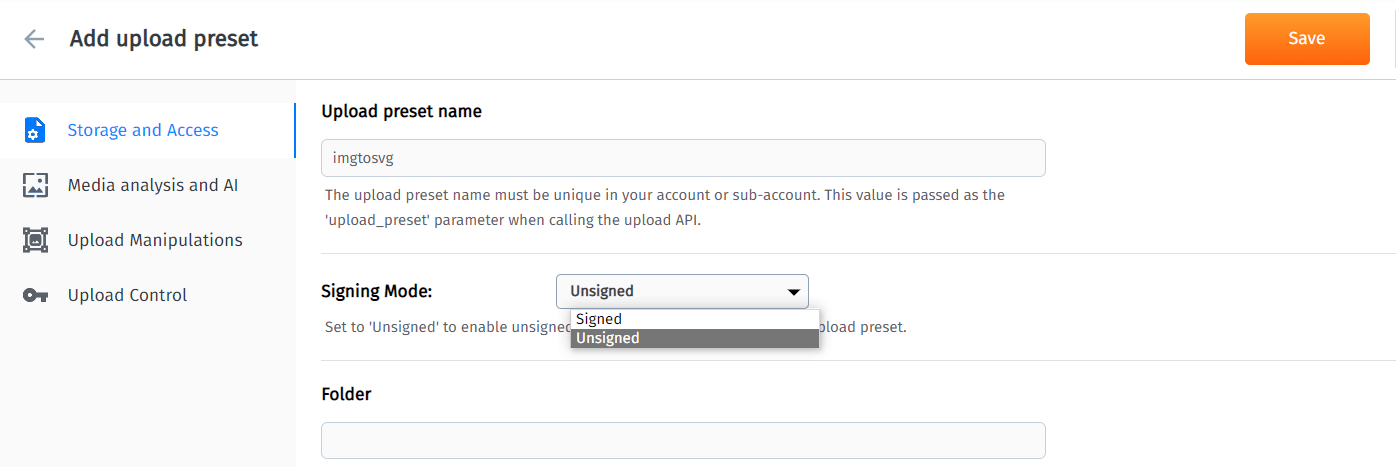
Take note of your upload preset name.
Install Cloudinary Package for Nuxt.js
In your project’s terminal, run the code below to install the Cloudinary package for Nuxt.js:
yarn add @nuxtjs/cloudinary
Code language: CSS (css)
Or using npm:
npm install @nuxtjs/cloudinary
Code language: CSS (css)
Configure Cloudinary in Nuxt.js
After its successful installation, open your nuxt.config.js file and update it with the code below:
export default {
  // do not remove pre-existing code
  modules: ['@nuxtjs/axios', '@nuxtjs/cloudinary'],

  cloudinary: {
    cloudName: process.env.CLOUDINARY_CLOUDNAME,
  },
  // do not remove pre-existing code
};
Code language: JavaScript (javascript)
In the code above, you did the following:
- Added
@nuxtjs/cloudinaryto your Nuxt.js modules array - Specified your Cloudinary
cloudNamein a Cloudinary object
Select an Image from your Device
In your code editor, open pages/index.vue and observe the code on lines 16 to 26:
<input
  type="file"
  accept="image/*"
  name="fileInput"
  class="hidden"
  @change="handleChange"
  ref="fileInput"
/>
<!-- ...template code -->
<button :onClick="handleRef" purple="true">Choose Image</button>
Code language: HTML, XML (xml)
In the code above:
- The
<input />accepts image files and triggers thehandleChangemethod - The
class="hidden"hides<input>from the viewer, andref="fileInput"lets another element reference<input> - The
<Button>element is a custom component with anonClickprop that triggers thehandleRefmethod
Update the handleRef method
Scroll down to your <script> tag and update the handleRef() method with the code below:
<script>
  // do not remove pre-existing code
  export default {
    methods: {
      handleRef() {
        this.$refs.fileInput.click();
      },
    },
  };
</script>
Code language: HTML, XML (xml)
In the code above, you did the following:
- Checked for a
fileInputref in your project’s list of$refs - Listened for the
click()method triggered byfileInput
When a user clicks on the <Button> component containing this handleRef() method, it triggers a click() method on the <input /> and allows the user to select an image from their device.
Update the handleChange method
In your <script> tag, update the handleChange() method with the code below:
<script>
  // do not remove pre-existing code
  export default {
    methods: {
      handleChange(e) {
        // console.log(e)
        const reader = new FileReader();

        reader.readAsDataURL(e.target.files[0]);

        reader.onload = (onloadEvent) => {
          this.setImage = onloadEvent.target.result;
        };
      },
    },
  };
</script>
Code language: HTML, XML (xml)
In this code, you did the following:
- Created a
readervariable that contains an instance of JavaScript’sFileReader()API - The
readerreads the image file and returns its data as a base64 encoded string, which is passed tosetImage
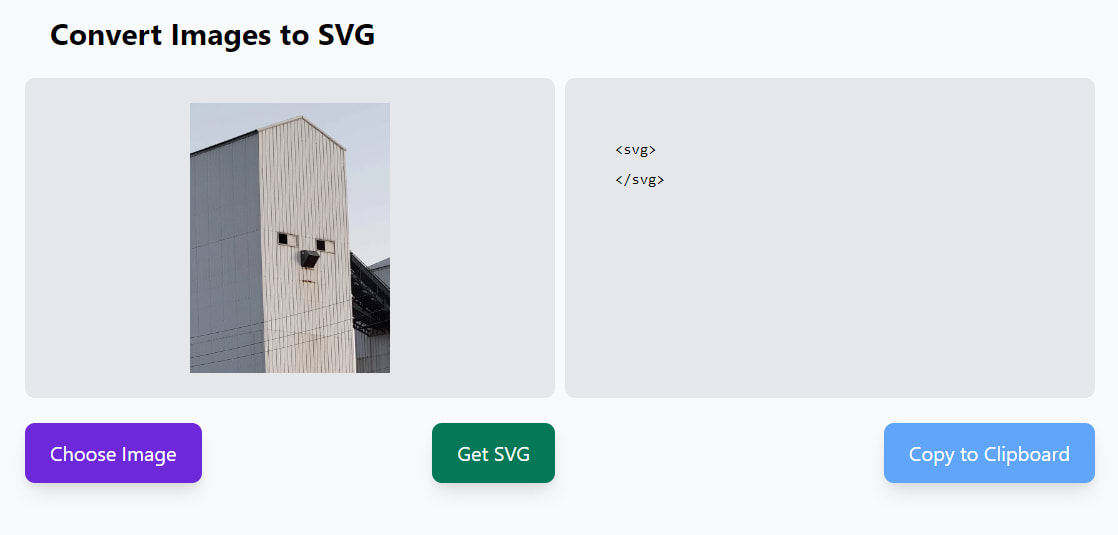
Due to :src="setImage" in line 11 of your pages/index.vue file, <img> will display the selected image on the browser, ready for upload:
In the <script> tag of your pages/index.vue, update the handleUpload() method with the code below:
<script>
  // do not remove pre-existing code
  export default {
    methods: {
      async handleUpload() {
        this.setUploadStatus = true;

        if (this.setImage !== '') {
          // Upload image to Cloudinary
          const uploadImage = await this.$cloudinary
            .upload(this.setImage, {
              upload_preset: 'imgtosvg',
            })
            .then((res) => res.public_id);
        } else {
          alert('Choose image first!');
        }
      },
    },
  };
</script>
Code language: HTML, XML (xml)
In the code above, you did the following:
- Set the
setUploadStatusstate totrue, which triggers the loading state of the<Button>component on lines 28 to 34. Note that this<Button>contains anonClickprop to trigger thehandleUpload()method - Checked if the user selected an image
- Created a
uploadImagevariable that uploads your selected image to Cloudinary, withupload_presetas its parameter. Replace the value ofupload_presetwith yours from Cloudinary - The
uploadmethod returns an Asset object containing the details of the image you just uploaded. You then returned itspublic_id, setting it as the value foruploadImage
Generate SVG URL with public_id
Update the handleUpload() method with the code below:
<script>
  // do not remove pre-existing code
  export default {
    methods: {
      async handleUpload() {
        this.setUploadStatus = true

        if (this.setImage !== '') {
          // Upload image to Cloudinary
          const uploadImage = await this.$cloudinary
            .upload(this.setImage, {
              upload_preset: 'your_cloudinary_unsigned_upload_preset_name'
            })
            .then((res) => res.public_id)

          // Convert to SVG
          const url = await this.$cloudinary.image.url(uploadImage, {
            format: 'svg',
            effect: 'vectorize',
          })

          this.setImage = url
      },
    }
  }
</script>
Code language: HTML, XML (xml)
In the code above, you did the following:
- Generated an image URL from
Cloudinary and set its
formattosvgand itseffecttovectorize - Updated the value of
setImagetourl, which will display your converted image in your browser
Extract SVG code from URL
In your terminal, run the command below to install html-formatter:
yarn add html-formatter
Or using npm:
npm install html-formatter
This package lets you display auto-formatted HTML code, making it more readable. In your pages/index.vue, import html-formatter and update the handleUpload()
method with the code below:
<script>
  import formatter from 'html-formatter';

  export default {
    methods: {
      async handleUpload() {
        this.setUploadStatus = true;

        if (this.setImage !== '') {
          // Upload image to Cloudinary
          const uploadImage = await this.$cloudinary
            .upload(this.setImage, {
              upload_preset: 'your_cloudinary_unsigned_upload_preset_name',
            })
            .then((res) => res.public_id);

          // Convert to SVG
          const url = await this.$cloudinary.image.url(uploadImage, {
            format: 'svg',
            effect: 'vectorize',
          });

          this.setImage = url;

          // Extract SVG code
          await this.$axios
            .$get(url)
            .then((data) => (this.svgDisplay = formatter.render(data)));
        } else {
          alert('Choose image first!');
        }

        this.setUploadStatus = false;
      },
    },
  };
</script>
Code language: HTML, XML (xml)
In the code above, you did the following:
- Imported
html-formatterasformatter - Fetched the SVG image from its URL with
$axios, which returns the SVG code asdata - Updated the value of
svgDisplayto the formatteddata, displaying it on the browser - Disabled the loading state by changing
setUploadStatustofalse
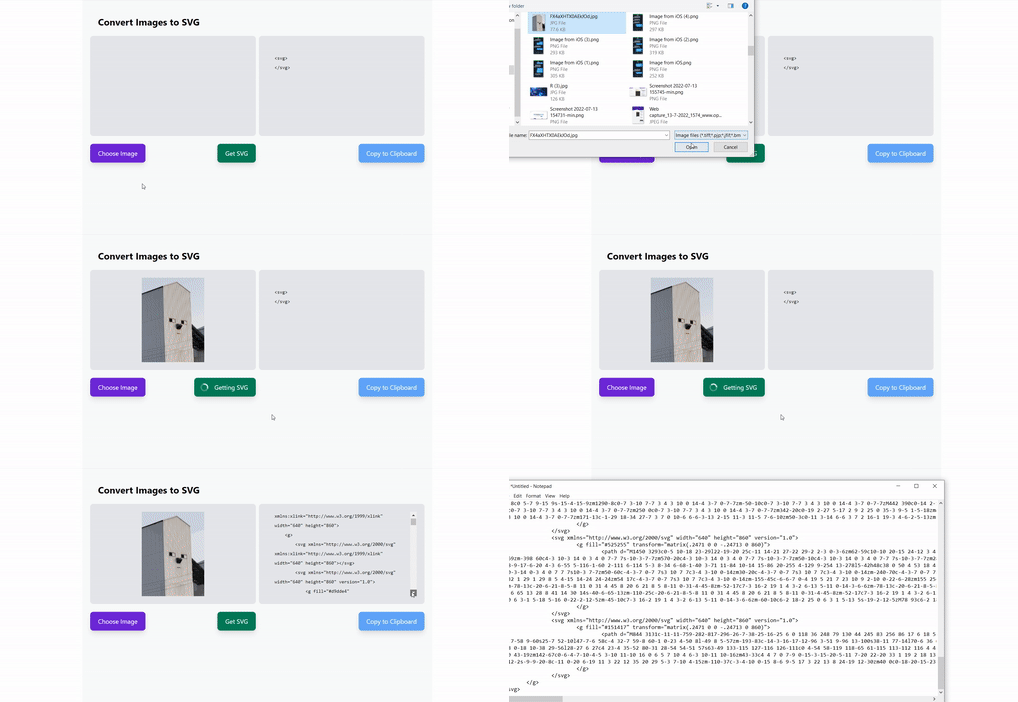
Here is the result of your code:
Copy SVG code to Clipboard
In your terminal, run the command below to install copy-to-clipboard:
yarn add copy-to-clipboard
Or using npm:
npm install copy-to-clipboard
This package lets you save content to your browser’s clipboard.
In the <script> tag of your pages/index.vue, import copy-to-clipboard and update the copySvg() method with the code below:
<script>
  // do not remove pre-existing code
  import copy from 'copy-to-clipboard';

  export default {
    methods: {
      copySvg() {
        copy(this.svgDisplay);
        this.clipboardStatus = 'Copied!';
        setTimeout(() => {
          this.clipboardStatus = 'Copy to Clipboard';
        }, 2000);
      },
    },
  };
</script>
Code language: HTML, XML (xml)
In the code above, you did the following:
- Imported the
copy-to-clipboardpackage ascopy - Saved the current value of
svgDisplayto your browser’s clipboard withcopy() - Changed the text of the clipboard button in line 45 to
'Copied!', and back to'Copy to Clipboard'two seconds later
In this article, you learned how to convert an image to SVG using Cloudinary, extract its SVG code and display it in a Nuxt.js project using the <pre /> tag. Check out these resources below for a deeper understanding of how Nuxt.js or Cloudinary works.
