
Media uploading has transitioned from conventional clicking and uploading to drag and drop functionality. Most companies are now moving to this new trend for a better user experience. In this tutorial, we will be implementing a drag and drop functionality in a react application.
First, we need to create our react application. To do that, Make sure you have Nodejs and npm installed then paste the code below into the terminal.
npx create-react-app media-upload
Install the react-dropzone package, which will help us implement the drag and drop functionality. To install the package, run the code below.
npm install react-dropzone
After setting up our project and installing the react-dropzone package, the next is to import the package into our App.js. We will be importing the useDropzone hook from the package and calling it inside our component. To do that, paste the code snippet below.
import React from 'react';
import { useDropzone } from 'react-dropzone';

function App() {
const {
  getRootProps,
  getInputProps,
  isDragActive,
} = useDropzone({ onDrop });

return (
       ...
);
}
export default App;
Code language: JavaScript (javascript)
useDropZone hook gives us access to the properties for handling dropping a file. It also takes a config object, and one of the properties in the config object is the onDrop function called after the file is dropped in the dropzone.
useDropZone returns getRootProps, getInputProps, isDragActive which we can call to get the Drag and Drop API properties and pass those to our elements.
This is what the dropzone input and root should look like:
<div {...getRootProps()}>
  <input {...getInputProps()} />
    <!-- Any content you want to show on the drop zone -->
</div>
Code language: HTML, XML (xml)
The getRootProps sets drag and drop API properties on the chosen root. Here is what the properties look like:
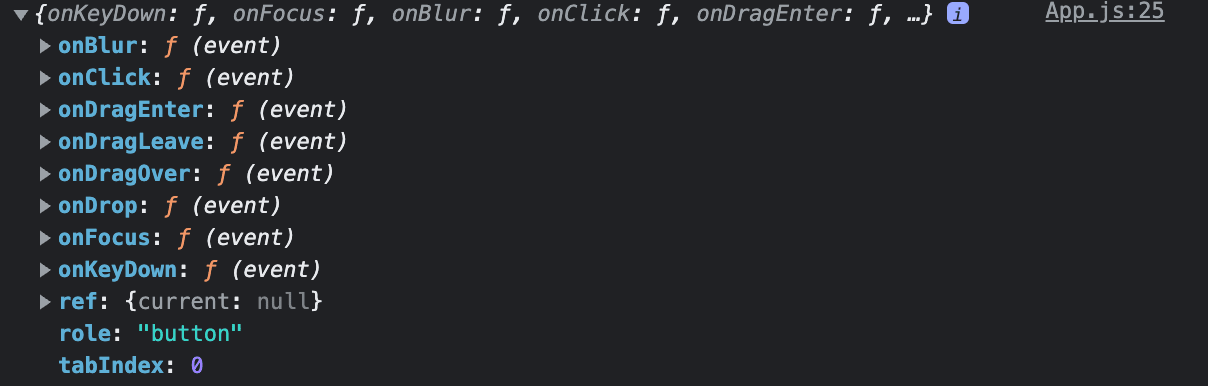
These events allow your browser to listen to users’ drag and drop interactions.
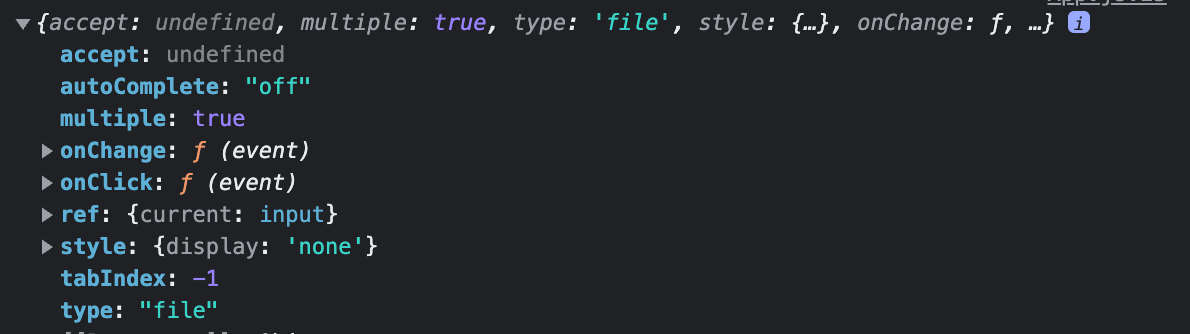
The getInputProps is like getRootProps but attaches events and properties to an input. It will do things like setting the input type to file and also attaching the onChange event handler. Here are the properties:
The isDragActive is a boolean value that is true if we are dragging a file over the Dropzone but false if not. To add the isDragActive function paste the code below in after the input tag.
{isDragActive ? (
  <p className="text-center text-xl">Drop your media files here</p>
) : (
  <p className="text-center text-xl">
    Drag and drop some files here, or click to select files
  </p>
)}
Code language: HTML, XML (xml)
Now that we have added the useDropZone properties to our JSX. we will define our callback function. Remember we mentioned that onDrop is the callback function called when a file is dropped on the drop zone. Paste the code below to define the function.
const onDrop = React.useCallback((acceptedFiles) => {
  console.log(acceptedFiles);
}, []);

const {
  getRootProps,
  getInputProps,
  isDragActive,
} = useDropzone({ onDrop });
Code language: JavaScript (javascript)
The onDrop function passed to the hook receives an argument containing the information about the updated file. Here, we can upload the file to a cloud, preview the file, and more. Wrapped the function with useCallback to ensure that it does not trigger unnecessary re-renders.
Suppose we want to set props on elements with either the getRootProps or getInputProps. In that case, we need to put them as an argument to those functions to avoid overriding things unexpectedly.
So instead of this:
<div {...getRootProps()} role="button">
  <input {...getInputProps()} />
    <!-- Any content you want to show on the drop zone -->
</div>
Code language: HTML, XML (xml)
Do this:
<div {...getRootProps({
  role: 'button'
})}>
  <input {...getInputProps()} />
    <!-- Any content you want to show on the drop zone -->
</div>
Code language: HTML, XML (xml)The useDropzone has some predefined props for validations. It has the accept props, maxFiles props, and many others. It can also accept a defined validation function as props if we choose not to use the predefined functions. The accept props disallows files not included in the accept list. Hence we can only select files that are listed. In the snippet below, we can only upload png and jpeg files.
useDropzone({
  accept: 'image/jpeg,image/png'
});
Code language: CSS (css)
maxFiles defines the maximum number of files that can be uploaded. If the validation fails, we will get an empty array in the onDrop callback.
useDropzone({
  maxFiles: 2
});
Code language: CSS (css)
To show the actual error, we can inspect the fileRejections from useDropzone.
const {
  fileRejections, // Error files
  getRootProps,
  getInputProps,
  isDragActive,
} = useDropzone({
  onDrop,
  accept: 'image/jpeg,image/png',
  maxFiles: 2,
});
Code language: JavaScript (javascript)
To display the error message using the fileRejections ,You can iterate through the rejected files and render the errors.
Paste the code below to display the errors:
{fileRejections.map(({ file, errors }) => {
  return (
    <li key={file.path}>
      {file.path} - {file.size} bytes
      <ul>
        {errors.map((e) => (
          <li key={e.code}>{e.message}</li>
        ))}
      </ul>
    </li>
  );
})}
Code language: JavaScript (javascript)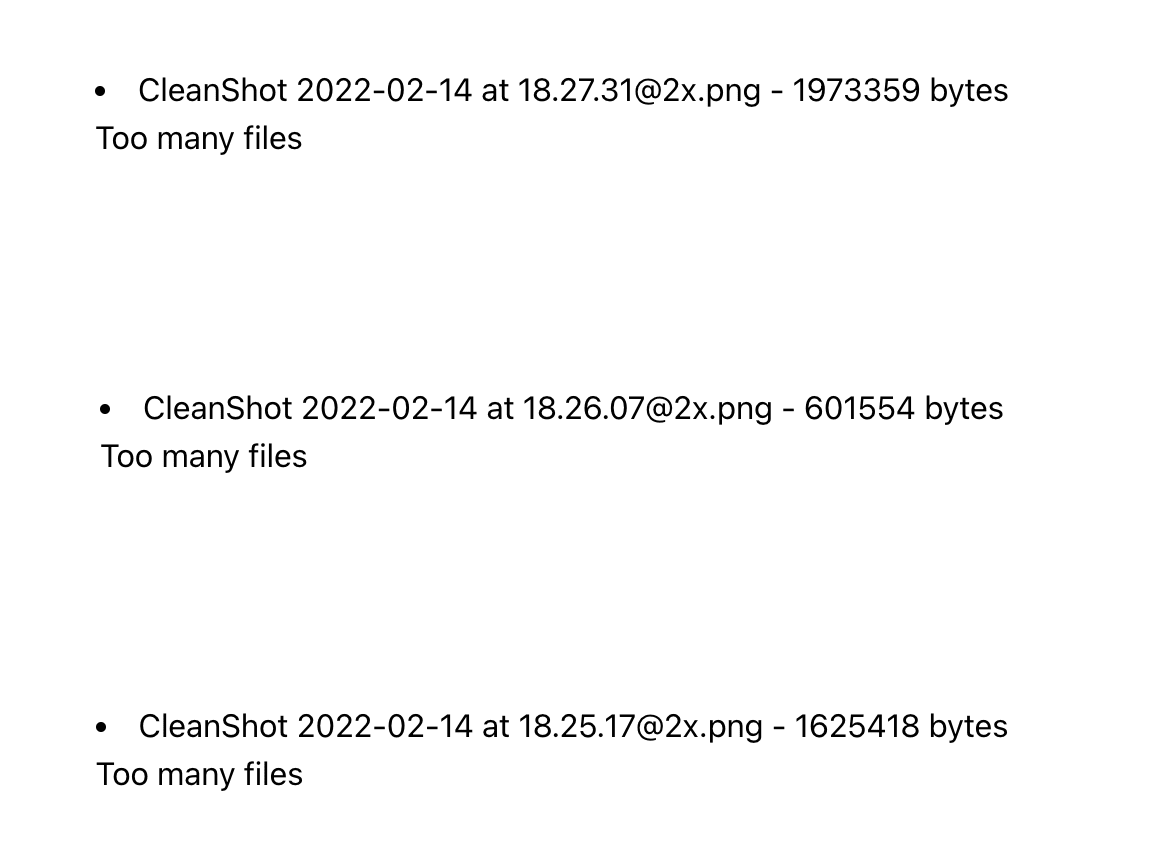
We can also do all sorts of flexible and custom validations and not just limited to what is allowed as an argument to the useDropzone hook. Here is an example showing how to validate for max size for each file:
// Validate that the file size is less than 2mb

function fileSizeValidator(file) {
  if (file.size > 1024 ** 2 * 2) {
    return {
      code: 'size-too-large',
      message: `File is larger than 2mb`,
    };
  }
  return null;
}

const onDrop = React.useCallback((acceptedFiles) => {
  console.log(acceptedFiles);
}, []);

const {
  fileRejections,
  getRootProps,
  getInputProps,
  isDragActive,
} = useDropzone({
  onDrop,
  // Pass validator to useDropzone
  validator: fileSizeValidator,
});
Code language: JavaScript (javascript)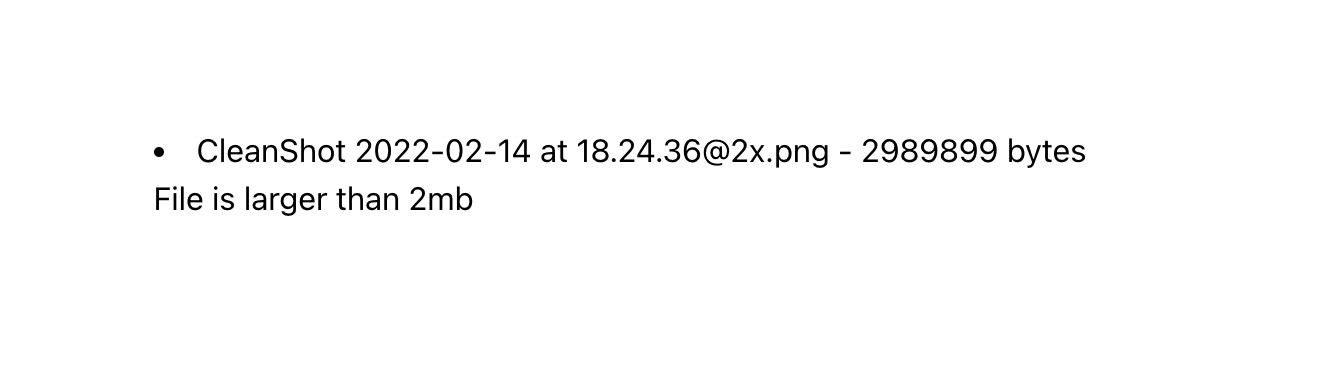
In the code snippet above, we wrote a custom validation function, fileSizeValidator, that validates the maximum size of each file upload. We then added it as the validator value in the useDropzone hook.
To preview images, use URL.createObjectURL and pass the file object as an argument to it. Before we do that, create a state to store the file object:
const [files, setFiles] = React.useState([]);
Code language: JavaScript (javascript)
In the onDrop function, use the createObjectURL to generate a preview and attach the preview to the file object:
const onDrop = React.useCallback((acceptedFiles) => {
  console.log(acceptedFiles);
  setFiles(
    acceptedFiles.map((file) =>
      Object.assign(file, {
        preview: URL.createObjectURL(file),
      })
    )
  );
}, []);
Code language: JavaScript (javascript)
Finally loop through the files and display a preview using an image tag if they are images:
{files.map(f => {
  return (<img src={f.preview} />)
})}
Code language: JavaScript (javascript)You can upload the files directly from the browser using Cloudinary Unsigned Upload. Add a button to upload whatever you have in the state:
// If files are in the state, upload the first item in the array of files

{files.length > 0 && (
  <button
    onClick={() => {
    const url =
      'https://api.cloudinary.com/v1_1/codebeast/image/upload';
    const formData = new FormData();
      // Use the first item to upload
      let file = files[0];
      formData.append('file', file);
      formData.append('upload_preset', 's9n5tgkf');
      fetch(url, {
        method: 'POST',
        body: formData,
      })
        .then((response) => {
          return response.json();
        })
        .then((data) => {
          console.log(data);
        });
    }}
  >
    Upload
</button>
)}
Code language: PHP (php)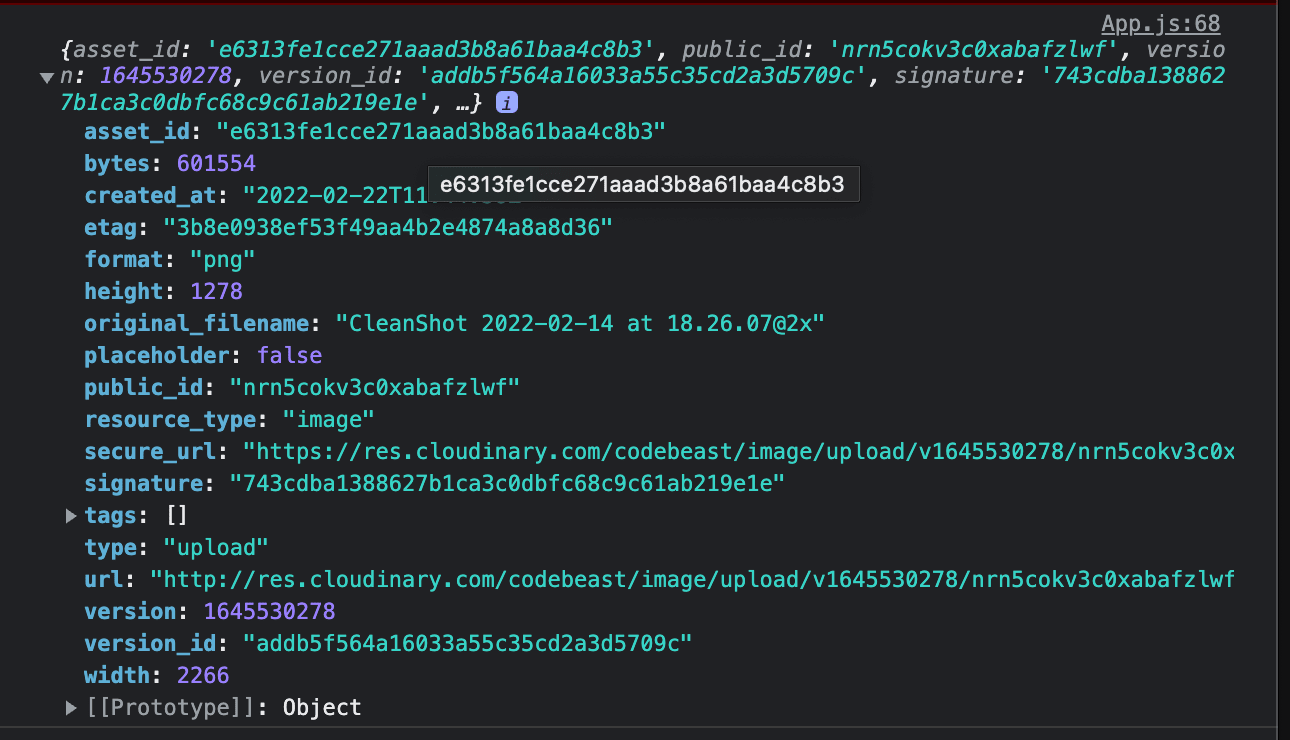
Implementing such a fantastic user experience feature in our React application should now be a thing of the past. This tutorial covered almost all critical areas from validations, upload, and error handling. I hope this tutorial is helpful. Don’t forget to check the official documentation of React Dropzone to explore further and add more features to your app. The complete source code for this tutorial is available on Codesandbox.