
The number of times our video has shown up in search results, social media, or a website determines the number of video impressions.
On the other hand, views indicate how many times our video has been viewed.
This article will show us how to track video impressions in Nuxtjs and save the count in Supabase.
The completed project is on Codesandbox. Fork it to get started quickly.
GitHub Repository
https://github.com/Olanetsoft/video-impression-in-nuxtjs-and-supabase
- Knowledge of JavaScript and Vue.js.
- The knowledge of Nuxt.js is not required but preferred.
Nuxt.js provides the bedrock of our Vue.js project, providing structure and flexibility while allowing us to confidently scale the application.
Nuxt.js is extensible, with a robust module ecosystem and hooks engine. This makes it simple to integrate our REST or GraphQL endpoints, favorite CMS, CSS frameworks, and other third-party applications.
Supabase is an open-source alternative to firebase, providing tools to scaffold a back-end server quickly. Supabase offers a PostgreSQL database which we’ll use in this project.
To create a new project, we use the command below to scaffold a new project:
    npx create-nuxt-app <project-name>
Code language: HTML, XML (xml)
A series of prompts will appear, and we recommend the following defaults:
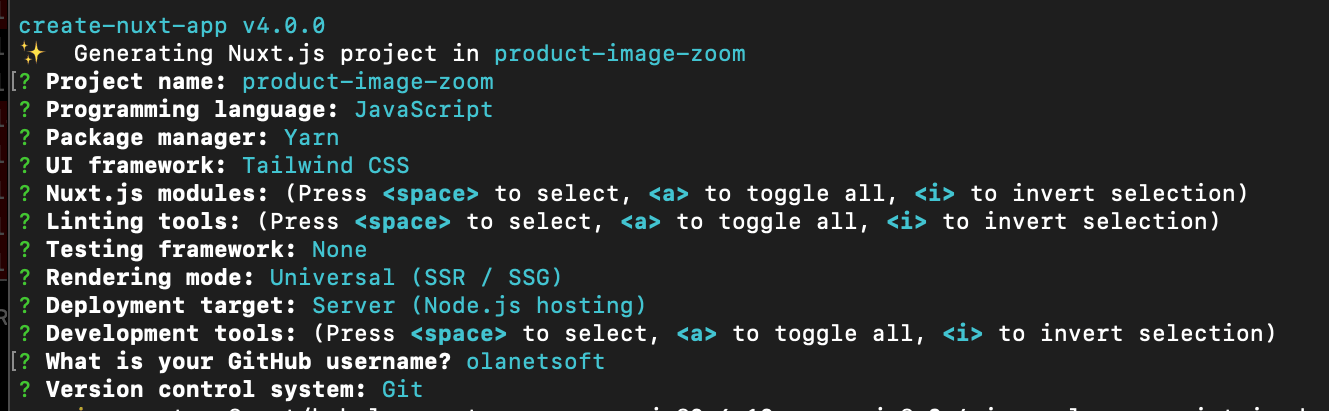
Next, we need to navigate the project directory and start the development server using the command below.
    cd <project name> && yarn dev
Code language: HTML, XML (xml)
Nuxt.js will start a hot-reloading development environment accessible by default at http://localhost:3000
Next, we install the @supabase/supabase-js Javascript SDK with
    yarn add @supabase/supabase-js
Code language: CSS (css)Let’s start by creating a Supabase account here. We’ll need a GitHub account to continue. We can quickly create and set up a GitHub account.
After logging into our Supabase account, we will be redirected to the dashboard, as shown below.
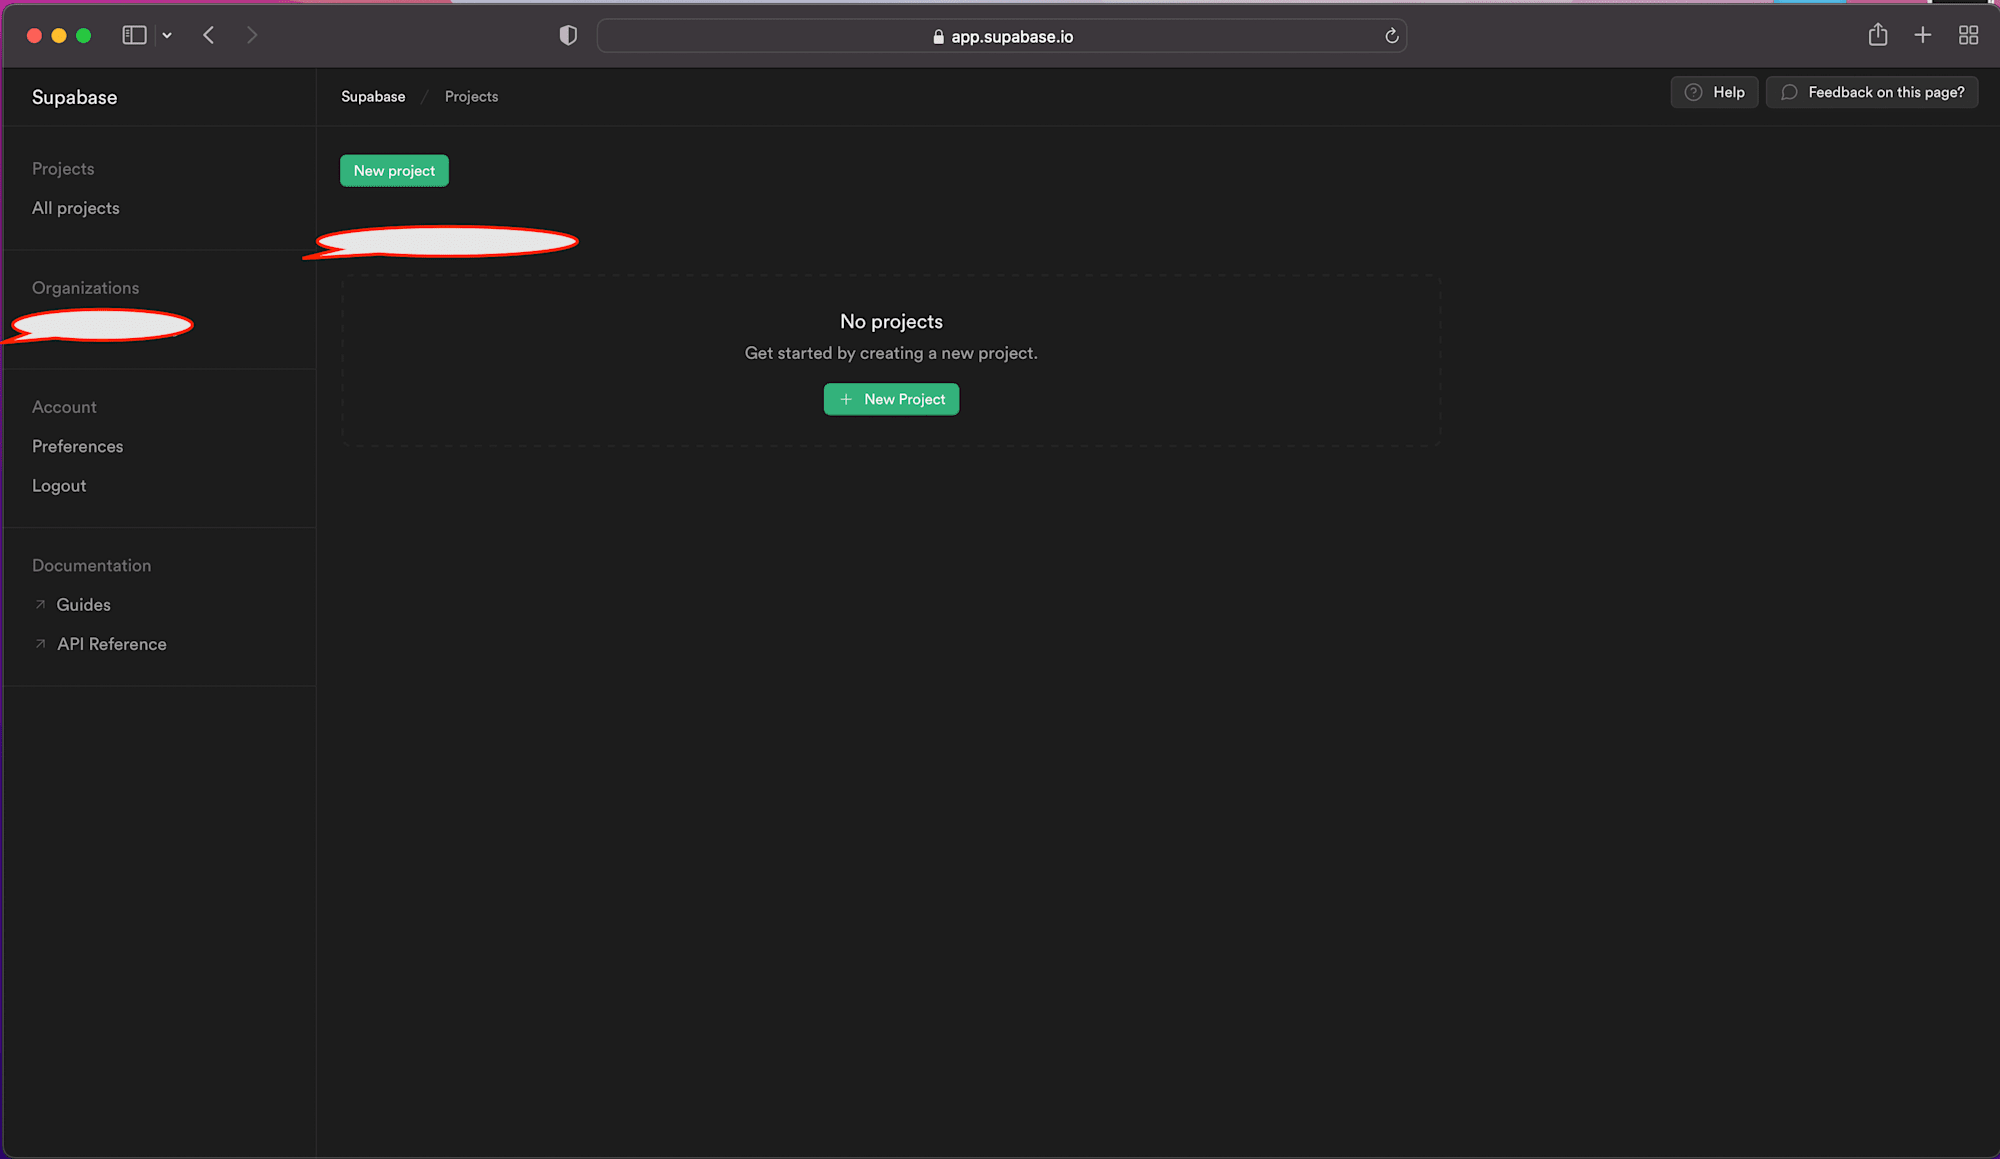
Next, we can now click on the New Project Button to create a new project for our demo application.
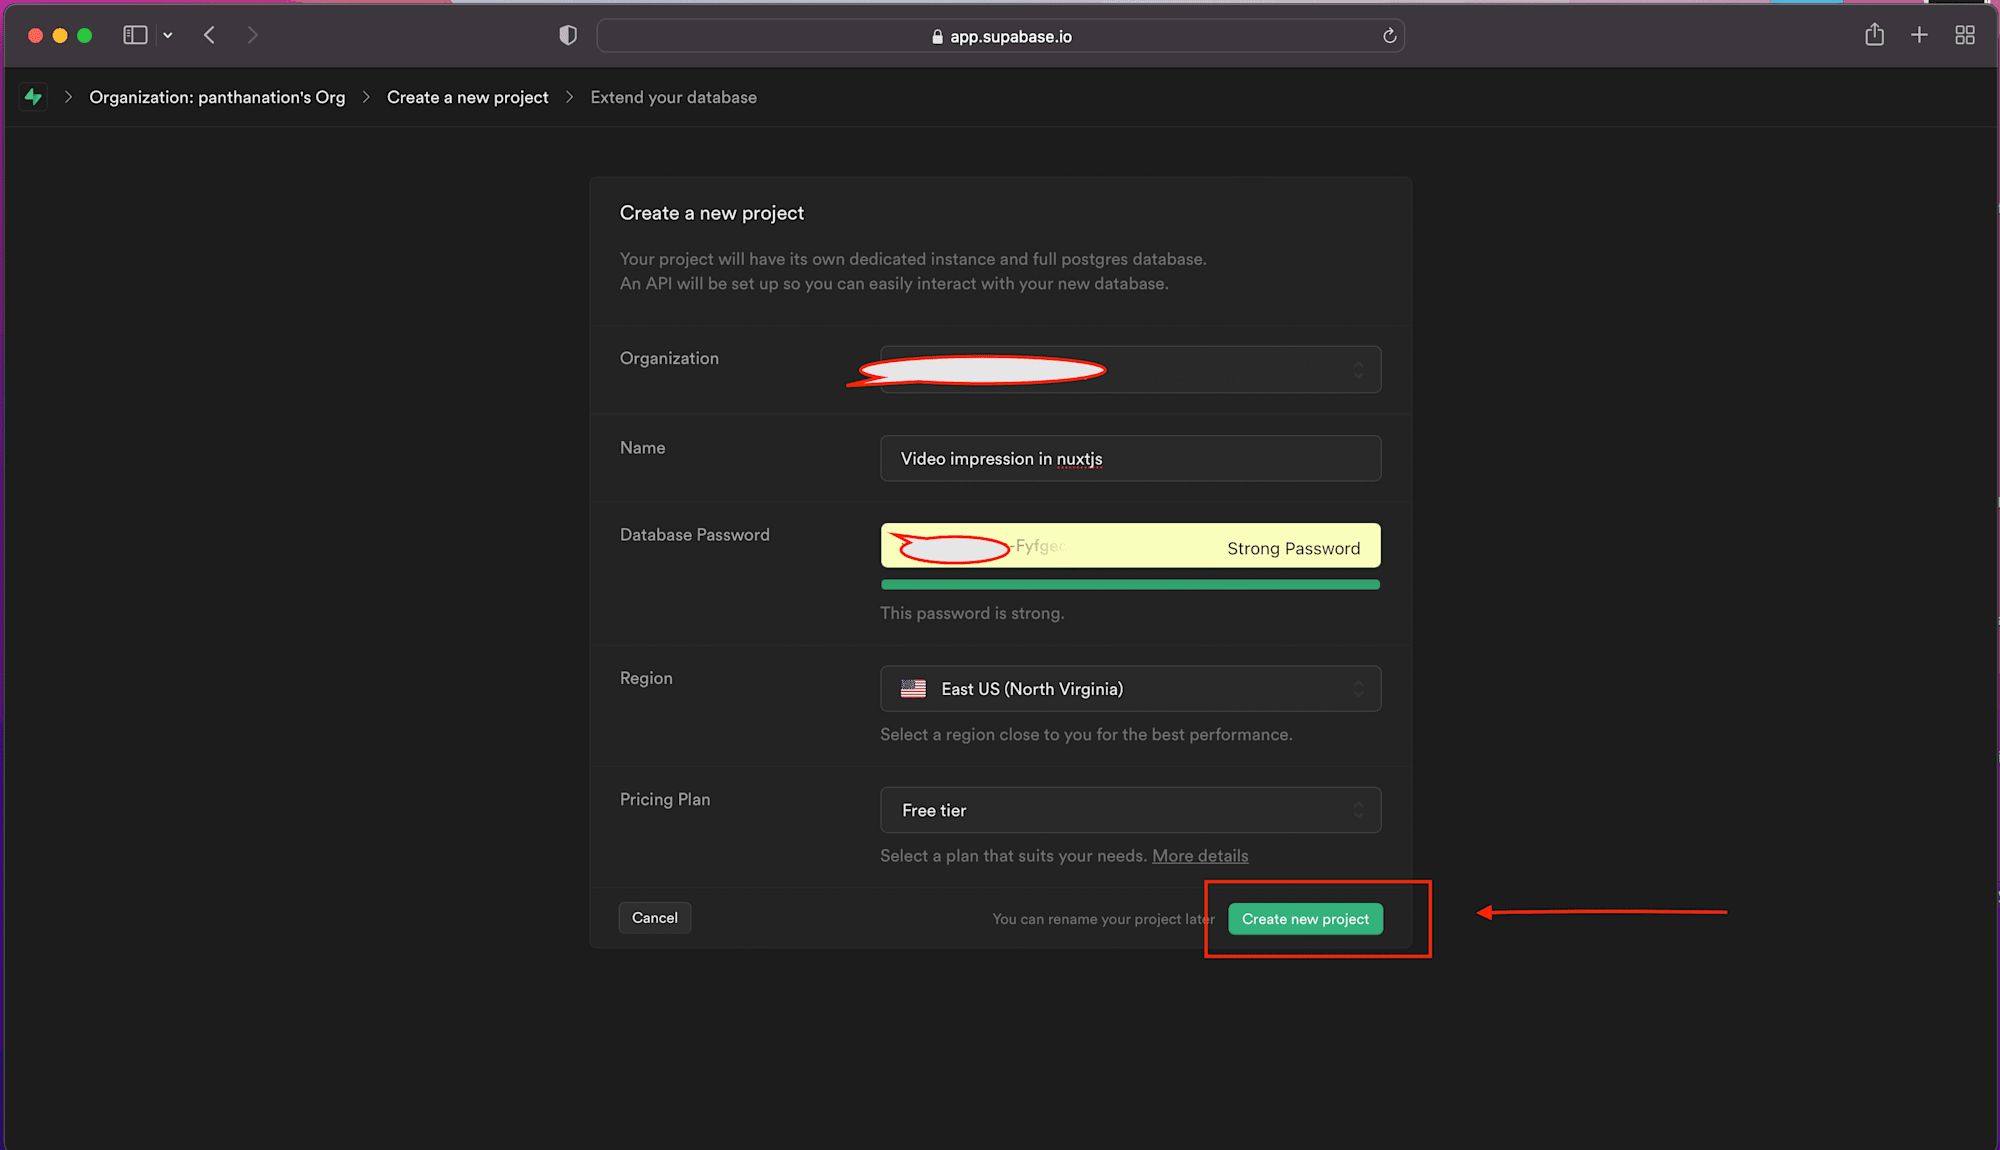
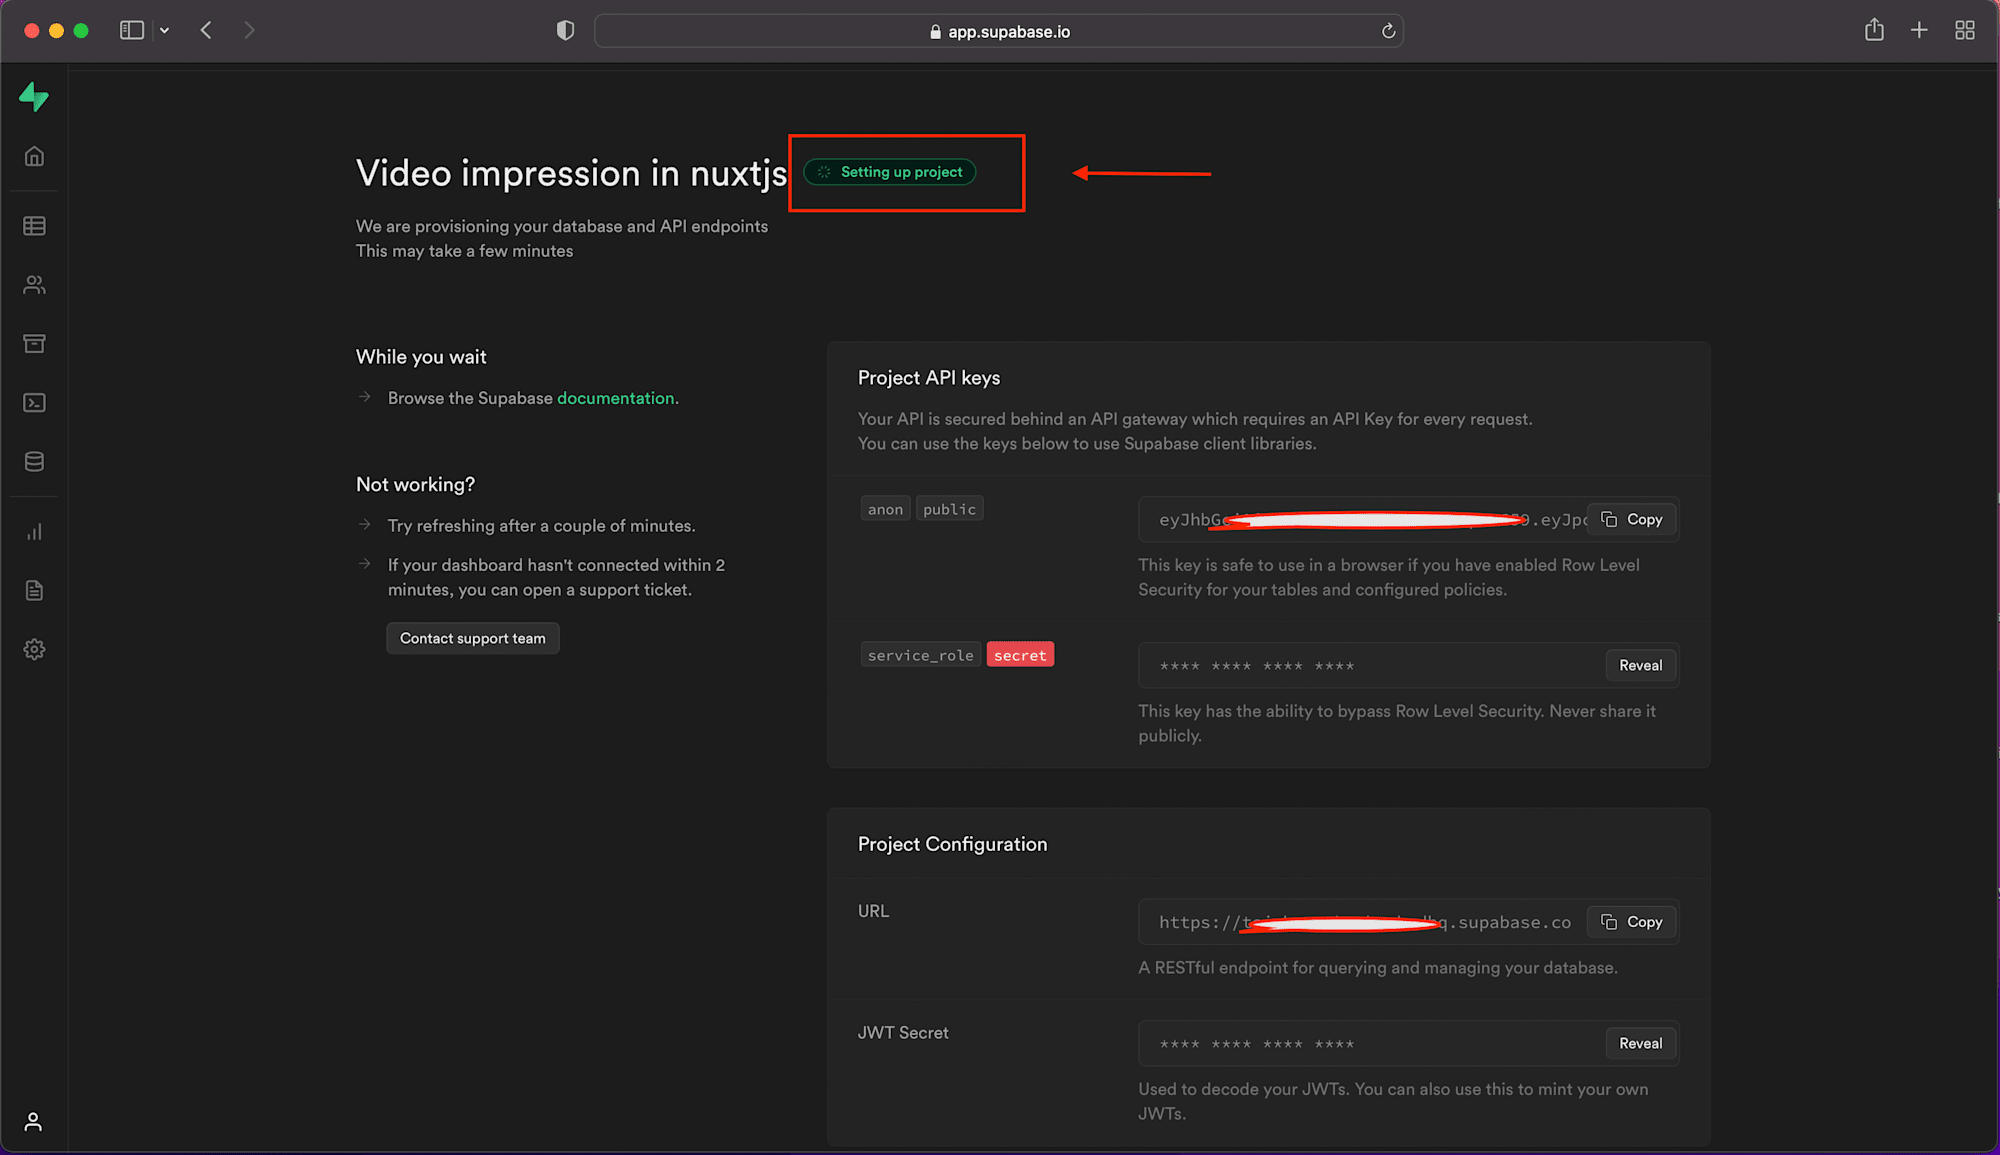
Then we’ll get the screen below, which indicates that the project is currently in build.
Using the database icon in the sidebar, we’ll build our database. In addition, we must click the + New button in the top right corner of the screen to create each column we require, as illustrated below.
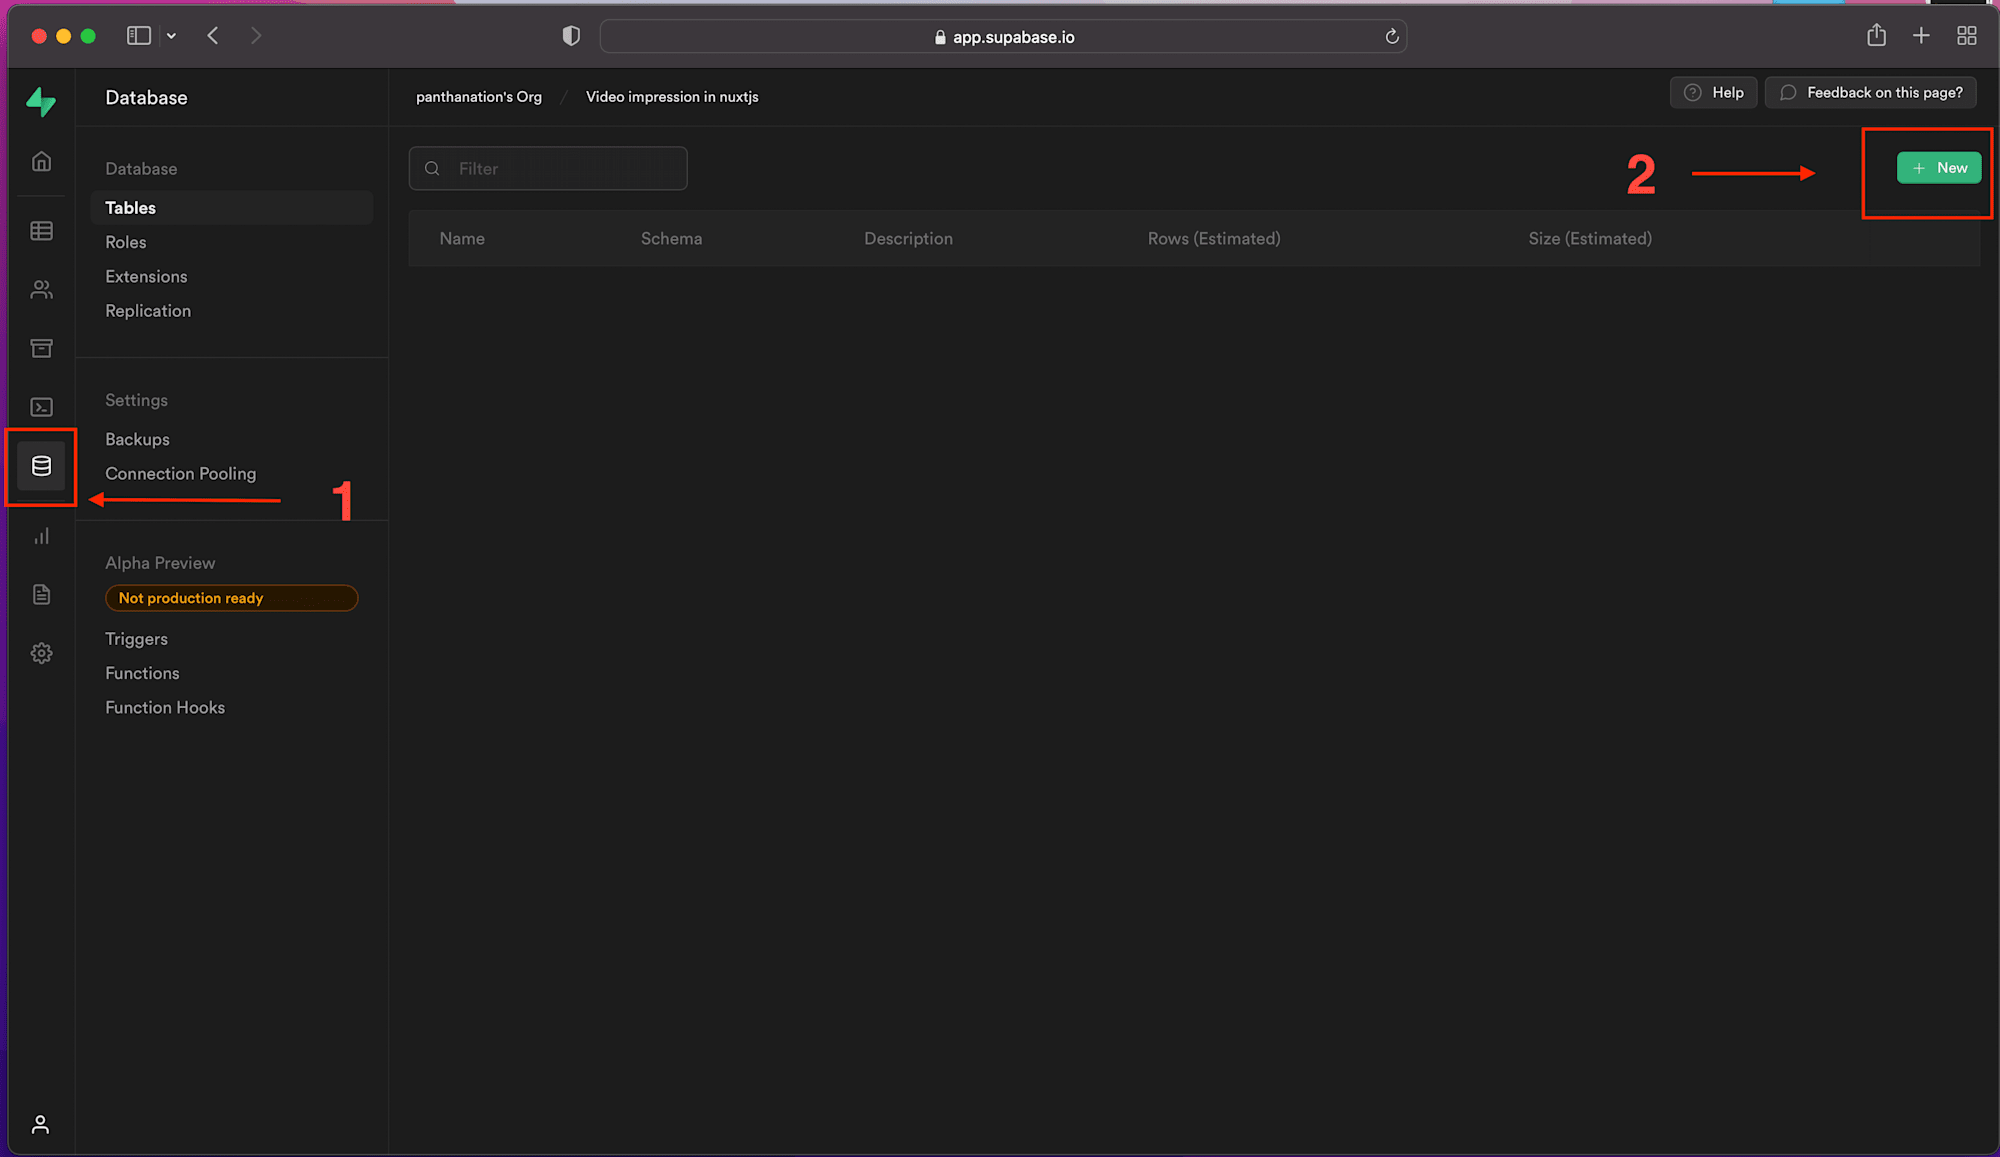
We will create a table called Video Impression and one column ImpressionCount for this project.
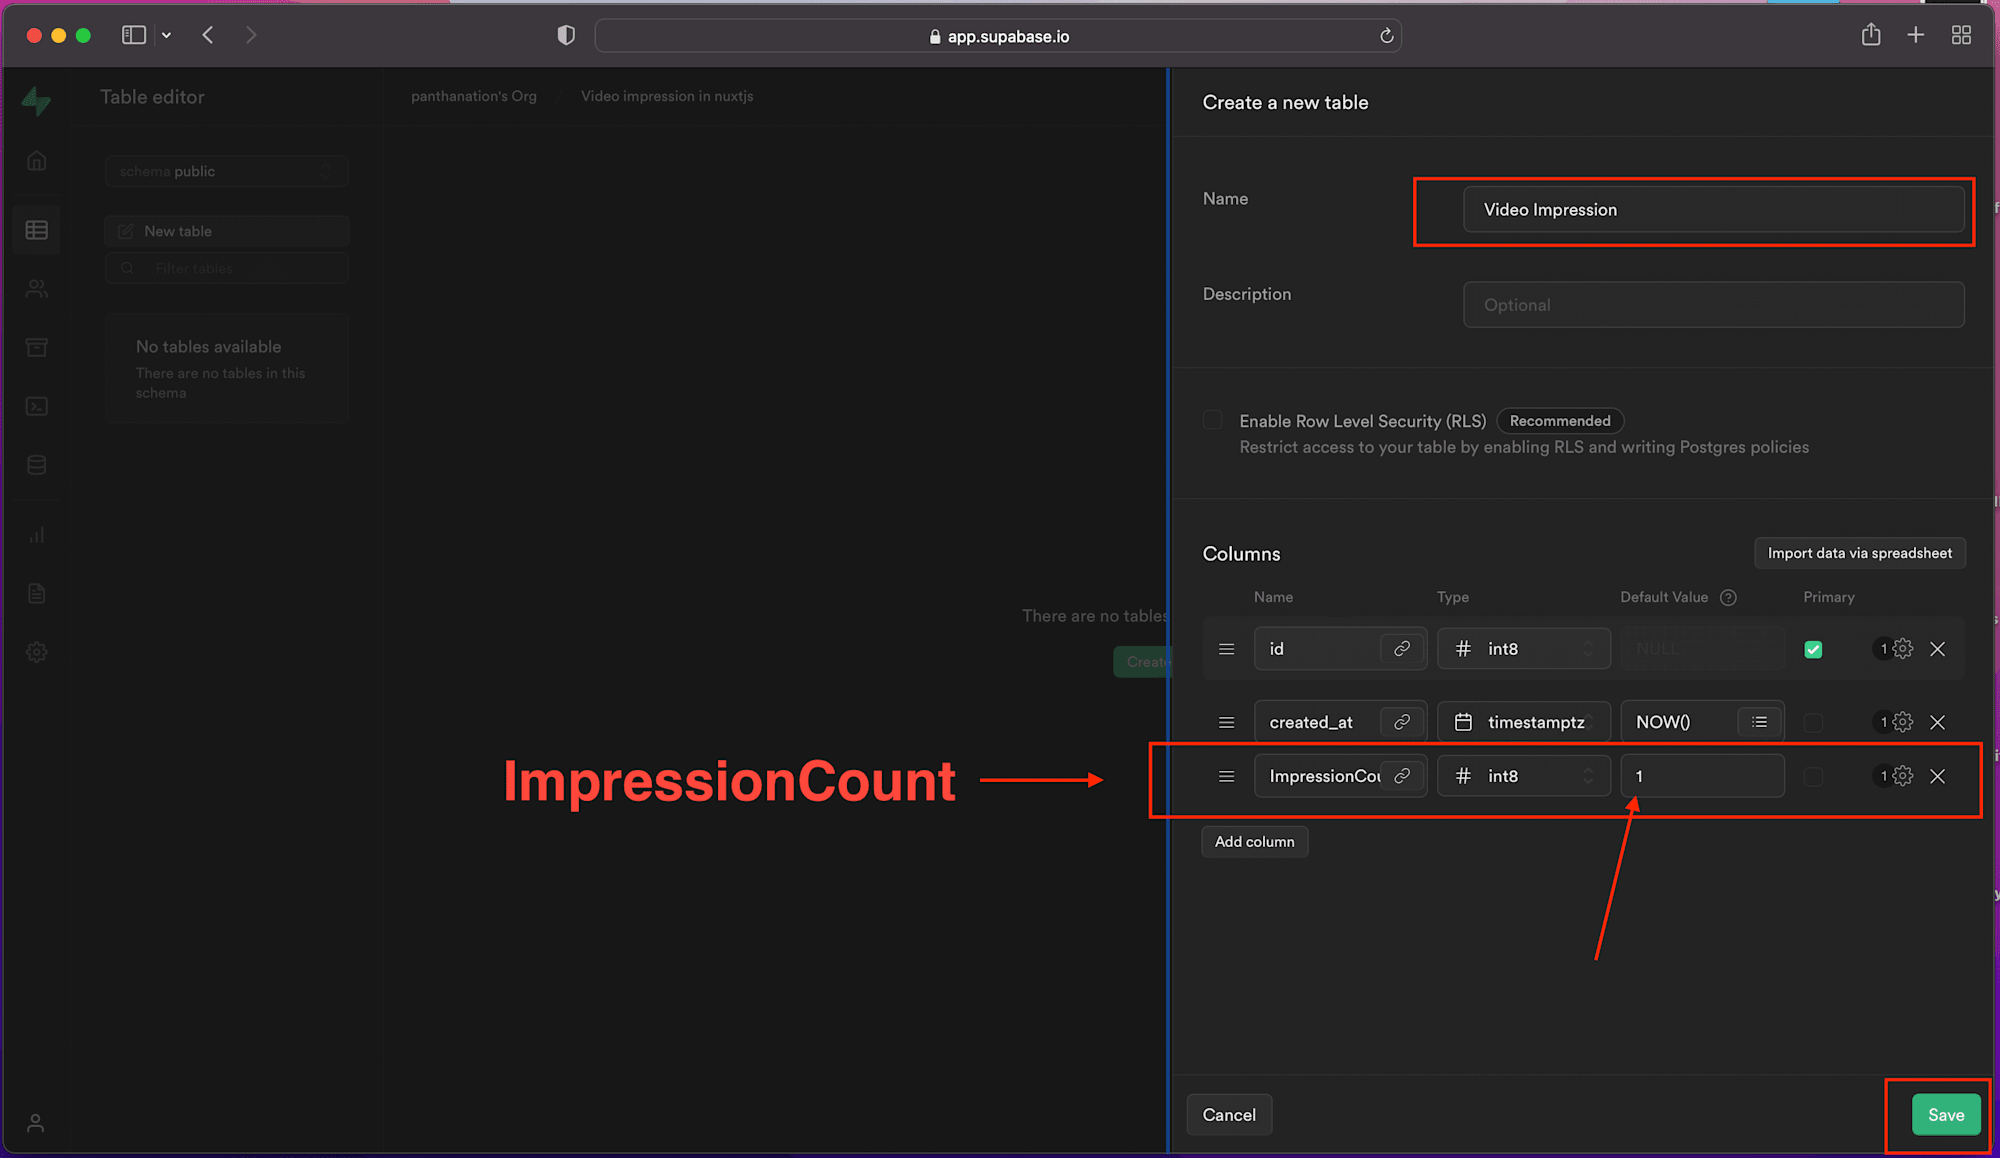
We’ve created our database table and the required fields. In the next section, we’ll set up our video player.
We need to be able to detect and respond when the status of a video player changes. Thus we will be relying on the Cloudinary Video Player for customization and integration.
Cloudinary video player is a JavaScript-based HTML5 video player with a slew of helpful customization and integration features, monetization, and analytics support.
The video player’s assets will be added to our nuxt.config.js in the link and script section of the file using the following snippet:
    // nuxt.config.js

    export  default  {
      head:  {
          ...
      link: [
          ...
      {
        rel:  'stylesheet',
        href:  'https://unpkg.com/cloudinary-video-player@1.5.9/dist/cld-video-player.min.css'
      }
            ],
      script:  [
      {
      src:  'https://unpkg.com/cloudinary-core@latest/cloudinary-core-shrinkwrap.min.js'
      },
      {
      src:  'https://unpkg.com/cloudinary-video-player@1.5.9/dist/cld-video-player.min.js'
      },
              ],
      },
    };
Code language: JavaScript (javascript)
We need to save our Cloudinary cloud name so that we may refer to it from any file. In the next step, It will be saved as an environmental variable in the global .env file at the project’s root.
We can get our cloud name from our Cloudinary dashboard by signing up for a Cloudinary Account.
Create a .env file at the root of the project with the command touch .env and update it with the following snippet:
    NUXT_ENV_CLOUDINARY_CLOUD_NAME=<cloudinary-cloud-name>
Code language: HTML, XML (xml)We’ll proceed to make a custom plugin for Supabase in our project.
We’ll create a plugins folder and a file titled supabase.client.js in the root directory.
To utilize the plugin, we paste the code below.
    /* plugins/supabase.client.js */
    import { createClient } from "@supabase/supabase-js";

    const supabase = createClient("https://oururl.supabase.co", "our-api-key");
    export default (_, inject) => {
      inject("supabase", supabase);
    };
Code language: JavaScript (javascript)
Now we can update the plugins array in nuxt.config.js with the new plugin:
    export default {
      //...
      plugins: ["~plugins/supabase.client.js"],
    }
Code language: JavaScript (javascript)Proceeding to build the project interface, we’ll create a new Video.vue file in the component folder and update it with the code snippet below.
    <template>
      <div class="flex justify-center items-center h-screen space-x-10">
        <h1 class="font-bold text-4xl mb-3">
          Track Video Impressions in Nuxtjs with Supabase
        </h1>
      </div>
    </template>

    <script>
    export default {
      name: "VideoPage",
    };
    </script>
Code language: HTML, XML (xml)
Next, we will import the Video component inside our pages/index.vue file with the code snippet below.
    <template>
      <Video/>
    </template>

    <script>
    export default {
      name: 'IndexPage'
    }
    </script>
Code language: HTML, XML (xml)
We should have a page similar to the image below in our browser.
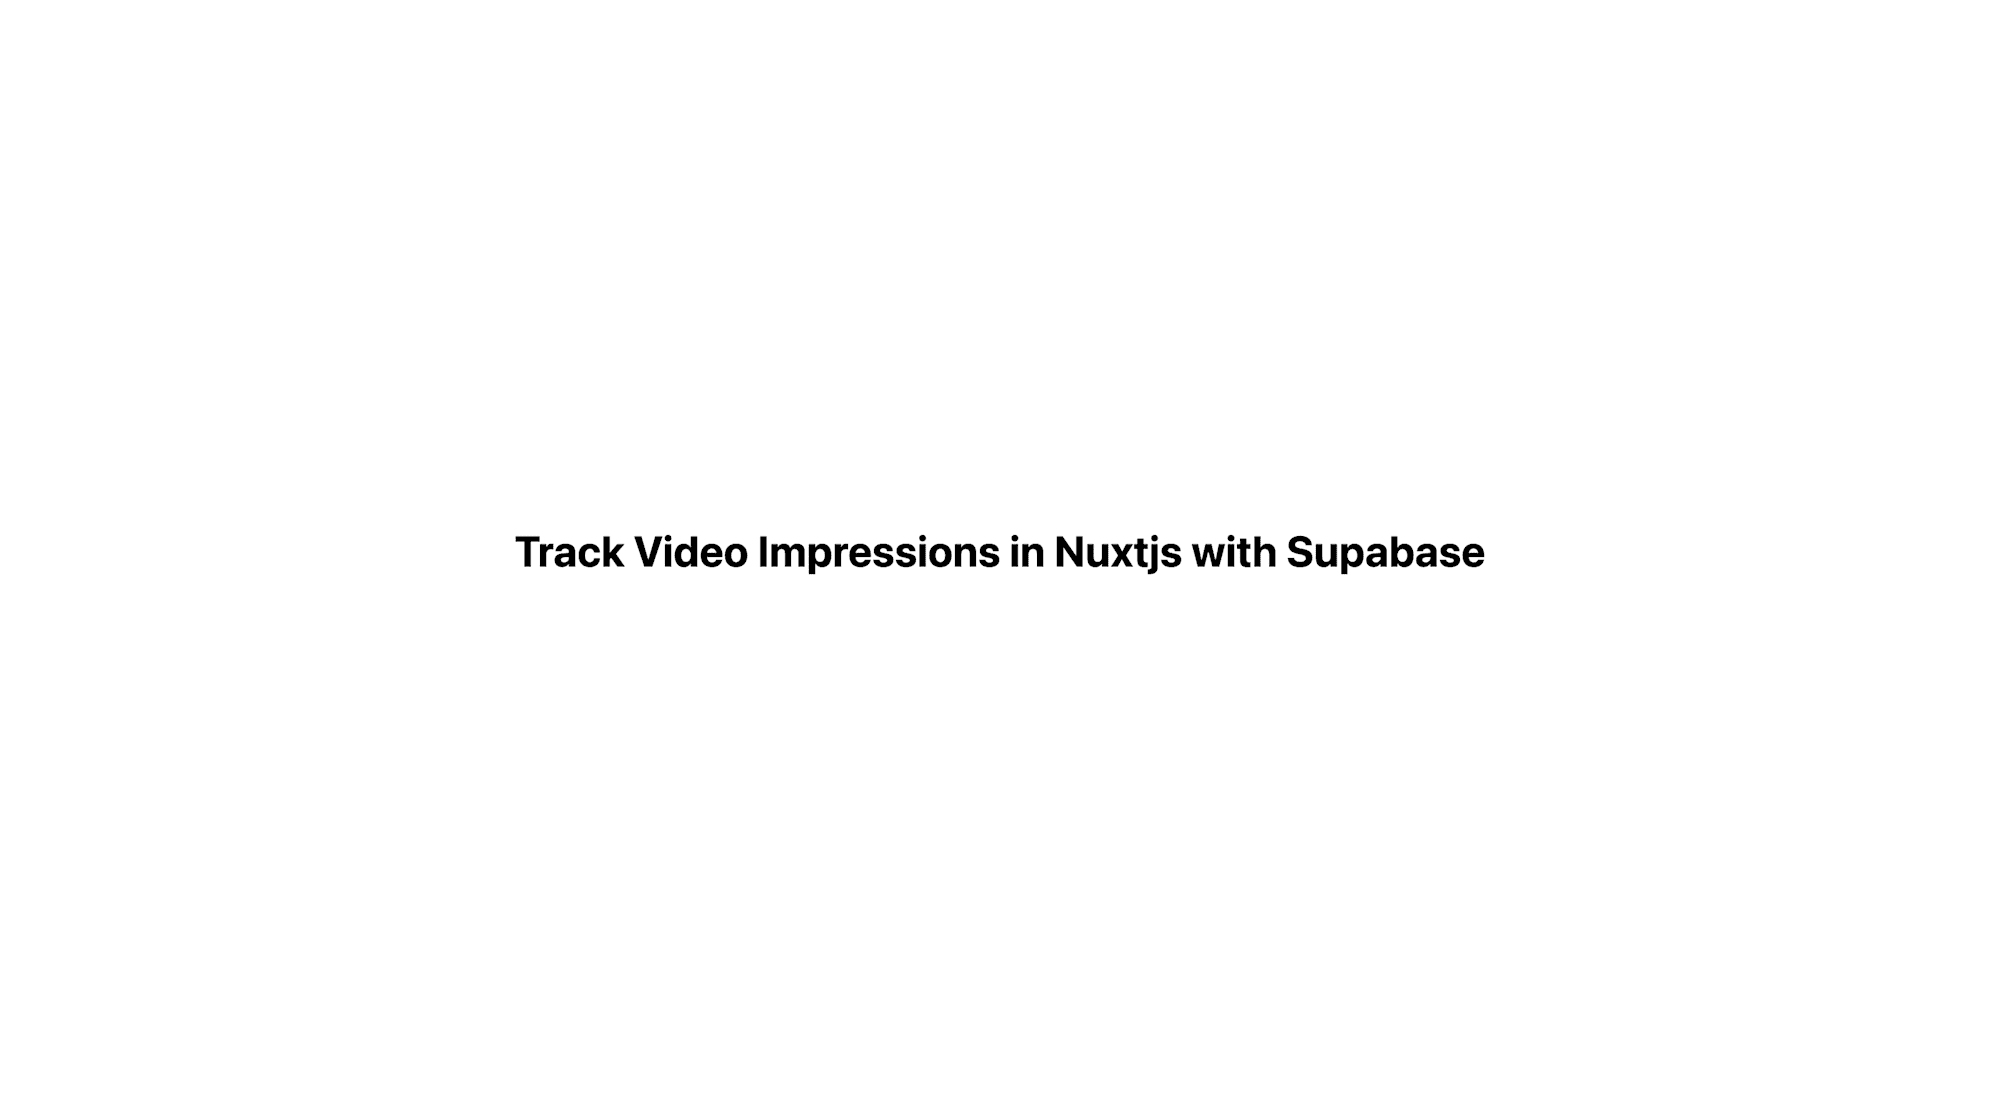
We can now create our video player by updating components/Video.vue with the following code snippet:
<template>
<div class="flex justify-center items-center h-screen space-x-10">
<h1 class="font-bold text-4xl mb-3">
Track Video Impressions in Nuxtjs with Supabase
</h1>
<div>
<div class="rounded overflow-hidden shadow-lg mb-4 content-center">
<div class="px-6 py-4 pb-2">
<video
id="video-player"
controls
width="500px"
class="width-full"
></video>
</div>
</div>
</div>
</div>
</template>
<script>
export default {
data() {
return {
cld: null,
player: null,
video: "samples/sea-turtle",
};
},
mounted() {
this.cld = cloudinary.Cloudinary.new({
cloud_name: process.env.NUXT_ENV_CLOUDINARY_CLOUD_NAME,
secure: true,
});
this.player = this.cld.videoPlayer("video-player", {
analytics: {
events: ["play"],
},
});
this.player.source(this.video);
},
name: "VideoPage",
};
</script>
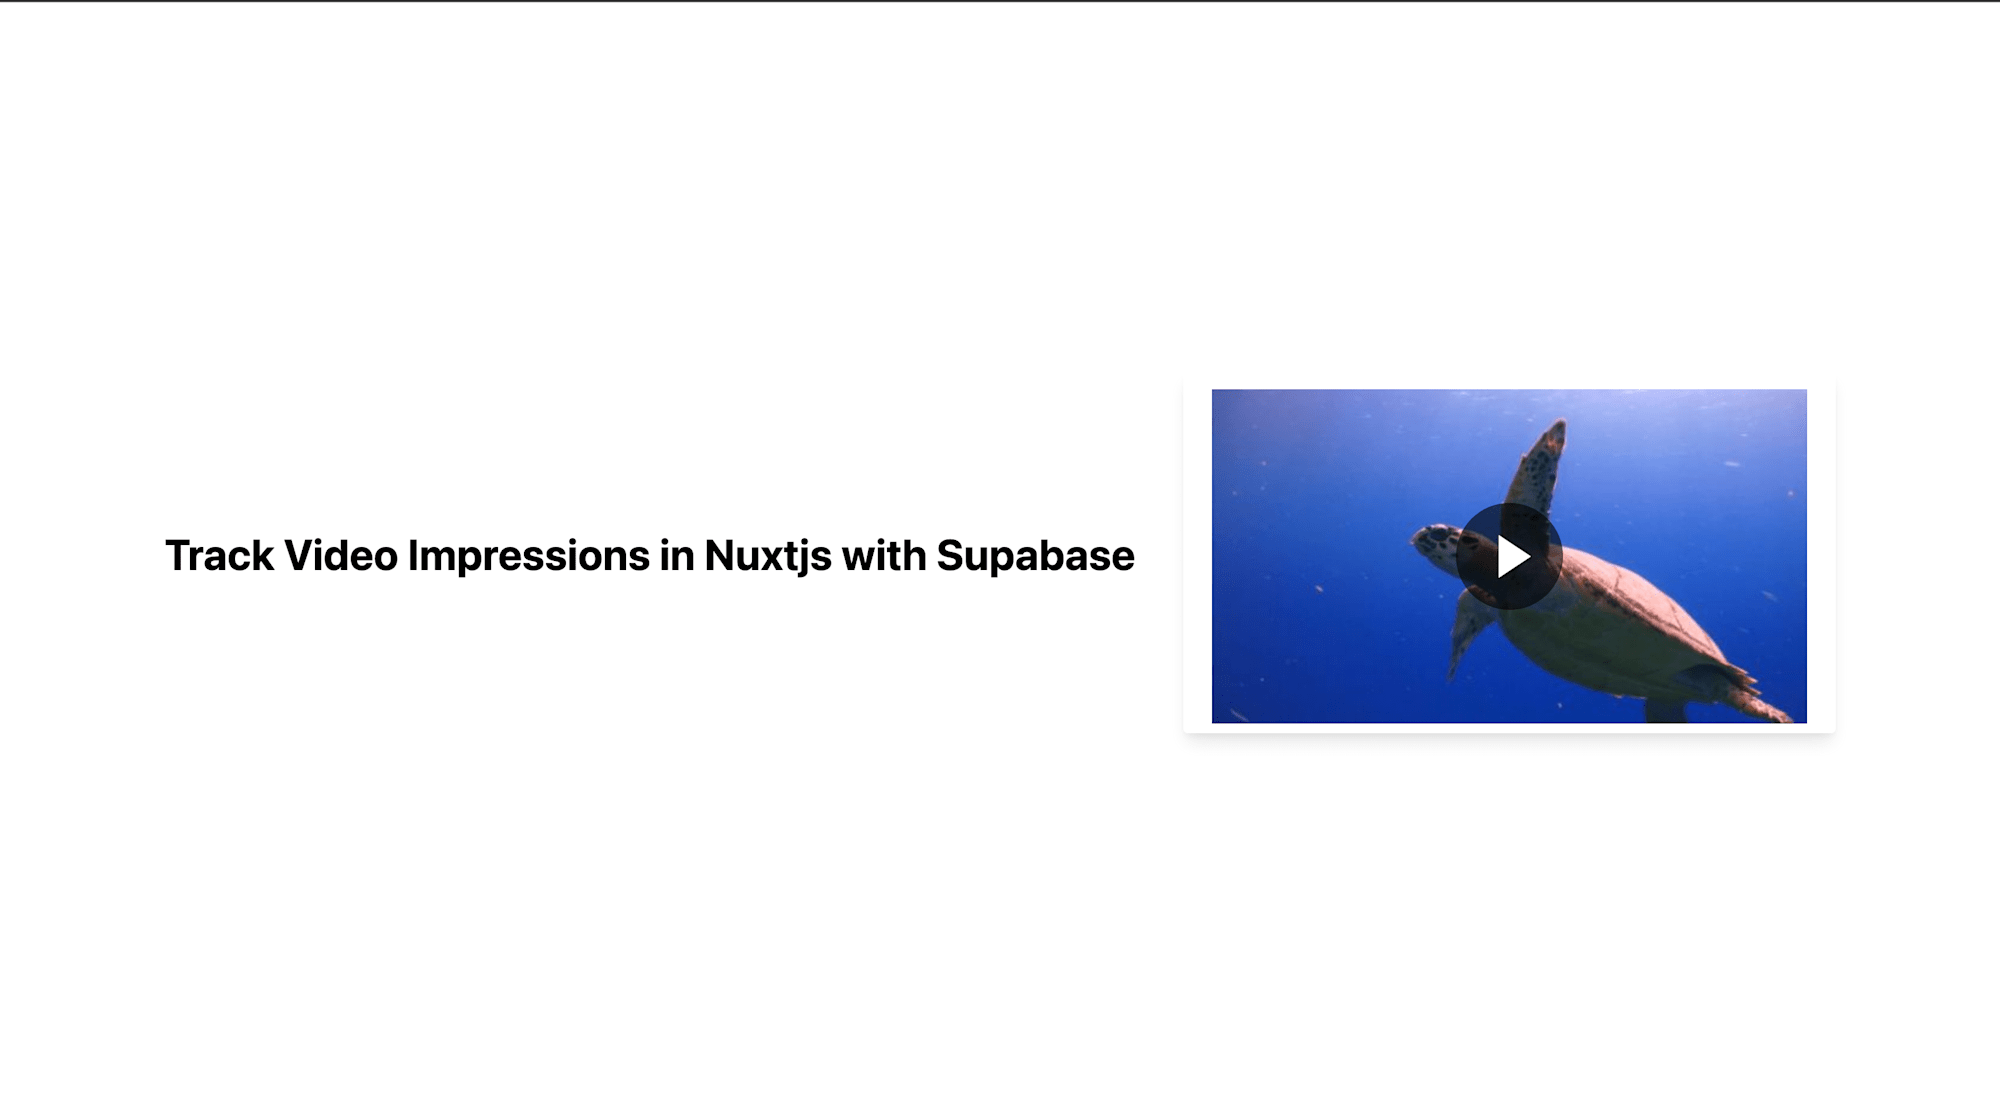
Code language: HTML, XML (xml)In the code snippet above, we established a Cloudinary instance, used it to initialize the video player, and set up the video source in our mounted lifecycle hook.
We should have something similar to the image below:
Next, we will track and save video impressions in the database we created earlier using the code snippet below.
https://gist.github.com/Olanetsoft/65237f7cb0dcf8de6bf9a7326fc7908f
https://gist.github.com/Olanetsoft/65237f7cb0dcf8de6bf9a7326fc7908f
In the snippet above we:
- Declared two functions,
saveImpressionandfetchCount, which save the video impression into our database and retrieve all our saved count, respectively. - Assigned the
fetchCountfunction to a count state variable - Called the
saveImpressionfunction that keeps track and saves the impression count whenever our video is played - Validate that if the
fetchCountis loading, we return aloadingtext or return the count retrieved from our database.
After testing our application, we should get something similar to what we have below.
https://www.loom.com/share/9414eebf45f54c22b9f3264b82175388
This article discussed how to track video impressions in Nuxtjs with Supabase. You can track and store various data points in Supabase using this pattern.
We may find these resources helpful.