
Video moderation helps you share highly engaging and effective video content while protecting your brand, customers and profits. We will create a simple automated video moderation platform that will help us filter out offensive videos.
Let’s get started.
The final project can be viewed on PHPSandbox and the entire source code is available on my Github repository.
Using Cloudinary in your Laravel projects is pretty straightforward. However, for you to be able to easily follow along, you need to have a good command of your terminal, Git and entry knowledge of PHP specifically with the Laravel framework.
Being that Laravel is a PHP Framework, we will need Composer. Like any modern PHP framework, Laravel uses Composer to manage its dependencies. So, before we can start ensure you have Composer installed on your machine. Follow step 1 below to install Composer and PHP.
your development or production machine.
-
Install Laravel
-
Via Composer:
composer create-project --prefer-dist laravel/laravel cloudinary-video-slideshow
- Via Laravel Installer
composer global require laravel/installer
laravel new cloudinary-video-slideshow
- In step 2 above we have installed the Laravel Installer and used it to scaffold a new application in the folder
cloudinary-video-slideshow. With Laravel installed, we should be able to start and test the server ensuring everything is okay. Change the directory to the project folder and run the local development server by typing the following commands:
cd cloudinary-video-slideshow
php artisan serve
The Laravel project is now up and running. When you open http://localhost:8000 on your computer, you should see the image below:
Cloudinary has a tonne of features from media upload, storage, administration, manipulation to optimization and delivery. In this article, we will use Cloudinary Video Transformations to combine existing or newly uploaded media files to create a slideshow.
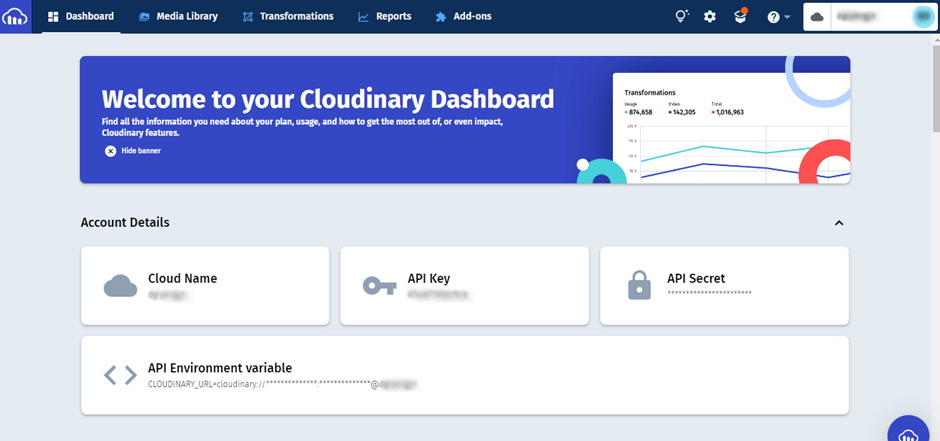
- Sign up for a free Cloudinary account then navigate to the Console page and take note of your Cloud name, API Key and API Secret.
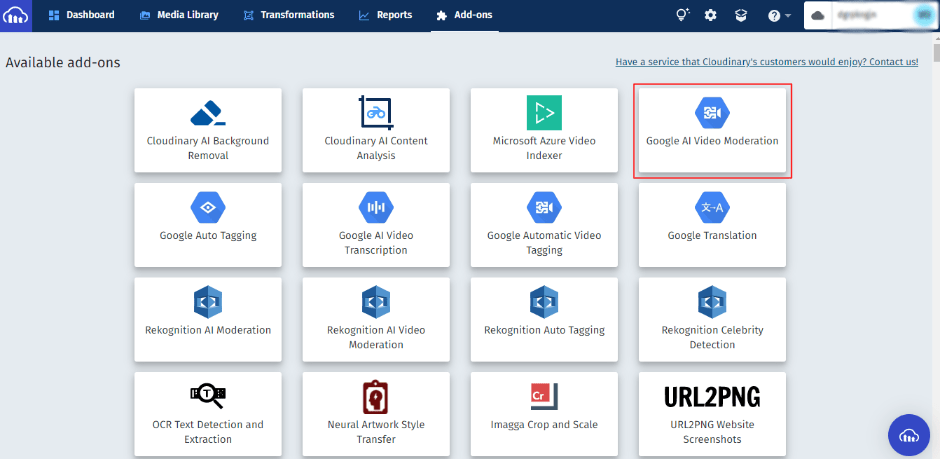
- Google AI Video Moderation Addon – while at the Cloudinary dashboard, click on the Addons menu and subscribe for the Google AI Video Moderation Addon.

- Install Cloudinary’s Laravel SDK:
composer require cloudinary-labs/cloudinary-laravel
Note: Please ensure you follow all the steps in the #Installation section. Publish the configuration file and add
the Cloudinary credentials you noted in Step 1 to the .env file.
CLOUDINARY_API_KEY=YOUR_CLOUDINARY_API_KEY

CLOUDINARY_API_SECRET=YOUR_CLOUDINARY_API_SECRET

CLOUDINARY_CLOUD_NAME=YOUR_CLOUDINARY_CLOUD_NAME
Cloudinary employs two addons for video moderation:
-
Rekognition AI Video Moderaion by AWS
-
Google AI Video Moderation
Google assigns a moderation confidence level indicating the chances that a video contains unacceptable content. The likelihood is given as a value on the following scale: very_unlikely, unlikely, possible, likely, and very_likely.
To send a request for Google AI Video Moderation with the default rejection confidence level we need to set the moderation parameter to google_video_moderation and set the resource_type to video:
$cloudinary->uploadApi()->upload("my_file.mp4", [ "resource_type" => "video", "moderation" => "google_video_moderation"]);
Let’s see this in code.
To uplaod a video for moderation we will need a UI (User Interface), we will use the Laravel package Livewire to build this.
- Install Livewire Package by running the following command in your Laravel project:
composer require livewire/livewire
- Include Livewire scripts and styles on every page that will be using Livewire. In our case
welcome.blade.php:
...

@livewireStyles

</head>

<body>

...

@livewireScripts

</body>

</html>

Code language: HTML, XML (xml)- We will then create a Livewire Component to handle our image uploads:
php artisan make:livewire FileUpload
This will create two files, first app/Http/Livewire/FileUpload.php and the other one
in resources/views/livewire/multiple-file-upload.blade.php
Now you can use this component anywhere in your Laravel project using the following snippet:
<livewire:file-upload/>
or
@livewire('file-upload')
- Open
resources/views/welcome.blade.phpand add the following code within the<body></body>tags as shown below:
<body class="antialiased">

<div>

@livewire('file-upload')

</div>

</body>

Code language: HTML, XML (xml)
This includes the Livewire component we created earlier in our welcome.blade.php.
Note: Please ensure you go through the Livewire documentation, to learn how to install and set it up.
- Open the file
resources/views/livewire/multiple-file-upload.blade.phpand populate it with the following code:
<form class="mb-5" wire:submit.prevent="uploadVideo">
<div class="form-group row mt-5 mb-3">
<div class="input-group">
<input id="video" type="file" class="form-control @error('video') is-invalid @enderror" wire:model="video">
@error('video')
<div class="invalid-feedback">{{ $message }}</div>
@enderror
</div>
<small class="text-muted text-center mt-2" wire:loading wire:target="video">
{{ __('Uploading') }}…
</small>
</div>
<div class="text-center">
<button type="submit" class="btn btn-sm btn-primary">
{{ __('Upload Video') }}
<i class="spinner-border spinner-border-sm ml-1 mt-1" wire:loading wire:target="uploadVideo"></i>
</button>
</div>
</form>
Code language: JavaScript (javascript)This is our Livewire Component view, this basically will display a form with a file input and a button.
You will see the implementation in code shortly.
Open the file app/Http/Livewire/FileUpload.php. Here, we are going to add a method that will handle the video selected by the user, upload them to Cloudinary for video moderation.
Add the following code to this file.
- First, we use Livewires
WithFileUploadsto help us with file uploads, then create the variable$video.
use  Livewire\WithFileUploads;

public  $video;

Code language: PHP (php)- Secondly, we will create the
uploadVideofunction which will upload the video to Cloudinary. We will add thefolder,resource_type,notification_urlandmoderationwhich will moderate the video.
public  function  uploadVideo()  {

...

}

Code language: PHP (php)- Let’s populate our method in step 2 above:
public  function  uploadFiles()  {

/* First we validate the input from the user. We will take a video file less than 10MB in size */

$this->validate([

'video'  =>  [

'required',

'file',

'mimes:avi,mp4,webm,mov,ogg,mkv,flv,m3u8,ts,3gp,wmv,3g2,m4v',

'max:102400'

],

]);

/* Upload video to Cloudinary for moderation */

cloudinary()->upload($this->video->getRealPath(),  [

'folder'  =>  'video-mod',

'resource_type'  =>  'video',

'moderation'  =>  'google_video_moderation:possible',

'notification_url'  =>  env('CLOUDINARY_NOTIFICATION_URL')

]);

session()->flash('message',  "Video moderation initiated successfully!");

}

Code language: PHP (php)
The code above performs validation then uploads the video file to Cloudinary for moderation.
On successful implementation, you should be able to see the following when you navigate to http://localhost:8000:

When you successfully upload a video with questionable content you will receive two responses at the notification_url we have set.
First response will be the upload notification with a pending moderation status:
{

"notification_type":  "upload",

"timestamp":  "2022-07-03T08:50:25+00:00",

"request_id":  "200c27d8d22acf7445ea1c759775bdb1",

"asset_id":  "62a5e294973044fd95df8eb1887a4db3",

"public_id":  "video-mod/PjtS3MQJUKYZzQ88GJoJMwhEkue2ND-meta5oqW6Z_zLeiusOW9lee_juWlveeUn_a0uy5tcDQ_-_crj35i",

"version":  1656838225,

"version_id":  "fefb04a8f3cd95100600cd3d8e3bdebe",

"width":  1280,

"height":  720,

"format":  "mp4",

"resource_type":  "video",

"moderation":  [

{

"status":  "pending",

"kind":  "google_video_moderation"

}

],

...

}

Code language: JavaScript (javascript)
The second response will be the moderation notification. This contains a bunch of data. Take note of the moderation_status which will let you know whether the video passed the moderation or not.
{

"moderation_response":  {

"moderation_confidence":  "POSSIBLE",

"frames":  [

{

"pornography_likelihood":  "POSSIBLE",

"time_offset":  0.769962

},

{

"pornography_likelihood":  "POSSIBLE",

"time_offset":  1.891071

},

{

"pornography_likelihood":  "POSSIBLE",

"time_offset":  2.730552

},

{

"pornography_likelihood":  "LIKELY",

"time_offset":  3.888789

},

{

"pornography_likelihood":  "LIKELY",

"time_offset":  4.755875

},

{

"pornography_likelihood":  "VERY_LIKELY",

"time_offset":  5.77656

},

{

"pornography_likelihood":  "LIKELY",

"time_offset":  6.650433

},

{

"pornography_likelihood":  "VERY_LIKELY",

"time_offset":  7.55418

},

{

"pornography_likelihood":  "LIKELY",

"time_offset":  8.730771

}

]

},

"moderation_status":  "rejected",

"moderation_kind":  "google_video_moderation",

"notification_type":  "moderation",

...

}

Code language: JavaScript (javascript)
You can checkout the documentation for more details.
Webhooks are one of a few ways web applications can communicate with each other. We can receive Cloudinary’s responses through a webhook and run processes that will do something like notify the user or ban the video.
Create a WebhookController.php by typing the following command:
php artisan make:controller WebhookController
In the file created app/Http/Controllers/WebhookController.php we will add the following code:
public  function  cloudinary(Request  $request)  {

//Verification

$verified  =  SignatureVerifier::verifyNotificationSignature(json_encode($request),  $request->header('X-Cld-Timestamp'),  $request->header('X-Cld-Signature'));


// If the signature is verified and moderation is rejected

if  ($verified  &&  $request->moderation_status  ===  'rejected')  {

// Ban video

...

// Notify user

...

}


return  response('Unverified',  401);

}

Code language: PHP (php)
Tip: A webhook is a mechanism where an application can notify another application that something has happened.
Since the notification from Cloudinary will be an external request we will need to allow it through the VerifyCsrfToken.php middleware to prevent CSRF errors.
...

protected  $except  =  [

'webhooks'

];

}

Code language: PHP (php)
Next, we will create the webhook route in routes/api.php.
...

//webhooks client

Route::post('webhooks/cloudinary',  [WebhookController::class,  'cloudinary']);

Code language: PHP (php)
And finally update our CLOUDINARY_NOTIFICATION_URL in the environment variables file .env as follows:
CLOUDINARY_NOTIFICATION_URL=https://<app_url>/api/webhooks/cloudinary

Code language: HTML, XML (xml)Cloudinary allows you to automatically moderate all videos uploaded to your application using Google’s AI Moderation. This is vital in protecting your users from explicit and suggestive adult content in videos on your website or mobile application.
Using Cloudinary’s upload and delivery APIs we can have peace of mind knowing that videos uploaded on our platforms will be automatically approved for user viewing.
Check out Cloudinary for your A to Z media management – upload, storage, administration, manipulation, optimization and delivery.
Get started with Cloudinary in your Laravel projects for FREE!