
Cloudinary is a Software-as-a-Service (SaaS) solution for managing all your web or mobile application’s media assets in the cloud. Cloudinary offers an end-to-end solution for all your image and video needs, including upload, storage, administration, transformation, and optimized delivery. Laravel is a PHP framework developed with developer productivity in mind. The framework also aims to evolve with the web and has already incorporated several new features and ideas in the web development world—such as job queues, API authentication out of the box, real-time communication, and much more.
Slideshows are the perfect addition to your media collection. They make your social media content engaging, fun, and memorable and are great for business promotional purposes. In this article, we will create a video slideshow using Laravel and Cloudinary.
Some use cases for slideshows include:
-
Creating a personalized video of a user’s recent items.
-
Creating a personalized video of items a user left in their shopping cart.
-
Creating a daily sale video of different products automatically.
-
Creating a real-estate video out of apartment images.
The possibilities are endless since with dynamic transformations like Content-Aware Crop you can create video slideshows for your Instagram, WhatsApp, and TikTok Stories.
Let’s get started.
The final project can be viewed on PHPSandbox and the entire source code is available on my Github repository.
Using Cloudinary in your Laravel projects is pretty straightforward. However, for you to be able to easily follow along,
you need to have a good command of your terminal, Git, and entry knowledge of PHP specifically with the Laravel
framework.
Being that Laravel is a PHP Framework, we will need Composer. Like any modern PHP framework, Laravel uses Composer to manage its dependencies. So, before we can
start to ensure you have Composer installed on your machine. Follow step 1 below to install Composer and PHP.
your development or production machine.
-
Install Laravel
-
Via Composer:
composer create-project --prefer-dist laravel/laravel cloudinary-video-slideshow
- Via Laravel Installer
`composer global require laravel/installer
laravel new cloudinary-video-slideshow
- In step 2 above we have installed the Laravel Installer and used it to scaffold a new application in the folder
cloudinary-video-slideshow. With Laravel installed, we should be able to start and test the server ensuring everything is okay. Change the directory to the project folder and run the local development server by typing the following commands:
cd cloudinary-video-slideshow
php artisan serve
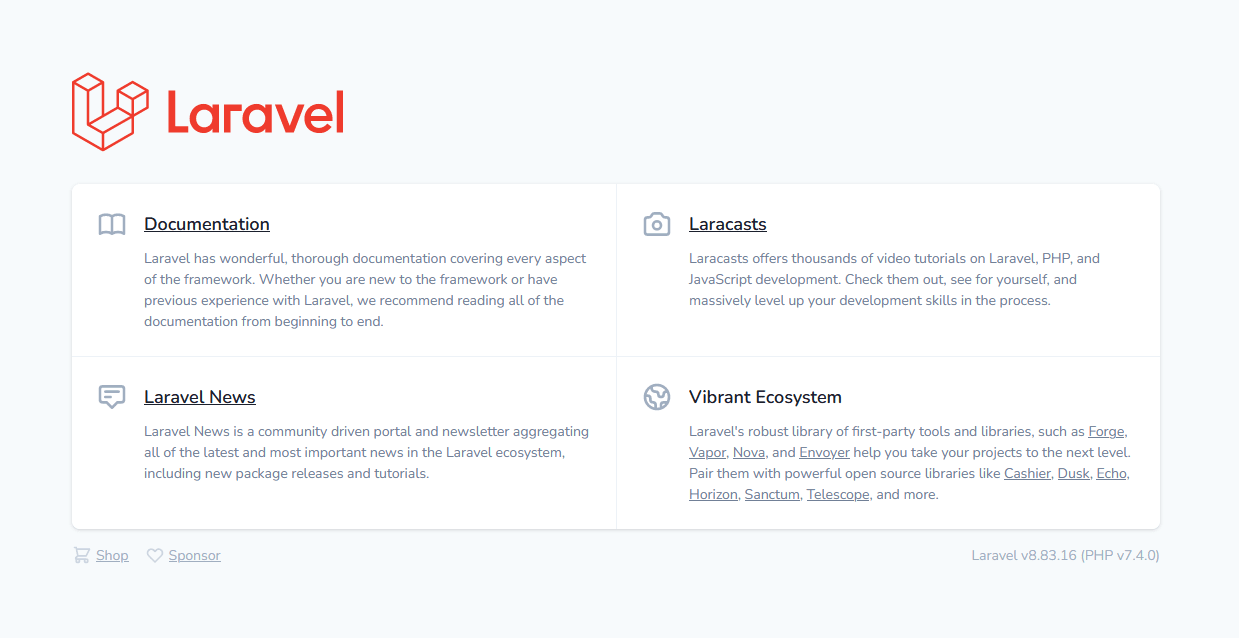
The Laravel project is now up and running. When you open http://localhost:8000 on your computer, you should see the image below:
Cloudinary has a tonne of features from media upload, storage, administration, and manipulation to optimization and delivery. In this article, we will use Cloudinary Video Transformations to combine existing or newly uploaded media files to create a slideshow.
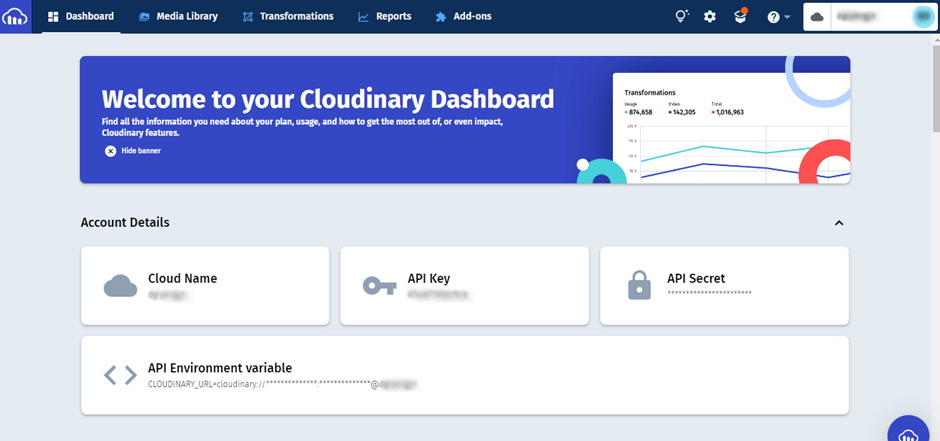
- Sign up for a free Cloudinary account then navigate to the Console page and take note of your Cloud name, API Key and
API Secret.
- Install Cloudinary’s Laravel SDK:
composer require cloudinary-labs/cloudinary-laravel
Note: Please ensure you follow all the steps in the #Installation section. Publish the configuration file and add
the Cloudinary credentials you noted in Step 1 to the .env file.
CLOUDINARY_API_KEY=YOUR_CLOUDINARY_API_KEY

CLOUDINARY_API_SECRET=YOUR_CLOUDINARY_API_SECRET

CLOUDINARY_CLOUD_NAME=YOUR_CLOUDINARY_CLOUD_NAME
There are two ways you can generate a slide show depending on your use case:
- Using a delivery URL – here you can use a template downloaded from Cloudinary to combine the relevant components in a delivery URL that looks as follows:
https://res.cloudinary.com/<cloudname>/video/upload/fn_render:<global-settings>;vars_(<slide-settings>(<individual-slide>))/<global-transformations>/<template>.<ext>
- Using the Upload API – this is the technique we will use in this article. We will use the
create_slideshowmethod of the Upload API. This will create a new video in your Cloudinary account based on the parameters provided.
To generate a video slideshow we will need a UI (User Interface), we will use the Laravel package Livewire to build this.
- Install Livewire Package by running the following command in your Laravel project:
composer require livewire/livewire
- Include Livewire scripts and styles on every page that will be using Livewire. In our case
welcome.blade.php:
...

@livewireStyles

</head>

<body>

...

@livewireScripts

</body>

</html>

Code language: HTML, XML (xml)- We will then create a Livewire Component to handle our image uploads:
php artisan make:livewire MultipleFileUpload
This will create two files, first app/Http/Livewire/MultipleFileUpload.php and the other one
in resources/views/livewire/multiple-file-upload.blade.php
Now you can use this component anywhere in your Laravel project using the following snippet:
<livewire:multiple-file-upload/>
or
@livewire('multiple-file-upload')
- Open
resources/views/welcome.blade.phpand add the following code within the<body></body>tags as shown below:
<body class="antialiased">

<div>

@livewire('multiple-file-upload')

</div>

</body>

Code language: HTML, XML (xml)
This includes the Livewire component we created earlier in our welcome.blade.php.
Note: Please ensure you go through the Livewire documentation, to learn how to install and set it up.
- Open the file
resources/views/livewire/multiple-file-upload.blade.phpand populate it with the following code:
<form class="mb-5"  wire:submit.prevent="uploadFiles">

<div class="form-group row mt-5 mb-3">

<div class="input-group">

<input type="file"  class="form-control @error('files'|'files.*') is-invalid @enderror"  placeholder="Choose files..."  wire:model="files"  multiple>

@error('files'|'files.*')

<div class="invalid-feedback">{{ $message }}</div>

@enderror

</div>

<small class="text-muted text-center mt-2"  wire:loading  wire:target="files">

{{ __('Uploading') }}…

</small>

</div>

<div class="text-center">

<button type="submit"  class="btn btn-sm btn-primary w-25">

{{ __('Generate Slideshow') }}

</button>

</div>

</form>

Code language: JavaScript (javascript)
This is our Livewire Component view, this basically will display a form with a multiple-file input and a button.
You will see the implementation in code shortly.
Open the file app/Http/Livewire/MultipleFileUpload.php. Here, we are going to add a method that will handle the multiple files selected by the user, upload them to Cloudinary and save their public_id’s in an array that we will use later on.
Add the following code to this file.
- First, we use Livewires
WithFileUploadsto help us with file uploads, then create two variables$media
and $optimizedImage which is an array that will contain the image URLs we get back from Cloudinary.
use  Livewire\WithFileUploads;

public  $files  =  [];

public  $slides  =  [];

// Needed to specify the type of media file for our slideshow

public  $imageExt  =  ['jpeg',  'jpg',  'png',  'gif',];

Code language: PHP (php)- Secondly, we will create the
uploadFilesfunction which will upload the media files to Cloudinary. We will apply specific transformations that will optimize our images for our slideshow with an aspect ratio of9:16which works great for most social media platforms.
public  function  uploadFiles()  {

...

}

Code language: PHP (php)- Let’s populate our method in step 2 above:
public  function  uploadFiles()  {

/* First we validate the input from the user. We will take multiple image and or video files less than 10MB in size */

$this->validate([

'files'  =>  [

'required',

'max:102400'

],

'files.*'  =>  'mimes:jpeg,jpg,png,gif,avi,mp4,webm,mov,ogg,mkv,flv,m3u8,ts,3gp,wmv,3g2,m4v'

]);

/* We will now upload the media files to Cloudinary with specified transformations and get back the public_id */

foreach  ($this->files  as  $file)  {

$media  =  cloudinary()->upload($file->getRealPath(),  [

'folder'  =>  'video-slideshow',

'public_id'  =>  $file->getClientOriginalName(),

'transformation'  =>  [

'aspect_ratio'  =>  '9:16',

'gravity'  =>  'auto',  //can be face, face etc

'crop'  =>  'fill'

]

])->getPublicId();

/* Here we will check whether the file is an image or video from its extension and generate the appropriate media type parameter for the manifest_json */

if  (in_array($file->getClientOriginalExtension(),  $this->imageExt))  {

$this->slides[]  =  ['media'  =>  'i:'.$media];

}  else  {

$this->slides[]  =  ['media'  =>  'v:'.$media];

}

}

/* Creating the manifest_json parameter */

$manifestJson  =  json_encode([

"w"  =>  540,

"h"  =>  960,

"du"  =>  60,

"vars"  =>  [

"sdur"  =>  3000,

"tdur"  =>  1500,

"slides"  =>  $this->slides,

],

]);

/* signingData for generating the signature */

$cloudName  =  env('CLOUDINARY_CLOUD_NAME');

$timestamp  =  (string)  Carbon::now()->unix();

$signingData  =  [

'timestamp'  =>  $timestamp,

'manifest_json'  =>  $manifestJson,

'public_id'  =>  'test_slideshow',

'folder'  =>  'video-slideshow',

'notification_url'  =>  env('CLOUDINARY_NOTIFICATION_URL')

];

$signature  =  ApiUtils::signParameters($signingData,  env('CLOUDINARY_API_SECRET'));

/* Using Laravel Http Request to send a POST request to the create_slideshow end point */

$response  =  Http::post("https://api.cloudinary.com/v1_1/$cloudName/video/create_slideshow",  [

'api_key'  =>  env('CLOUDINARY_API_KEY'),

'signature'  =>  $signature,

'timestamp'  =>  $timestamp,

'manifest_json'  =>  $manifestJson,

'resource_type'  =>  'video',

'public_id'  =>  'test_slideshow',

'folder'  =>  'video-slideshow',

'notification_url'  =>  env('CLOUDINARY_NOTIFICATION_URL')

]);

// Determine if the status code is >= 200 and < 300...

if  ($response->successful())  {

session()->flash('message',  'Slideshow generated successfully!');

}  else  {

session()->flash('error',  'Slideshow generation failed! Try again later.');

}

}

Code language: PHP (php)
The code above uploads the media files to Cloudinary returning their public_id‘s. Let’s talk about the code.
We will get the files from user input and upload them to Cloudinary and use their public_id’s to create the media type parameter media_ which will take the form media_i:<public_id> for images and media_v:<public_id> for videos.
foreach  ($this->files  as  $file)  {

$media  =  cloudinary()->upload($file->getRealPath(),  [

'folder'  =>  'video-slideshow',

'public_id'  =>  $file->getClientOriginalName(),

'transformation'  =>  [

'aspect_ratio'  =>  '9:16',

'gravity'  =>  'auto',  //can be face, face etc

'crop'  =>  'fill'

]])->getPublicId();


if  (in_array($file->getClientOriginalExtension(),  $this->imageExt))  {

$this->slides[]  =  ['media'  =>  'i:'.$media];

}  else  {

$this->slides[]  =  ['media'  =>  'v:'.$media];

}

}

Code language: PHP (php)
The create a slideshow endpoint requires either a manifest_transformation or a manifest_json. The manifest_json parameter is a stringified json parameter, allowing you to define your slideshow settings in a structured data format, which then needs to be converted to a string.
$manifestJson  =  json_encode([

"w"  =>  540,

"h"  =>  960,

"du"  =>  60,

"vars"  =>  [

"sdur"  =>  3000,

"tdur"  =>  1500,

"slides"  =>  $this->slides,

],

]);

Code language: PHP (php)
You can checkout the reference for full details on the relevant options.
Since we are sending a request to the Cloudinary API, we need to create a signature to authenticate our request. Cloudinary SDKs automatically generate this signature for any upload or admin method that requires it. However, in this case, we are making a direct call to the REST API and we need to generate the signature.
$cloudName  =  env('CLOUDINARY_CLOUD_NAME');

$timestamp  =  (string)  Carbon::now()->unix();

$signingData  =  [

'timestamp'  =>  $timestamp,

'manifest_json'  =>  $manifestJson,

'public_id'  =>  'test_slideshow',

'folder'  =>  'video-slideshow',

'notification_url'  =>  env('CLOUDINARY_NOTIFICATION_URL')

];


$signature  =  ApiUtils::signParameters($signingData,  env('CLOUDINARY_API_SECRET'));

Code language: PHP (php)
The signature is a SHA-1 or SHA-256 hexadecimal message digest created based on the following parameters:
-
All parameters added to the method call should be included except :
file,cloud_name,resource_typeand yourapi_key. -
Add the
timestampparameter. -
Sort all the parameters in alphabetical order.
-
Separate the parameter names from their values with an
=and join the parameter/value pairs together with an&.
Tip: We took a shortcut and used the Cloudinary SDK ApiUtils to create the signature:
$signature  =  ApiUtils::signParameters($signingData,  env('CLOUDINARY_API_SECRET'));

Code language: PHP (php)With everything ready we can send the request to Cloudinary and start the video slideshow generation. We will use Laravel’s Http Request based on Guzzle.
$response = Http::post("https://api.cloudinary.com/v1_1/$cloudName/video/create_slideshow", [

'api_key' => env('CLOUDINARY_API_KEY'),

'signature' => $signature,

'timestamp' => $timestamp,

'manifest_json' => $manifestJson,

'resource_type' => 'video',

'public_id' => 'test_slideshow',

'folder' => 'video-slideshow',

'notification_url' => env('CLOUDINARY_NOTIFICATION_URL')

]);

Code language: PHP (php)
Note: Once our slideshow is ready Cloudinary will send us a Webhook notification to the notification_url.
If you successfully implemented the code above, you should be able to see the following when you navigate to http://localhost:8000:

Once we send the request successfully. Cloudinary will send us a pending response as it processes the generation of the video slideshow:

Cloudinary will send the following response:
{

"status":  "processing",

"public_id":  "test_slideshow",

"batch_id":  "00b45635e533ab11e63585dd145ab7816ca19bff2bf3f298a0e66d87405ab7793"

}

Code language: JSON / JSON with Comments (json)
When the Cloudinary is done generating the slideshow it will send us a Webhook notification to the notification URL we provided in the request.
{

"notification_type":  "upload",

"timestamp":  "2021-08-11T07:44:41+00:00",

"request_id":  "799b0f8305df4206b6d8f5dbdde0cdfc",

"asset_id":  "640cb419bed70ef5b86e2bbe7cbb388a",

"public_id":  "test_slideshow",

"version":  1628667799,

"version_id":  "afcd9bdec6552adc43d7f316da077200",

"width":  500,

"height":  500,

"format":  "mp4",

"resource_type":  "video",

"created_at":  "2021-08-11T07:43:19Z",

"tags":  [],

"pages":  0,

"bytes":  521868,

"type":  "upload",

"etag":  "d7b3ecf1f5508af9fb8518158e78642f",

"placeholder":  false,

"url":  "http://res.cloudinary.com/demo/video/upload/v1628667799/test_slideshow.mp4",

"secure_url":  "https://res.cloudinary.com/demo/video/upload/v1628667799/test_slideshow.mp4",

"access_mode":  "public",

"audio":  {},

"video":  {

"pix_format":  "yuv420p",

"codec":  "h264",

"level":  30,

"profile":  "High",

"bit_rate":  "163900",

"time_base":  "1/15360"

},

"frame_rate":  30,

"bit_rate":  166997,

"duration":  25,

"rotation":  0,

"nb_frames":  750

}

Code language: JSON / JSON with Comments (json)
We will handle this notification by creating a WebhookController.php by typing the following command:
php artisan make:controller WebhookController
In the file created app/Http/Controllers/WebhookController.php we will add the following code:
public  function  cloudinary(Request  $request)  {

//Verification

$verified  =  SignatureVerifier::verifyNotificationSignature(json_encode($request),  $request->header('X-Cld-Timestamp'),  $request->header('X-Cld-Signature'));


// If the signature is verified get the secure url to our slideshow

if  ($verified)  {

$secureUrl  =  $request->secure_url;


return  view('livewire.view-slideshow',  ['slideshow_url'  =>  $secureUrl]);

}


return  response('Unverified',  401);

}

Code language: PHP (php)
Tip: A webhook is a mechanism where an application can notify another application that something has happened.
When we receive the notification from Cloudinary we can notify the user by sending them an e-mail, SMS, or push notification. It is really up to you but, in this case, we are just returning a view and passing the slideshow URL to it.
Since the notification from Cloudinary will be an external request we will need to allow it through the VerifyCsrfToken.php middleware to prevent CSRF errors.
...

protected  $except  =  [

'webhooks'

];

}

Code language: PHP (php)
Next, we will create the webhook route in routes/api.php.
...

//webhooks client

Route::post('webhooks/cloudinary',  [WebhookController::class,  'cloudinary']);

Code language: PHP (php)
And finally update our CLOUDINARY_NOTIFICATION_URL in the environment variables file .env as follows:
CLOUDINARY_NOTIFICATION_URL=https://<example.com>/api/webhooks/cloudinary

Code language: HTML, XML (xml)
Finally, we can enjoy our slideshow:
Yes, Cloudinary makes it easy to generate a slideshow by automating and applying some transformations. This is beautiful since it allows you to focus on other things like promoting your business with the newly created slideshow.
The possibilities are endless, check out Cloudinary for your A to Z media management – upload, storage, administration, manipulation, optimization, and delivery.
Get started with Cloudinary in your Laravel projects for FREE!