
The days of needing a graphic designer to edit hundreds of videos manually are over. Today, Python scripts make it easy to scale video production for your projects and produce high-quality videos in bulk, for the best possible user experience.
It’s no wonder writing programs in Python has become the efficient and cost-effective way to edit and personalize videos. Automating video edits using Python makes it possible for companies to deliver campaign videos to users and keep product videos up-to-date on websites without stress.
Python provides some powerful libraries, including MoviePY, Scikit-video, and VidGear, that enable you to edit your videos with only a few lines of code.
Cloudinary is another tool that provides comparable functionality. It’s a cloud-based image and video management service that provides rich editing capabilities accessible via an easy-to-use Python SDK. Cloudinary also provides advanced features that make a huge difference, for example cropping with AI to ensure that the important parts of the video are kept inside the picture throughout, video optimization to improve web performance, and adaptive streaming for a better user experience.
In this blog post, you’ll see examples of how you can automate Python video editing and optimization with Cloudinary, including:
- Trimming and concatenating video clips.
- Adding subtitles, watermarks, and background music.
- Non-linear editing in the form of video overlays.
- Removing backgrounds.
You’ll also learn how to utilize AI to smart-crop your videos and how to optimize your videos for ideal web performance and smooth streaming on your site.
You might want to apply the editing and optimization techniques in the code snippets below to your own videos. To do that, follow the instructions to create a Cloudinary account, upload a few videos, and configure.
Then, replace the public IDs (the unique identifiers for the videos) in the code snippets below with those of the assets you uploaded.
Here’s how to get started with Cloudinary:
- Register here.
- Drag and drop the videos you want to use in the Media Library. Keep a record of their public IDs so you can reference them later in your code.
You can also upload videos programmatically.
3. Install Cloudinary.
- In a terminal in your Python3 environment, run the following code:
pip3 install cloudinary
pip3 install python-dotenv
4. Configure Cloudinary.
- In your project, create a file called
.envcontaining your API environment variable from your product environment credentials:
# .env
#
# Copy and paste your API environment variable
# =============================================
CLOUDINARY_URL=cloudinary://<api_key>:<api_secret>@<cloud_name>
Code language: PHP (php)When writing your own applications, follow your organization’s policy on storing secrets and don’t expose your API secret. Don’t store your .env under version control for maximum security.
5. In your project, create a new file called my_file.py. Copy and paste the following into this file:
# my_file.py
#
# Set your Cloudinary credentials
# ==============================
from dotenv import load_dotenv
load_dotenv()
# Import the Cloudinary library
# ==============================
import cloudinary
# Set configuration parameter: return "https" URLs by setting secure=True
# ==============================
config = cloudinary.config(secure=True)
# Log the configuration
# ==============================
print("Your Cloudinary Credentials:")
print(config.cloud_name, config.api_key)Code language: PHP (php)The following examples show a gamut of video editing and optimization possibilities using Python and Cloudinary. The goal is to give you a small taste of what you can do with Cloudinary, show you how to implement the edits, and inspire you to start creating your own.
You can take a look at each example individually, and you can see a full code sandbox below or on GitHub.
The following function returns the URL of an original video saved in Cloudinary:
# my_file.py

def getOriginal(publicId):
 originalURL=cloudinary.CloudinaryVideo(publicId).build_url()
 return originalURLCode language: PHP (php)
The public ID, the video’s unique identifier, is passed in to function. Cloudinary returns the video’s URL, which can be used to deliver the video in its original form.
Here’s the video:
The following examples show how to edit the original video by adding a few parameters.
This code snippet edits the video in numerous ways:
Resizing and cropping: {"aspect_ratio":"4:3", "crop":"fill", "y":"100", "width":"400"}
Trimming: {"duration": "5"}
Concatenating a cropped, resized, and trimmed video stored in Cloudinary with public ID docs/video_features_tutorial/makeup:
{"duration": "5", "flags": "splice", "overlay": "video:docs:video_features_tutorial:makeup"},
{"aspect_ratio": "4:3", "crop": "fill", "y":"130", "width": "400"},
{"flags": "layer_apply" }
Adding background music, stored in Cloudinary with public ID video_features_tutorial/romeo_and_juliet:
{"overlay": "video:docs:video_features_tutorial:romeo_and_juliet"},
{"flags": "layer_apply"}
Adding a watermark, stored in Cloudinary with public ID cloudinary_icon, resized and placed in the north east corner or the video:
{"overlay": "cloudinary_icon"},
{"width": "40", "x":"10", "y":"10" },
{"flags": "layer_apply", "gravity": "north_east"}
Adding an SRT file stored in Cloudinary with public ID video_features_tutorial/captions.srt as subtitles:
{"overlay": {"resource_type": "subtitles", "public_id":"docs/video_features_tutorial/captions.srt"}},
{"flag": "layer_apply" }
def concatenated():
 videoURL = cloudinary.CloudinaryVideo("docs/video_features_tutorial/hair").build_url(transformation=[
   {"aspect_ratio":"4:3", "crop":"fill", "y":"100", "width":"400"},
   {"duration": "5"},
   {"duration": "5", "flags": "splice", "overlay": "video:docs:video_features_tutorial:makeup"},
   {"aspect_ratio": "4:3", "crop": "fill", "y":"130", "width": "400"},
   {"flags": "layer_apply" },
   {"overlay": "video:docs:video_features_tutorial:romeo_and_juliet"},
   {"flags": "layer_apply"},
   {"overlay": "cloudinary_icon"},
   {"width": "40", "x":"10", "y":"10" },
   {"flags": "layer_apply", "gravity": "north_east"},
   {"overlay": {"resource_type": "subtitles", "public_id": "docs/video_features_tutorial/captions.srt"}},
   {"flag": "layer_apply" }])
 return videoURLCode language: JavaScript (javascript)
Here’s the edited video:
Here’s an example of non-linear editing. You can apply one video over the other as an overlay to have them play at the same time:
# my_file.py

def overlay():
 videoURL = cloudinary.CloudinaryVideo("docs/sdk/go/exercise1").build_url(transformation=[
   {"crop":"scale","width":"300"},
   {"overlay": "video:exercise2"},
   {"crop":"fit","width":"80","border":"1px_solid_white"},
   {"flags": "layer_apply","gravity":"north_east","start_offset":"2.0"}
   ])
 return videoURLCode language: PHP (php)
Here’s the video:
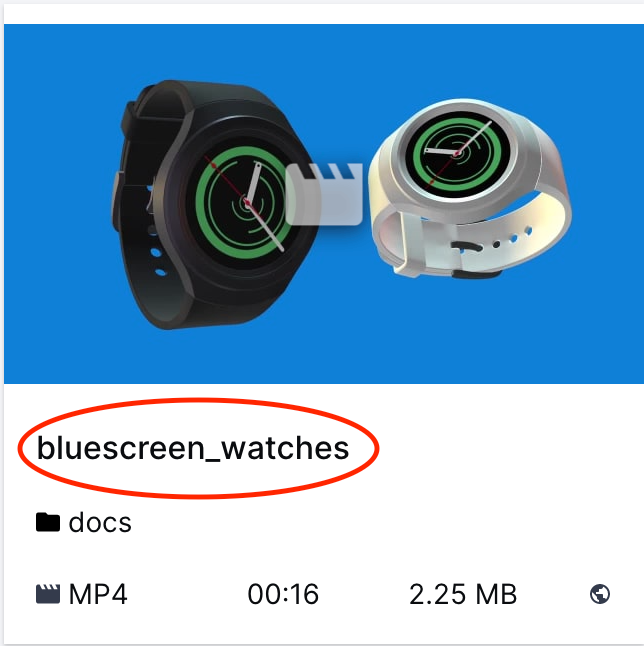
In this example, the blue background in this product video is switched to a beach scene:
# my_file.py

def removeBackground():
 videoURL=cloudinary.CloudinaryVideo("docs/sunset_waves").build_url(transformation=[
 {'width': 500, 'crop': "scale"},
 {'overlay': "video:docs:bluescreen_watches"},
 {'flags': "relative", 'width': "0.6", 'crop': "scale"},
 {'color': "#0e80d8", 'effect': "make_transparent:20"},
 {'flags': "layer_apply", 'gravity': "north"},
 {'duration': "15.0"}
 ])
 return videoURLCode language: PHP (php)
Here’s the video:
When you crop videos, especially in bulk, you risk cutting out the important parts and ruining the video. Cloudinary prevents this from happening by using AI to make sure that the main subjects of the video are followed throughout.
Cropping this video causes the gymnast to move in and out of view because, the crop by default just captures the center of the video:
# my_file.py

def getGAutoOrig():
 videoURL = cloudinary.CloudinaryVideo("olympic_gymnast.mp4").build_url(transformation=[
   {"crop":"fill","width":"120","height":"300"}])
  return videoURLCode language: PHP (php)
Here’s the video, cropped without AI applied. Notice the gymnast doesn’t stay in the frame throughout:
Adding the gravity:auto parameter ensures that the gymnast remains in focus:
def gAuto():
 videoURL = cloudinary.CloudinaryVideo("olympic_gymnast.mp4").build_url(transformation=[
   {"crop":"fill","gravity":"auto","width":"120","height":"300"}])
return videoURLCode language: JavaScript (javascript)Cloudinary can reduce the size of your videos to improve your web performance with:
- f_auto: Delivers the video using the best format for the requesting browser.
- q_auto: Delivers the video using the optimal compression that balances the smallest size without sacrificing visual quality.
# my_file.py

def fqAuto():
  videoURL = cloudinary.CloudinaryVideo("docs/sunglasses").build_url(transformation=[
    {"fetch_format":"auto","quality":"auto"}])
  return videoURLCode language: PHP (php)
Here’s the optimized video:
Cloudinary can ensure that your videos are delivered with the least interruption, at every second and from any browser, using adaptive bitrate streaming.
# my_file.py

def autoStreaming():
  videoURL=cloudinary.utils.cloudinary_url("docs/waterfall.m3u8", streaming_profile="auto", resource_type="video")
  return videoURLCode language: PHP (php)
Here’s the streaming video:
These are just some of the Python video editing and optimization possibilities that Cloudinary can offer. Cloudinary provides similar editing capabilities to Python libraries such as MoviePY, Scikit-video, and VidGear, along with some Cloudinary-unique capabilities to boot. Leverage Cloudinary’s smart-cropping, optimization, and adaptive bitrate streaming to improve your website’s performance and user experience.
You’re invited to explore the expanse of editing and management features that Cloudinary offers. Let us know which are your favorites!

