
React allows you to transform images with zoom and rotate functionality. When you know the prompts, it’s easy to transform you images to align them perfectly to your design objectives.
To be clear, React image zoom means enlarging an image so that the details are more visible using ReactJS. Zooming in on a picture has many wide applications ranging from zooming through a camera lens to zooming in on a photo on the internet.
On the other hand, to rotate an image in React is an image processing feature that allows you to turn an image in a clockwise or counterclockwise direction.
In this post, you’ll learn how to zoom and rotate images with React in three ways: the React-image-zoom package, Cloudinary, and React.js.
Additionally, for those looking to handle rotations using native CSS properties in React, we will also delve into methods like transform: rotate(), transform-origin, and transition to achieve the same effect.
React-image-zooom is an npm package that will allow users to zoom in on images. This component has minimal styling footprint. In addition, we can pass in custom class names and id props that’ll enable us to customize the package to fit our design needs.
Cloudinary Image APIs make it easy to upload, store, manage, transform, and deliver images and videos for web and mobile applications.
The complete project is on CodeSandbox below. Use the link in the sandbox to fork and run it to quickly get started.
In order to get started with performing React image zoom in zoom out as well as how to do a rotate image in React, you’ll need the following:
- Experience with JavaScript and React.js.
- Installing Node.js.
- For the simplest approach, plus a suite of additional image transformation features, you can use Cloudinary for free. If you don’t already have an account, sign up for Cloudinary for free now.
We’ll run the following command in the terminal to create a new React.js application:
npx create-react-app zoom-rotate-app
The above command bootstraps a React application in ****the zoom-rotate folder.
Next, we’ll navigate to the project directory and install some dependencies:
cd zoom-rotate # to navigate into the project directory
Code language: PHP (php)
Navigate to the src directory and delete all the files except App.js and index.js.
Next, we’ll install the following npm packages:
- react-image-zooom, so we can access the zoom component in a React environment.
- @cloudinary/url-gen to add Cloudinary transformations and generate a URL.
- react-icons to give us access to icons for rotating our image.
npm install react-image-zooom @cloudinary/url-gen react-icons
Code language: CSS (css)
or
yarn add react-image-zooom @cloudinary/url-gen react-icons
Code language: CSS (css)
Next, we’ll install the bootstrap library with the following command to handle our styles.
npm install react-bootstrap bootstrap
Next, we’ll log in to Cloudinary, navigate to the Samples folder, navigate to People, and tag a few images.
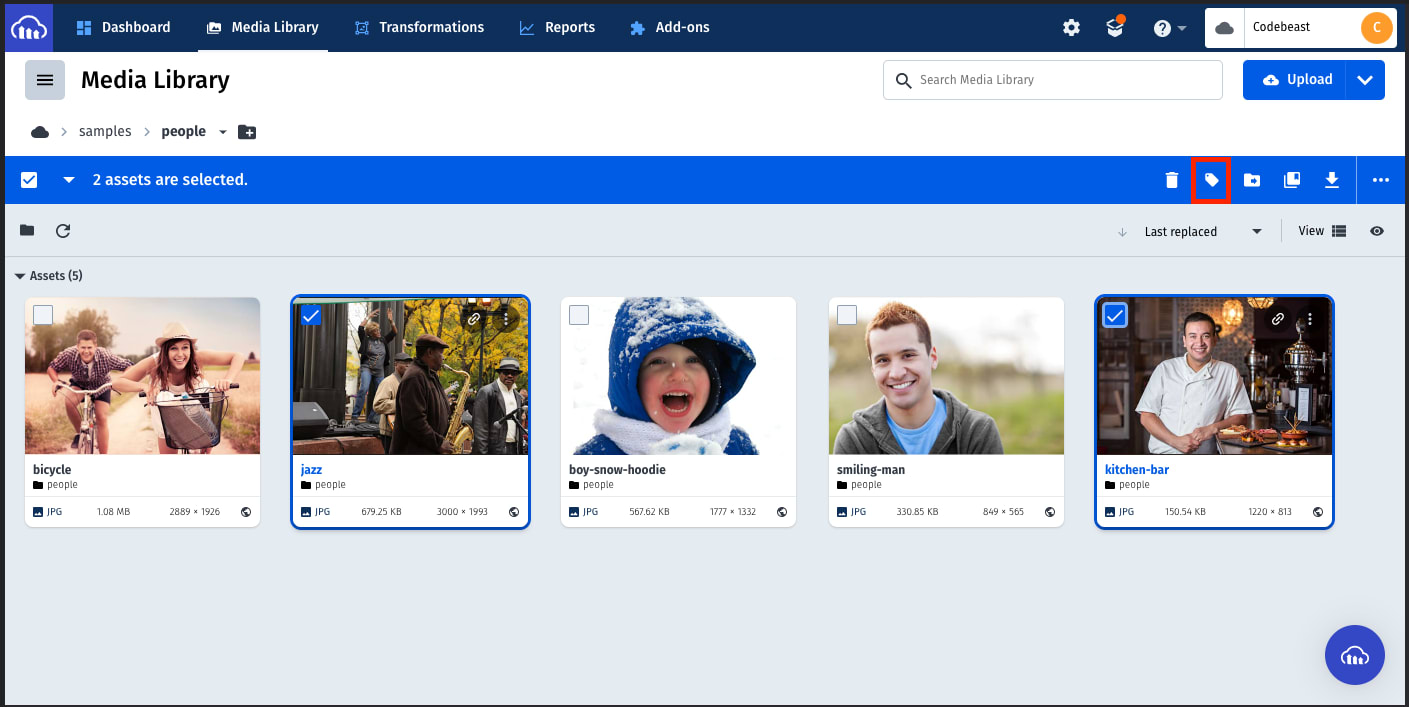
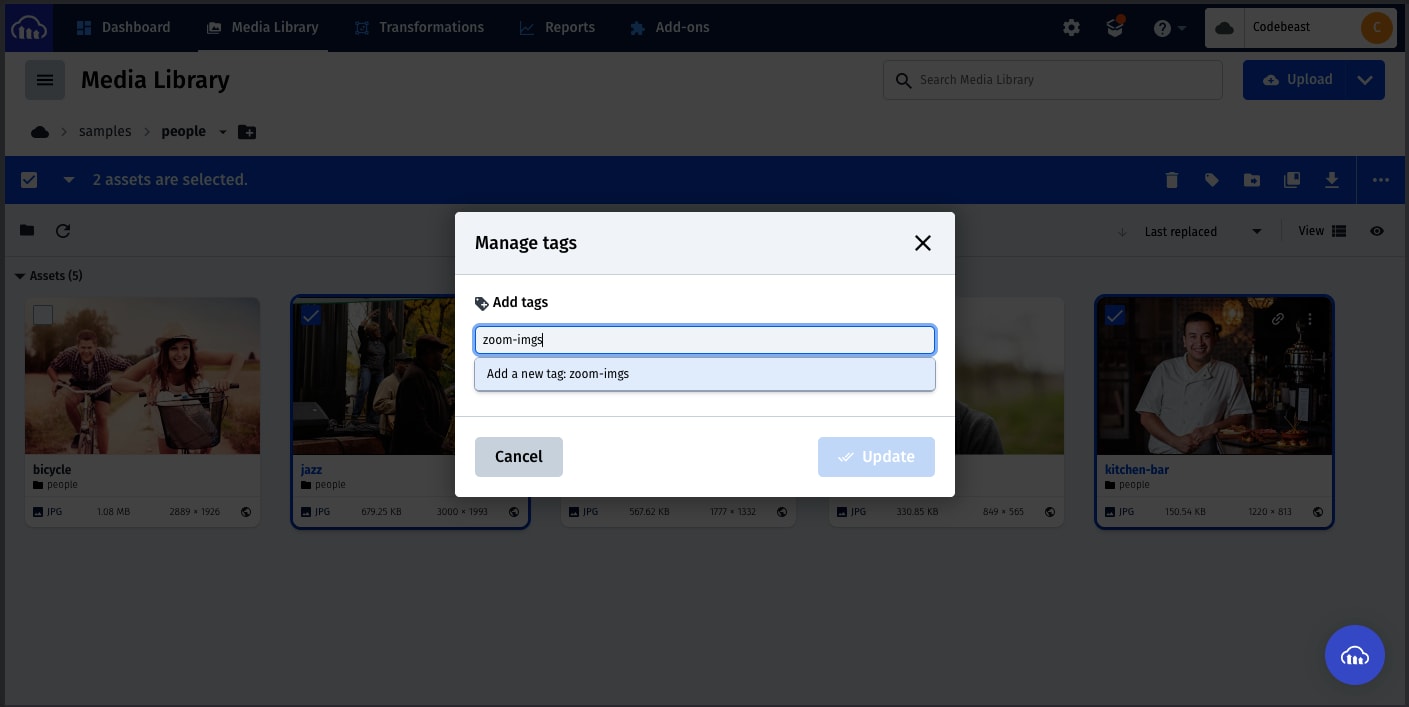
Create a tag name and click the Update button.
Next, we’ll provide our details in this URL format and query it to get our Cloudinary tagged assets:
https://res.cloudinary.com/<cloud-name>/<type>/list/<tag-name>.json
Code language: HTML, XML (xml)
Next, we’ll remove restrictions on Image list in Cloudinary. Navigate to Settings (the gear icon), click the Security tab and uncheck Resource List under Restricted media types.
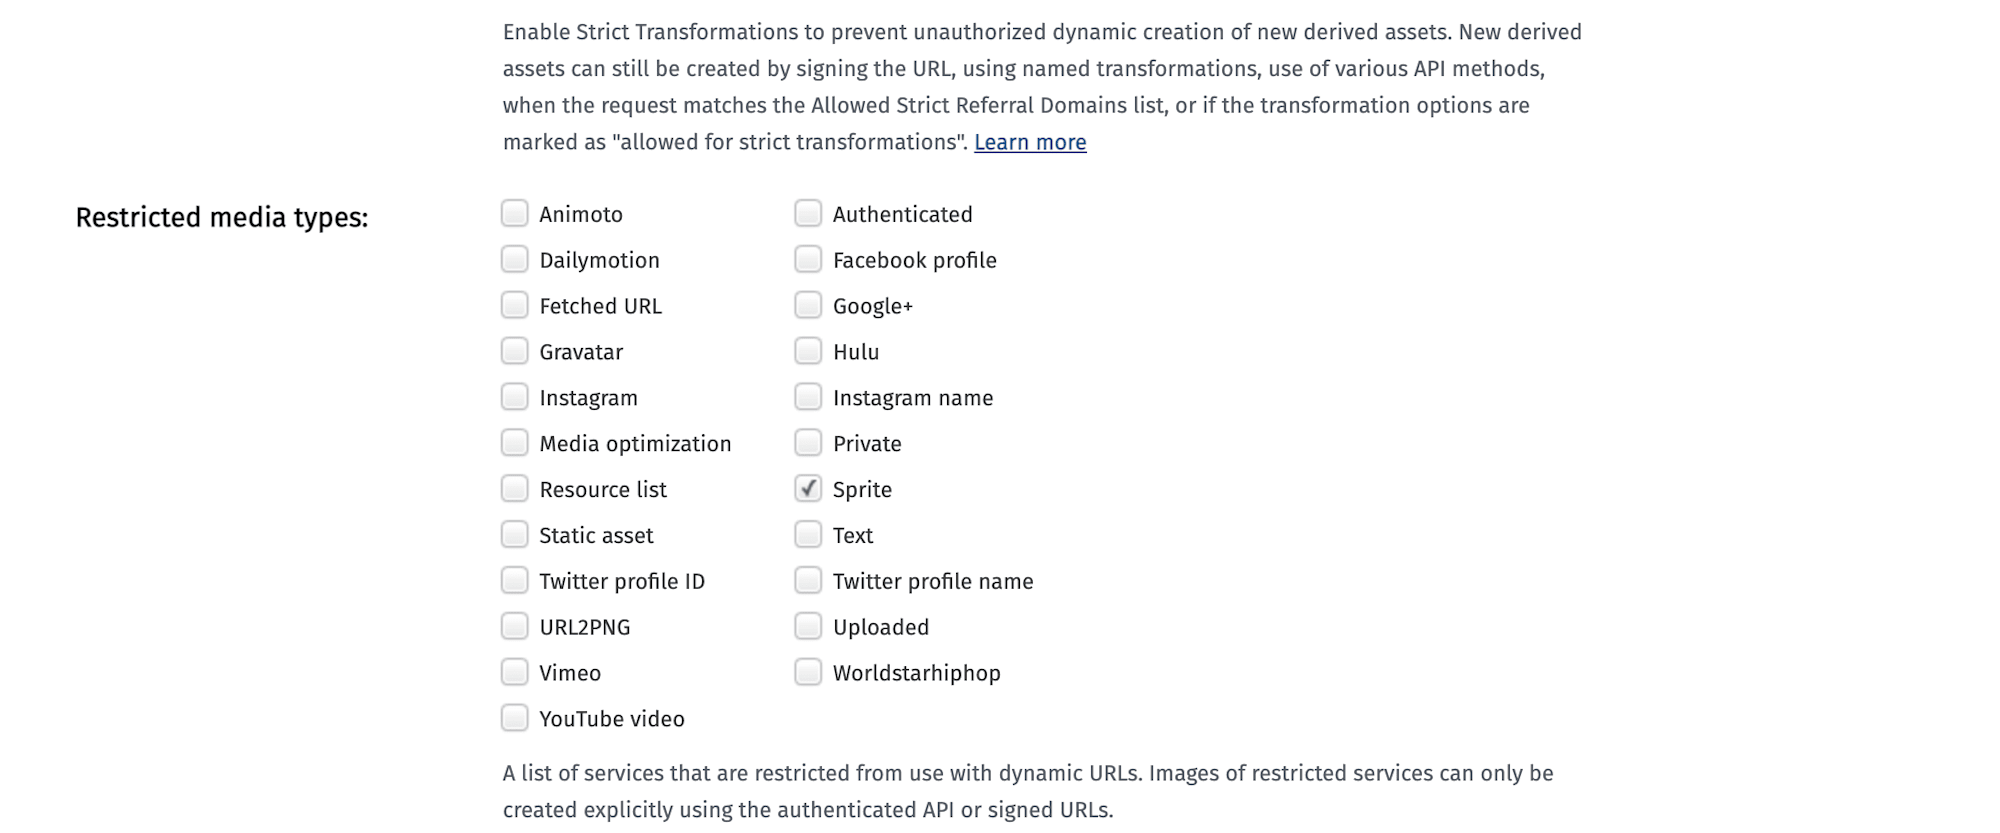
Scroll down to save your settings.
Next, import the following line of code inside the pages/index.js file:
import "bootstrap/dist/css/bootstrap.min.css";
Code language: JavaScript (javascript)
Your index.js should look like this:
//index.js
import React from 'react';
import ReactDOM from 'react-dom/client';
import App from './App';
import "bootstrap/dist/css/bootstrap.min.css";

const root = ReactDOM.createRoot(document.getElementById('root'));
  root.render(
    <React.StrictMode>
      <App />
    </React.StrictMode>
  );
Code language: JavaScript (javascript)Now, clean up the App.js file and update it with the following lines of code :
import "./App.css";
import ImageZoom from "react-image-zooom";
import { useState, useEffect } from "react";

const App = () => {
  const [imageData, setImageData] = useState(null);

  const baseURL = "https://res.cloudinary.com/<cloud-name>/image";

  const getImages = async () => {
    const res = await fetch(
      "https://res.cloudinary.com/<cloud-name>/image/list/<tag-name>.json"
    );
  const data = await res.json();
    setImageData(data);
  };


return (
  <div className="App">
    <h1>ZOOM and Roatate Images in React.js</h1>
    <div className="gallery">
      {imageData &&
        imageData.resources.map((item) => {
          const { format, public_id, version, type } = item;
          return (
            <div key={version} className="gallery-img">
              <ImageZoom
                src={`${baseURL}/${type}/v${version}/${public_id}.${format}`}
                alt="Zoom-images"
                zoom="300"
              />
            </div>
          );
        })}
    </div>
  </div>
);
};
export default App;
Code language: JavaScript (javascript)
In the snippets above, we:
- Imported
ImageZoomfrom “react-image-zooom” and useState and useEffect from “react”. - Created
imageDatastate constant with useState hook and created a baseURL constant. - Created the
getImages()function to fetch the tagged assets from Cloudinary and update the imageData state. - Looped through the
imageData, generated a URL for the images, and used theImageZoomcomponent and displayed them.
We would see our images rendered with zoom-in and zoom-out functionalities in the browser.
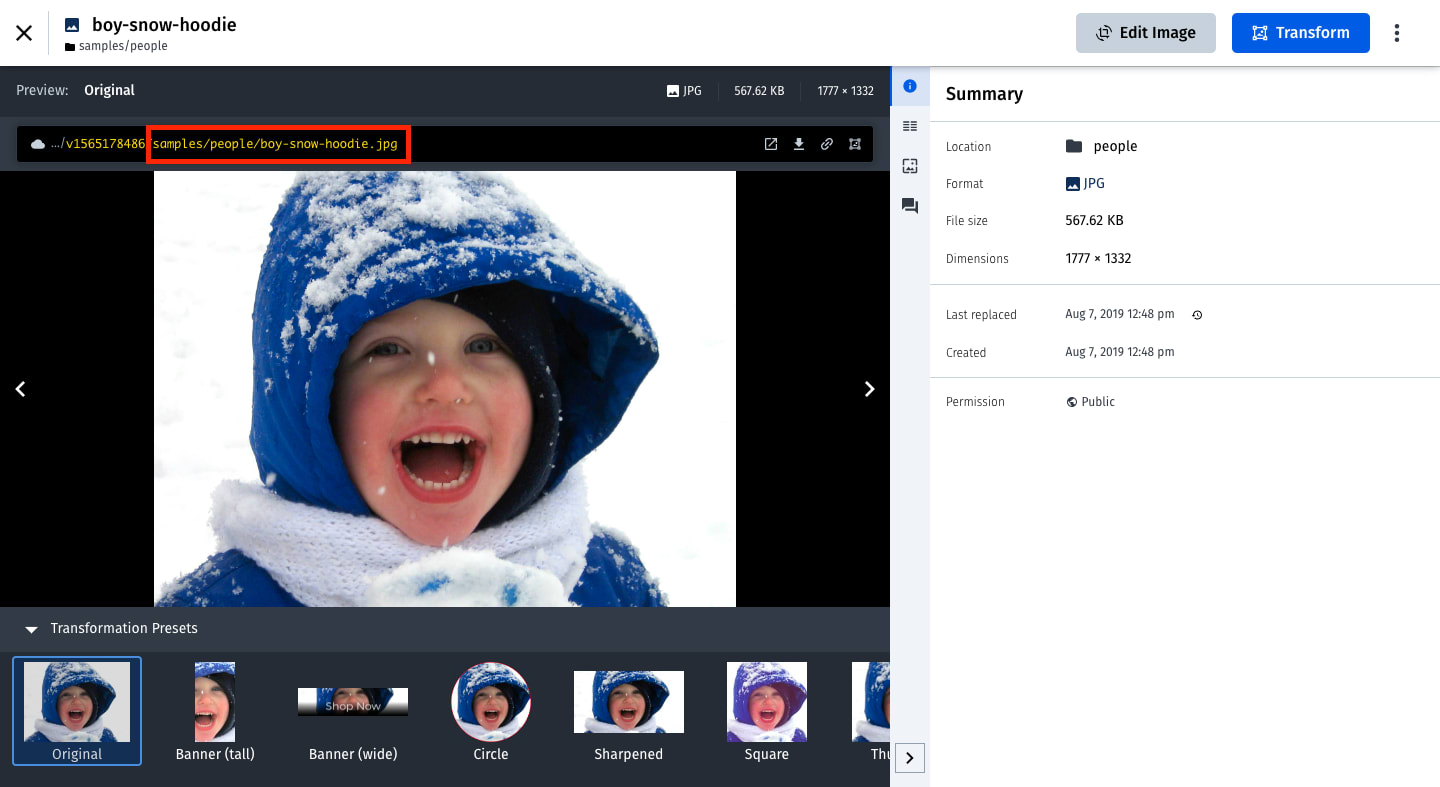
First, let’s head to the Cloudinary Media Library, double-click any image asset, and copy the image directory.
Next, update the App.js with the following snippets:
//App.js
...
import { Cloudinary } from "@cloudinary/url-gen";
import { byAngle } from "@cloudinary/url-gen/actions/rotate";
import { BsArrowClockwise, BsArrowCounterclockwise } from "react-icons/bs";

const App = () => {
    ...
  const [imageURL, setImageURL] = useState();
  const [rotateValue, setRotateValue] = useState(0);

  const rotateImages = () => {
    const cld = new Cloudinary({
      cloud: {
        cloudName: "cloud-name",
      },
    });
    const rotateImg = cld
      .image("image directory here")
      .rotate(byAngle(rotateValue));
      setImageURL(rotateImg.toURL());
    };

  ...

useEffect(() => {
    ...
  rotateImages();
});

return (
  <div className="App">
    <h1>Zoom and Roatate Images in React.js</h1>
      <div className="gallery">
         ...
      </div>

      <div className="rotate">
        <img src={imageURL} alt="snow-boy" width={500} height={500} />
        <div className="controls m-3">
          <button
            onClick={() => setRotateValue(rotateValue - 90)}
            className="m-1 btn-primary"
          >
            <BsArrowCounterclockwise />
          </button>
          <button
            onClick={() => setRotateValue(rotateValue + 90)}
            className="m-1 btn-primary"
          >
            <BsArrowClockwise />
          </button>
        </div>
      </div>
    </div>
  );
};
export default App;
Code language: JavaScript (javascript)
In the snippets above, we:
- Imported Cloudinary and
byAnglerotate actions from “@cloudinary/url-gen.” - Imported Clockwise and CounterClockwise arrows from react-icons and created
imageURLandrotateValuestate constants. - Created the
rotateImages()function and inside it, started a new instance of Cloudinary, and passed our cloud name. - Created the
rotateImgconstant, targeted our image asset, called therotate()andbyAngle()functions on it. Then, we passed therotateValuestate and updated theimageURLstate. - Rendered the
imageURLin an img tag and rendered the Counterclockwise and Clockwise arrows with anonClick()function that will decrease or increase therotateValuestate.
Your App.js should look like this:
//App.js
import "./styles.css";
import ImageZoom from "react-image-zooom";
import { useState, useEffect } from "react";
import { Cloudinary } from "@cloudinary/url-gen";
import { byAngle } from "@cloudinary/url-gen/actions/rotate";
import { BsArrowClockwise, BsArrowCounterclockwise } from "react-icons/bs";

const App = () => {
  const [imageData, setImageData] = useState(null);
  const [imageURL, setImageURL] = useState();
  const [rotateValue, setRotateValue] = useState(0);
  const rotateImages = () => {
  const cld = new Cloudinary({
    cloud: {
      cloudName: "cloud-name"
    }
  });

  const rotateImg = cld
    .image("image directory here")
    .rotate(byAngle(rotateValue));
    setImageURL(rotateImg.toURL());
  };

  const baseURL = "https://res.cloudinary.com/<cloud-name>/image";
  const getImages = async () => {
    const res = await fetch(
      "https://res.cloudinary.com/<cloud-name>/image/list/<tag-name>.json"
    );
    const data = await res.json();
    setImageData(data);
  };

useEffect(() => {
  getImages();
  rotateImages();
});

return (
  <div className="App">
    <h1>Zoom and Rotate Images in React.js</h1>
      <div className="gallery">
        {imageData &&
          imageData.resources.map((item) => {
            const { format, public_id, version, type } = item;
            return (
              <div key={version} className="gallery-img">
                <ImageZoom
                  src={`${baseURL}/${type}/v${version}/${public_id}.${format}`}
                  alt="Zoom-images"
                  zoom="300"
                />
              </div>
            );
          })}
      </div>
      <div className="rotate">
        <img src={imageURL} alt="snow-boy" width={500} height={500} />
        <div className="controls m-3">
          <button
            onClick={() => setRotateValue(rotateValue - 90)}
            className="m-1 btn-primary"
          >
            <BsArrowCounterclockwise />
          </button>
          <button
            onClick={() => setRotateValue(rotateValue + 90)}
            className="m-1 btn-primary"
            >
            <BsArrowClockwise />
          </button>
        </div>
      </div>
    </div>
  );
};
export default App;
Code language: JavaScript (javascript)
We’ll have the zoom and rotate functionalities working on the images in the browser as expected.
To rotate an image directly in your React components without relying on Cloudinary, you can use the CSS transform: rotate() property. This is a simple yet effective way of rotating your images. Here’s an example:
img { transform: rotate(90deg); }
Additionally, you can specify the point around which the image should rotate using the transform-origin property:
img { transform: rotate(90deg); transform-origin: top left; }
By default, the image rotates around its center. But with transform-origin, you can set it to other values like top left or bottom right.
If you’d like to add an animation effect to the rotation, utilize the transition property:
img { transform: rotate(90deg); transition: 1s; }
With this CSS snippet, your image will take one second to complete its rotation. It’s a nifty trick to smoothen the visual effect of the rotation.
In this post, we implemented zoom and rotating image functionalities using Cloudinary, React-image-zoom, and React. Sign up for a free Cloudinary account today to get started.


