
In May 2018, Cloudinary sponsored Capitol Music Group’s first hackathon held by its new Capitol360 Innovation Center, which aims at connecting musicians and software technologists to facilitate and stimulate the creation of music. See this interview for details. As a starter project for the hackathon, we built a sample app called Music Discovery Service.
Due to licensing, we cannot display the app.
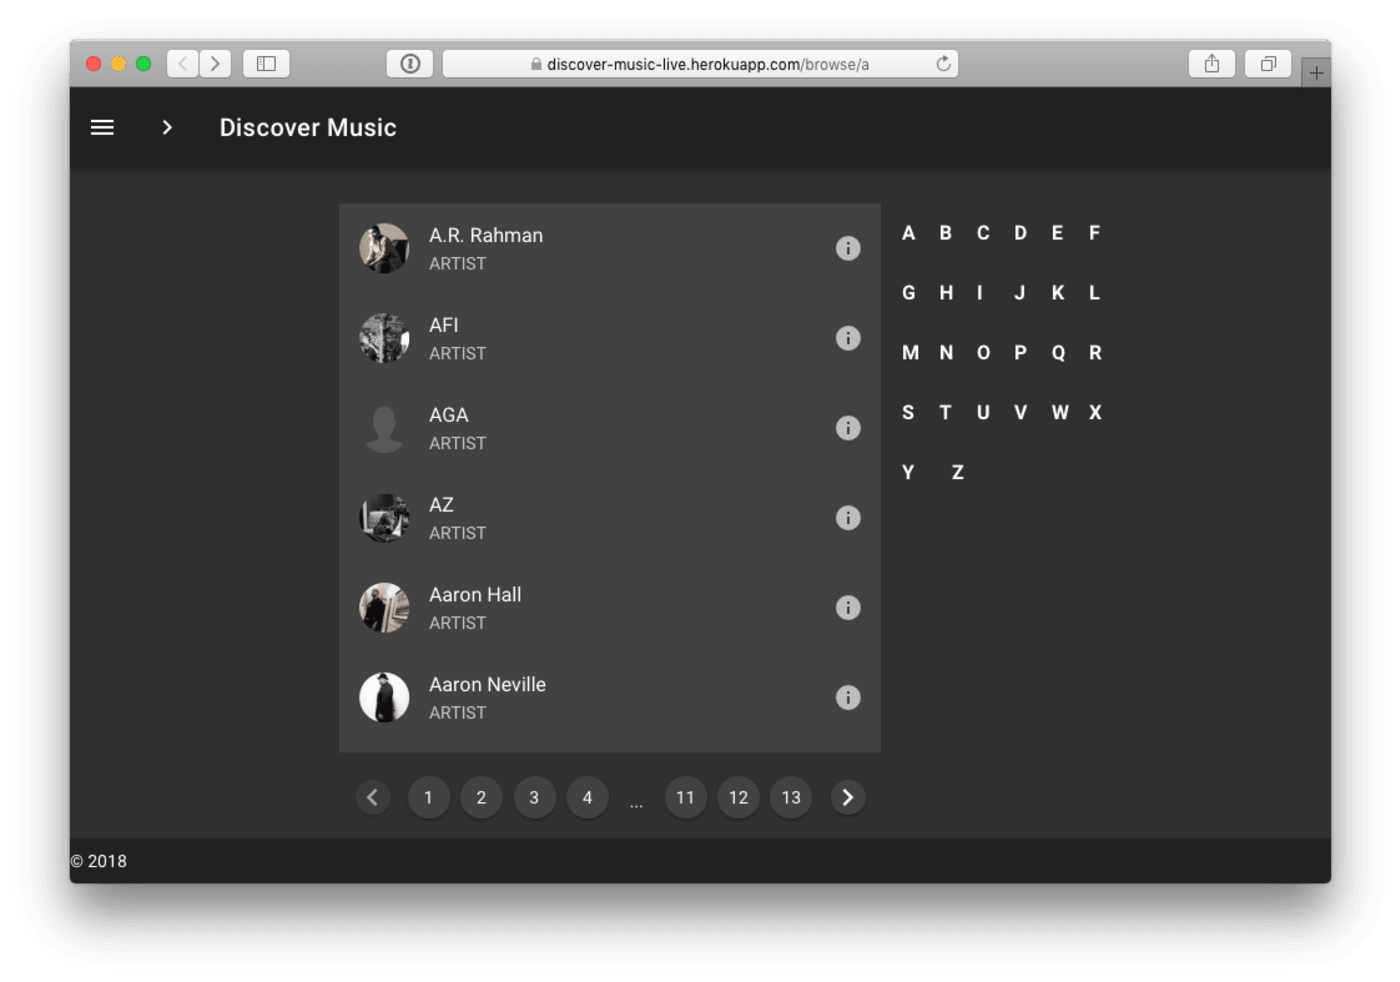
Building a Music Discovery Service brings together such technical concepts as consuming APIs, rendering audio in the browser, and transforming images. The Music Discovery Service combines them all as a music-player app in which you can browse through a list of artists, search for artists, pick an artist’s album, view all the tracks in the selected album, and play songs from there.
This guide walks you through the process of building a Music Discovery Service and highlights its key features.
We built this app with the Vue.js JavaScript framework, ES6 JavaScript, and the Codepen environment. A working knowledge of their programming constructs would help you follow the process.
This app contains four major components, each serving as a page for the component’s content:
-
Browse(also the home page) -
BrowserList -
Album -
Playing
There are three support components:
-
RiseLoader -
Carousel -
AlbumList
Since the Browse page is also the home page; we must define its route such that those artists with names that start with a certain letter populate the page whenever someone visits the root route. In other words, define the routes for the Browse component to match that requirement. The route also redirects the visitor to the /browse/a route. That syntax means that the browse route takes a parameter, which is the letter of the alphabet, in this case a.
To display a list of the artists returned from the server, we need a list component for holding the individual data for the artists. That component also needs helper functions. To accomplish all that, we create a separate utility file and then import the file into the component.
In the utility file, we declare and export the base API’s URL for our project and the letters of the alphabet. The file contains a goTo function for navigation. Additionally, the file defines the query parameters for that particular route with the route name. The file also contains a normalizeTitle function that takes in a title string as a parameter, replacing all the spaces and forward slashes in title with -.
Next, we feed data to the BrowserList component for display. How to get that data? From the API. Because we’ve already defined the API with the helper function in the utility file, all we need to do is update the Browser component to make a request to the API and then feed that data to BrowserList.
We now paginate the data returned from the server because we can’t display everything on one page. Also, at this point, only the the artists whose first names start with the alphabet a are displayed. We must find a way to filter through the rest of the alphabet.
Thankfully, Vuetify contains a pagination component, which, along with an alphabetic filter, we then add to the Browsercomponent.
Also, in the BrowserList component, we add an event listener to listen for a page change and an alphabet filter.. For each letter, when a click event is triggered, the goTo method is called, which navigates the audience to the selected letter filter.
Now we need a way to enable the audience to search for their favorite artist. You might say, “Oh if they know the artist’s name, they can simply use the alphabet filter.” Well, what if they don’t? What if there were a hundred artists with the same name?
Adding a search capability would greatly improve the app’s user experience. We’ve already added a search field to the UI. Now let’s make it search for artists based on an entry.
Next comes the addition of a carousel to the Browse page to showcase the imagery of the artists on the app. We create a separate component called carousel.vue to handle the functionality of the carousel and then place the component in the Browse page, as follows:
//carous.vue
....
methods: {
  transformCoverImage(item) {
    console.log(item);
    let url =
      item.image ||
      'http://artwork-cdn.7static.com/static/img/artistimages/00/008/194/0000819457_300.jpg';
    return this.cl.url(url, {
      width: '1036',
      height: 250,
      gravity: 'center',
      crop: 'pad',
      aspectRatio: '16:9',
      background: 'auto:predominant',
      effect: 'gradient_fade:symmetric_pad:0.05',
      fetchFormat: 'auto',
      format: 'png',
      quality: 'auto',
      type: 'fetch',
    });
  },
  ....
The cl function we imported from the utility file is from the Cloudinary library. With Cloudinary, the media-management platform for web and mobile developers, we can transform the images on the carousel as seen in the transformCoverImage method. .
So, let’s install the Cloudinary JavaScript library for image transformation. Run the following command in a terminal in your project folder:
npm install cloudinary-core
Afterwards, open the utility file and initialize the Cloudinary library there with the snippet below:
// utils.js
...
export const cl = cloudinary.Cloudinary.new({
  cloud_name: 'christekh',
  secure: true,
});
Finally, reference the newly-created carousel component on the Browse page. That component is displayed right above the search field.
When the audience clicks an artist name on the Browse page, they’d expect to see a list of the artist’s featured albums. For that to happen, we create a separate component that serves as the album page. We then click an artist name on the Browse page to see what should be on that album list. For now, only breadcrumbs are displayed; let’s generate an album list.
Before making the call to the server for a list of an artist’s albums, we need a component to display that list. For that purpose, we create a component called AlbumList, which we loop through and then display the list of items as a component property. AlbumList receives two properties:
items, the list of albums
cl, the Cloudinary library for image transformation
The album list is now all set, showing the albums on the Album page. As a nice touch, show the artist’s image on the Album page.
Finally, we build a page on which the songs in the album are played on demand We do that by creating a component called Player, which handles the listing of tracks on an album and which also holds the player. That player is a component that controls the music the audience will be listening to: play, stop, shuffle, and so forth.
Here’s what we do: Create a file called Player.vue with the following snippet in the components folder:
....
transformAlbumAvatarImage() {
  return this.cl.url(this.album.image, {
    width: 200,
    height: 200,
    gravity: 'auto',
    crop: 'fill',
    fetchFormat: 'auto',
    quality: 'auto',
    type: 'fetch',
  });
},
transformArtistBannerImage() {
  return this.cl.url(this.artist.image, {
    width: 1800,
    height: 150,
    gravity: 'west',
    crop: 'lpad',
    aspectRatio: '16:9',
    background: 'auto:predominant',
    fetchFormat: 'auto',
    quality: 'auto',
    type: 'fetch',
  });
},
....
We used Cloudinary to transform the banner images in the transformAlbumAvatarImage and transformArtistBannerImage methods.
Next, we update the player component to fetch the tracks from the server.
Even though the Player page is now done, we have yet to play any music there. To set up a player on the page, we leverage the vue-aplayer library, which contains a player component with controls for play, stop, shuffle, forward, and other tasks. To make use of player, we load the album’s track list on it and then update the Player.vue file.
A neat feature would be to enable the audience to share the track they are listening to. The vue-social-sharing library makes creating social-sharing links a breeze. Simply feed the information about the current playing track into the component and it will generate a sharing link.
Two steps are involved:
Register the social-sharing library as an external plugin for the app.
Open the Player.vue file and update it to include the social-sharing links for the player.
That’s it. Simple as ABC.
You’ve just learned how to build a music player with VueJs. In the process, you’re acquainted with concepts like image transformations with Cloudinary, fetching and displaying data from an API, and making use of external plugins. Let us know if you have any questions in comments.
Social Sharing