
Businesses around the world are looking to drive customer engagement through automation and AI. Today, we will be looking at how we can use Google’s video intelligence API to analyze videos and store the videos on Cloudinary. You can apply this to any use case. To keep it simple, we will be navigating real estate videos.
Have a quick overview of what will be covered in this tutorial.
- Obtain necessary credentials from Cloudinary
- Obtain necessary credentials from Google Cloud Platform
- Upload media to Cloudinary
- Analyze video using Google’s video intelligence API
- Render the video on the client-side
- Extract video markers from video analysis results.
- Navigate video using extracted markers
To test the final product visit the codesandbox below :
The corresponding GitHub repository can be found here
There are tons of tutorials on how to do this. You can check out the official Node.js website on installation and adding the path to your environment variables. You could also check out NVM, a version manager for node. If you are a power user and might be switching between node versions often, I would recommend the latter.
You will need a code editor. Any code editor will do. Check out Visual Studio Code, which has great support for javascript and node.
We’re going to need a sample real estate video to work with. There are numerous sources for this type of video. One way would be to download a bunch of royalty-free images and then turn them into a video where each photo spans a couple of seconds. I used this approach on https://moviemakeronline.com and was able to quickly create a short video. Here’s the link to the video if you’d like to reuse it.
Cloudinary provides a number of media solutions. These include programmable media, media optimization, dynamic asset management, and more
You will need some API credentials before making requests to Cloudinary. Luckily, you can get started with a free account immediately. Head over to Cloudinary and sign in or sign up for a free account. Once done with that, head over to your console. At the top left corner of your console, you’ll notice your account details. Take note of your Cloud name API Key and API Secret. We will need those later

If you haven’t worked with GCP before, this might be a bit intimidating, follow closely.
Navigate to the quickstart guide. You will first create an account if you do not have one. If you already have a google account you will just use that to authenticate.
You will then navigate to the project selector dashboard and select an existing project or create a new project. After you have selected or created a project, you need to ensure that billing is enabled for that project. Now, don’t panic. Some of the GCP APIs are offered on a free tier with a monthly limit on how many times you can call the API. Therefore, they will need a billing account for them to bill if you exceed those limits. For development environments, you will almost never exceed those limits. Learn how to confirm that billing is enabled for your project.
After all, this is done, you can then proceed to enable the Video Intelligence API for your newly created project. The next step is to create a service account. You can think of this as API keys, but for your project’s environment. Head over to the Create a service account page and select your project.
In the service account name field, input any sensible name. I named mine video-intelligence-nextjs. This also automatically fills in out Service account ID.

Click on Create and Continue and then click on Done. And now on your service accounts dashboard, you’ll see the newly created service account. Click on the More actions button under actions and navigate to manage keys.
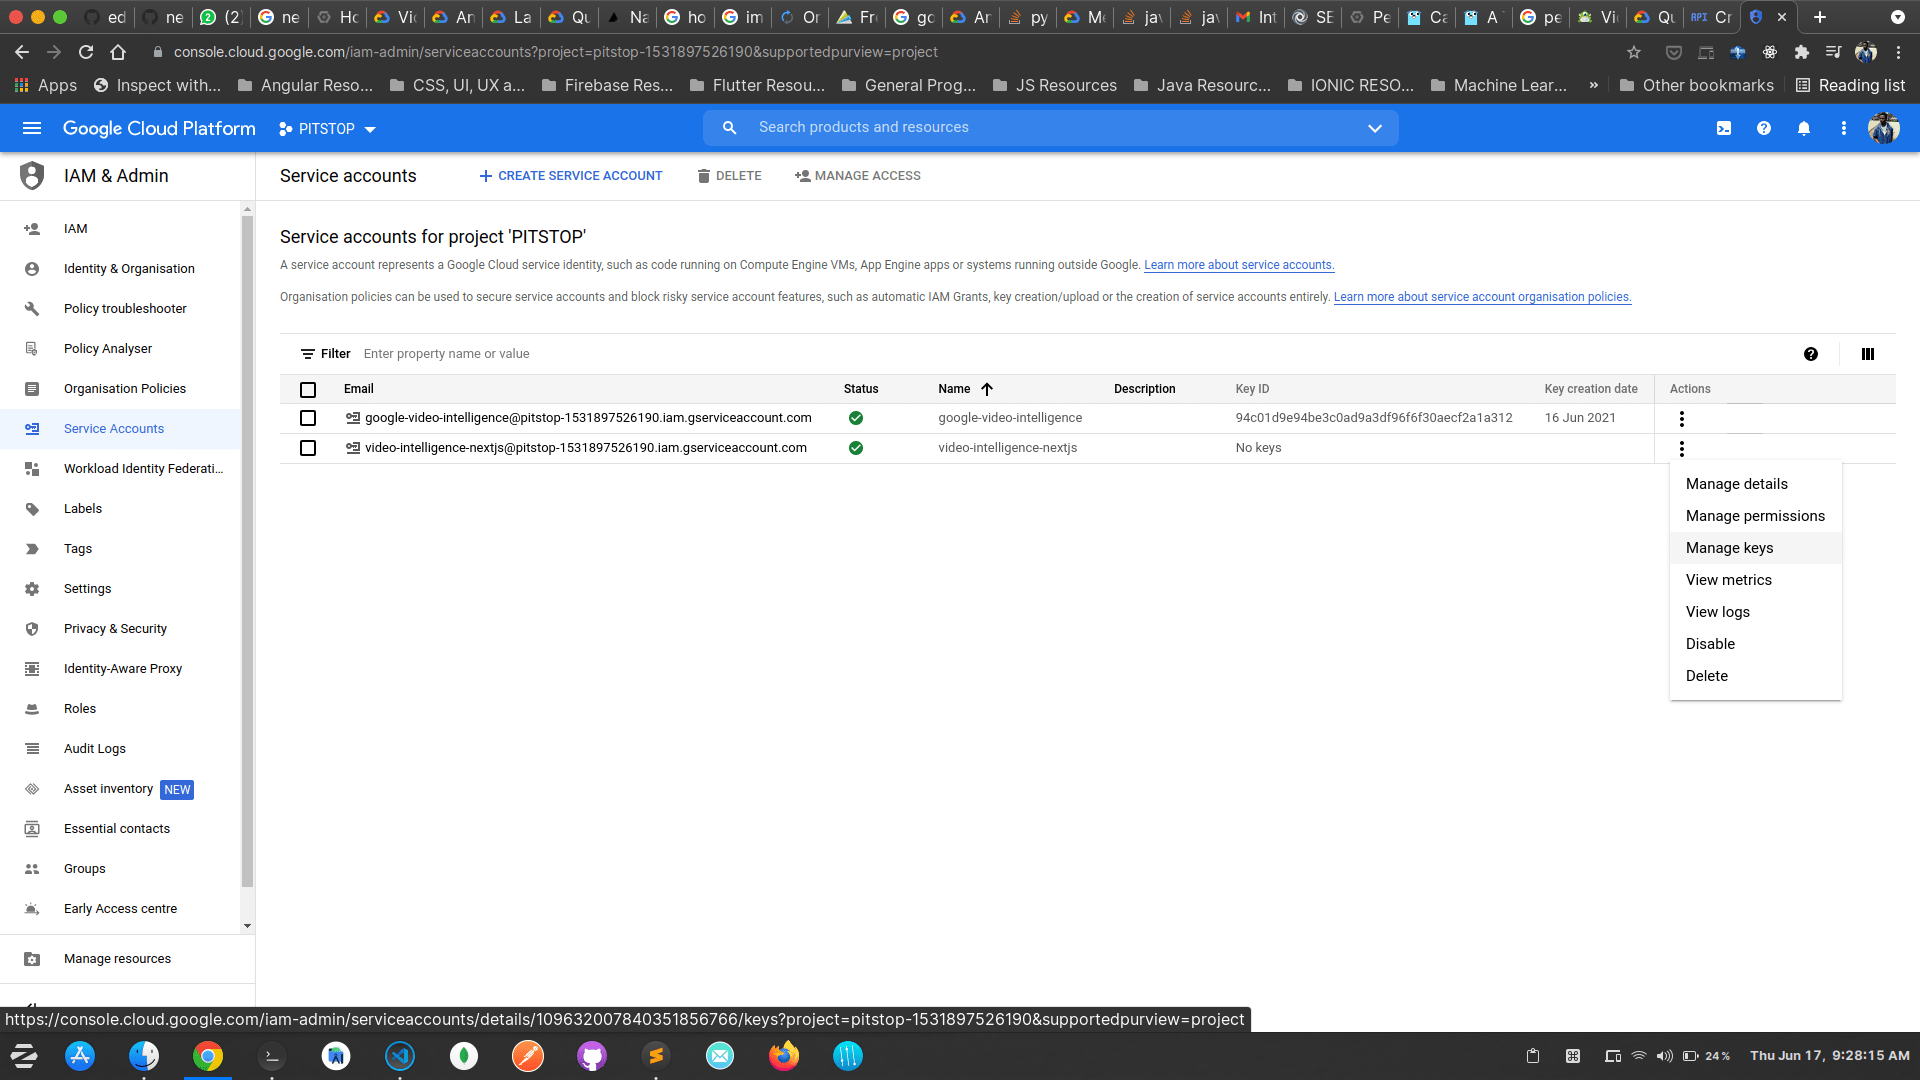
Click on Add key and choose Create new key
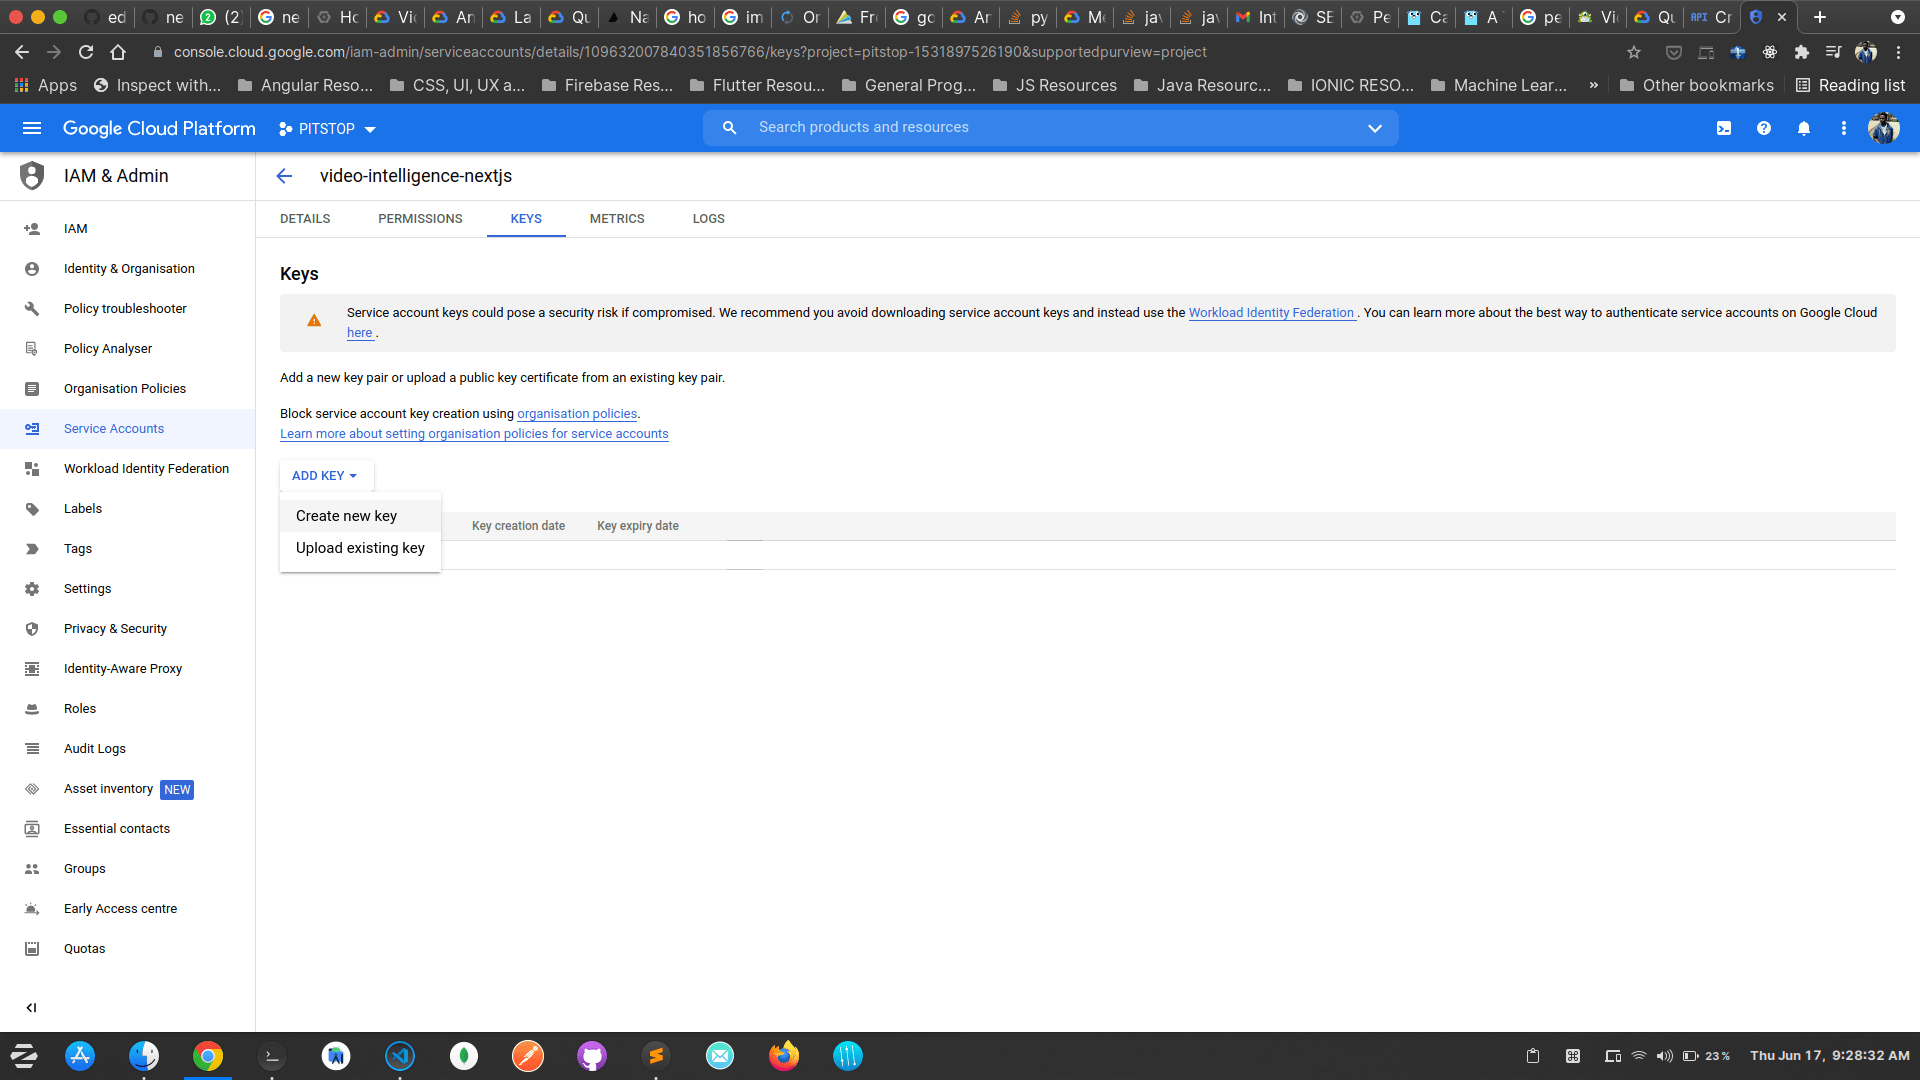
In the pop-up dialog, choose the JSON option.
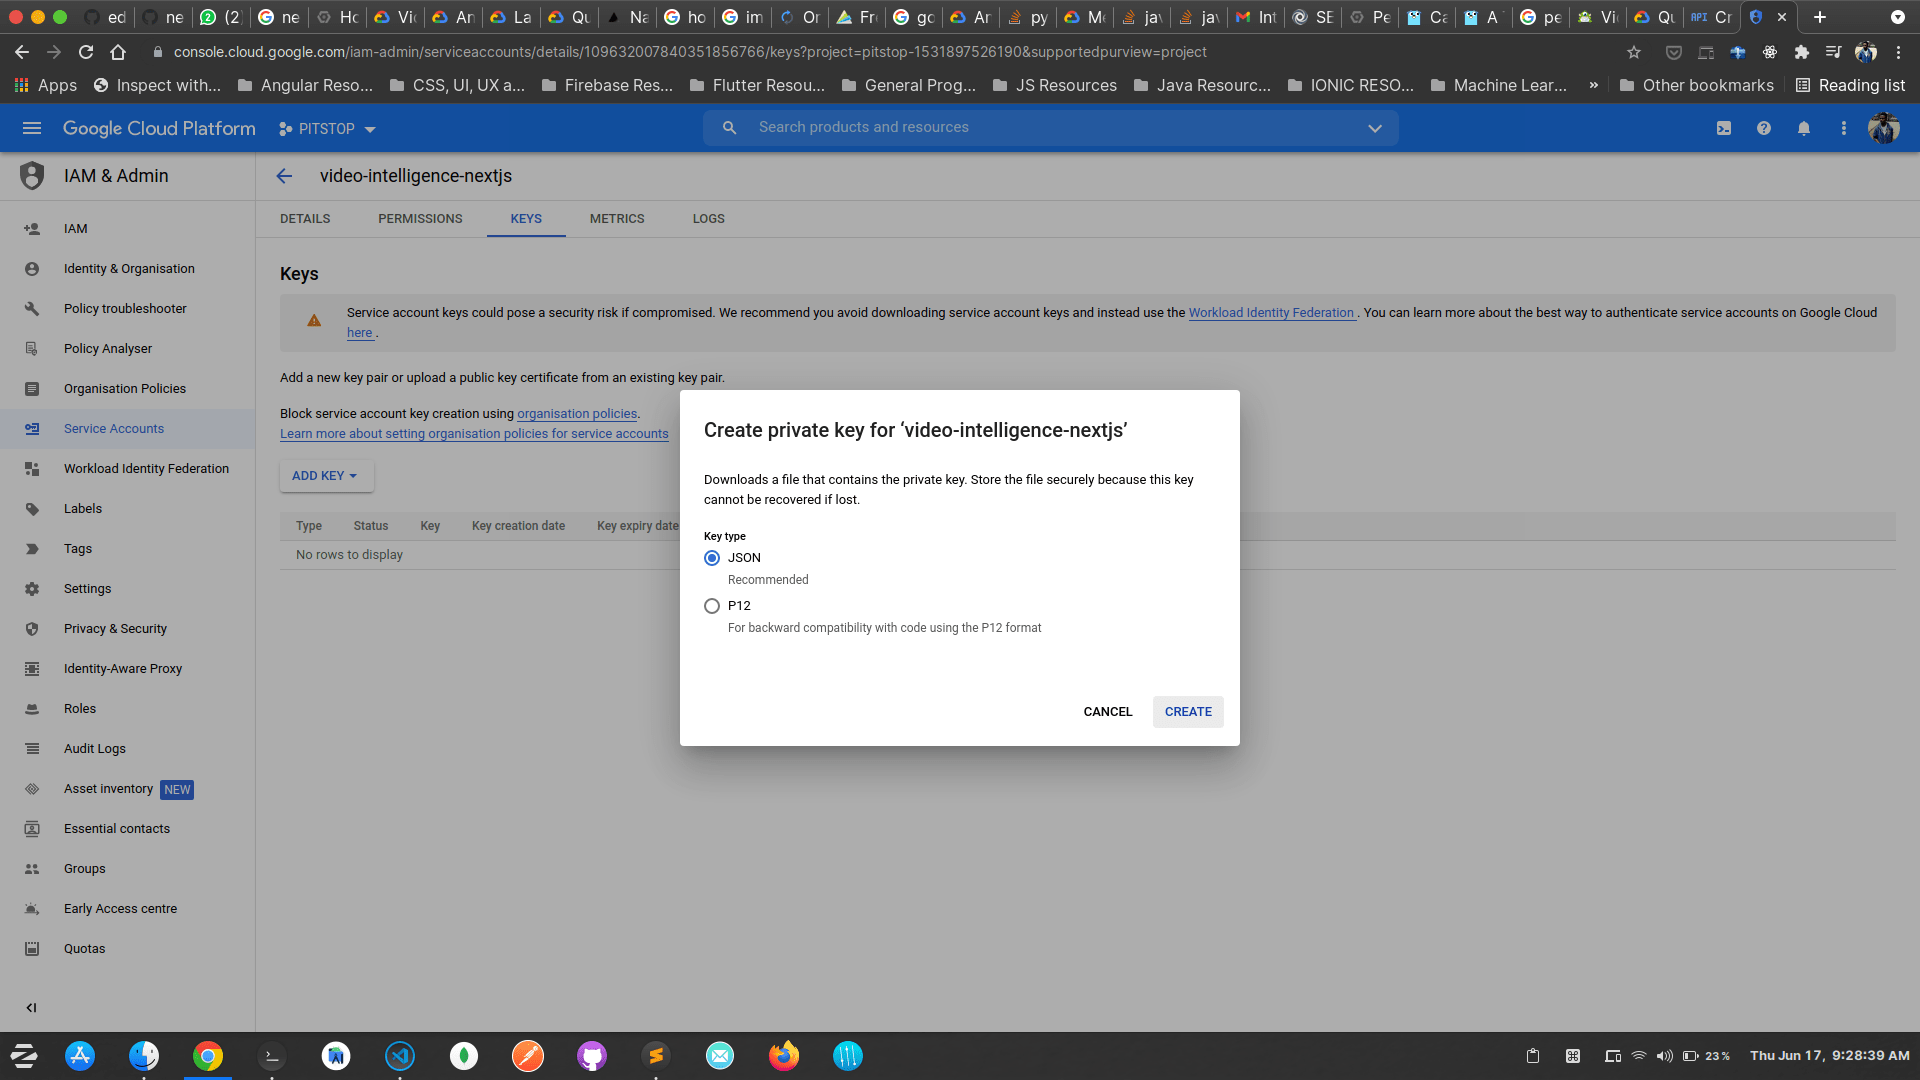
This will download a .json file. Rename this file as credentials.json and note its location. We will use it later. Also, note that we named it credentials.json so that I can easily refer to it later. You can give it any name you want.
Let’s go ahead and initialize a new project. You can check out different installation options on the official docs.
Open up your terminal/command line and navigate to your desired Project folder. Run the following command
npx create-next-app
The terminal will ask for your project name. Give it any sensible name. I’m going to name mine google-video-intelligence. The command installs a few react dependencies and scaffolds our project for us.
Change the directory into your newly created project and open the folder in your code editor.
cd google-video-intelligence
The first step is to install the necessary dependencies. Run the following command in your terminal at the root of your project
npm install --save cloudinary
Next, is to set up the cloudinary SDK and initialize it. At the root of your project create a new folder and name it lib. Inside the lib folder, create a new file and name it cloudinary.js. Paste the following code inside.
// lib/cloudinary.js

import { v2 as cloudinary } from "cloudinary";

cloudinary.config({
  cloud_name: process.env.CLOUD_NAME,
  api_key: process.env.API_KEY,
  api_secret: process.env.API_SECRET,
});

export default cloudinary;
Code language: JavaScript (javascript)
We first import the v2 API from the Cloudinary package that we just installed. We rename the v2 API as cloudinary for better readability. Calling the config method on the API will initialize it with the cloud_name api_key and api_secret. Notice the use of environment variables to store the sensitive keys. We’ve referenced the keys as environment variables but, we have not defined them yet. Let’s do that now.
At the root of your project, create a new file and name it .env.local. Inside the file, paste the following data
CLOUD_NAME=YOUR_CLOUD_NAME
API_KEY=YOUR_API_KEY
API_SECRET=YOUR_API_SECRET
Replace YOUR_CLOUD_NAME YOUR_API_KEY and YOUR_API_SECRET with the appropriate values from the Prerequisites > Cloudinary account and API keys section.
We now have our API ready to use. Let’s use it. We will be using Next.js api routes to handle the upload and analysis of the videos. Read more about api routes on the official docs. Navigate to pages/api in your code editor and create a new file called videos.js. This file will be the entry point for our /api/videos endpoint. Paste the following piece of code inside.
// pages/api/videos.js

export default async (req, res) => {
  // Check the incoming http method. Handle the POST request method and reject the rest.
  switch (req.method) {
    // Handle the POST request method
    case "POST": {
      try {
        const result = await handlePostRequest();

        // Respond to the request with a status code 201(Created) and the result
        return res.status(201).json({
          message: "Success",
          result,
        });
      } catch (error) {
        // In case of an error, respond to the request with a status code 400(Bad Request)
        return res.status(400).json({
          message: "Error",
          error,
        });
      }
    }
    // Reject other http methods with a status code 405
    default: {
      return res.status(405).json({ message: "Method Not Allowed" });
    }
  }
};
Code language: JavaScript (javascript)
You will quickly notice that we’re missing the handlePostRequest method. Let’s create that now. Inside the same file add the following method.
// pages/api/videos.js

const handlePostRequest = async () => {
  // Path to the file you want to upload
  const pathToFile = "public/videos/house.mp4";

  // Upload your file to cloudinary
  const uploadResult = await handleCloudinaryUpload(pathToFile);
};
Code language: JavaScript (javascript)
We’re defining the path to the file we want to upload and analyze. For the simplicity of this tutorial, we’re just getting a locally stored file. Ideally, you would want to upload a file from the user’s device and use that instead. Next, we delegate the upload to cloudinary to a function called handleCloudinaryUpload. Let’s create that in the same file, pages/api/videos.js
At the top of the file, import the cloudinary instance that we set up earlier
// pages/api/videos.js
import cloudinary from "../../lib/cloudinary";
import { annotateVideoWithLabels } from "../../lib/google";
Code language: JavaScript (javascript)
And Just below the handlePostRequest function, add the following
// pages/api/videos.js

const handleCloudinaryUpload = (path) => {
  // Create and return a new Promise
  return new Promise((resolve, reject) => {
    cloudinary.uploader.upload(
      path,
      {
        // Folder to store video in
        folder: "videos/",
        // Type of resource
        resource_type: "video",
      },
      (error, result) => {
        if (error) {
          // Reject the promise with an error if any
          return reject(error);
        }

        // Resolve the promise with a successful result
        return resolve(result);
      }
    );
  });
};
Code language: JavaScript (javascript)
With that, we have our upload code complete. Read more about the upload media api and options you can pass from the official documentation. We also imported a function called annotateVideoWithLabels in preparation for the next section
Once done with our upload to cloudinary, we need to analyze the video.
Let’s first install a dependency. We need the Node.js sdk. Run the following command in your terminal/command line
npm install --save @google-cloud/video-intelligence
Code language: CSS (css)
We are still inside the pages/api/videos.js file. Update the handlePostRequest function to the following.
// pages/api/videos.js

const handlePostRequest = async () => {
  // Path to the file you want to upload
  const pathToFile = "public/videos/house.mp4";

  // Upload your file to cloudinary
  const uploadResult = await handleCloudinaryUpload(pathToFile);

  // Read the file using fs. This results in a Buffer
  const file = await fs.readFile(pathToFile);

  // Convert the file to a base64 string in preparation of analysing the video with google's video intelligence api
  const inputContent = file.toString("base64");

  // Analyze the video using Google's video intelligence api
  const annotations = await annotateVideoWithLabels(inputContent);

  // Return an object with the cloudinary upload result and the video analysis result
  return { uploadResult, annotations };
};

Code language: JavaScript (javascript)
After the cloudinary upload, we read our file into a buffer. We then convert that into a base64 string that we will pass to Google. And finally, delegate the analysis to a function called annotateVideoWithLabels. Let’s create this method now.
Inside our lib folder, create a new file and name it google.js. Paste the following code inside lib/google.js
// lib/google.js

import {
  VideoIntelligenceServiceClient,
} from "@google-cloud/video-intelligence";

// Create a new Video intelligence service client
const client = new VideoIntelligenceServiceClient({
  // Google cloud platform project id
  projectId: process.env.GCP_PROJECT_ID,
  credentials: {
    client_email: process.env.GCP_CLIENT_EMAIL,
    private_key: process.env.GCP_PRIVATE_KEY.replace(/\\n/gm, "\n"),
  },
});

/**
 *
 * @param {string | Uint8Array} inputContent
 * @returns
 */
export const annotateVideoWithLabels = async (inputContent) => {
  // Grab the operation using array destructuring. The operation is the first object in the array.
  const [operation] = await client.annotateVideo({
    // Input content
    inputContent: inputContent,
    // Video Intelligence features
    features: ["LABEL_DETECTION"],
    // Options for context of the video being analyzed
    videoContext: {
      // Options for the label detection feature
      labelDetectionConfig: {
        labelDetectionMode: "SHOT_AND_FRAME_MODE",
        stationaryCamera: true,
        frameConfidenceThreshold: 0.6,
        videoConfidenceThreshold: 0.6,
      },
    },
  });

  // Grab the result using array destructuring. The result is the first object in the array.
  const [operationResult] = await operation.promise();

  // Gets annotations for video. This is the first item in the annotationResults array
  const annotations = operationResult.annotationResults[0];

  return annotations;
};
Code language: JavaScript (javascript)
Let’s go over this. At the top, we import the VideoIntelligenceServiceClient from the SDK. We then proceed to initialize the client.
We’ve referenced some environment variables. Let’s define those. Open the .env.local file at the root of your project and add the following below the existing variables.
GCP_PROJECT_ID=YOUR_GCP_PROJECT_ID
GCP_PRIVATE_KEY=YOUR_GCP_PRIVATE_KEY
GCP_CLIENT_EMAIL=YOUR_GCP_CLIENT_EMAIL
Let’s go over where you can find your project id, private key, and client email. Remember the file we downloaded in the Prerequisites > Google Cloud Platform(GCP) credentials section. Open the file in a text editor. Inside the credentials.json file, you will find the appropriate values. Replace YOUR_GCP_PROJECT_ID,YOUR_GCP_PRIVATE_KEY and YOUR_GCP_CLIENT_EMAIL with the appropriate values from credentials.json
Make sure not to commit the json file into version control as it contains sensitive keys
There are many different ways of authenticating Google APIs. Check out the official documentation. The method that I have used here is a bit unorthodox but I chose to use it so that I can just use environment variables without needing to include the credentials.json file. Read more about the method I used on these docs on github.
Next we have our annotateVideoWithLabels function. The function takes in a string or a buffer array. Use the VideoIntelligenceServiceClient‘s annotateVideo method and pass in your input content and a few options. Have a look at the official documentation for more information. Let’s just go over some of the options briefly.
-
inputContent– This is a base64 string or buffer array of your video file. If your video is hosted on Google cloud storage, you’ll want to use theinputUrifield instead. Unfortunately, only Google cloud storage URLs are supported. Otherwise, you will have to use theinputContent. -
features– This is an array of the Video intelligence features that should be run on the video. Read more in the documentation. For this tutorial, we only need theLABEL_DETECTIONfeature which identifies objects, locations, activities, animal species, products, and more. -
videoContext.labelDetectionConfig.labelDetectionMode– The mode to use to identify labels. We choseSHOT_AND_FRAME_MODEwhich analyses frame by frame and also different shots/segments. Check out the official documentation -
videoContext.labelDetectionConfig.stationaryCamera– This will depend on the video that you are analysing. It informs the client whether the video camera is stationary or moving. -
videoContext.labelDetectionConfig.frameConfidenceThreshold– Confidence threshold for frame analysis. Check out the official documentation -
videoContext.labelDetectionConfig.videoConfidenceThreshold– Confidence threshold for video segments analysis. Check out the official documentation
The annotateVideo method of VideoIntelligenceServiceClient returns an operation. We convert that to a promise by calling .promise() on the operation and wait for the promise to resolve.
We then get the result using javascript Array destructuring. It’s important that we understand the structure of the analysis/annotation result. Take a look at the official documentation for detailed information. Here’s what the structure of operationResult might look like.
/// Structure of operationResult
{
  annotationResults: [
    {
      segmentLabelAnnotations: [
        {
          entity: {
            entityId: string,
            description: string,
            languageCode: string,
          },
          categoryEntities: [
            {
              entityId: string,
              description: string,
              languageCode: string,
            },
          ],
          segments: [
            {
              segment: {
                startTimeOffset: string,
                endTimeOffset: string,
              },
              confidence: number,
            },
          ],
          frames: [
            {
              timeOffset: string,
              confidence: number,
            },
          ],
        },
      ],
      frameLabelAnnotations: [
        {
          entity: {
            entityId: string,
            description: string,
            languageCode: string,
          },
          categoryEntities: [
            {
              entityId: string,
              description: string,
              languageCode: string,
            },
          ],
          segments: [
            {
              segment: {
                startTimeOffset: string,
                endTimeOffset: string,
              },
              confidence: number,
            },
          ],
          frames: [
            {
              timeOffset: string,
              confidence: number,
            },
          ],
        },
      ],
    },
  ],
}
Code language: JavaScript (javascript)
The annotation results are an array and we only need the first item in the array. We then finish up by returning that. With all that in place, we’re finally done with the backend and can now move on to the frontend.
Open pages/index.js and replace the code inside with the following.
// pages/index.js

import { useRef, useState, MutableRefObject } from "react";

export default function Home() {
    /**
     * @type {MutableRefObject<HTMLVideoElement>}
     */
    const playerRef = useRef(null);

    // Our annotated video
    const [video, setVideo] = useState();

    const [loading, setLoading] = useState(false);

    return [
        <div key="main div">
            <header>
                <h1>Navigating auto tagged videos</h1>
            </header>

            <main className="container">
                <div className="wrapper">
                    <div className="actions">
                        <button onClick={handleUploadVideo} disabled={loading}>
                        Upload
                        </button>
                    </div>
                    <hr />
                    {loading
                        ? [
                            <div className="loading" key="loading div">
                            Please be patient as the video uploads...
                            </div>,
                            <hr key="loading div break" />,
                        ]
                        : null}
                    {video ? (
                        <div className="videos-wrapper">
                            <div className="video-wrapper">
                                <video
                                    ref={playerRef}
                                    controls
                                    src={video.uploadResult.secure_url}
                                ></video>
                                <div className="navigation">
                                </div>
                            </div>
                            <p>{video.uploadResult.secure_url}</p>
                        </div>
                    ): (
                        <div className="no-videos">
                        No video yet. Get started by clicking on upload above
                        </div>
                    )}
                </div>
            </main>
        </div>,
        <style  key="style tag" jsx>
        </style>
    ];
}
Code language: HTML, XML (xml)
We now have our barebones structure with a video element where the video will be rendered if the video state is not null. The video element stores a reference to the DOM element in the playerRef use ref hook. Read more about the useRef hook from the official documentation.
And we also have a div with className navigation. This div will hold our navigation markers. We’ll work on that in the next section. For now, all we need is to define the handleUploadVideo method inside our Home component. Just above the return statement, add the following method.
const handleUploadVideo = async () => {
    try {
      // Set loading to true
      setLoading(true);

      // Make a POST request to the `api/videos/` endpoint
      const response = await fetch("/api/videos", {
        method: "post",
      });

      const data = await response.json();

      // Check if the response is successful
      if (response.status >= 200 && response.status < 300) {
        /**
         * @type {UploadVideoResult}
         */
        const result = data.result;

        // Update our videos state with the results
        setVideo(result);
      } else {
        throw data;
      }
    } catch (error) {
      // TODO: Handle error
      console.error(error);
    } finally {
      setLoading(false);
      // Set loading to true once a response is available
    }
  };
Code language: JavaScript (javascript)
Inside the method, we first set the loading state to true. We then make a POST request to our /api/videos endpoint. We then extract the JSON body content from the response. Finally, we check if the response is successful and update our video state with the result. Again, It’s important to note that it would be more ideal to have a form with a file input. You can then send the file to the backend for upload and analysis.
The final piece of the puzzle is the navigation markers.
Remember the empty div with className navigation? Let’s modify that. Look for the following div
<div className="navigation">
</div>
Code language: HTML, XML (xml)
and replace this with
<div className="navigation">
    <h2>Rooms</h2>
    {video.annotations.frameLabelAnnotations
    .filter((annotation) =>
        annotation.categoryEntities?.some((entity) =>
        entity?.description?.includes("room")
        )
    )
    .map((annotation, index) => {
        return [
        <details key={`entity-${index}`}>
            <summary>{annotation.entity.description}</summary>
            <ul>
            {annotation.frames.map((frame, frameIndex) => {
                const seconds = frame.timeOffset.seconds ?? 0;

                return (
                <li
                    key={`frame-${frameIndex}`}
                    onClick={() => {
                    playerRef.current.currentTime = seconds;
                    }}
                >
                    Seek to{" "}
                    {new Date(seconds * 1000)
                    .toISOString()
                    .substr(11, 8)}
                </li>
                );
            })}
            </ul>
        </details>,
        <hr key={`entity-break-${index}`} />,
        ];
    })}
</div>
Code language: HTML, XML (xml)
At this point, it’s important to understand the structure of the data stored in the video state. It might be helpful to console log that out to get a good understanding. We also saw the structure of the analysis result at the end of the Analyze video using Google video intelligence section.
We first get video.annotations.frameLabelAnnotations and filter the annotations that have the word room in the entity description. We do this because the result has a number of annotations/labels that we won’t need. This will also depend on your use case. We filtered using room since we’re focusing on real estate for this tutorial.
Next, we map through the remaining annotations and return a detailed element for every annotation since each annotation/label may have been spotted in more than one frame. For the summary, we show a description of the entity that was identified in the annotation/label. For the actual details, we return a list item for every frame which contains the entity.
For this, you need to understand how the HTML video element works. To seek the currently playing video we set its currentTime field. This is mainly why we needed to keep a reference to the element in the playerRef useRef hook. To navigate to a certain part of the video, we set the currentTime of the video element to the timeOffset of the frame where the annotation/label shows. The timeOffset field has the seconds and nanos field. In our example, we just use the former(timeOffset.seconds).
And that’s it. You can find the full code along with the CSS on Codesandbox or on Github
This tutorial just shows a simple way to get started. In a real-world application, you would want to optimize a few things. For example, the videos may take a long time to upload or analyze. It wouldn’t be ideal to wait for this to finish. Have a look at Cloudinary notifications and Google video intelligence long-running operations. You might also want to store the resulting information in some sort of database.