Editing videos to remove the background is a common task, especially if you want to use the video in creative ways on your website. Chroma keying, popularly known as “green screening,” allows for the replacement of the green-colored background. In this tutorial, not only will we learn how to remove the green screen background using Cloudinary, but we’ll also explore how to use videos as dynamic backgrounds for your web pages. Let’s start by demonstrating how a video’s green screen color can be filtered out.
The final project can be viewed on Codesandbox.
You can get the GitHub source code here Github
Prior entry-level understanding of javascript and react
In your project directory create a new Nextjs app using create-next-app CLI :
npx create-next-app chromaKeying
Head to the directory
cd chromaKeying
You can use npm run dev to run the nextjs server locally.
Delete all the contents in the pages/index directory and replace them with the following
import Processor from '../components/Processor';
export default function Home() {
  return (
    <div>
      <Processor />
    </div>
  )
In the code above, our root component contains a function named Home which imports a component named Processor, imported from the directory components/Processor. You will build this directory by creating a folder named components and inside it create a new file named Processor.jsx. in the Processor.jsx file start by creating a functional component as shown below
export default function Processor() {
  return (
    <div>
      works
    </div>
  )
This should be enough to run the browser with the page looking as shown:

With the components set up, we’ll continue by first setting up the project backend. The backend will handle the app’s cloudinary online storage and provide the uploaded video’s cloudinary link.
We start by configuring cloudinary environment variables in our application. Head to the official cloudinary website. The cloudinary website contains a free tier which can be accessed through this link. Sign up and login to access your account dashboard. An example of a dashboard will be as follows
 .
.
The three environment variables will be the Cloud name, API Key, and API Secret.
To use them, head back to your project root directory and create a file named .env. Inside it paste the following code
CLOUDINARY_NAME =

CLOUDINARY_API_KEY =

CLOUDINARY_API_SECRET=
Fill in the blank spaces with your respective environment variables and restart your project.
With our keys set up, head to thepages/api folder and create a file named cloudinary.js. This is where we will code our upload function.
Start by pasting the following code
  var cloudinary = require('cloudinary').v2;

cloudinary.config({
    cloud_name: process.env.CLOUDINARY_NAME,
    api_key: process.env.CLOUDINARY_API_KEY,
    api_secret: process.env.CLOUDINARY_API_SECRET,
});
The above code simply configures the cloudinary envs to our component. Below it paste the following function
export default async function handler(req, res) {
    let uploaded_url = '';
    const fileStr = req.body.data;

    if (req.method === 'POST') {
        try {
            const uploadedResponse = await cloudinary.uploader.upload_large(fileStr, {
                resource_type: "video",
                chunk_size: 6000000,
            });
            uploaded_url = uploadedResponse.secure_url;
            console.log(uploaded_url)
        } catch (error) {
            console.log(error);
        }
        res.status(200).json({ data: uploaded_url });
        console.log('complete!');
    }
}
The above is a nextjs handler function that will receive a request body from the frontend
and upload it for online storage. On uploading, the code will capture the uploaded file’s cloudinary url and assign it to the uploaded_url variable, which will be sent back to the front end as a response.
With the above handler function, our backend is complete!
The front end is simply the part of our project involving direct user interaction.
Earlier, we had created our component and if you run the project you can still see the content from the Processor component.
Inside the components/Processor.jsx directory, start by pasting the necessary imports at the top of the page. We will only need one
import { useState, useRef } from 'react';
Inside the Processor function, paste the following
  let video, canvas, outputContext, temporaryCanvas, temporaryContext;
  const canvasRef = useRef();
  const [computed, setComputed] = useState(false);
  const [link, setLink] = useState('');
Each of the above variables will be understood as we move on.
Replace your function’s return statement with the following code,
<>
            <header className="header">
                <div className="text-box">
                    <h1 className="heading-primary">
                        <span className="heading-primary-main">Cloudinary Chroma Keying</span>
                    </h1>
                    <a href="#" className="btn btn-white btn-animated" onClick={computeFrame}>Remove Background</a>
                </div>
            </header>
            <div className="row">
                <div className="column">
                    <video className="video" crossOrigin="Anonymous" src='https://res.cloudinary.com/dogjmmett/video/upload/v1632221403/sample_mngu99.mp4' id='video' width='400' height='360' controls autoPlay muted loop type="video/mp4" />
                </div>
                <div className="column">
                    { link ? <a href={link}>LINK : {link}</a> : <h3>your link shows here...</h3>}
                    <canvas className="canvas" ref={canvasRef} id="output-canvas" width="500" height="360" ></canvas><br />
                </div>
            </div>
        </>
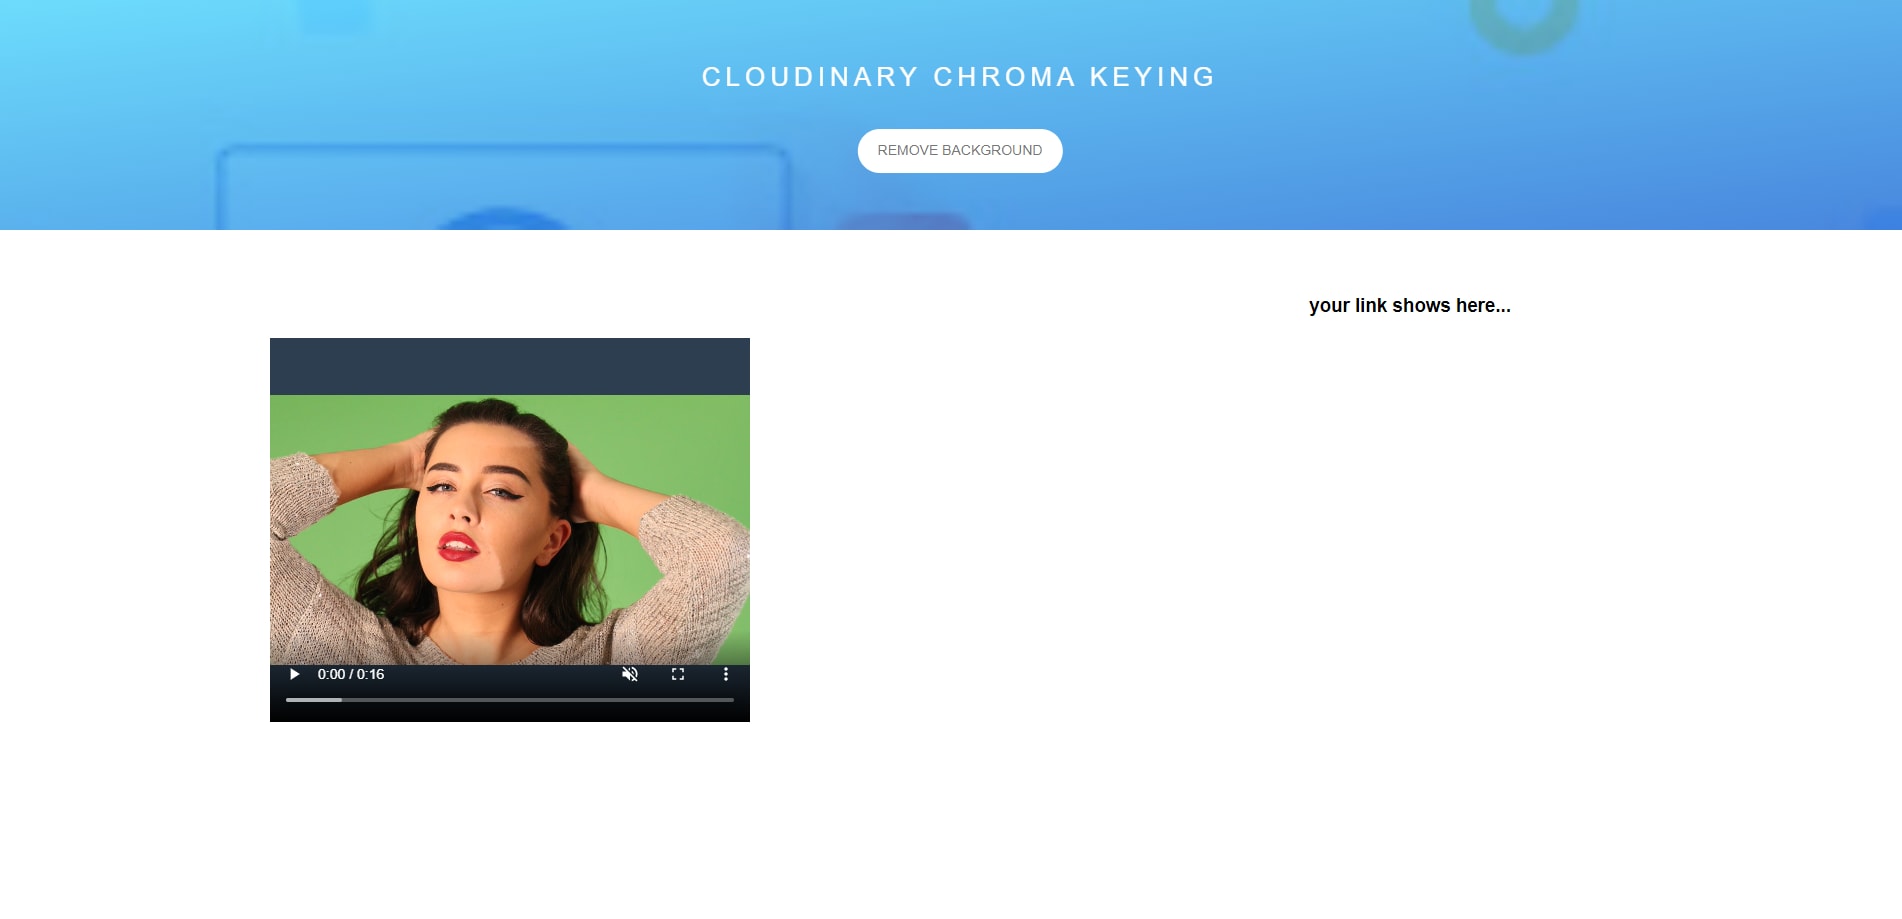
The above code should simply create a UI that users will be interacting with. The UI will be like below
 .
.
If the page has not shown up, don’t worry, that’s because the REMOVE BACKGROUND button contains an onClick function named computeFrame. Let’s create it. Above the return statement, paste the following
function computeFrame(){

}
Your UI should work by now.
Let us modify our computeFrame function. When this function is fired, the function should remove the green color from the video and maintain the foreground. Therefore start by pasting the following inside it
        video = document.getElementById("video")

        temporaryCanvas = document.createElement("canvas");
        temporaryCanvas.setAttribute("width", 800);
        temporaryCanvas.setAttribute("height", 450);
        temporaryContext = temporaryCanvas.getContext("2d");

        canvas = document.getElementById("output-canvas");
        outputContext = canvas.getContext("2d");
Above, we begin using the variables created earlier. the video variable references the video element in our return statement. We’ve then created a temporary canvas element and assigned it to the temporaryCanvas variable then configured its width and height property. We assign its context to the temporaryContext variable.
The temporaryContext variable will be used to fetch the current video frame as an image and pass the video size and element using the drawImage method.
        temporaryContext.drawImage(video, 0, 0, video.width, video.height);
        let frame = temporaryContext.getImageData(0, 0, video.width, video.height);
We can now remove the green screen background. Our sample image data is in a single-dimensional array format. This means that the image begins with the first row’s pixel then followed by the next one in the same row. this happens over the following row repeatedly till the whole image is covered. There are 4 data in each pixel, 3 RGB values, and alpha transparency. That means four array spaces followed by an array size that is four times the original pixel number. We will create a loop that checks all pixels’ RGB value and get the value for each pixel by multiplying the index by four and adding an offset. R, the first value for each pixel will get zero offsets while G and B will get 1 and 2 offsets respectively.
for (let i = 0; i < frame.data.length / 4; i++) {
            let r = frame.data[i * 4 + 0];
            let g = frame.data[i * 4 + 1];
            let b = frame.data[i * 4 + 2];

        }
At this point, we can confirm each pixel’s RGB value that resembles the green color and set their alpha value to zero which will remove the green screen. This will modify the code above as follows
 for (let i = 0; i < frame.data.length / 4; i++) {
            let r = frame.data[i * 4 + 0];
            let g = frame.data[i * 4 + 1];
            let b = frame.data[i * 4 + 2];

            if (r > 70 && r < 160 && g > 95 && g < 220 && b > 25 && b < 150) {
                frame.data[i * 4 + 3] = 0;
            }
        }
Better results can be achieved through a more advanced algorithm but for our case, this should be enough. Use the setTimeout to recursively call itself and create a rendering loop.
outputContext.putImageData(frame, 0, 0)
setTimeout(computeFrame, 0);
```
Your green screen should be able to disappear at this point.

Next, we record our animated canvas as a WebM file using MediaRecorder API for cloudinary upload.
Create a constant to upload recorded media chunks
const chunks = [];
Create another to reference our canvas element using the useRef hook
const cnv = canvasRef.current;
Grab the canvas MediaStream
const stream = cnv.captureStream()
Initialize the recorder, and let it store data in our array each time the recorder has new data
const rec = new MediaRecorder(stream); rec.ondataavailable = e => chunks.push(e.data);
A complete blob will be constructed when the recorder stops
rec.onstop = e => uploadHandler(new Blob(chunks, { type: ‘video/webm’ })); rec.start();
you can also set the time the media stops recording. We shall stop our in 16 seconds
setTimeout(() => rec.stop(), 16000);
In the above codes notice the `uploadHandler` function. If we run this project now, there will be an error `uploadHandler is to define`. We solve this by creating the function itself.
async function uploadHandler(){
}
The function above will be used to send our WebM files to the backend for upload.
Replace with its full code below
async function uploadHandler(blob) { await readFile(blob).then((encoded_file) => { try { fetch(’/api/cloudinary’, { method: ‘POST’, body: JSON.stringify({ data: encoded_file }), headers: { ‘Content-Type’: ‘application/json’ }, }) .then((response) => response.json()) .then((data) => { setComputed(true); setLink(data.data); }); } catch (error) { console.error(error); } }); }
The function is an async function since it will involve an await expression to make the promise returning function act synchronous by suspending execution until the promise is fulfilled. The resolved value will be the await expression's return value. Use the following [link](https://developer.mozilla.org/en-US/docs/Web/JavaScript/Reference/Statements/async_function) for a better understanding of asynchronous functions. In our case, the await expression will use the blob prop from the `computeFrame` function. it will return a base64 encoded file awaited from a fileReader function. Paste the following to include your fileReader
function readFile(file) { return new Promise(function (resolve, reject) { let fr = new FileReader();
        fr.onload = function () {
            resolve(fr.result);‘
        };

        fr.onerror = function () {
            reject(fr);
        };

        fr.readAsDataURL(file);
    });
}
- First, upload your video with a green screen background to Cloudinary.
- Use the
e_replace_colorparameter to replace the green color in the background with transparency. - Save the video with the new transparent background.
Embedding videos as backgrounds can provide a dynamic visual experience for your website visitors. Here’s how you can do it:
You can add a video as a background to your Next.js website by utilizing the <video> tag. Make sure to include the autoplay, muted, and loop attributes to ensure a seamless user experience.
<video autoplay muted loop>
  <source src="video.mp4" type="video/mp4">
</video>
Note: Use code with caution. Always ensure your website remains user-friendly and that background videos do not distract from essential content.
Position the video to serve as the backdrop for your content using CSS:
video { position: fixed; top: 0; left: 0; width: 100%; height: 100%; z-index: -1; }
This CSS will position the video behind other content, making it serve as a background that plays continuously in a muted state. Remember to use code with caution and test thoroughly on different devices and browsers for the best user experience.
With Cloudinary, removing the green screen from videos is simple and straightforward. Additionally, using videos as a background can enhance the look and feel of your website, offering a more engaging experience for users. However, always ensure any video or interactive element added to your website does not hinder user experience or accessibility.
