
Google Analytics is a free tracking tool provided by Google that shows how visitors interact with your website. This post will discuss how to track user engagements and events on a specific section or a component in our website using a Cloudinary video player. We will also learn more about google analytics and how to use it to track user activities.
Here is a link to the demo CodeSandbox.
First, sign up for a free Cloudinary account if you don’t have one already and upload a video to your account. Displayed on your account’s Management Console (aka Dashboard) are important details: your cloud name, API key, etc.
Run this command in your terminal to create a React app in a folder called video-analytics:
npx create-react-app video-analytics
Next, run this command to install the dependencies we need for this project:
npm install cloudinary-core cloudinary-video-player
In your src directory, create a folder called components, then create a file called videoPlayer.js inside the components folder and add the following to it:
import { Cloudinary } from "cloudinary-core";
import "cloudinary-video-player";
const cld = new Cloudinary({ cloud_name: "ifeomaimoh", secure: true });
function MyPlayer() {
  const myVid = cld.videoPlayer("player", {
    bigPlatButton: "true",
    controls: "true",
  });
  myVid.source("production_ID_3741671_nknpda");
  return;
}
export default MyPlayer;
Code language: JavaScript (javascript)
In the code above, we created an instance of Cloudinary and passed our cloud name. We also created an instance of a video player using the videoPlayer method, and it returns a player object. The method accepts an id (id of the video element), which tells Cloudinary where to embed the video player. It also accepts some configurations. Next, we call the source method and pass the public id of a video uploaded to Cloudinary as an argument.
Next, let’s use the MyPlayer component in our App.js file.
import "./App.css";
import { useEffect } from "react";
import "cloudinary-video-player/dist/cld-video-player.min.css";
import MyPlayer from "./Components/VideoPlayer";
export default function App() {
  useEffect(() => {
    MyPlayer();
  }, []);
  return (
    <div className="App">
      <h2>Tracking user activities on a cloudinary video</h2>
      <div className="vid-container">
        <video
          controls
          muted
          className="cld-video-player cld-fluid"
          id="player"
        />
      </div>
    </div>
  );
}
Code language: JavaScript (javascript)
We imported our MyPlayer component and called it inside a useEffect hook. We then embedded the video player by adding an HTML video element and passed the id referenced in the videoPlayer method.
If we go over to the browser, we would see a functional video player.
We need to host our project and get a URL that will be used to set up the data stream. See here for how to deploy your site on Netlify.
Now, create a free account here. After creating the account:
-
Click on the Start measuring button.
-
Add an account name, and click the Next button.

-
Add a property name and click the show advanced options link**.**
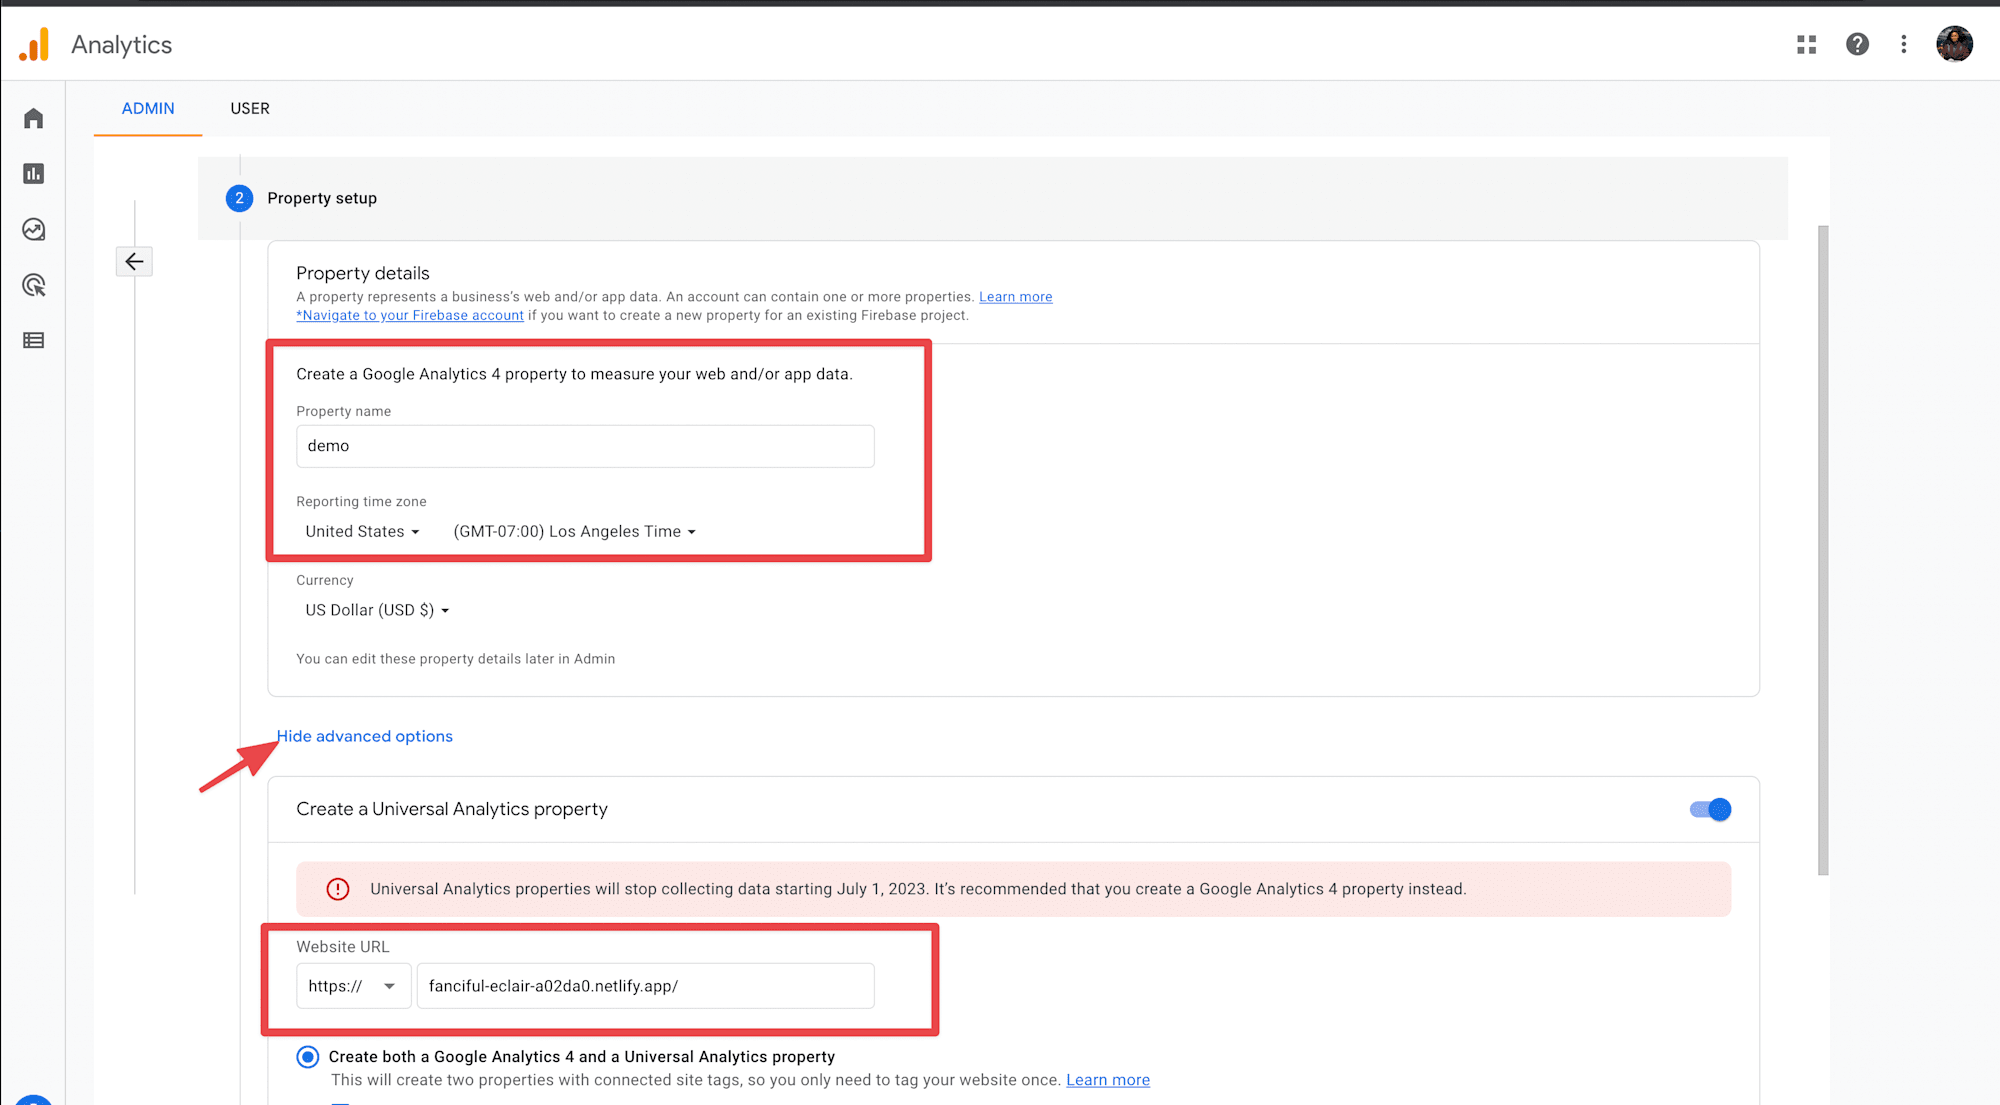
-
Enable the toggle button for the Create a Universal Analytics property and provide the URL for your deployed project.
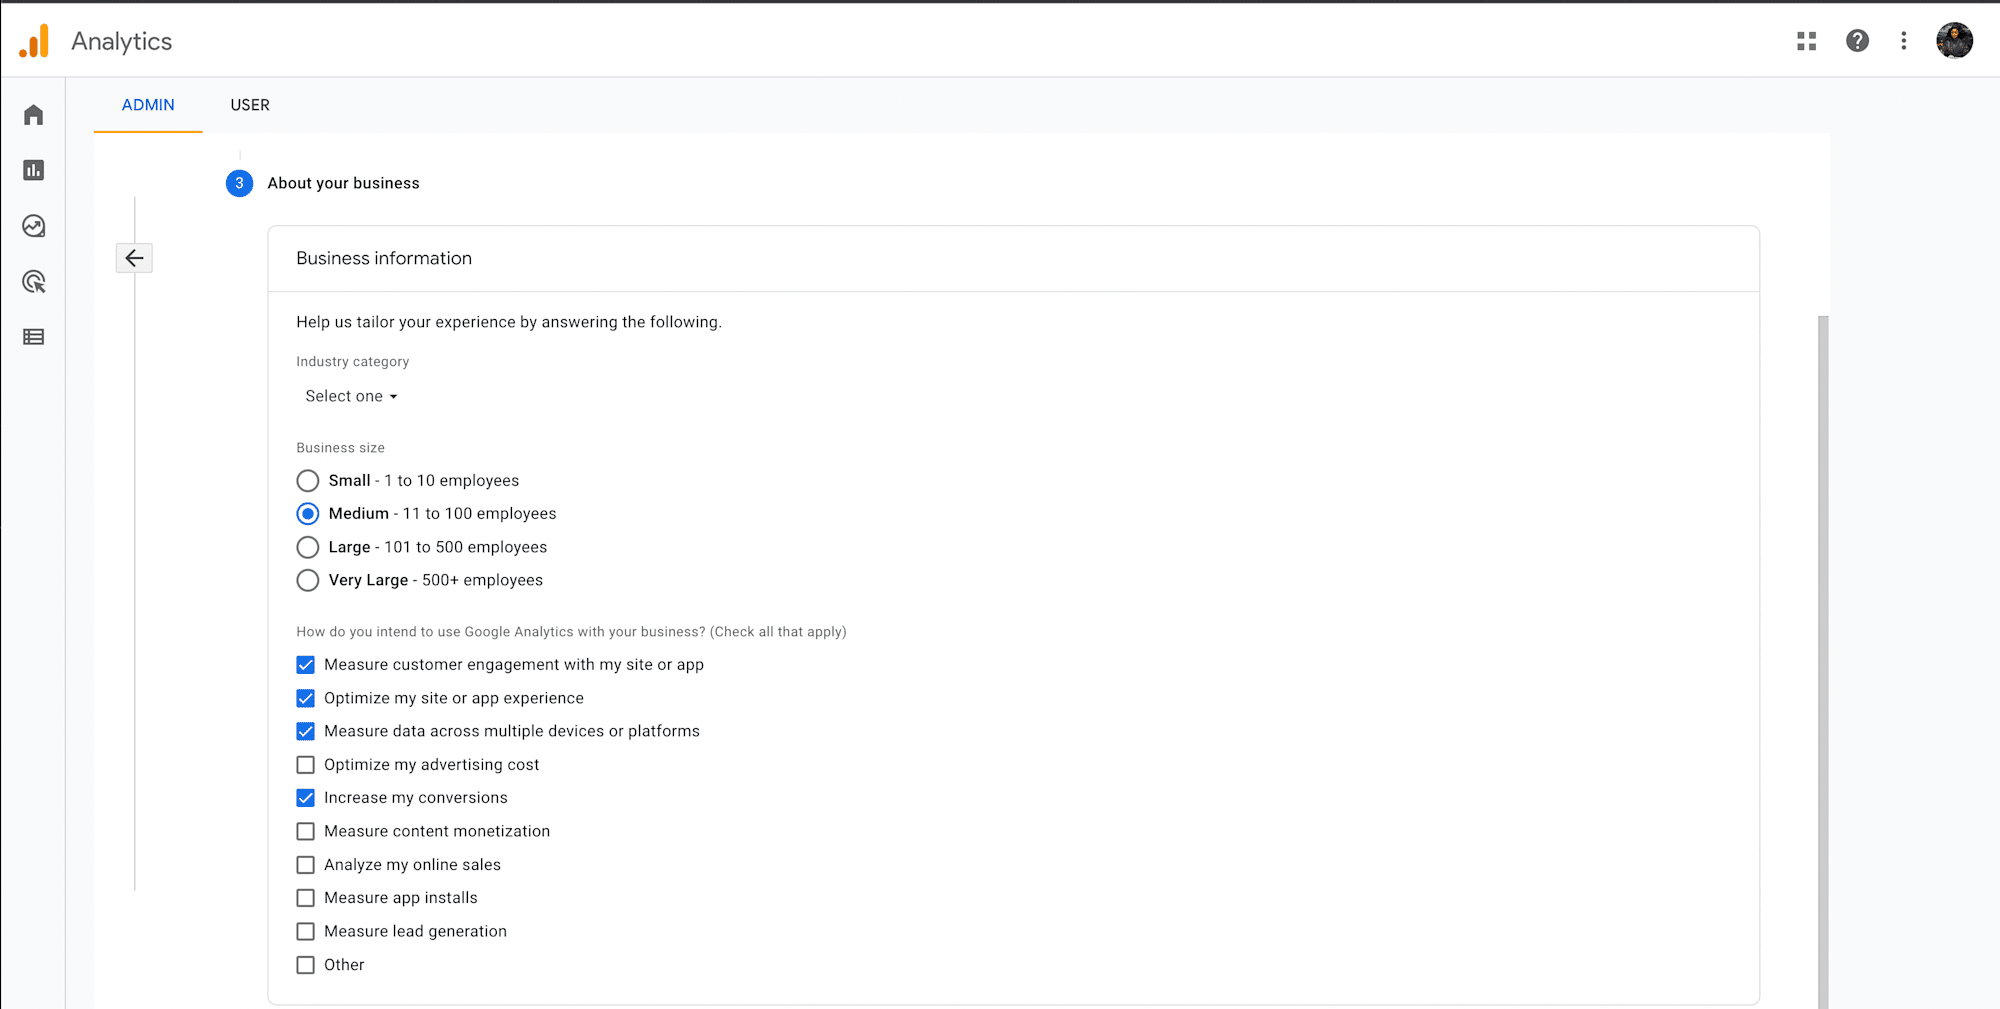
-
Check your related business information from the list provided and click the Create button.
First, let’s specify the events we want to monitor, including additional sub-settings, like timesplayed and percentsplayed in the videoPlayer function.
Update your VideoPlayer.js file with the following:
import { Cloudinary } from "cloudinary-core";
import "cloudinary-video-player";
const cld = new Cloudinary({ cloud_name: "ifeomaimoh", secure: true });
function MyPlayer() {
  const player = cld.videoPlayer("player", {
    bigPlatButton: "true",
    controls: "true",
    analytics: {
      events: ["play", "pause", "ended", "error"],
    },
  });
  player.source("8ba64b04-f0e6-43af-a6a0-d7815646332b_jdh3ty");
  return;
}
export default MyPlayer;
Code language: JavaScript (javascript)
In the code above, we added the analytics prop with an array of events.
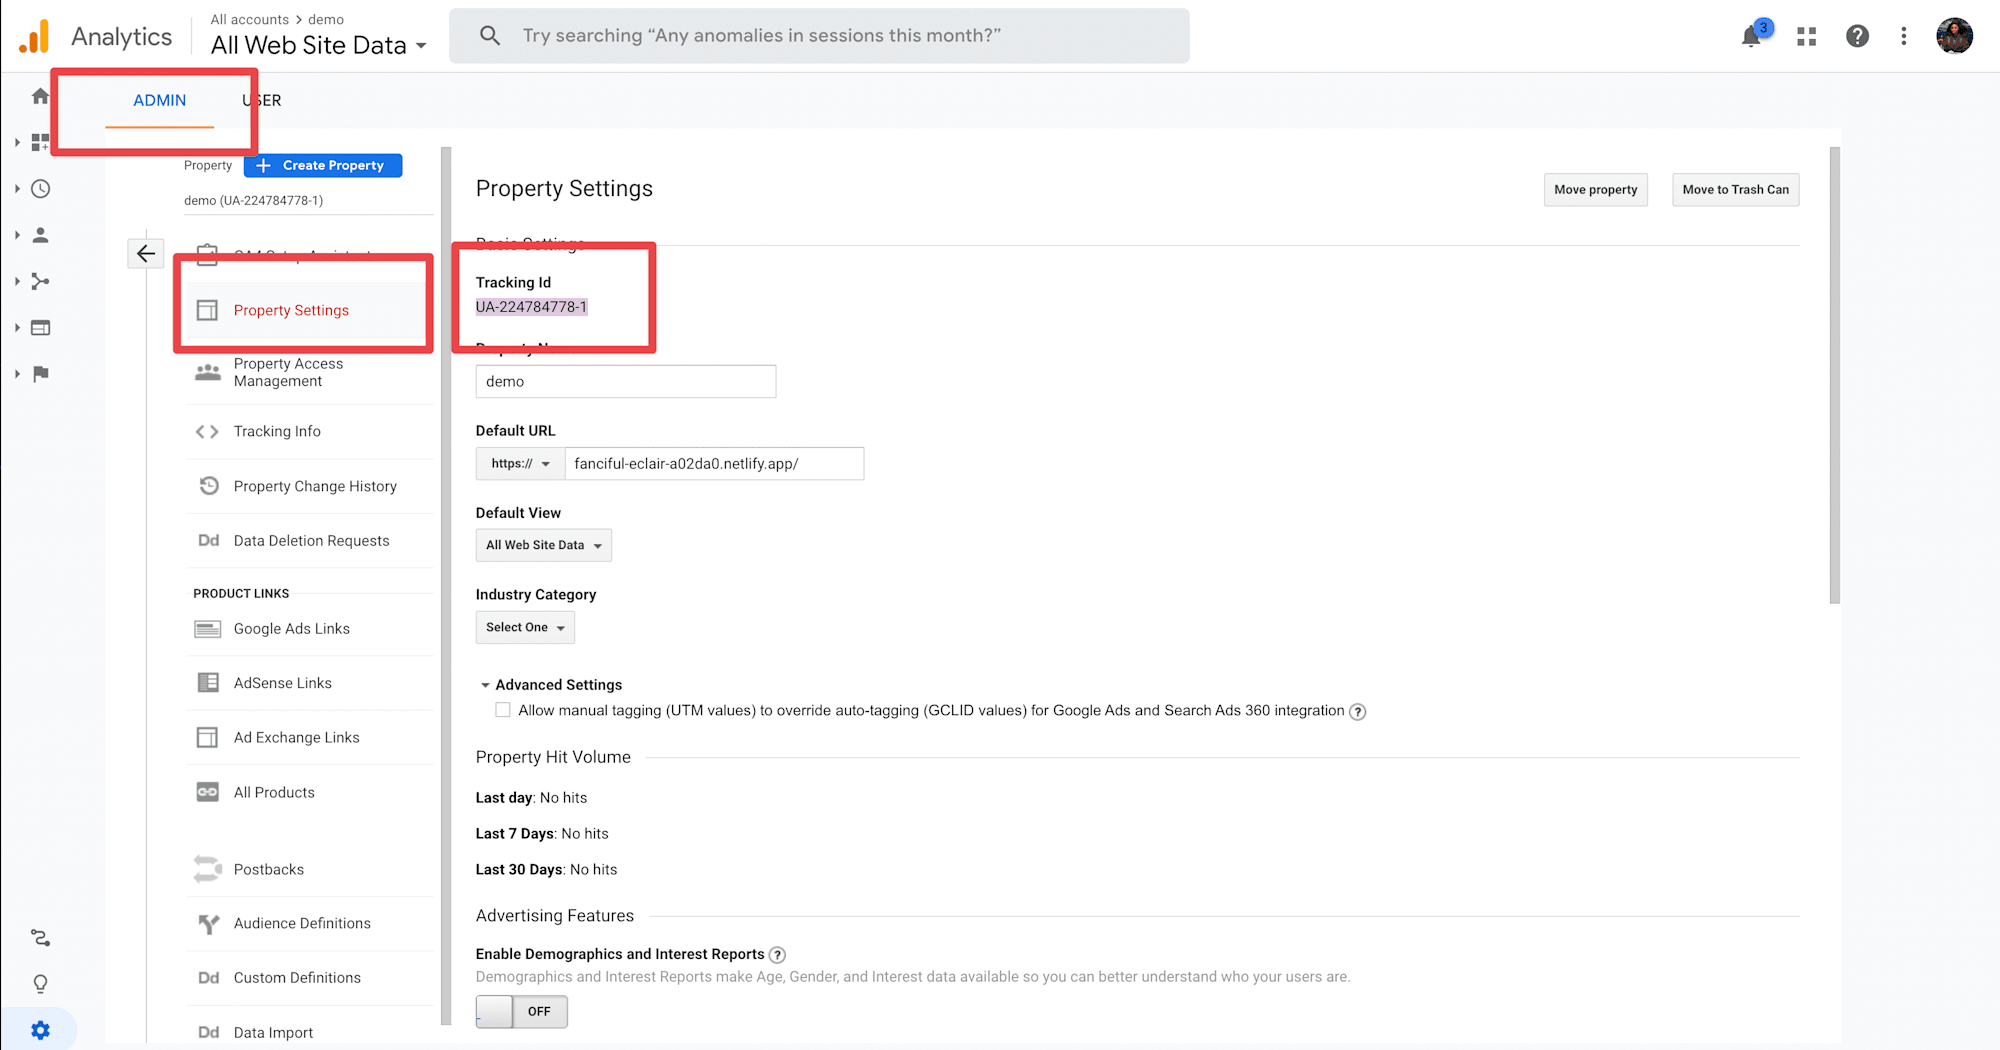
Now we need to include the google analytics tracking snippets with our tracking ID in the head tag of our index.html file. Let’s get the tracking ID from our google analytics dashboard. Click on the Admin link on your dashboard, click on Property Setting and copy the tracking Id.
<!DOCTYPE html>
<html lang="en">
  <head>
    <meta charset="utf-8" />
    <meta name="viewport" content="width=device-width, initial-scale=1" />
    <meta name="theme-color" content="#000000" />
    <meta
      name="description"
      content="Web site created using create-react-app"
    />
    <script>
      (function (i, s, o, g, r, a, m) {
        i["GoogleAnalyticsObject"] = r;
        (i[r] =
          i[r] ||
          function () {
            (i[r].q = i[r].q || []).push(arguments);
          }),
          (i[r].l = 1 * new Date());
        (a = s.createElement(o)), (m = s.getElementsByTagName(o)[0]);
        a.async = 1;
        a.src = g;
        m.parentNode.insertBefore(a, m);
      })(
        window,
        document,
        "script",
        "https://www.google-analytics.com/analytics.js",
        "ga"
      );

      // Add your tracking ID here.
      ga("create", "UA-224784778-1", "auto");
      ga("send", "pageview");
    </script>
    <title>React App</title>
  </head>
  <body>
    <noscript>You need to enable JavaScript to run this app.</noscript>
    <div id="root"></div>
  </body>
</html>
Code language: HTML, XML (xml)
With this, we’ve successfully added google analytics to our project. We can now watch and monitor user engagements and events in our project from our google analytics dashboard.
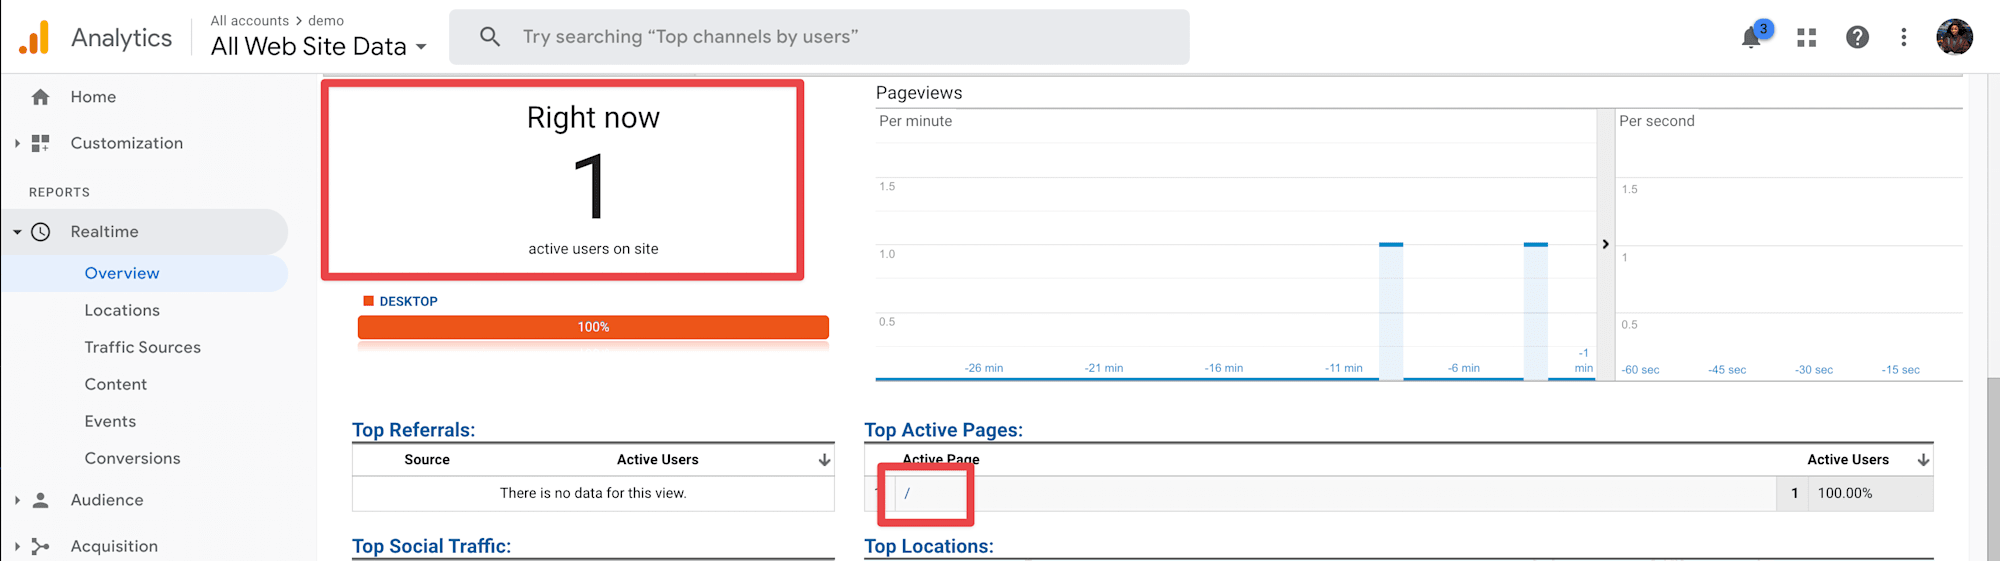
We can see active users from the real-time report.
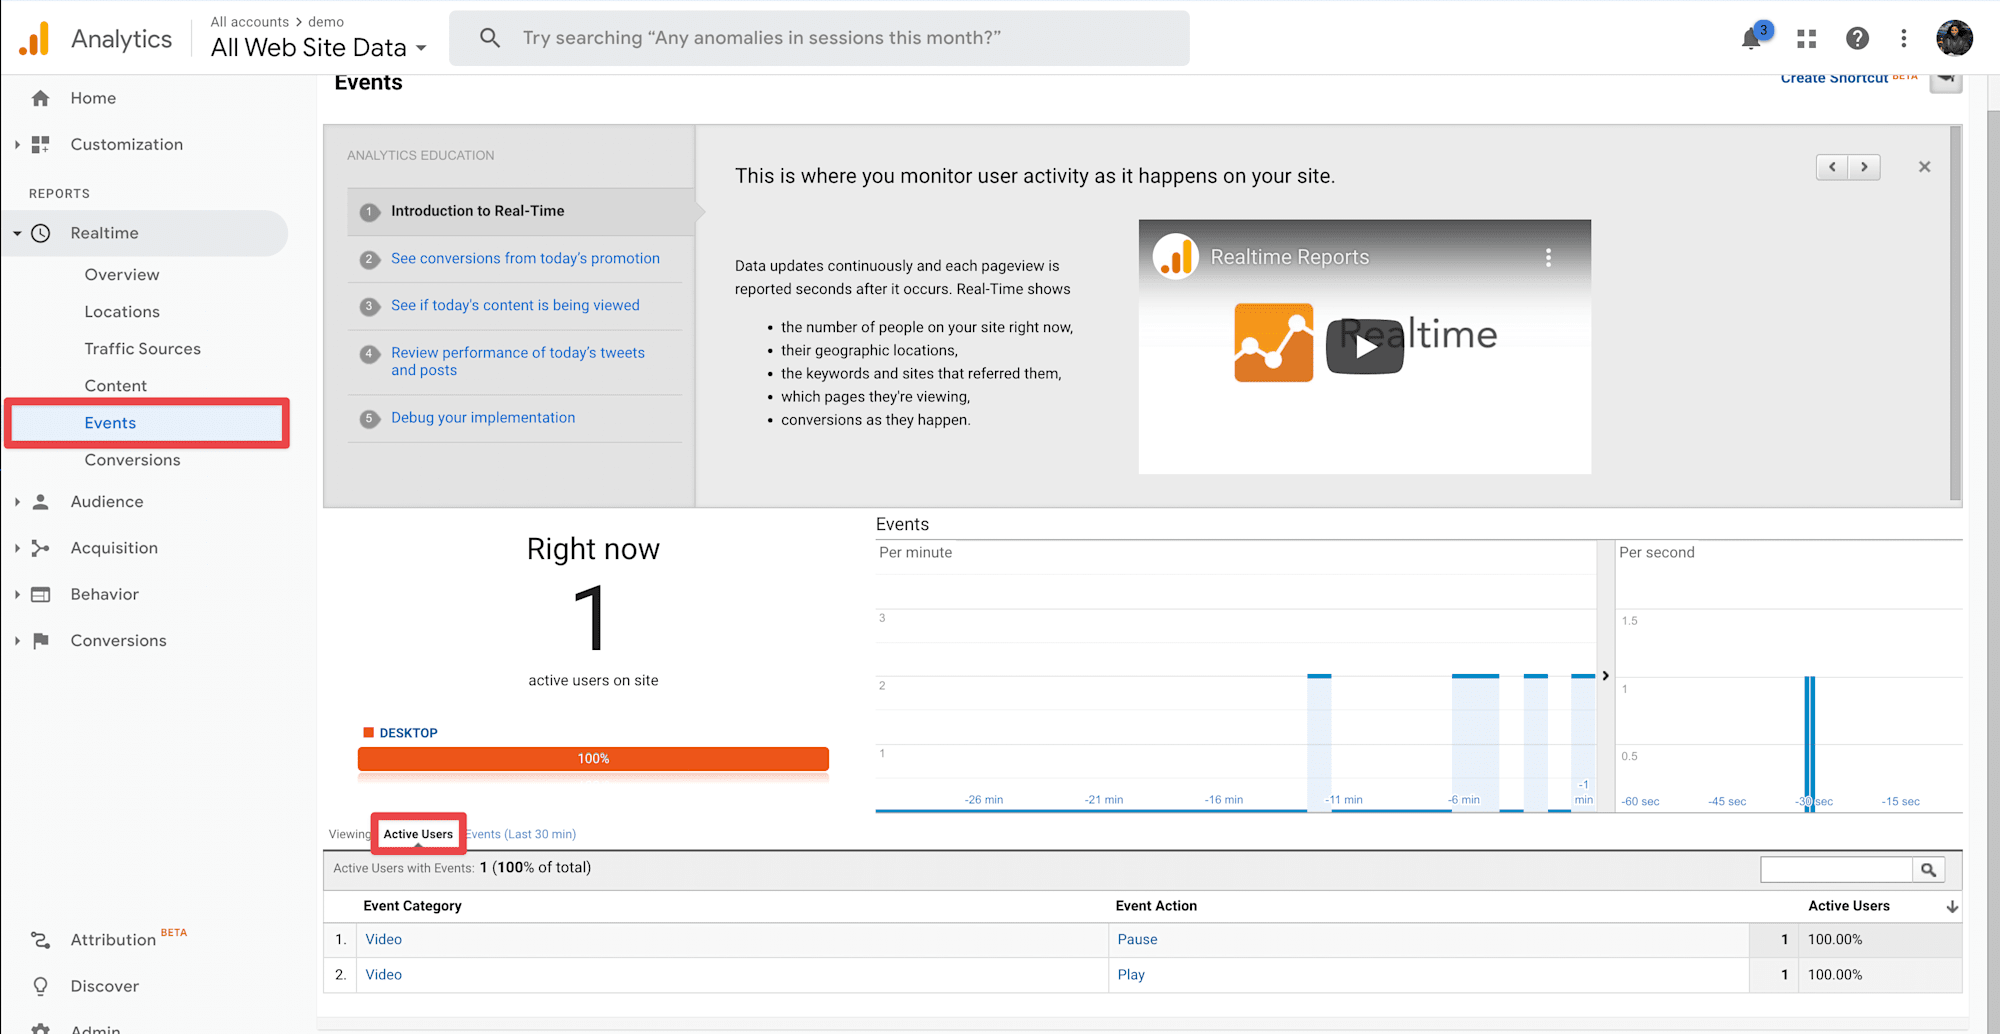
In the real-time event, we can see that our user-triggered different events; the Event Category is Video, and the actions are play and Pause.
Find the project here on GitHub.
In this article, we learned how to add google analytics to our application to provide valuable insights about our website’s visitors, like track critical data about how and when customers watch our videos.
Resources you may find helpful: