
Art is an expression of creativity, and the way it is created constantly evolves. In the past, it had to be done manually, leaving room for errors and a lot of stress. Now, you can create art at the click of a button.
In this article, you will learn how to create a custom music album cover art using text and any image of your choice and enhance it using Cloudinary’s Neural Art Style Transfer add-on.
Cloudinary is a cloud-based media management service that stores, transforms, optimizes, and delivers images and videos to your websites and applications. It also provides a variety of add-ons to enhance its capabilities and provide new and exciting ways to manage your media files.
You can view a complete demo of this article on CodeSandbox below:
https://codesandbox.io/embed/nextjs-music-art-demo-f87vjd?fontsize=14&hidenavigation=1&theme=dark
Explore its source code on GitHub, or check out a Vercel-hosted live version.
To follow along with the steps presented in this article, you should have:
- Good knowledge of functional programming with JavaScript and React.
- A Cloudinary account. Create a free one here.
- Experience working with NextJS will make this article easier to follow, but it is not required.
In your terminal, navigate to your preferred directory and run the command below to download and set up the starter files for this project:
yarn create next-app nextjs-music-art-demo -e https://github.com/dpkreativ/nextjs-music-art-starter
After its successful setup, open the project in your preferred code editor to view its source code. Run the command below to view it in your browser on localhost:3000
yarn dev
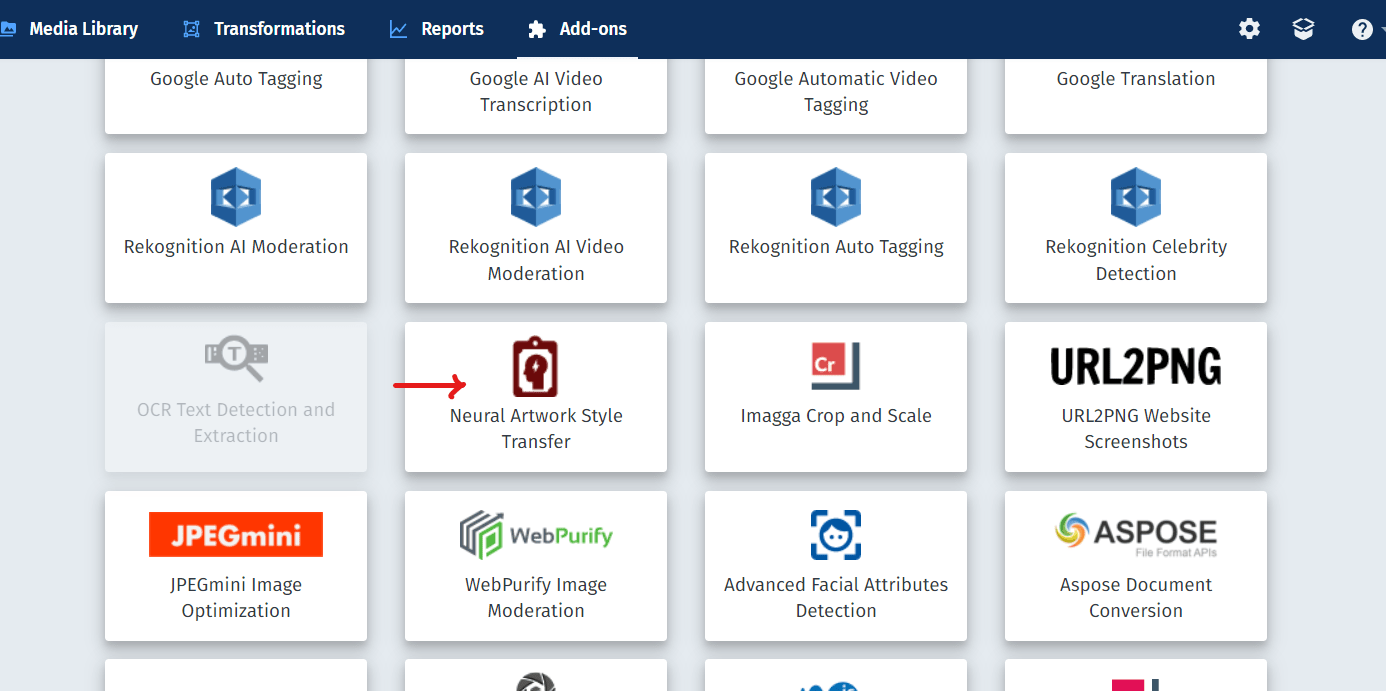
In your browser, log into your Cloudinary dashboard and click on the “Add-ons” tab to view the add-ons available on Cloudinary, then scroll down till you find and click on “Neural Artwork Style Transfer”:
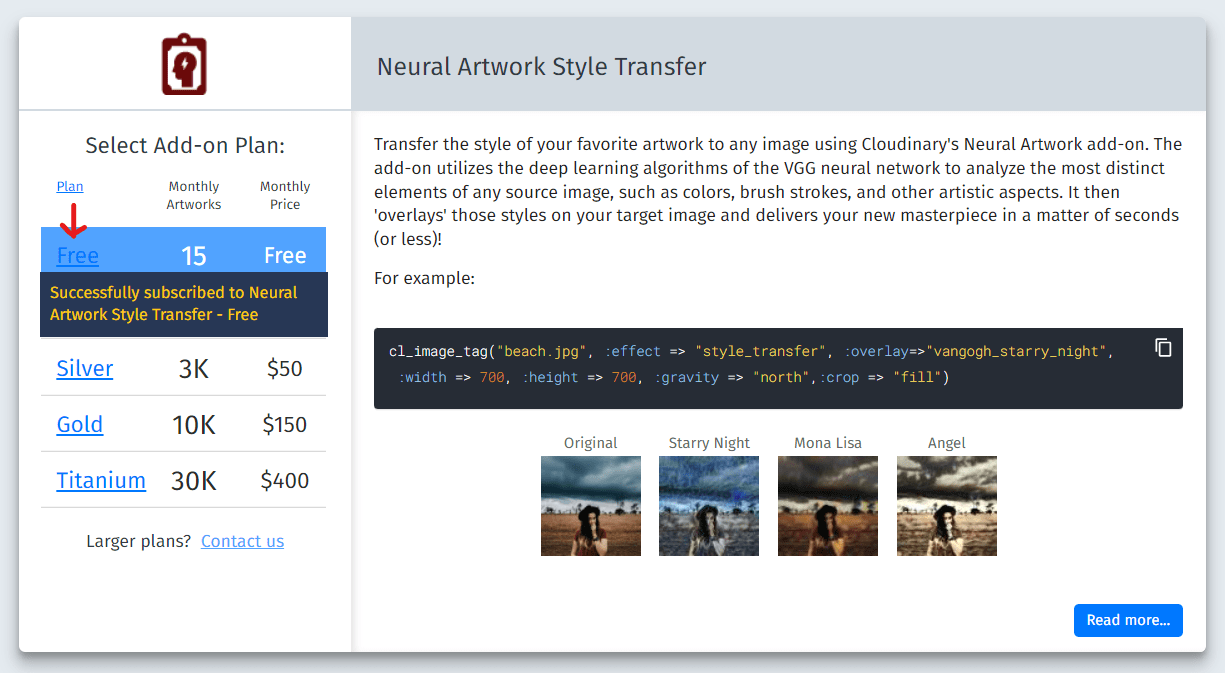
Click on “Free” to subscribe to the free plan, which allows you to create up to 15 artworks each month:
In your Cloudinary dashboard, click on the “Settings” icon on the right side of the navigation bar. Click on the “Security” tab and scroll down till you locate “Unsigned add-on transformations allowed”:
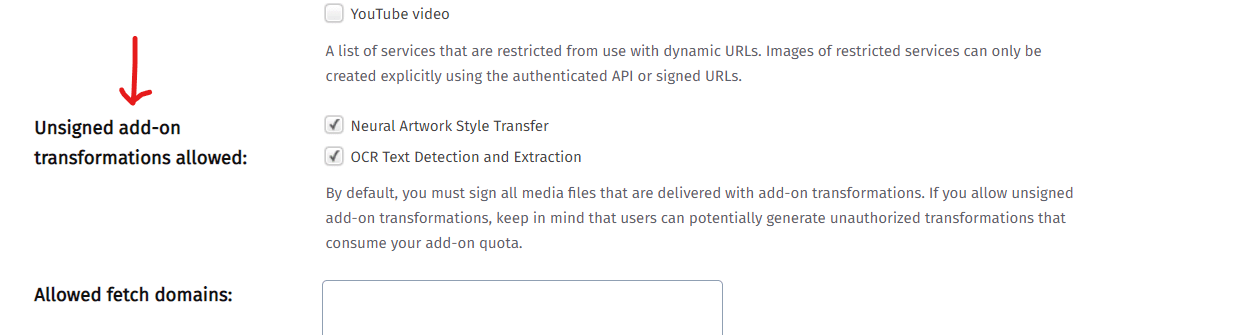
Ensure that the “Neural Artwork Style Transfer” box is checked, then scroll down and click on the “Save” button.
In your project’s terminal, run the command below to install Cloudinary:
yarn add cloudinary
After its successful installation, store environment variables by creating a .env.local file in the root directory of your project and update it with the code below:
CLOUDINARY_NAME=<YOUR CLOUDINARY CLOUD NAME COMES HERE>
CLOUDINARY_KEY=<YOUR CLOUDINARY API KEY COMES HERE>
CLOUDINARY_SECRET=<YOUR CLOUDINARY API SECRET COMES HERE>
Open your Cloudinary dashboard in your browser and copy your Cloud Name, API Key, and API Secret. Update the values in .env.local with the Cloudinary credentials you got.
In your code editor, create a uploadAlbumApi.js file in the pages/api/ folder and update it with the code below:
const cloudinary = require('cloudinary').v2;

cloudinary.config({
  cloud_name: process.env.CLOUDINARY_NAME,
  api_key: process.env.CLOUDINARY_KEY,
  api_secret: process.env.CLOUDINARY_SECRET,
});

export default (req, res) => {
  const text = req.body.text;
  const image = req.body.image;
  return cloudinary.uploader.upload(
    image,
    {
      transformation: [
        {
          overlay: {
            font_family: 'Montserrat',
            font_size: 144,
            text: text,
          },
        },
        { flags: 'layer_apply', gravity: 'north_east' },
      ],
    },
    (error, result) => {
      if (error) return res.status(500).json({ Error: error });
      return res.status(200).json({ data: { ...result } });
    }
  );
};
In the code block above, you did the following:
- Imported
cloudinaryand set the value of its config parameters –cloud_name,api_key,api_secret– with data from your.env.localfile. - Retrieved the text and image data from the request payload.
- Used the Cloudinary upload method to upload the image, applying the text as an overlain transformation.
- Handled any error from the upload operation and returned the data on a successful image upload to Cloudinary.
In your pages/index.js file, update the handleAlbumSubmit() function with the code below:
  // === ONSUBMIT FUNCTIONS ===
  /* Handle Album Submit:
      - This function uploads your image and text data to create your album art.
  */
  const handleAlbumSubmit = async (e) => {
    e.preventDefault();
    setLoadingMyAlbumArt(true);
    try {
      const { data } = await fetch('/api/uploadAlbumApi', {
        method: 'POST',
        body: JSON.stringify(myAlbumArtData),
        headers: {
          'Content-Type': 'application/json',
        },
      }).then((res) => res.json());
      setMyAlbumArtData({ ...myAlbumArtData, text: '', image: '' });
      setMyAlbumArtPreview(data);
      setLoadingMyAlbumArt(false);
    } catch (error) {
      console.log({ Error: error });
      setLoadingMyAlbumArt(false);
    }
  };
In the code above, you
- Used
e.preventDefault()to prevent the page from reloading andsetLoadingMyAlbumArt()totrue, which triggers the loading state of the submit button. - Used a
try-catchblock to send afetch()request to youruploadAlbumApi, withmyAlbumArtDataas its body. It returns a JSON response containing yourdataobject. - Cleared the input fields using empty strings in
setMyAlbumArtData()and stored the contents of yourdataobject usingsetMyAlbumArtPreview. - Turned off the loading state of the submit button using
setLoadingMyAlbumArt(false), and in thecatchblock, you logged errors to the console.
At this point, you can create an album art through Cloudinary by uploading an image and a text. Test it out on your browser:

In your code editor, create a uploadPopArtApi.js file in the pages/api/ folder and update it with the code below:
const cloudinary = require('cloudinary').v2;
cloudinary.config({
  cloud_name: process.env.CLOUDINARY_NAME,
  api_key: process.env.CLOUDINARY_KEY,
  api_secret: process.env.CLOUDINARY_SECRET,
});
export default (req, res) => {
  const image = req.body;
  return cloudinary.uploader.upload(image, (error, result) => {
    if (error) return res.status(500).json({ Error: error });
    return res.status(200).json({ data: { ...result } });
  });
};
Similar to the previous image upload API function you created above, this function uploads an image to Cloudinary, only this time, without image transformations.
In pages/index.js, create the handlePopArtSubmit() function with the code below:
  const handlePopArtSubmit = async (e) => {
    e.preventDefault();
    setLoadingPopArt(true);
    try {
      const { data } = await fetch('./api/uploadPopArtApi', {
        method: 'POST',
        body: popArtPreview,
      }).then((res) => res.json());
      setPopArtData(data);
      setLoadingPopArt(false);
    } catch (error) {
      console.log({ Error: error });
      setLoadingPopArt(false);
    }
  };
In the code above:
- You set the loading state of the
Apply Neural Transferbutton to true. - You made a
POSTrequest touploadPopArtApi, withpopArtPreviewas the request’s body. - Your response is a
dataobject injsonformat, which you destructured into the{ data }variable. - You then add the data gotten from the API response to the
popArtDatastate.
Scroll down your pages/index.js file till you see the code below:
{/* === SECTION THREE: DISPLAY AI-GENERATED ALBUM ART ===
  In this section below:
    - You're creating a dynamic image URL with Neural Art Style Transfer parameters applied.
    - The URL is set as the image src and displays the AI-generated album art.
*/}
<section className="md:col-span-2">
  <div className="w-full h-72 border-blue-400 border-2 rounded-lg">
    {popArtData !== undefined ? (
      <img
        src={`https://res.cloudinary.com/dpkreativ/image/upload/l_${popArtData.public_id}/e_style_transfer,fl_layer_apply/${myAlbumArtPreview.public_id}.${myAlbumArtPreview.format}`}
        alt="final image" className="object-contain h-full w-full"
      />
    ) : (
      <span className="self-center flex flex-col space-y-3 p-5">
        <p className="italic">Final image here</p>
      </span>
    )}
  </div>
</section>
In the code above, using the Cloudinary dynamic URL transformation parameters, you added a neural style transfer layer from the new image popArtData to the original image myAlbumArtPreview.
Here is the final demo:
In this article, you learned how to create and customize your music cover art using NextJS, Cloudinary’s transformation parameters, and neural style transfer AI. You can explore it further by browsing through Cloudinary’s official documentation on image transformations or neural style transfer add-ons.