
Oftentimes, developers and architects must supplement their project documents with diagrams, charts, sequence drawings, and the like. Instead of creating them with traditional software like Microsoft Visio, I searched for a more developer-friendly alternative and found a project with just the right tool, which I was able to integrate with Cloudinary with gratifying results. This post describes the tool and the integration steps.
We created a live environment for users to test the markdown diagram tool at mermaid.cloudinary.us
Although Visio is a viable tool, I found it difficult to use because of these limitations:
- All team members must procure the software or establish an account with the service.
- Artifacts are stored outside the source hierarchy.
- Running
diffto compare changes is onerous.
Additionally, I had to pinpoint the right color combinations and laboriously arrange the objects in diagrams to make them look pretty. Those chores were time-consuming and distracting from the core task of documenting a complex workflow. I wanted a tool with which I could simply “write” a markdown diagram, after which the tool would do the heavy lifting of prettying up the image with the right colors, spacing, and fonts. Guess what, I found just such a tool—in mermaid!
Highlighted on mermaid’s repo’s page is the goal of the project:
Generate diagrams, charts, graphs, or flows from Markdown-like text via JavaScript.
You can create many types of diagrams on mermaid: flow charts, Gantt charts, sequence diagrams, class diagrams, state diagrams. Since the actual diagram is rendered in plain Markdown, you can add the source to version control so that updates are readily accessible by your team for collaboration. Also, mermaid offers a live editor, which you can download and then host the code for your team. Alternatively, you can use the publicly-hosted editor.
I was hooked on mermaid from the start and used it heavily. However, the Scalable Vector Graphics (SVG) images it produces don’t work well for presentations. To resolve that issue, I exported the SVG format to a raster format like PNG. Below are the steps. In the meantime, claim your Cloudinary free forever account here.
Disclaimer: I’m not a React developer. This is my first attempt at hacking so please ignore my lack of syntactic elegance.
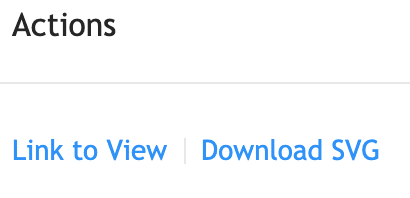
Step 1: Add an option to the Actions tab.
The mermaid live editor offers two options in the Actions tab: Link to View and Download SVG, which produces a .svg file.
I added an option called Download Image—

—by adding the following code to the render method in the src/components/Preview.js file:
<Divider type='vertical' />
          <a href='' download='' target='_blank' onClick={this.handleOnDownloadImage}>Download Image</a>
Since all my code was in a file called uploader.js, which exported a method called upload, I imported that method, like this:
import { upload } from './uploader'
Next, I registered the handle in the constructor:
this.handleOnDownloadImage = this.handleOnDownloadImage.bind(this)
I then added the function for the onClick handler, as follows:
handleOnDownloadImage (event) {
    const svgObject = `data:image/svg+xml;base64,${Base64.encode(this.container.innerHTML)}`
    event.target.href = upload(svgObject)
    // useful if you right-click and download
    event.target.download = 'mermaid.png'
  }
See the full Preview.js file for reference.
Step 2: Add the upload capability.
To add the function that handles uploads to Cloudinary, I made use of the unsigned upload method, which requires no authentication, enabling everyone to access the image. To simplify the process, I uploaded with a raw API POST request instead of working through an SDK. Here are the details of the upload request:
-
API endpoint:
https://api.cloudinary.com/v1_1/mermaid/upload, wheremermaidis the cloud name. If you have a Cloudinary account, replacemermaidin the code with your cloud name. -
JSON request body:
-
file: This is a Base64-encoded string of the SVG object. *tag: This is a tag with the valuemermaid. You can add more meaningful data to it, e.g., the diagram type, the diagram context, the associated project, etc. -
upload_preset: This is the preset that is defined in your account. Below are my settings:
-

Here’s the code for the upload function:
var url = 'https://api.cloudinary.com/v1_1/mermaid/upload'
  var xhr = new XMLHttpRequest()
  var fd = new FormData()
  xhr.open('POST', url, false)
  xhr.setRequestHeader('X-Requested-With', 'XMLHttpRequest')
  // fd.append('public_id', publicId)
  fd.append('upload_preset', 'mermaid')
  fd.append('tags', 'Mermaid')
  fd.append('file', svgImage)
This function obtains the SVG image data from Preview.js, invokes the upload function, and picks up the URL for the uploaded SVG image. I added the following Cloudinary transformations to enhance the image:
- Convert the image format from SVG to PNG.
- Apply three transformations:
- Add a solid black background (
bo_3px_solid_rgb:00390b) to the image. For details, see the Cloudinary API Reference onformat. - Replace the default transparent background with a white background (b_white). For details, see the Cloudinary API Reference on
background. - Overlay the Cloudinary (
l_cloudinary_icon,w_0.1,g_south_east,o_7) icon at the bottom right corner. For details, see the Cloudinary API Reference onoverlay.
- Add a solid black background (
Cloudinary then returns the final URL and the browser opens the image in a new tab. Here’s the complete code of the uploader. The diagram below image explains the workflow.

Here’s the markup for the sequence diagram:
sequenceDiagram
User-->>Mermaid: Create a diagram
Mermaid-->>Mermaid: Generate SVG
Note over User, Mermaid: Update diagram as it is being edited
User-->>Mermaid: Click Download Image
Mermaid-->>Uploader: Pass SVG data
Uploader-->>Uploader: Build unsigned upload POST request
Uploader-->>Cloudinary: Upload SVG
Cloudinary-->>Uploader: Generate Cloudinary URL
Uploader-->>Uploader: Build transformed PNG URL
Note over Uploader,Mermaid: Change format, transparency, overlay
Uploader-->>Mermaid: Respond with Cloudinary PNG URL
Mermaid-->>User: Display image
Recall that the integration makes use of the simple unsigned upload method. For tighter security, switch to the signed upload method instead. Also, to prevent unauthorized users from uploading images to your account, do not turn on unsigned upload. You could also lock down access to your images.
For details on the various ways of securing digital assets, read this Cloudinary Support article.
Would this Cloudinary-mermaid integration be of use to you? If so, do give it a try.