
Interactivity is fast becoming a norm in building applications. Integrating this interactivity is sometimes an arduous task for developers. Over time, solutions have been created to take care of these tasks while developers focus on other aspects of the application development. An example of this solution is the Dolby APIs. Dolby provides a range of APIs for converting digital media formats or enhancing audio quality to produce high-quality media and communications.
In this article, we’ll use the Dolby API, Cloudinary, and Nuxt.js to produce high-quality media by uploading video to Cloudinary, enhancing the audio on Dolby, and then re-uploading the enhanced video to Cloudindary.
Nuxt.js is a Vue.js based, open-source JavaScript library that improves building server-rendered Vue.js applications, leading to more performant web applications.
Cloudinary is a cloud-based video and image management platform that offers services for managing and transforming uploaded assets for usage on the web.
We completed this project in a CodeSandbox. Fork and run it to quickly get started.
Check out the complete source code here.
Understanding this article requires the following:
- Installation of Node.js
- Basic knowledge of JavaScript
- Familiarity with Nuxt.js
- A Cloudinary account (sign up for a free account here)
- A Dolby account for audio processing (Signup is completely free)
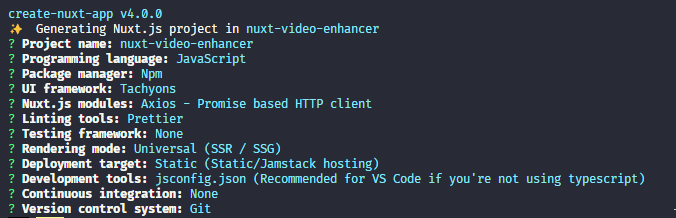
Use npx create-nuxt-app <project-name> in your terminal to create a new Nuxt.js project.
The process of scaffolding the project provides a list of options, which should look like this:
After successful project creation, navigate into your directory and start the application by running the following command:
cd <project name>
npm run dev
Code language: HTML, XML (xml)
Nuxt.js will start a hot-reloading development environment accessible by default at http://localhost:3000.
We need to set up a Cloudinary upload widget, which will be responsible for uploading our videos to Cloudinary. To do this, we will add the link in the head object of our project’s nuxt.config.js. This adds the script to be used globally in the application.
head: {
    script: [
      {
        src: 'https://upload-widget.cloudinary.com/global/all.js'
      }
    ],
  }
Code language: CSS (css)
Next, we will update the pages/index.vue with the configuration needed to use the Cloudinary upload widget.
<template>
<div>
<div class="br3 bg-white ba dark-gray b--black-10 shadow-3 w-100 w-60-m w-30-l mw6 center mt5 ph4 pv4 tc">
<button class="f4 link dim br3 pv2 ph2 mb2 dib white bg-navy ba b--navy pointer mt3 mt0-l inline-flex items-center" @click="openUploadModal" v-if="isInitial">
Upload video
</button>
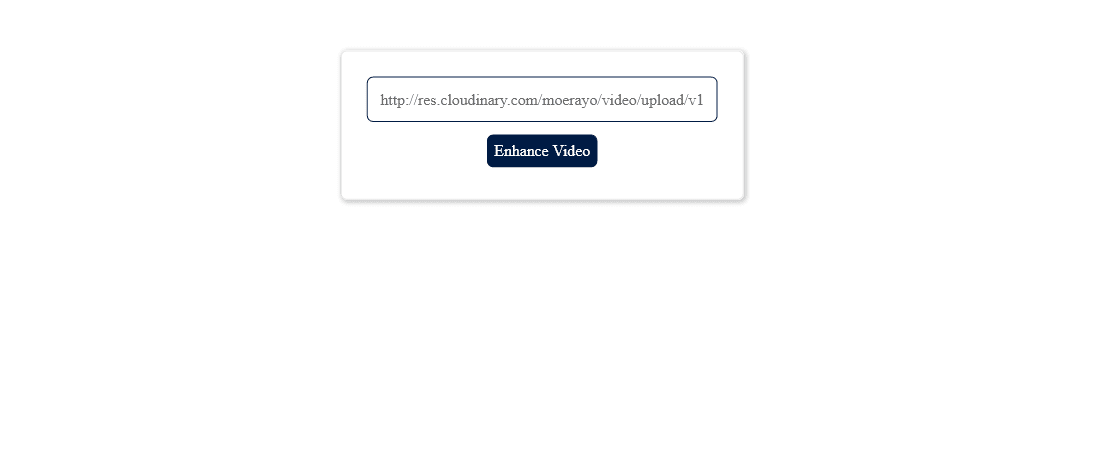
<form v-if="url.length > 0" class="tc ma">
<input type="text" :value="url" class="pa3 db w-100 br3 b--navy ba f4" disabled="true">
<button class="f4 link dim br3 pv2 ph2 mb2 dib white bg-navy ba b--navy pointer mt3 inline-flex items-center">Enhance Video</button>
</form>
</div>
</div>
</template>
<script>
export default {
data(){
return {
url: '',
isInitial: true,
cloudName: '**',
uploadPreset: '**',
}
},
methods: {
openUploadModal() {
window.cloudinary.openUploadWidget(
{ cloudName: this.cloudName,
uploadPreset: this.uploadPreset
},
(error, result) => {
if (!error && result && result.event === "success") {
console.log('Done uploading..: ', result.info);
this.isInitial = false;
this.url = result.info.url;
console.log(this.url)
}
}
).open();
},
}
}
Code language: HTML, XML (xml)We achieved the following from the code snippet above:
- Added a method called
openUploadModal, executed when the Upload Video button is triggered - Added a data property to manage the error, the
cloudName,uploadPreset, andurl - Included a state variable of
isInitialin our data property to handle the upload state
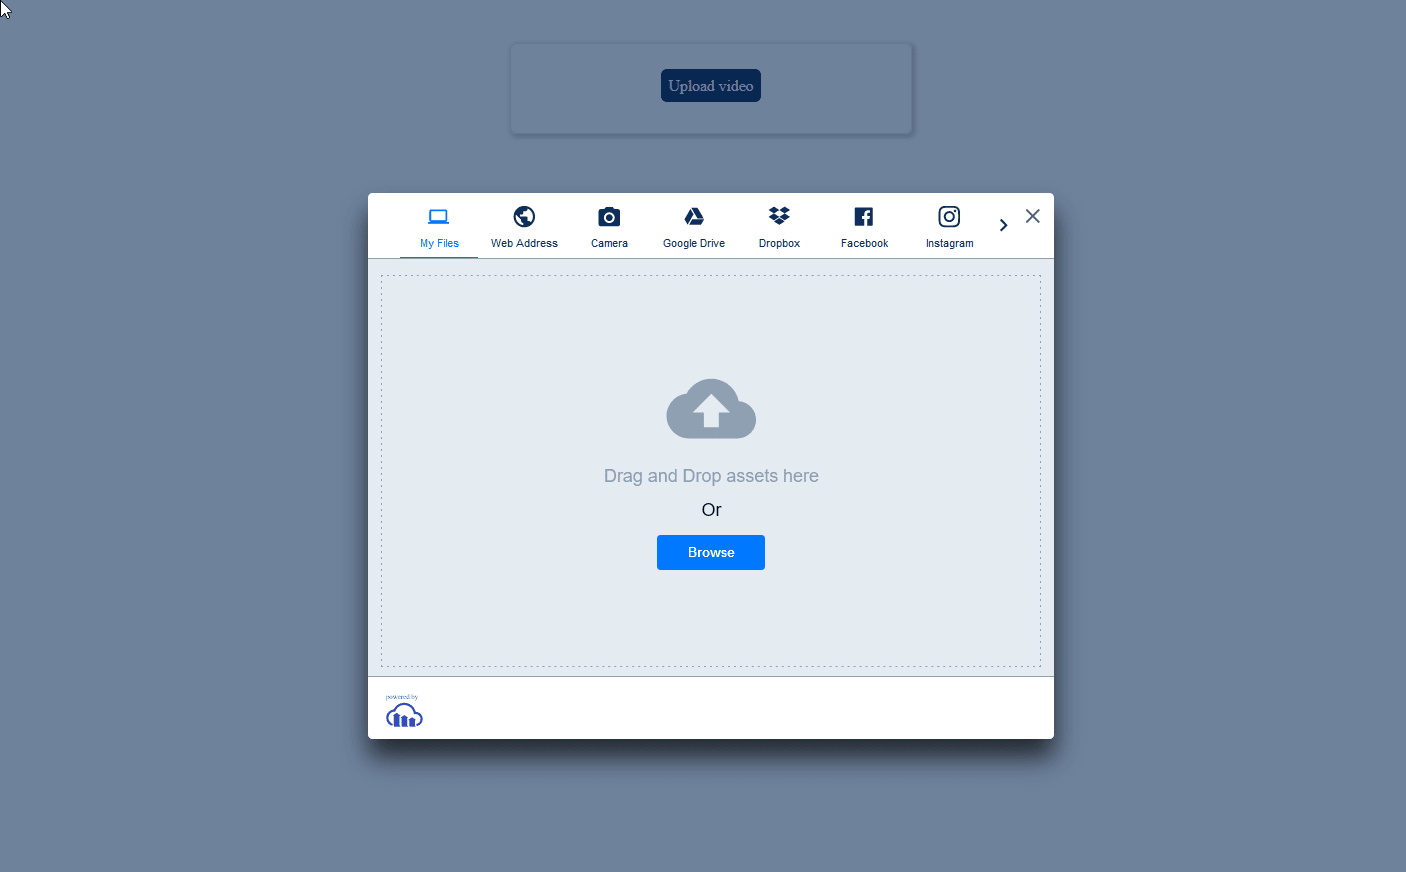
Upon clicking the Upload Video button, we’ll see the interface below. We can now upload a video, get the url, and use this returned url in the following stages.
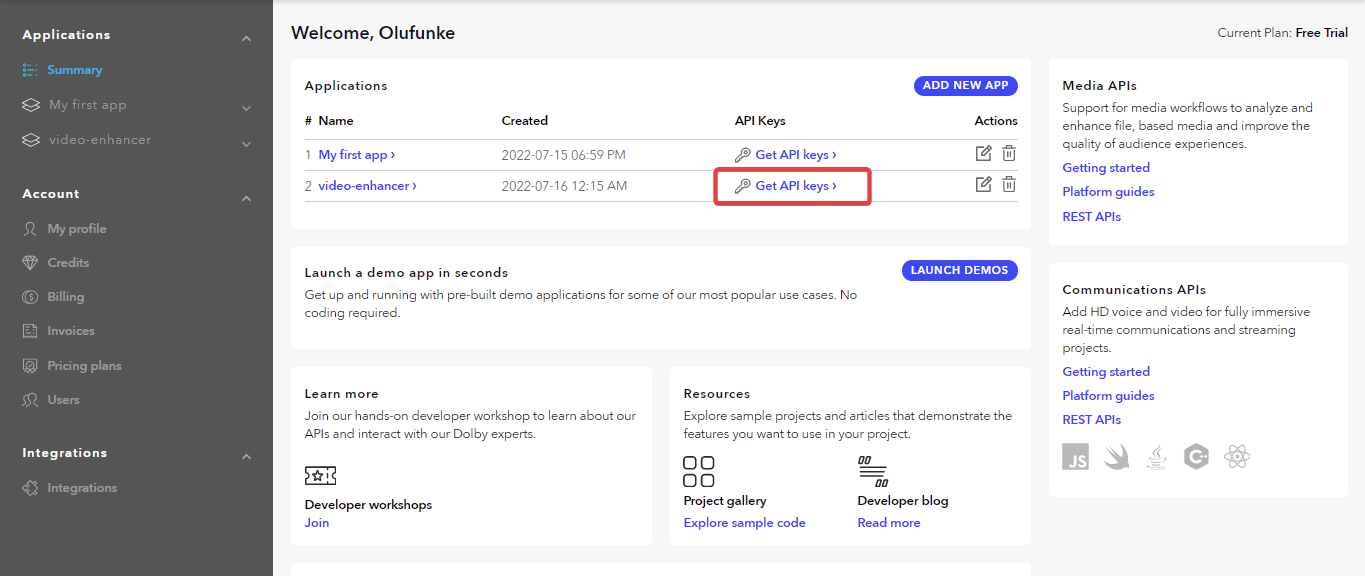
To use any of Dolby’s APIs, we need to create an account with Dolby here. Dolby directs us to the page below. From here, we can add a new application.
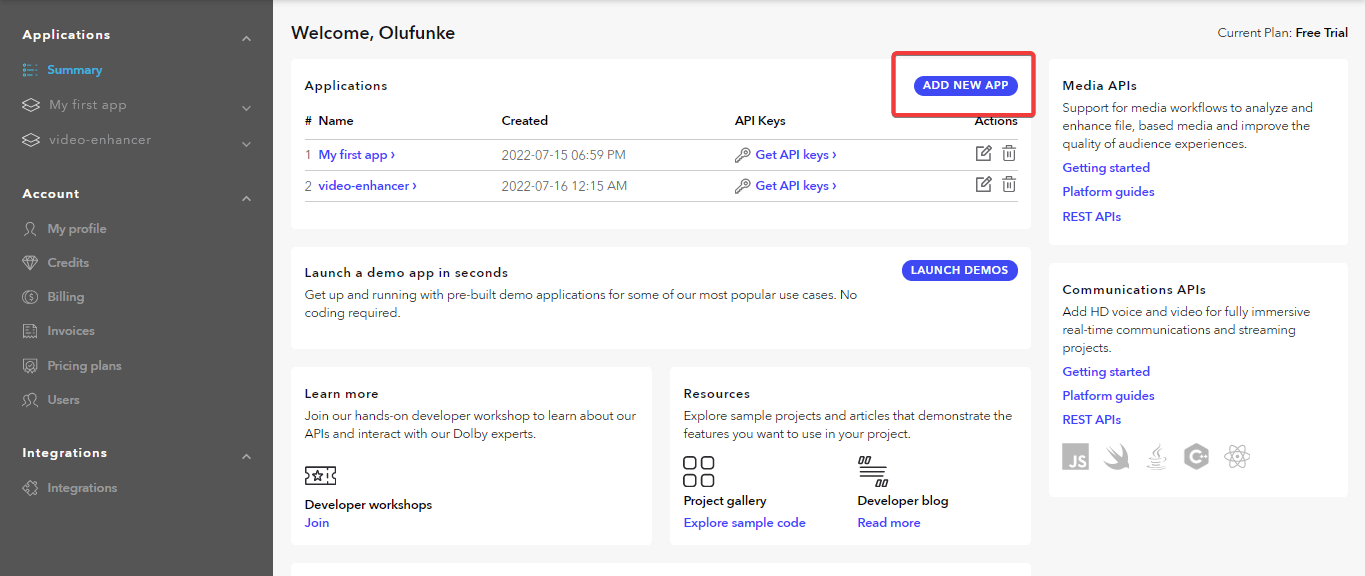
Clicking on the ADD NEW APP button above yields the view below. We will add our application name and click the CREATE button.

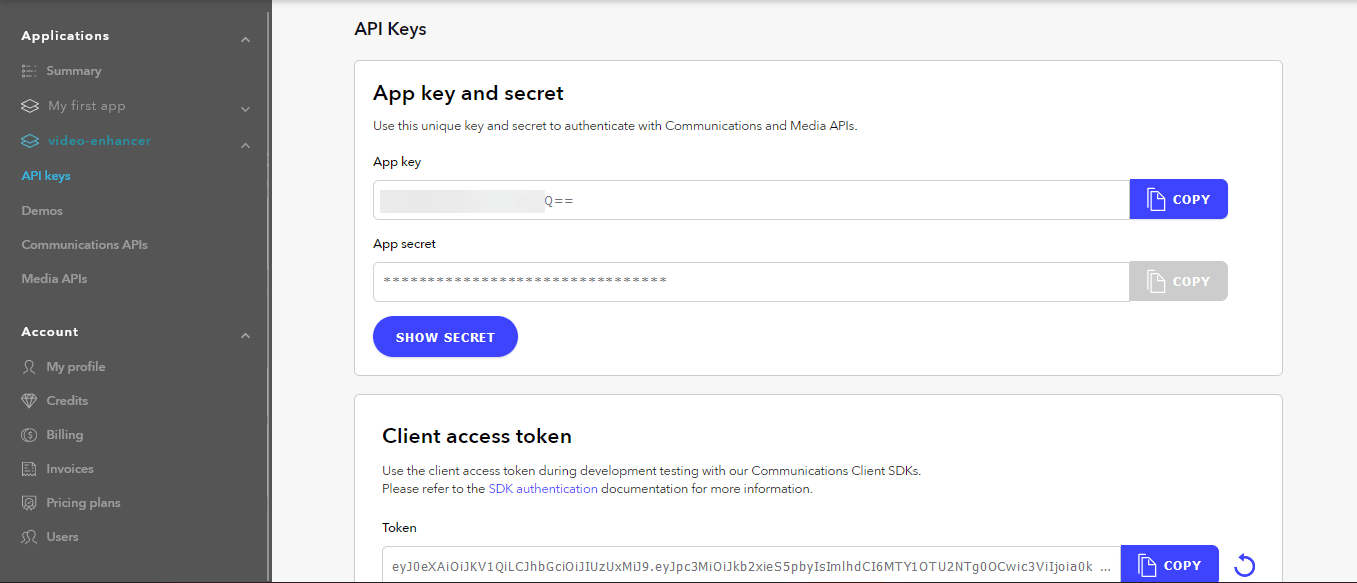
In our Nuxt.js application, we’ll need the APP KEY and APP SECRET provided by Dolby. To get these credentials, click the application we created and click on the Get API keys, as shown in the image below.
Clicking on the annotated part in the image above reveals the credentials we will copy for our application.
Before we can use the Dolby API in our application, we must first authenticate the application by getting an API token using the credentials from our Dolby dashboard. To do this, we will create a .env file in the Nuxt application root folder.
Afterward, add the credentials following the structure below:
APP_KEY='**'
APP_SECRET='**'
Code language: JavaScript (javascript)
Now we can proceed to use it in our Nuxt.js application, like so:
<template>
  <div>
    <!-- HTML template goes here -->
    <button class="f4 link dim br3 pv2 ph2 mb2 dib white bg-navy ba b--navy pointer mt3 inline-flex items-center">Enhance Video</button>
  </div>
</template>
<script>
export default {
  data(){
    return {
      apiToken: '',
    }
  }.
  methods: {
    openUploadModal() {
        // cloudinary upload widget
    },
    async enhanceVideo(){
      const auth = Buffer.from(`${process.env.APP_KEY}:${process.env.APP_SECRET}`).toString('base64');
      const response = await fetch('https://api.dolby.io/v1/auth/token', {
        method: 'POST',
        body: new URLSearchParams({
          grant_type: 'client_credentials',
          expires_in: 7200
        }),
        headers: {
          "Accept": 'application/json',
          'Content-Type': 'application/x-www-form-urlencoded',
          'Authorization': `Basic ${auth}`
        }
      });
      const json = await response.json();
      this.apiToken = json.access_token;
  }
}
Code language: HTML, XML (xml)
In the code block above, we matched the credentials already set in the .env file against Dolby’s authentication API: https://api.dolby.io/v1/auth/token.
This method is executed when the enhanceVideo method is called. This generates a token as a response, which we will use to enhance the media further.
Dolby provides us with three APIs to work with when enhancing media.
-
The media enhance request API: This API is responsible for enhancing the media. It takes two parameters: the input URL of the media to be enhanced and the output URL to which the Dolby API will write. The response from the
[https://api.dolby.com/media/enhance](https://api.dolby.com/media/enhanc)API is ajob_idthat checks the media status. -
The job status checker API: Enhancing the uploaded video takes seconds to minutes, and we’ll need to check the status of the job before downloading the media. To do this, we will add the
job_idprovided by the enhancement request, like so:https://api.dolby.com/media/enhance?job_id=the job_id. -
Media download API: On confirmation that the enhancement is complete, we can proceed to download the enhanced video using the same output URL as was used in the media request.
We can update the pages/index.vue and add the code in our methods, like so:
<script>
export default {
  methods: {
    async enhanceVideo(){
      //Dolby authnentication code goes here

      //media enhancement API
      const enhanceRequest = {
        method: "POST",
        url: 'https://api.dolby.com/media/enhance',
        headers: {
          "Authorization": `Bearer ${this.apiToken}`,
          "Content-Type": "application/json",
          "Accept": "application/json"
          },
        data:{
        input: this.url,
        output: 'dlb://out/video-enhanced.mp4'
        }
      }
      //enhancement checker API
      const enhancementCheck = {
        method: "GET",
        headers: {
          "Authorization": `Bearer ${this.apiToken}`,
          "Content-Type": "application/json",
          Accept: "application/json"
        },
      };
      //media download API
      const mediaDownload = {
        method: 'GET',
        url: 'https://api.dolby.com/media/output',
        headers: {
          'Authorization': `Bearer ${this.apiToken}`,
          'Content-Type': 'application/json',
          "Accept": "application/octet-stream"
        },
        responseType: 'stream',
        params: {
          url: 'dlb://out/video-enhanced.mp4'
        }
      };
    }
  }
}
</script>
Code language: HTML, XML (xml)
The code block above is a representation of the three APIs provided by Dolby for enhancement. We added the apiToken given by authenticating our Nuxt.js application to the header of each request. Also, the enhanceRequest request has the url taken from the uploaded Cloudinary video as input.
Our goal is to get the URL from the video uploaded to Cloudinary, send the URL to Dolby for enhancement, check the enhancement status until it is complete, get the link for the enhanced video, and upload the enhanced video back to Cloudinary.
Now, let’s put it all together by modifying the pages/index.vue with the below:
https://gist.github.com/MoeRayo/954f4d17563c7779fea6bf5f28022088
In this code block above, we achieved the following:
-
Created a
waitfunction to delay for 2 seconds when running the “while” loop -
Added a
statevariable to manage the “while” loop as conditions are met -
The first API call to Dolby was made using the returned Cloudinary input URL as input
-
Used the returned
job_idto check the status of the enhancement every 2 seconds using thewaitfunction. This checks whether the enhancement is complete to either stop or continue the loop -
Upon confirmation of enhancement, we get the downloadable URL from Dolby
-
Finally, we check whether the downloadable URL matches
mp4in the URL and only then will we proceed to upload the video to Cloudinary
We can confirm the enhancement by logging into our Cloudinary account and navigating to the Media Library. In this tab, we can see the original and enhanced videos; playing both will confirm the quality differences.