
Videos are powerful tools driving the age-old industry of content marketing. Getting it right with videos and maximizing their marketing potential comes with the time-consuming effort of optimizing, managing, administering, and delivering them to your target audience. With managed media solutions like Cloudinary, we have less to worry about since almost everything is handled automatically.
In this article, we will look at how to leverage Cloudinary’s rich media transformation tools by building a simple web application that incorporates trimmed videos of products. Without further Ado, let’s dive in.
Here’s a CodeSandbox link to the project.
Run the this command in your terminal to bootstrap a simple react application:
npx create-react-app product-listing
Next, we need to install the Cloudinary SDKs as dependencies. Run this command in your terminal:
    npm install @cloudinary/react @cloudinary/url-gen@latest
Code language: CSS (css)
The @cloudinary/url-gen module will generate URLs and apply transformations to media assets stored on the Cloudinary account, while the @cloudinary/react module provides components to render media assets to the screen.
If you don’t have a Cloudinary account already, create one here for free. After that, log in to view your account credentials stored in the account details section on your Dashboard.
Since we will be working on a client application, we will need just our API Key and cloud Name; these will be used to configure the Cloudinary SDKs we installed earlier.
We also need to upload some video files to Cloudinary, which will be used in our demo application. See here to learn how to upload assets to Cloudinary via the Media Library. You can get non-copyrighted videos from Pexels.
As seen below, each media item you upload will have a unique random string referred to as its public ID. It serves as a unique identifier for uploaded media assets.

The application will need some data to render our products; usually, this data will live in a database somewhere on a server. To keep things simple, we would be storing our data in a file locally. Run the following command to create a file named data.json.
    cd src
    touch data.json
Code language: CSS (css)
Next, populate the file with the following:
    {
        "products":[
          {
            "id":1,
            "title":"macbook",
            "price":1200,
            "videoId":"8ba64b04-f0e6-43af-a6a0-d7815646332b_jdh3ty",
            "description":"A laptop manufactured by Apple."
          },
          {
            "id":2,
            "title":"mustang",
            "price":27000,
            "videoId":"477be0a5-3a37-4a81-b322-18bebe43fa1a_pypgpu",
            "description":"A series of American automobiles manufactured by Ford"
          },
          {
            "id":3,
            "title":"durag",
            "price":2000,
            "videoId":"3d983441-017b-49de-b8a0-6496699f1c9c_jickhv",
            "description":"Silky, or wave cap is a close-fitting cloth cap tied around the top of the head."
          },
          {
            "id":4,
            "title":"microphone",
            "price":50,
            "videoId":"d64fceb6-bfe7-473b-8565-ab8360a4d824_d79xiq",
            "description":"A microphone is a device that is used to make sounds louder or to record them"
          }
        ]
    }
Code language: JSON / JSON with Comments (json)
This file holds an array of objects containing random properties that describe each product. A noteworthy one is a videoId property which has the public IDs of video assets we uploaded to Cloudinary. Replace the value of the videoId property with the public IDs of videos uploaded to your Cloudinary account.
Create a folder called components in your src directory. Create a file called product.js in the components folder and add the following to it:
    import React from 'react';
    import VideoPreviewer from './VideoPreviewer';
    const Product = ({ videoId, price, description, title }) => {
      return (
        <div className='product br'>
          <section className='product_vid'>

          </section>
          <section className='product_details'>
            <div className='grid_1_1'>
              <span className='badge b-gr'>${price}</span>
              <span className='badge b-pur'>for {price > 2000 ? 'adults' : 'kids'}</span>
            </div>
            <h4>{title}</h4>
            <p>{description}</p>
          </section>
        </div>
      );
    };
    export default Product;
Code language: JavaScript (javascript)
This component is purely presentational; it simply renders a UI containing product information which the component receives as props.
Next, let’s update our App.js file to use this component.
    import Product from "./components/Product";
    import "./style.css";
    import Data from "./dummyData.json";
    const App = () => {
      return (
        <main>
          <div className="container">
            {Data.products.map((product, index) => (
              <Product {...product} key={index} />
            ))}
          </div>
        </main>
      );
    };
    export default App;
Code language: JavaScript (javascript)
The code above imports the hardcoded data, the Product component, and some styles. The component body renders the product component using the data.
Run this command in your terminal to see the running application:
npm start
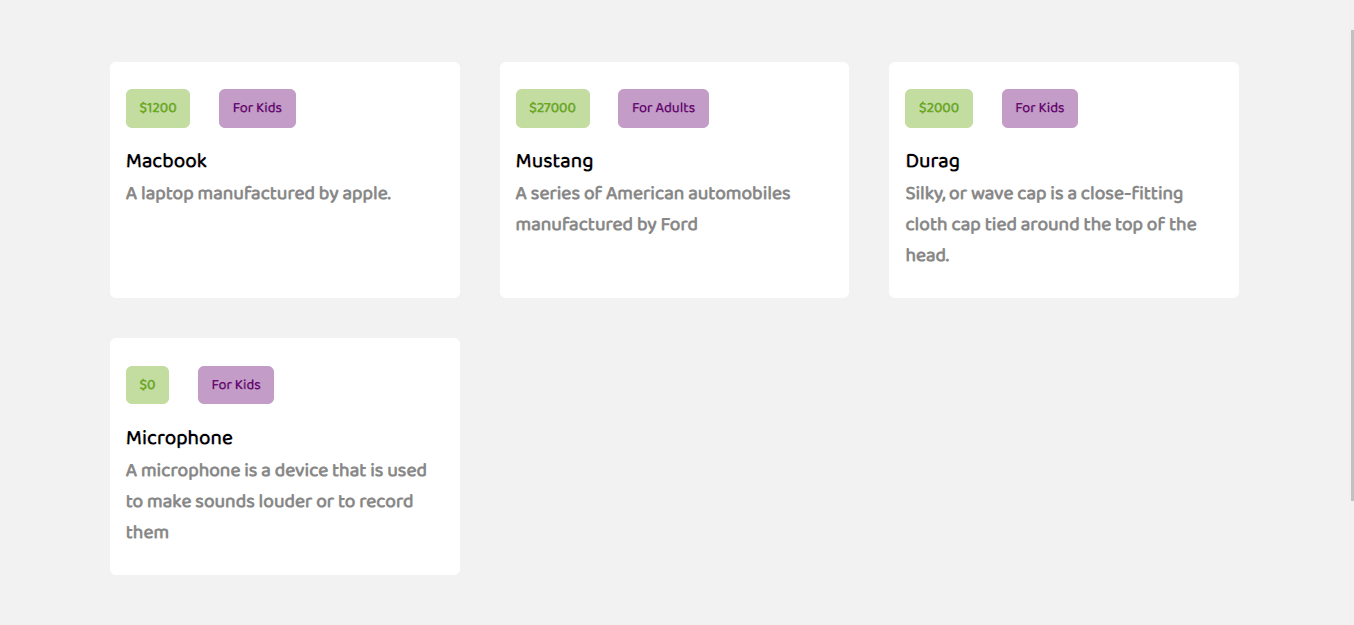
We now have our products listed, and we need to display our videos. In the components folder, create a file called videoPlayer.js and add the following to it:
    import { Cloudinary } from "@cloudinary/url-gen";
    import { trim } from "@cloudinary/url-gen/actions/videoEdit";

    const cld = new Cloudinary({
      cloud: {
        cloudName: "<INSERT-CLOUD-NAME-HERE>",
      },
    });
Code language: JavaScript (javascript)
In the code above, we imported the Cloudinary class and created an instance using our Cloudinary credentials. We imported the trim action, which will help us generate the required transformation parameter that will be embedded in the asset’s delivery URL.
The videos uploaded on our Cloudinary account are of different sizes, but we want to display a trimmed version of these videos. Like every remotely stored media asset on the Internet, each video we uploaded to Cloudinary has some Unique URL pointing to it. Cloudinary refers to this URL as the delivery URL.
We will use the Cloudinary instance to dynamically generate URLs for our video assets using their PublicID and appending the appropriate transformation parameters.
Update your VideoPlayer.js file with the following:
    import { Cloudinary } from "@cloudinary/url-gen";
    import { trim } from "@cloudinary/url-gen/actions/videoEdit";

    const cld = new Cloudinary({
      //...
    });

    const VideoPlayer = ({ videoId }) => {
      let video = cld.video(videoId).videoEdit(trim().duration(5.0));
    };
    export default VideoPlayer;
Code language: JavaScript (javascript)
We defined and exported the component VideoPlayer, which accepts publicID as props. It uses the Cloudinary instance, and a series of chained function calls to build the delivery URL to the video asset.
It does the following:
- It creates a video object instance using the publicID by calling
video(). Each video instance holds a set of methods, some of which are called action groups that define how to transform the asset. - Next, we call the
videoEditaction group, which expects a set of actions that feed thetrimaction we brought in earlier. The call totrim().duration(5.0)adds transformation parameters to cut the video with a playback time of 5s.
Next, we need to feed the URL to a video source to display the video. Since our application may display so many videos, we can add a bit of optimization to them. Update the imports in your VideoPlayer.js file with the code below.
    import { lazyload, AdvancedVideo } from '@cloudinary/react';
Code language: JavaScript (javascript)
Update your VideoPlayer component with the code below.
    return (
        <AdvancedVideo
          cldVid={video}
          plugins={[lazyload("0", 0.4)]}
          controls={false}
          autoPlay={true}
          loop
          muted
        />
    );
Code language: JavaScript (javascript)
This component returns the AdvancedVideo component, which renders a traditional HTML5 video tag. The component receives several props; the first is the cldVid prop, representing the URL to the transformed video.
We added the lazyload() plugin and specified parameters that control when our video loads on the page for optimizations. See here for more on the lazyload plugin.
The other props are pretty intuitive; they state that the rendered video should display no controls, play automatically and loop continuously with no sound.
As a final step, let’s update our Product component to import and use the VideoPlayer component with the code below.
    import React from "react";
    import VideoPlayer from "./VideoPlayer";
    const Product = ({ videoId, price, description, title }) => {
      return (
        <div className="product br">
          <section className="product_vid">
            <VideoPlayer videoId={videoId} />
          </section>
          <section className="product_details">
         {/* ... */}
          </section>
        </div>
      );
    };
    export default Product;
Code language: JavaScript (javascript)
You should see the product listing app with the trimmed videos displayed as expected if you run your application.
You can find the complete project here on GitHub.
Backed by its ubiquitous nature, stats, and conversion rate, videos add a zing to how we do a lot in our world today. With great platforms like Cloudinary in the mix, this guide scratches the surface of what can be achieved by building a simple app that includes trimmed videos of products.
Resources you may find helpful: