
Designing a website entails overseeing an extensive collection of visuals. Managing this diverse range of images while keeping them current presents a significant challenge for development teams.
In this blog post, we’ll address a typical UI pattern where users can interact with images in a gallery through client-side navigation or access them directly via shareable URLs. By leveraging Cloudinary Digital Asset Management solutions together with the latest features of Next.js (parallel and intercepting routes), we’ll explore how these functionalities can be combined to address typical challenges encountered when implementing modal interfaces, including:
Enabling modal content to be shareable via URL links. Maintaining context when the page is refreshed rather than closing the modal. Implement modal closure during backward navigation instead of returning to the previous route. Facilitating modal reopening during forward navigation.
In version 13, Next.js introduced a new App Router built on React Server Components. This router supports shared layouts, nested routing, loading states, error handling, and more.
The App Router works in a new directory named app.

Creating a page.tsx file inside the app/main-page folder allows you to define what users will see when they navigate to /main-page. So folder names inside the app directory define your app routes.
Creating nested routes is simple, you just have to follow this folder pattern:
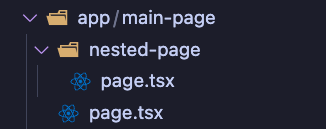
In this case, the URL of your page will be /main-page/nested-page.
Parallel Routes in Next.js allow for the simultaneous rendering of multiple pages or sections within the same layout. They are particularly useful for dynamic areas of an application, such as dashboards or social media feeds.
You use named slots defined with the @folder convention to create parallel routes. For instance, if you have slots for left and right page sections, you’d define them as @left and @right.
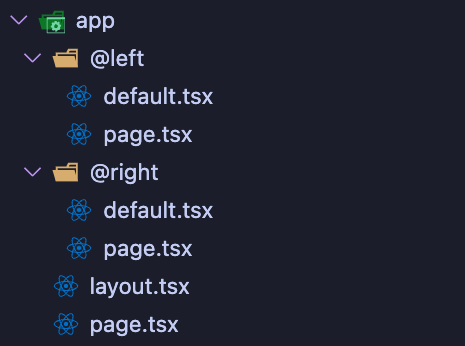
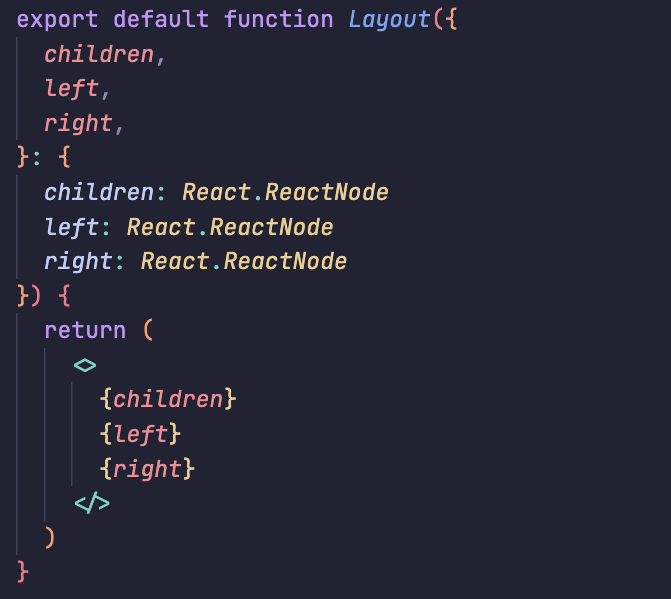
These slots are then passed as props to the shared parent layout component, which can render them alongside the main content.
It’s important to note that slots don’t affect the URL structure. Even if you have a slot like @left, the URL won’t change to include that slot name.
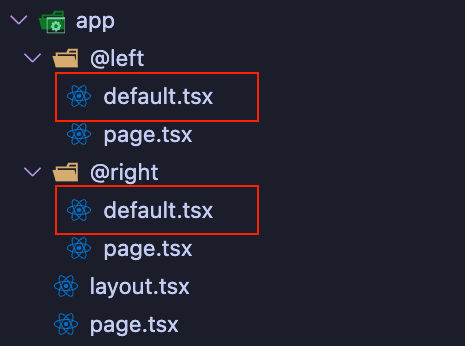
By default, Next.js manages each slot’s active state. During client-side navigation, it updates the content within a slot without affecting the other slots. However, Next.js may render a default component for unmatched slots during a full-page reload or display a 404 error if no default component is defined.
You can define a default component as a fallback to handle unmatched slots during initial loads or full-page reloads. This ensures a consistent user experience even when navigating between different application sections.
Intercepting routes in Next.js enables loading a route from another part of the application within the current layout. This approach proves beneficial when you aim to seamlessly display route content without disrupting the user’s context.
For instance, suppose you click a photo in a feed. Instead of navigating to a separate page, the photo appears in a modal overlaying the feed. Next.js intercepts the photo route, conceals the URL, and presents the content within the existing feed layout.
However, when accessing the photo via a shareable URL or refreshing the page, the entire photo page should render independently, bypassing route interception.
Intercepting routes utilize the (..) convention. This convention allows you to match segments at different levels:
- (.) matches segments on the same level.
- (..) matches segments one level above.
- (..)(..) matches segments two levels above.
- (…) matches segments from the root app directory.
Combining these two new Next.js concepts with Cloudinary’s Digital Asset Management solutions, we will build an image gallery where each image is clickable. Clicking on one of the images will open a modal with a preview of the image itself, and the user will also be able to navigate to the image page directly using a shareable URL.
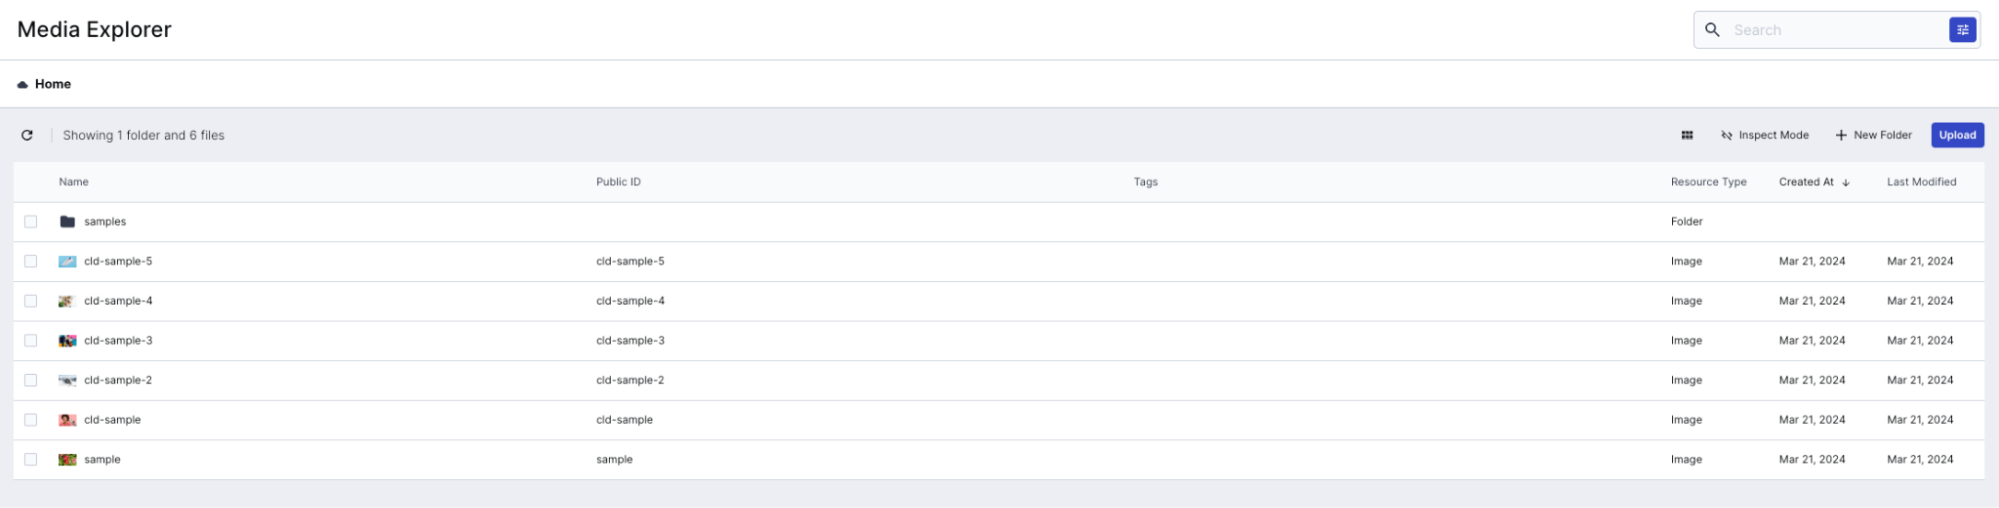
After creating an account and signing up for free with Cloudinary, you’ll have access to your dashboard, where all the API keys you’ll need to build this example will be available.

Additionally, you can start uploading all the assets you want directly through your Cloudinary console. For simplicity, in this example, we’ll use the images that you’ll find already uploaded by default.
Let’s initialize now our Next.js App with the command:
npx create-next-app@latest
Our folder structure will be as follows:
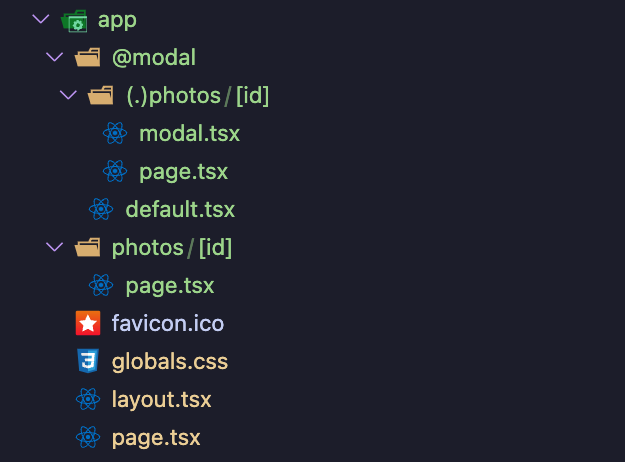
We’ll create a Parallel Route for our Modal @modal and intercepting the photo route with an Intercepting Route. Since @modal is a Slot and not a segment, the route we’d like to intercept is at the same level as our modal, so we must use the (.) syntax.
Our layout.tsx file will have the modal slot, as you can see, together with the children, which is going to be our page.tsx file with the image gallery.
app/layout.tsx:
export default function RootLayout({
  children,
  modal
}: Readonly<{
  children: React.ReactNode;
  modal: React.ReactNode
}>) {
  return (
    <html lang="en">
      <body className={inter.className}>
        <div className="grid grid-rows-[auto_1fr_auto] h-screen">
          <main>
            {children}
            {modal}
            <div id="modal-root" /></main>
        </div>
      </body>
    </html>
  );
}

Code language: JavaScript (javascript)
app/page.tsx:
export default async function Home() {
  return (
    <Wrapper className="max-w-7xl">
      <h2 className="sr-only">Image Gallery</h2>
      <ul className="grid grid-cols-2 lg:grid-cols-3 gap-2">
        {pictures.map(picture => {
          return (
            <li key={picture.id}>
              <Link
                className="relative group"
                key={picture.id}
                href={`/photos/${picture.id}`}
                passHref
              >
                <CldImage
                  src={picture.image.publicId}
                  width={730}
                  height={900}
                  crop="fill"
                  alt={picture.image.alt}
                />
                <div className="lg:opacity-0 lg:group-hover:opacity-100
                      transition-opacity absolute bottom-0 left-0
                      w-full bg-gradient-to-t from-zinc-900 px-5 py-4">
                  <h3 className="text-white text-3xl lg:translate-y-2
                        lg:group-hover:translate-y-0
                        transition-transform">
                    {picture.title}
                  </h3>
                </div>
              </Link>
            </li>
          )
        })}
      </ul>
    </Wrapper>
  )
}

Code language: JavaScript (javascript)
We’ve created the CldImage component in our component folder, which is a simple wrapper to the default CdlImage component exported from next-cloudinary with the 'use client' directive because Next Cloudinary image component is not fully equipped to be shipped in a react server component yet, and since all the page.tsx file in the new Next.js router are server pages by default, we need to be careful and add this directive on top of our image component.
"use client";
import { CldImage as CldImageDefault, CldImageProps } from 'next-cloudinary';
const CldImage = (props: CldImageProps) => {
  return (
    <CldImageDefault {...props} />
  );
}
export default CldImage;

Code language: JavaScript (javascript)
Next, we’ll import in our page.tsx file all the pictures. This is because we’ve added some more useful data in the images just to enhance our app. Here’s one example of our data structure for images:
[
	{
		"title":  "Sport",
		"id":  "sport",
		"image":  {
			"publicId":  "cld-sample-3",
			"url": "https://res.cloudinary.com/dbyfj6t6c/image/upload/v1711039374/cld-sample-3.jpg",
			"width":  1870,
			"height":  1250,
			"alt":  "Basketball"
		}
	},
	...other images’ data...
]
Code language: JSON / JSON with Comments (json)
All this data can be retrieved from our Cloudinary console.
We could also directly fetch all the images we’ve uploaded to our Cloudinary console using the Cloudinary API. We just have to create a fetch function in our page.tsx file that fetches all the available images:
async function getImages() {
  const url =
    `https://api.cloudinary.com/v1_1/${process.env.NEXT_PUBLIC_CLOUDINARY_CLOUD_NAME}/resources/image`
  const auth = Buffer.from(process.env.NEXT_PUBLIC_API_KEY + ':'
    + process.env.NEXT_PUBLIC_API_SECRET).toString('base64')
  const res = await fetch(url, {
    headers: {
      Authorization: `Basic ${auth}`
    }
  })
  if (!res.ok) {
    throw new Error('Failed to fetch data')
  }
  return res.json()
}

Code language: JavaScript (javascript)
Once we click one of the images in the gallery, we’ll navigate through the photo/[id] page, but our intercepting route will intercept this path and display the image inside of a modal:
app/@modal/(.)photos/modal.tsx:
'use client';
import { type ElementRef, useEffect, useRef } from 'react';
import { useRouter } from 'next/navigation';
import { createPortal } from 'react-dom';
export function Modal({ children }: { children: React.ReactNode }) {
  const router = useRouter();
  const dialogRef = useRef<ElementRef<'dialog'>>(null);
  useEffect(() => {
    if (!dialogRef.current?.open) {
      dialogRef.current?.showModal();
    }
  }, []);
  function onDismiss() {
    router.back();
  }
  return createPortal(
    <div className="modal-backdrop">
      <dialog ref={dialogRef} className="modal" onClose={onDismiss}>
        {children}
        <button onClick={onDismiss} className="close-button" />
      </dialog>
    </div>,
    document.getElementById('modal-root')!
  );
}

Code language: JavaScript (javascript)
app/@modal/(.)photos/page.tsx:
import { Modal } from './modal';
import CldImage from '@/components/CldImage';
import pictures from '@/data/pictures.json';
export default function PhotoModal({
  params: { id: photoId },
}: {
  params: { id: string };
}) {
  const picture = pictures.find(({ id }) => id === photoId);
  if (!picture) return <Modal>No Image found</Modal>
  return (
    <Modal>
      <CldImage
        src={picture.image.publicId}
        width={730}
        height={900}
        crop="fill"
        alt={picture.image.alt}
      />
    </Modal>
  );
}

Code language: JavaScript (javascript)
Using Next.js Parallel and Intercepting routes, we can also use browser navigation to close and re-open the image modal:
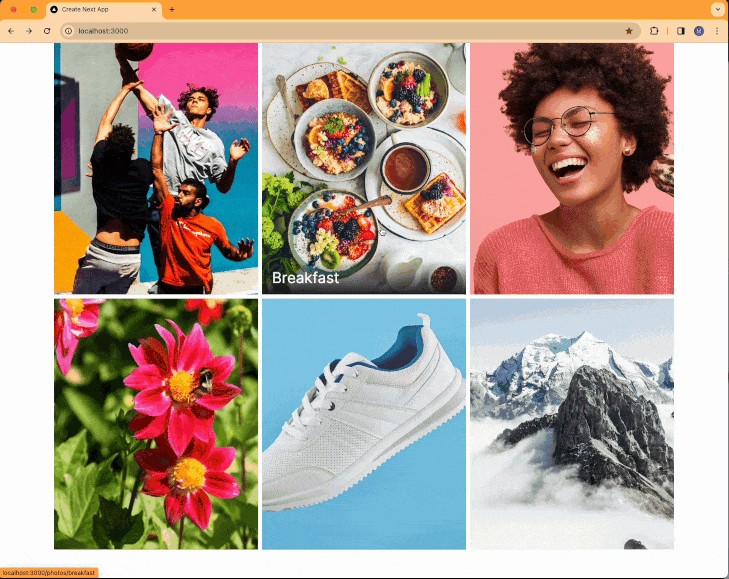
All the images have a shareable URL that you can copy and paste into your browser to open the image page, as you can see in the example above.
The actual photo page is:
app/photos/[id]/page.tsx:
export default function PhotoPage({
  params: { id: photoId },
}: {
  params: { id: string };
}) {
  const picture = pictures.find(({ id }) => id === photoId);
  if (!picture) return <div>No Image found</div>
  return (
    <div>
      <CldImage
        src={picture.image.publicId}
        width={730}
        height={900}
        crop="fill"
        alt={picture.image.alt}
      />
    </div>
  );
}

Code language: JavaScript (javascript)By harnessing the capabilities of Next.js’s Intercepting and Parallel routes and seamlessly integrating them with Cloudinary Digital Asset Management features, we’ve successfully constructed a robust and dynamic image gallery. Our exploration only scratches the surface of Cloudinary Digital Asset Management, which enables us to optimize image usage, directly perform image transformation, both manually and with generative AI, and explore a lot of other functionalities.
If you found this blog post helpful and want to discuss it in more detail, head over to the Cloudinary Community forum and its associated Discord.


