Over time, engineering efforts have been put into developing more performant web applications. Jamstack technologies like Next.js came from this need.
JAMstack technologies like Next.js emerged from an interest in improving the performance of modern web applications.
This article will show you one way to improve your application performance by lazy-loading video assets on a Next.js page.
Next.js is a modern React.js framework for building fast web pages and web applications. Next.js touts numerous features to improve both developer experience, and web application performance.
Lazy-loading is a technique in software engineering that requires delaying fetching/loading resources until you need them. The loading activity can be triggered by different user actions, including scrolling, hovering, or highlighting.
Lazy-loading shaves off any kilobytes contributing to page load times or network resources. It’s currently used to defer images and JavaScript modules during runtime.
Now, as a page loads, videos load a placeholder image along with a portion of the video. Once the video is played, the remaining part of the video is buffered.
We’ll shave off the page kilobytes loaded by the video, and defer loading until the video is scrolled into view, using the web intersection observer API. React-intersection-observer is a React.js implementation for an intersection observer, which informs us when a DOM element is in view.
We completed this project in CodeSandbox, and you can fork it to run the code.
Having some knowledge of, and experience with, JavaScript and React.js is required for this project. You don’t need to know Next.js in-depth, either.
We’ll install Next.js globally on our computer using yarn with the CLI command.
yarn create next-app
This command opens a prompt to enter the project title. We’ll use a project name of our choice, and yarn will install all dependencies required to bootstrap a Next.js project with the default starter.
Find more methods to install Next.js here.
With the new project created, we’ll install two dependencies. We’ll need the Cloudinary-React library to use Cloudinary’s robust video player, and react-intersection-observer.
In the project directory, we’ll install these packages using yarn in the CLI with:
yarn add cloudinary-react react-intersection-observer
With these installed, we’ll start a development server for the project using the CLI command, yarn dev.
Like most modern frontend development frameworks, pages are created automatically using files in a designated folder. This is true for Next.js, too. The project’s home page is located in pages/index.js in the project’s root directory.
We’ll need to create long-form content on the homepage so that we can sufficiently handle the scrolling activity. To do this, we’ll make a content block component file titled ContentBlock.jsx with dummy text in src/components. In this file, we’ll create a function component with the following:
    export const ContentBlock = ({ title = "Part" }) => {
      return (
        <div>
          <h2>{title}</h2>
          <p>
            Lorem ipsum dolor sit amet, consectetur adipiscing elit. Aenean nisl
            nunc, commodo quis faucibus non, venenatis nec mi. Praesent velit neque,
            gravida at felis a, pulvinar sollicitudin metus. Vestibulum quis
            vehicula metus. Maecenas tincidunt est ex, nec volutpat enim gravida
            vitae. Donec dui orci, lacinia nec suscipit vitae, suscipit eget nulla.
            Pellentesque ipsum velit, accumsan vel vehicula et, convallis at eros.
            Fusce ac elit id ante varius posuere vitae eget enim. Nunc enim ex,
            sodales vitae suscipit eget, dictum ac ante. Pellentesque tincidunt
            vehicula pellentesque. Aliquam posuere et turpis non tincidunt.
            Curabitur rhoncus euismod ante euismod cursus. Donec quis arcu eu sem
            mattis fringilla non et augue. Integer lorem purus, sollicitudin vel
            egestas et, mattis efficitur metus. Nam consectetur faucibus sem varius
            lacinia.
          </p>
          <p>
            Duis vitae ultricies tortor. In hac habitasse platea dictumst. Praesent
            a ante sit amet ante mollis mattis ac nec nibh. Ut id tristique leo.
            Etiam lobortis lacinia purus at semper. In mattis tincidunt leo, non
            laoreet neque elementum vel. Nam ullamcorper lacus massa, a finibus
            neque auctor eget. Sed sapien felis, tempus quis tempor vel, ultrices eu
            lorem. Aenean in egestas tellus. Proin velit ante, suscipit in dui sit
            amet, maximus faucibus massa. Donec porttitor ante dolor, a convallis
            ligula mollis id. Curabitur suscipit nisi nec velit ornare porta. In
            erat odio, blandit et iaculis at, ultrices a sapien. Suspendisse
            potenti.
          </p>
        </div>
      );
    };
Code language: JavaScript (javascript)
This component will receive a prop of title with which we’ll set the content title, and it’ll render the set title and dummy text. We’ll also add a default title of Part through the prop.
This content block component will be used multiple times on the home page to create a scrollable page.
In the home page component located in pages/index.js, we’ll use the ContentBlock component to render multiple contents.
    import { ContentBlock } from "../src/components/ContentBlock";

    export default function IndexPage() {
      return (
        <div>
          <h1>Lazyloading videos in Next.js apps</h1>
          <div>
            <h2>We'll make a long page with text content</h2>
          </div>
          <ContentBlock title="Part 1" />
          <ContentBlock title="Part 2 - After the video player" />
          <ContentBlock title="Part 3" />
          <ContentBlock title="Part 4 - After the video player" />
        </div>
      );
    }
Code language: JavaScript (javascript)We’ll need to create a video player component, which we’ll use on the home page or any other page where it’s required. In src/components we’ll create a new component file named VideoPlayer.jsx. In the video player file, we’ll first import the required dependencies and create a memoized video player component.
    import { Video, CloudinaryContext } from "cloudinary-react";
    import { useState, useEffect, memo } from "react";
    import { useInView } from "react-intersection-observer";

    const MemoVidPlayer = memo(({ publicId }) => {
      return (
        <CloudinaryContext cloudName="chuloo">
          <Video publicId={publicId} width="600px" controls />
        </CloudinaryContext>
      );
    });
Code language: JavaScript (javascript)
In the snippet above, we created a video player using the Video component in the Cloudinary-React package. This Video component accepts a prop of publicId, a unique identifier for the video on Cloudinary. This way, we can serve remote optimized images hosted on Cloudinary.
You can create a Cloudinary account to store, retrieve, and perform transformations on media assets, including videos. For this project, it’s essential to note that we can replace the Video component used here with any other video element, including the HTML video element.
CloudinaryContext is a wrapper component that provides data passed as props to all of its child Cloudinary components. In this wrapper, we’ll pass the cloud name of our Cloudinary account. You can obtain this from your Cloudinary dashboard after creating an account.
The video player is returned in a memo function to ensure that the component doesn’t render again, so long as its content and data don’t change.
In VideoPlayer.jsx, we’ll create an exported function that we’ll use on the home page. This function will handle the lazy loading of the previously created MemoVidPlayer component.
    export const VideoPlayer = ({ vidPublicId = "video-blog/cat" }) => {
      const [publicId, setPublicId] = useState("");
      const { ref, inView } = useInView({ threshold: 1 });
      useEffect(() => {
        if (inView === true) {
          setPublicId(vidPublicId);
        }
      }, [inView, vidPublicId]);
      return (
        <div ref={ref}>
          <MemoVidPlayer publicId={publicId} />
        </div>
      );
    };
Code language: JavaScript (javascript)
In the VideoPlayer component, we’ll create a state variable to store the video’s publicId. The video player will not load if the public ID is wrong or a source is not provided. This is a similar pattern used in lazy-loading images. We’ll update the source of the video once it scrolls in view.
Next, we’ll destructure the ref and inView values from the useInView hook imported from react-intersection-observer. The ref value is assigned to the DOM element to be tracked, and inView returns a boolean value to show when the tracked element is in view. The threshold option ranges from 0 to 1, showing how much of the tracked element needs to be in view to trigger a change in the inView value.
In a useEffect hook, we’ll check if inView is true before updating the state value from an empty public ID to the video’s specified public ID. The useEffect hook takes a dependency array of values that would trigger the component’s rerender if it changes.
For our VideoPlayer component, we’ll set a default public ID of video-blog/cat.
Lastly, we’ll update the home page component to show the video player, with each video having a different public ID from the other.
import { VideoPlayer } from "../src/components/VideoPlayer";
export default function IndexPage() {
return (
<div>
<h1>Lazyloading videos in Next.js apps</h1>
<div>
<h2>We'll make a long page with text content</h2>
</div>
<ContentBlock title="Part 1" />
<VideoPlayer />
<ContentBlock title="Part 2 - After the video player" />
<VideoPlayer vidPublicId="video-blog/kitten" />
<ContentBlock title="Part 3" />
<VideoPlayer vidPublicId="video-blog/doggo" />
<ContentBlock title="Part 4 - After the video player" />
</div>
);
}
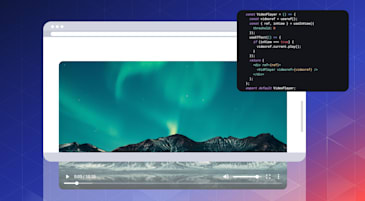
Code language: JavaScript (javascript)Here’s how the final page looks.
We’ll also check the browser console to see the loaded media assets in the network tab. The network tab shows the deferred loading of the video thumbnail and the preloaded video.
This article discussed the importance of lazy-loading media assets for performance improvements on modern web pages. We also walked through how to lazy-load a video component on a page using the react-intersection-observer package. Experiment with lazy-loading multiple videos on your pages for improved performance benefits.
Want to discuss the topic of this blog or have a question? Head over to the Cloudinary Community forums or Discord and join the conversation!
##Resources