
Many content creators and consumers tend to regard video as visuals, but that’s only part of the experience. Immersive video content includes strong audio. Just like in a movie, the audio for video content comprises many components: the narrator or subjects, the background music that sets the mood and draws viewers in, sound effects, and so forth.
It’s easy to overlook audio in deference to the visuals. However, high-quality audio counts as much in short videos as it does in long productions. Let’s dig into how poor audio impacts otherwise compelling video and explore how Cloudinary helps fix the issues for a more engaging viewing experience.
Audio problems are annoying. For example, with multiple clips produced at different times or by different people, the creator might neglect to level the sound, causing sound variation in compound videos.
Imagine this scenario: A viewer is a third of the way through watching a video, and suddenly the narrator’s voice turns twice louder. Or, worse, the next piece of background music jumps up a level and drowns out everything else. Such an abrupt volume change interrupts attention, makes the video feel less immersive, and might even cause the viewer to stop watching. On a streaming site like YouTube or Vimeo, you as the producer might lose views—or even receive thumbs-down ratings or nasty comments.
Other problems can result in annoying audio. Parts of the video might go quiet or become almost inaudible. Or the music is scratchy from poor quality or a low recorded bitrate.
However, a video with high audio quality might not be ideal. Why? Because you might’ve leveled all the audio but produced it at too high a quality level, which might crash machines that don’t support the audio codec. Additionally, the video quality might decline if a device’s connection or processor cannot handle the file.
Accessibility of audio matters just as much as quality and leveling since some of your audience might be deaf or hard of hearing, or they might speak a different language. Subtitles or other visual cues would be of tremendous help for them.
Producing optimal audio is challenging. Even experienced creators occasionally overlook certain details or run into obstacles.
Tools can help solve audio issues. A studio-quality microphone, such as a Blue Yeti model, which is relatively inexpensive and which offers moderate-level recording control, would make a huge difference.
In addition, with premium-quality studio headphones, you can listen to the video during the production process and identify problems. Budget allowing, whole devices dedicated to audio processing and sound control are available, not to mention first-rate computers, equipment, or devices for audio production.
On the other hand, budget constraints might preclude those hardware purchases, especially at the outset. Software is a far more economical alternative, and cloud production takes the load off your machines—especially if you work with only one computer.
As one of the longest-existing streaming sites, YouTube offers rudimentary tools—but not a full suite—for video editing. Also, the tools for various production software vary. Some focus on video; others on audio, but many merely control the basic audio functions postproduction. Other postproduction tools would come in handy to beat your audio into shape.
Cloudinary offers controls for both video and audio. While editing a video with Cloudinary, you can upload the audio files separately and work with several other tools with transformation capabilities similar to those in photo-editing software: clip, stretch, and so on. Even if encoded, those tools work directly on audio and video.
Plus, by uploading and hosting videos with Cloudinary, you can apply transformations through APIs, which support services of all kinds. Cloudinary even comes with a video player.
The next section describes a few transformations as examples. Feel free to use some of Cloudinary’s example videos or upload your own audio and video. Before you start, sign up for a free Cloudinary account.
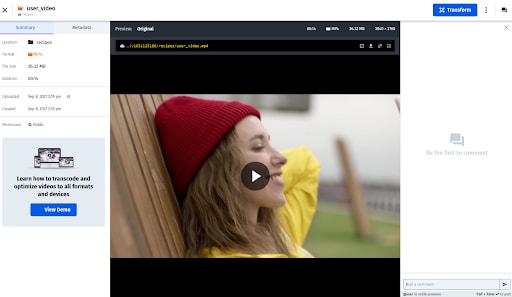
Here’s a demo of a simple transformation of a video from the Cloudinary Media Library. Follow these steps:
-
Double-click recipes and choose one of the four video options. After loading the video, click Transform to go to the video’s Transform page, where you can resize, crop, format, and edit videos on the fly. You can also add special effects.
-
Scroll down to Audio Codec and click No Audio to remove the audio from a video in order to overlay another version. A Refresh button is then deployed on the demo player.

-
Click Refresh to preview the change.
The code line below the player will have changed, and you can now download the edited video or post it as is on a website. If you’re using JavaScript or another framework or language, you can derive code to generate a player for it. See this example with React:
<Video publicId="recipes/asltranslation" > <Transformation audioCodec="none" /> </Video>Code language: HTML, XML (xml)
Other controls are also available, e.g., you can shift the audio frequency or change the codec to other formats that perform better on other systems. (As mentioned earlier, too good a sample or an unknown codec might cause crashes.) Besides, you can chain transitions for multiple edits.
To correct or edit audio directly, use Cloudinary’s MediaFlows system with which you can custom-build a video editor with a block-type programming interface and different features per block.
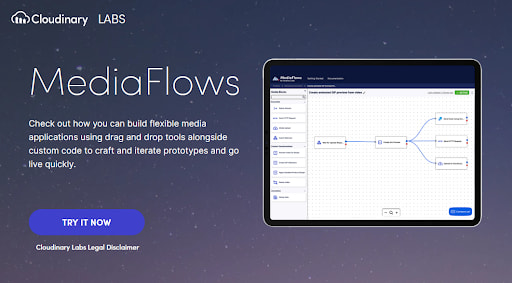
MediaFlows is in Beta, requiring a separate login after registration on Google or GitHub.
For sound enhancements, Cloudinary has worked with Dolby.io to build the Dolby.io Media Enhancement block. To enable that block, contact Cloudinary Support. Also, given that the block’s features are advanced, they require an additional Dolby.io API key.
Afterwards, you can use Dolby.io to transform the videos within your MediaFlows app. A new Dolby.io block is displayed, in which you can edit the volume, reduce the noise level, isolate a speech, or apply speech-leveling effects to fine-tune the video’s audio quality.
Ready to try MediaFlows for yourself? Check out “Enhancing Audio for Video using Dolby.io Media Enhance API”.
While working with an app, Cloudinary’s add-ons render your videos accessible. For instance, if you’ve built a custom uploader with Cloudinary, you can leverage a transcription tool through the Google AI Video Transcription Add-On by calling that tool through code with the Cloudinary API, just as you do with video transformations.
A case in point: When uploading a video through your app, you can chain the video to the Cloudinary API with the call below, which is programmed for the Node.js API, or with others that are slated for various languages or frameworks.
cloudinary.v2.uploader.upload("lincoln.mp4",
  { resource_type: "video",
	raw_convert: "google_speech" },
  function(error, result) {console.log(result, error) });
Code language: JavaScript (javascript)
Cloudinary and the Video Transcription tool transcribe the video in the language you specify. You can then turn the transcription into captions and configure Cloudinary to link to other add-ons for a more accessible video for wider audiences.
Because the quality and content of audio can enhance or destroy video, it’s just as crucial as video. A critical task is to ensure that your audio timing is on track.
Even though you can fix most audio problems with the correct tools, you need more help at times, especially if you’re working as a single developer. Give Cloudinary a try to see (and hear) how it can help you attain the video feel you aim for and reach wider audiences. Cloudinary also works with other services, boosting the range of features for managing audio.