
Today’s tremendous growth in e-commerce means that competition among businesses is heating up. One way to gain a competitive edge is to boost your product’s authenticity by incorporating user-generated content (UGC) into your product pages.
This tutorial shows you how to do the following:
- Build a progressive web app with Gatsby, a React-based web framework for JavaScript. Gatsby.js works seamlessly as a front end for building sites with Shopify, WordPress, and many other content management systems (CMS).
- Manage UGC for the app by integrating it with Cloudinary. Cloudinary is a robust, software-as-a-service (SaaS) platform with a one-stop solution for managing images and videos along with add-ons for organizing and transforming media.
To follow this tutorial, you must have a working knowledge of Git and web development. Experience with Gatsby is helpful; if that’s new to you, this tutorial steers you through what you need to know.
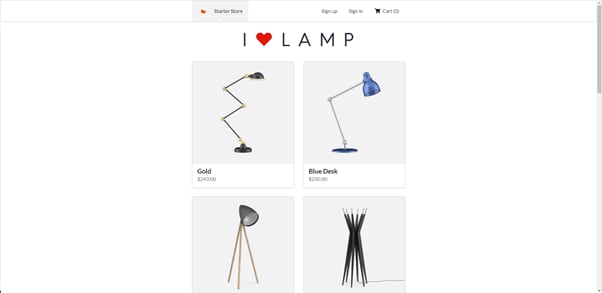
Since this tutorial’s main goal is to enhance an e-commerce site with UGC through Cloudinary, you need the Jamstack e-commerce template as a starter. Do the following:
- Install Gatsby on your computer.
- Clone the Starter Theme repository and open the folder with a code editor.
- Open a terminal at the root directory of the project and run
npm installto install the required packages. - Run
gatsby developto start a local development server of the project on localhost:8000.
Now integrate Cloudinary with the e-commerce app, enhancing it with UGC. Follow these steps:
-
Sign up for a Cloudinary account, which is completely free for up to 25 credits monthly, enough for plenty of transformations, storage, and bandwidth. Cloudinary’s intuitive dashboard displays your account details and recent usage data. You can upload media files directly from the dashboard. For the purpose of this tutorial, configure the site so your audience can upload their content with Cloudinary’s upload widget. See the steps below.
-
Create an upload preset: log in to Cloudinary, click the Profile icon on the upper-right corner, and then click the gear-shaped Settings icon at the top.
-
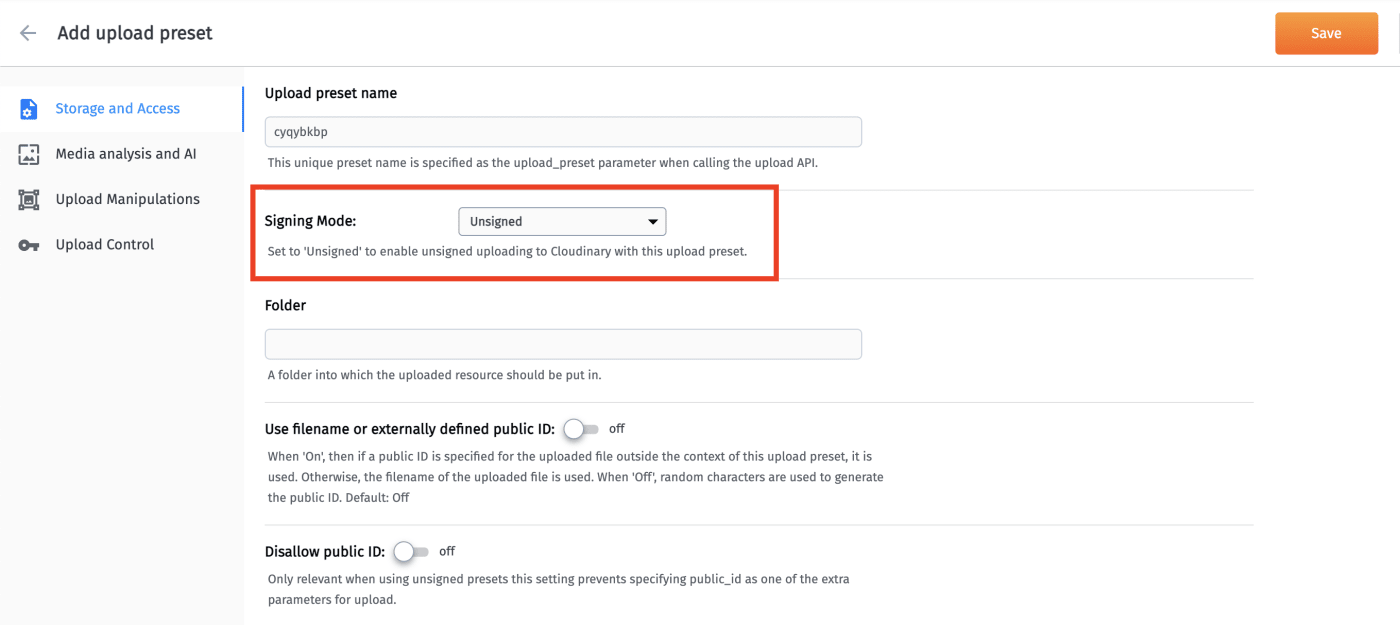
Click the Upload tab at the top, scroll down to the Upload presets section, and click Add upload preset. On the screen that is displayed, pull down the menu for Signing Mode and choose Unsigned to enable unsigned uploads. Click Save.
-
Click the Security tab at the top and, under Restricted media types, select Resource list so that you can retrieve media files from Cloudinary’s API.

To use Cloudinary’s React SDK with Gatsby, install a dependency and set up the app, as follows:
- Open the terminal and run the
npm install cloudinary-react --savecommand. - Add the custom script below to the
Gatsby-browser.jsfile in the root directory of the project so that you can use Cloudinary’s upload widget:
const addScript = url => {
  const script = document.createElement("script")
  script.src = url;
  script.async = true;
  document.body.appendChild(script);
}
export const onClientEntry = () => {
  window.onload = () => {
    addScript("https://widget.cloudinary.com/v2.0/global/all.js")
  };
};
Integration of Cloudinary with Gatsby is now complete. You can use all sorts of interesting features with Cloudinary’s React SDK inside the app. With Cloudinary, you can also validate, process, and transform user-generated videos. Cloudinary add-ons accord you control over content with artificial intelligence (AI).
The Cloudinary upload widget is a customizable, interactive, and responsive pop-up tool that uploads content directly to your Cloudinary account. The widget sends a callback function on successful uploads and offers cloud-name and upload-preset options for both signed and unsigned uploads. You only need JavaScript to integrate that widget into your web app.
To see what the upload widget can do, define a function in the src\components\ProductAttributes\index.js file and execute that function on a click event in your app, like this:
  const showWidget = () => {
    const uploadOptions = {
      tags: ["userVideos"],
      cloud_name: "your_cloud",
      upload_preset: "your_preset",
      resource_type: "video",
      folder: "videos",
    };
    const widget = window.cloudinary.createUploadWidget(
      uploadOptions,
      (error, result) => {
        if (!error && result && result.event === "success") {
          console.log(result);
        }
      }
    );
    widget.open();
  };
uploadOptions in the function above specifies that it accepts only resources with type video. All uploaded videos are stored in a folder named videos with the tag userVideos.
Next, call the showWidget function on the click of a button:
<div className="text-center mb-4">
        <button className="btn btn-primary"  onClick={showWidget}>
          Upload Review Video
        </button>
</div>
Clicking Upload Review Video then triggers this dialog box from the upload widget:

The most crucial aspects of managing UGC are moderation and security, which eliminate uploads of irrational, offensive, or harmful content. Implementation is a cumbersome task, but Cloudinary makes it swift with much less effort.
Cloudinary offers automatic and manual media moderations. Automated moderation, which approves or rejects the uploaded content, is through add-ons for images and videos. All you have to do is register for the add-ons, include them in the upload preset, and specify the moderation mode you desire. Follow these steps:
- Navigate to the section where you created the upload preset and enable unsigned uploads.
- Click the Upload Control tab on the left and select your moderation mode from the pull-down menu under Auto moderation.

Security of your assets is equally important. What happens if someone uploads a media file that contains malware? It could inflict a load of harm on your business within seconds. Cloudinary automatically checks for malicious files, ensuring that your assets are secure. To activate that security check, simply apply any form of transformation through Cloudinary, such as cropping or changing your assets’ width or format.
Cloudinary can also remove media information that’s not relevant to your business. The Optical Character Recognition (OCR) add-on, for example, automatically scans images and removes potentially sensitive information by blurring it.
Cloudinary’s content-aware cropping feature identifies the most significant part of the media and intelligently crops it. In the Gatsby app, set gravity to auto and crop to fill by adding transformations using the Transformation component imported from the cloudinary-react package:
import { CloudinaryContext, Transformation, Video } from "cloudinary-react";

<Video
  className=" col-xl-6 col-12 mb-2 shadow"
  publicId={publicIds[id].public_id}
  controls={true}
  >
  <Transformation
    width="300"
    height={window.innerWidth < 600 ? "300" : ""}
    gravity="auto"
    crop="fill"
  />
</Video>
Cloudinary’s responsive, JavaScript-based video player offers options for integration and customization, including skin themes, fonts, subtitles, transformations, and so forth. However, in the React app you just built, you can also dynamically pass the public ID (publicId) as an attribute to create a customized video player with the Video component of the Cloudinary-react SDK. If you look in the ProductAttributes page of the sample project, you’ll see we’ve imported several Cloudinary React components and added a video player to the page:
import { CloudinaryContext, Transformation, Video } from "cloudinary-react";
...
const getNextIndex = () => {
    return id + 1 < publicIds.length ? id + 1 : 0;
};
...
<CloudinaryContext cloudName="dafco2hao">
        {publicIds.length > 0 ? (
          <Header className="text-center" as="h3">
            Videos with No Transformation
          </Header>
        ) : null}
        {videos.map(data => {
          return (
            <div className="container " key={data.public_id}>
              <div className="row py-3">
                <Video
                  className="col-xl-6 p-0 col-12 shadow"
                  publicId={data.public_id}
                  controls={true}
                ></Video>
              </div>
            </div>
          );
        })}
        {publicIds.length > 0 ? (
          <>
            <Header className="text-center mb-4" as="h3">
              Video Playlist with Content Aware Cropping
            </Header>
            <Video
              className=" col-xl-6 col-12 mb-2 shadow"
              publicId={publicIds[id].public_id}
              controls={true}
            >
              <Transformation
                width="300"
                height={window.innerWidth < 600 ? "300" : ""}
                gravity="auto"
                crop="fill"
              />
            </Video>
          </>
        ) : null}
      </CloudinaryContext>
...
<div className="text-center mb-4">
    <Button onClick={() => setId(getNextIndex())} variant="primary">
            Next Video
    </Button>{" "}
</div>
You’ve now learned how to enhance your website by first integrating Cloudinary with a Gatsby.js app and then leveraging Cloudinary’s many advanced features, such as its upload widget, moderation and security capabilities, content-aware cropping, and video player. The deployed link of this sample e-commerce app includes all the functions discussed in this tutorial.
Ultimately, by dynamically generating content on your site with Cloudinary, you can promote your product’s authenticity and credibility, which bodes well for sales growth. For more details, see our developer resources.
Dhruv Patel is a full-stack developer and AWS-certified solutions architect. His motto is “Do What You Love” and Tech is surely one of them for him.