
If you’ve been working in the React ecosystem for a while, you’re probably familiar with some of the TanStack libraries like Router or Query. TanStack Start is a new full-stack React framework powered by TanStack Router. It doesn’t yet have all the bells and whistles that a more established framework like Next.js has, so there isn’t a component that automatically handles optimizing images on your site or a third-party Cloudinary framework integration. Still, we can add image/video optimization and much more to our TanStack Start website with the Cloudinary React SDK.
Just to give a little context, a TanStack Router and React Router are both routing libraries for React applications, but they differ in design philosophy and flexibility. React Router is the long-established standard, providing a straightforward way to manage navigation and dynamic routes within React apps. TanStack Router, a newer alternative from the creators of React Query, is designed for type safety, data loading, and better integration with modern React features like hooks and suspense. It focuses on predictable, data-driven routing with built-in support for loaders, optimistic updates, and URL state management. In essence, React Router is simpler and widely used, while TanStack Router is more advanced and tailored for complex, data-heavy applications.
So far we’ve given context for what is Tanstack Start and a comparison of Tanstack router vs React router. Now, we’ll create a simple TanStack Start project and add image optimization and uploading features using the Cloudinary React SDK.
If you don’t have Cloudinary, you can sign up now for free and for life. You’ll get access to be able to follow along here as well as all of Cloudinary.
There isn’t a fancy tool for starting a new TanStack Start project like you might get with Next or Astro quite yet. The easiest way to get started is to copy one of the example projects available in the project repository. For this demo, I’ll copy over the start-basic example project.
Once you have the start-basic directory copied over to your computer, navigate to the directory in your terminal. We can install the dependencies and start the dev server to see what the basic project looks like.
npm i
npm run dev
The dev server will start at http://localhost:3000. We get a basic web page with a navigation bar that we can use to navigate to some of the example pages.
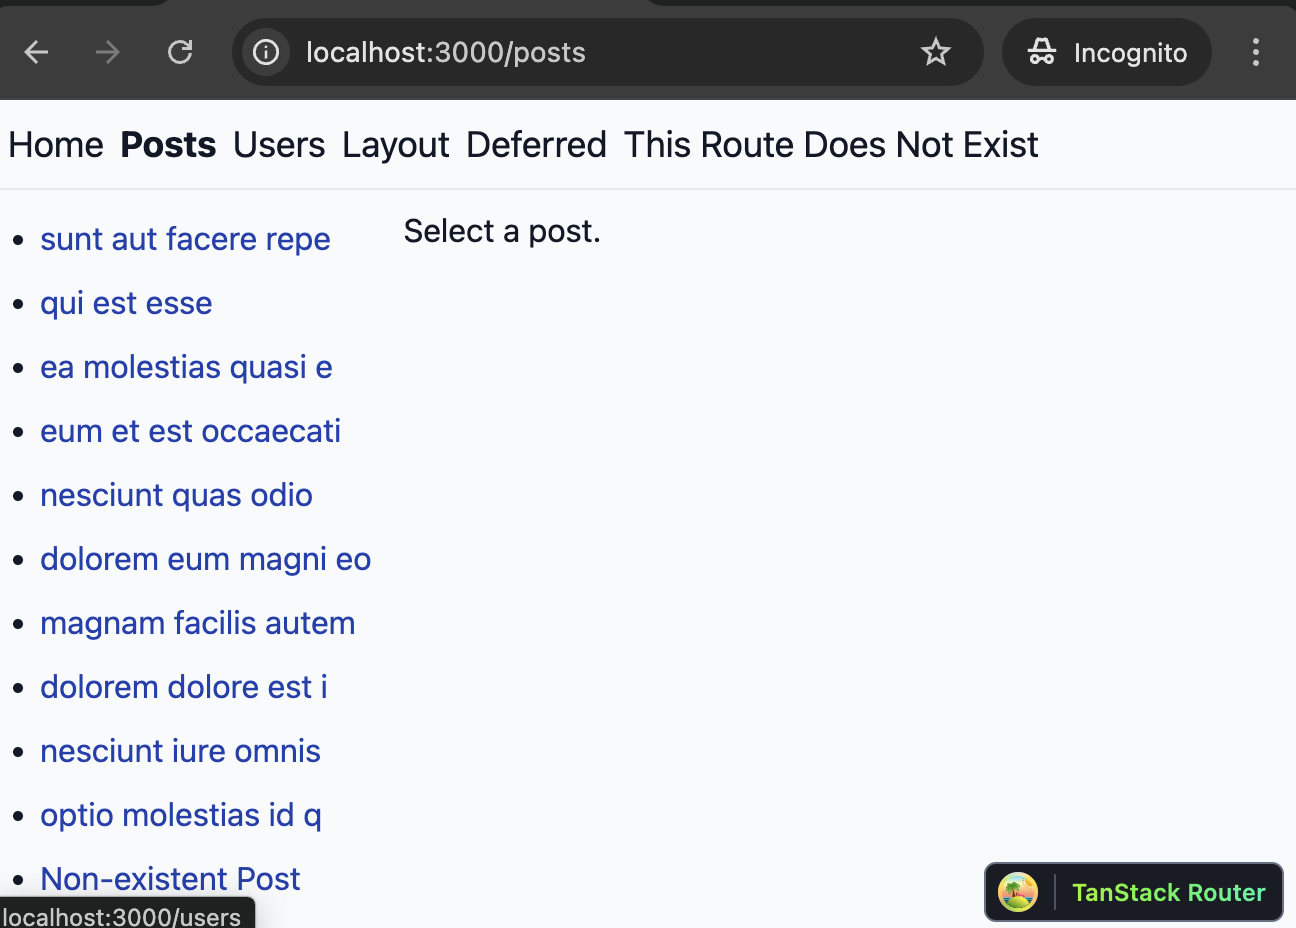
Now that we know what the site looks like, we’ll dive into how the project is structured. All the code lives in the app directory.
Here are the important parts that we’ll do most of our work in:
- components # directory for our React components
- routes # TanStack Start/Router file-based routing
- styles # css styles
- utils # js utilities
Code language: PHP (php)
If you open up the routes directory, the naming convention may look a little strange at first. You can find all the details on the file-based routing conventions here.
Now that we’re familiar with our new TanStack Start website, let’s plan out our new features.
First, we want to be able to upload images of our users to our Media Library.
Next, we’ll create an Avatar component to serve optimized avatar images of our users.
Because we haven’t set up a real database yet, our avatar images won’t be linked to any specific users on the demo site. In this post, they’re purely for illustration, but you can easily configure them to use real data.
To get started, we’ll need to install our Cloudinary dependencies:
npm i @cloudinary/url-gen @cloudinary/react
Code language: CSS (css)npm i -D @types/cloudinary-uploadwidget-browser
Code language: CSS (css)Add the following key to your compilerOptions in tsconfig.json
    "types": ["@types/cloudinary-uploadwidget-browser"],
Code language: JavaScript (javascript)
Next, let’s create a file named cloudinary.ts in our app directory. This file will create and export our configured Cloudinary instance:
import { Cloudinary } from "@cloudinary/url-gen";

export const cld = new Cloudinary({
  cloud: {
    cloudName: 'demo'
  }
});
Code language: JavaScript (javascript)
Replace ‘demo’ with your own cloud name.
To use the Upload widget, we’ll need to add the script to our RootDocument component /app/routes/__root.tsx. We can put it right below the framework’s <Scripts /> tag:
        {children}
        <ScrollRestoration />
        <TanStackRouterDevtools position="bottom-right" />
        <Scripts />
        <script
          src="https://upload-widget.cloudinary.com/latest/global/all.js"
          type="text/javascript"
        ></script>
      </body>
    </html>
  )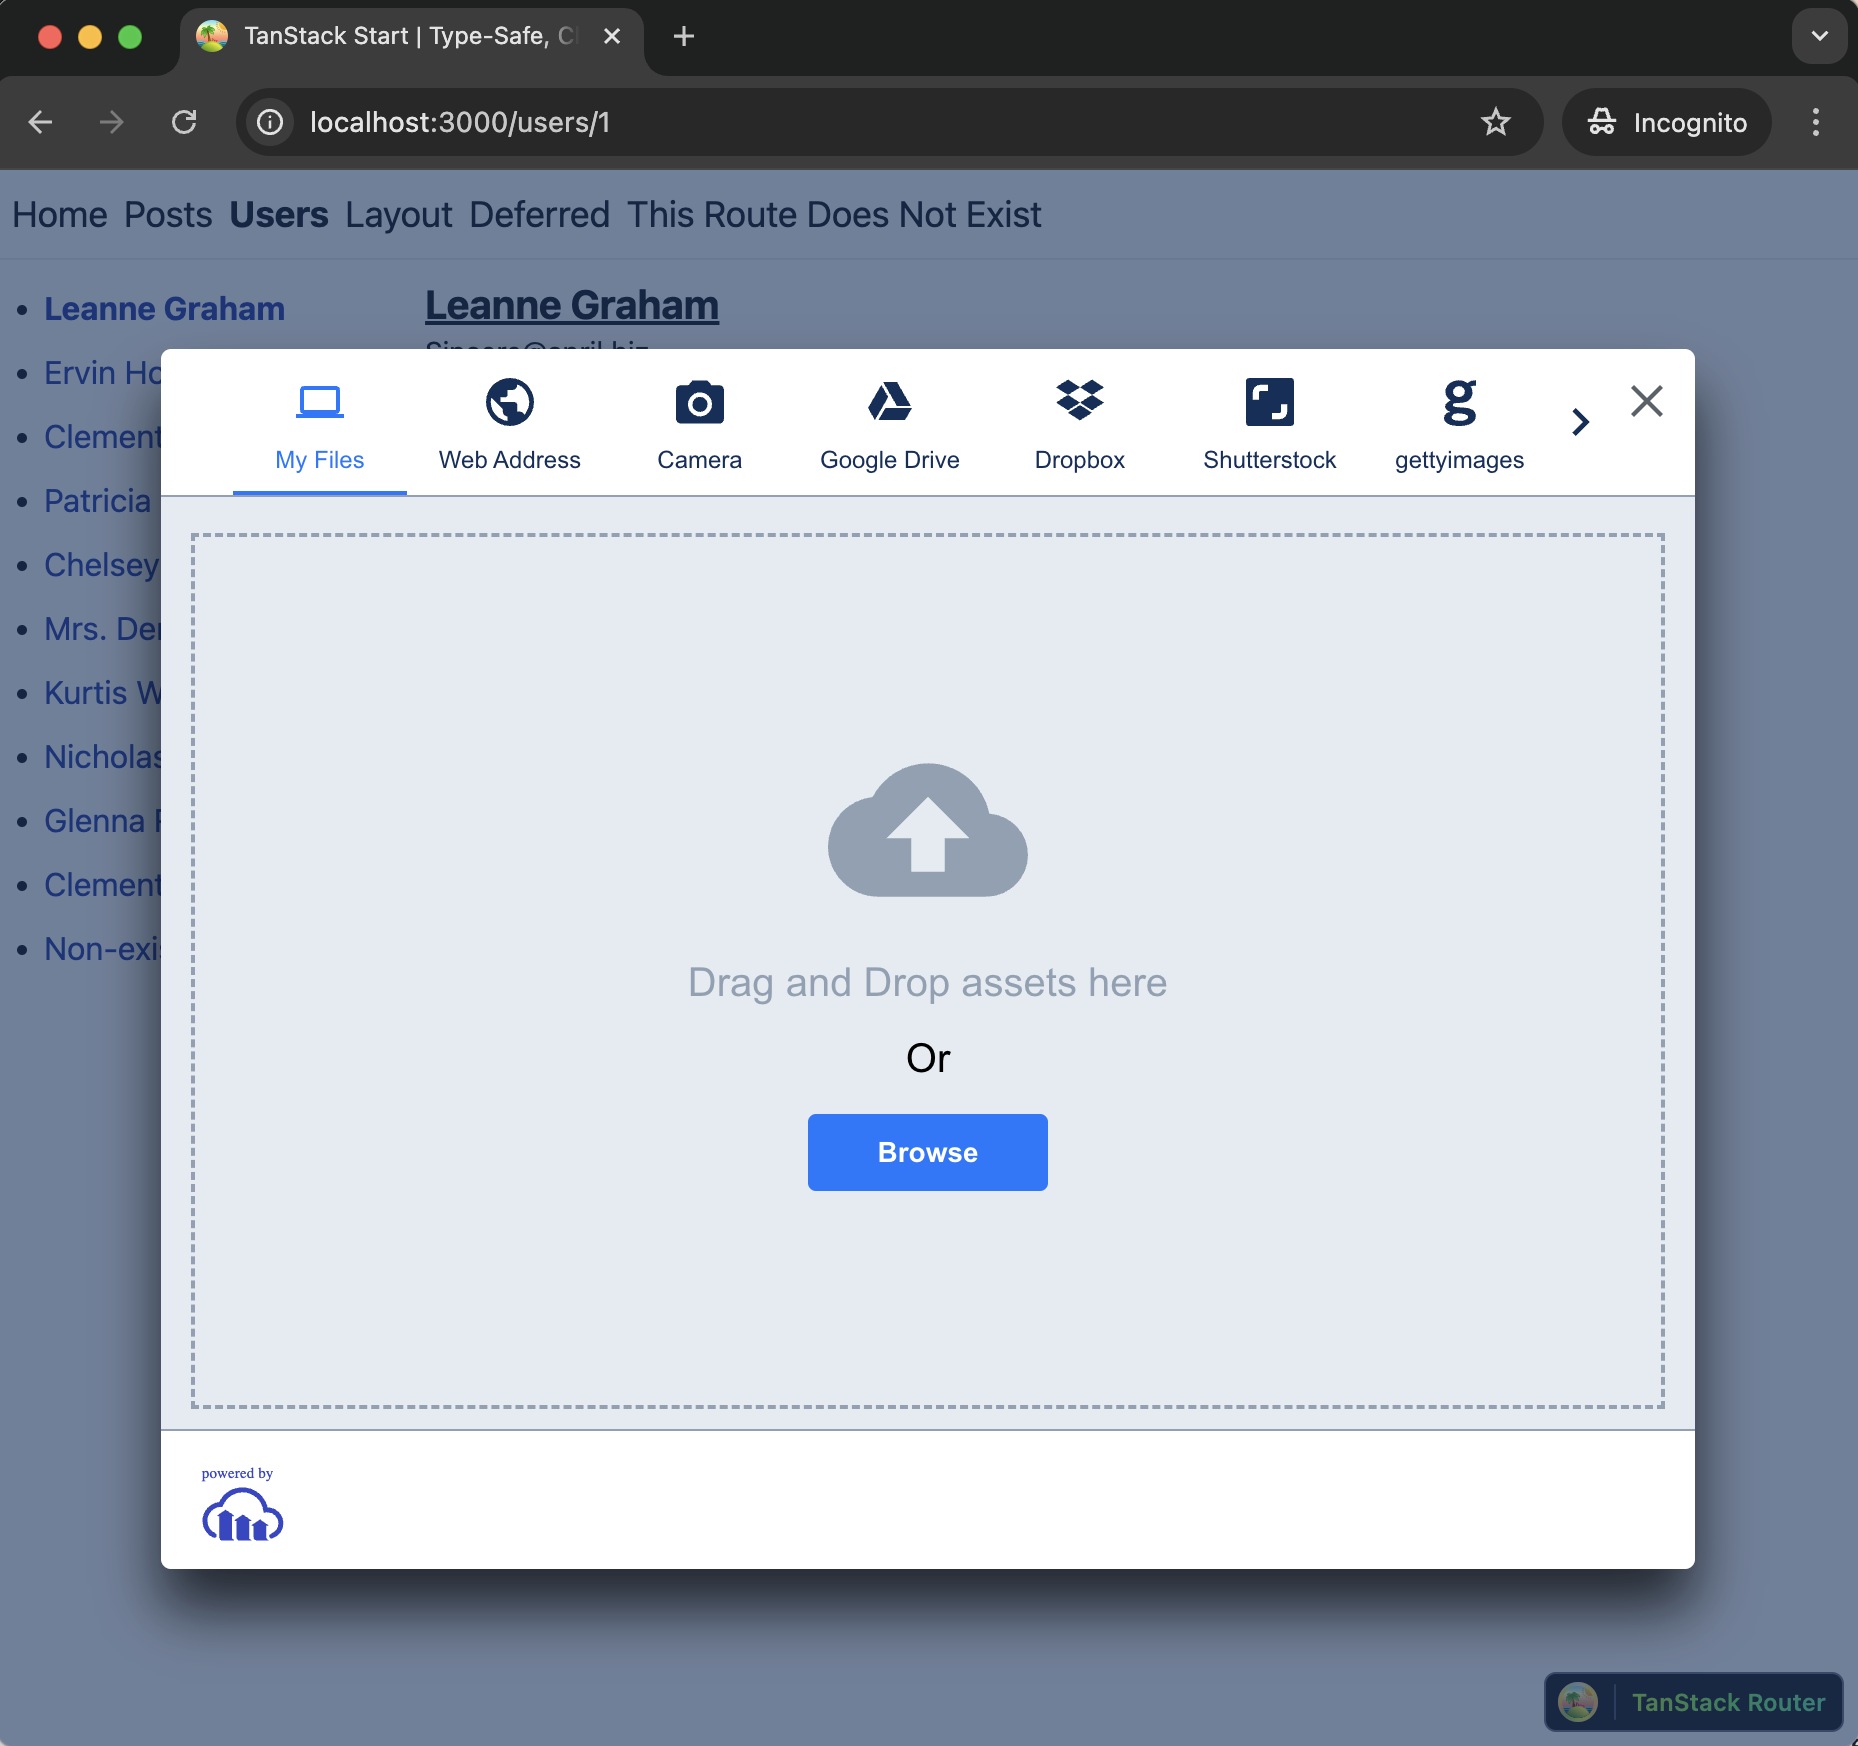
Code language: HTML, XML (xml)We’ll use the Upload widget to handle uploading avatar images to our media library. Let’s create the file for our component app/components/CloudinaryUploadWidget.tsx.
We’ll need to add our cloud name and an upload preset to the Upload widget config. If you’re not familiar with upload presets, you can learn how to set one up here.
import { useEffect, useRef } from 'react';

declare global {
  interface Window {
    cloudinary: CloudinaryBase;
  }
}

interface CloudinaryUploadWidgetProps {
 onUpload?: (publicId: string) => void;
}

export const CloudinaryUploadWidget: React.FC<CloudinaryUploadWidgetProps> = ({ uwConfig, setPublicId }) => {
  const uploadWidgetRef = useRef<any>(null);
  const uploadButtonRef = useRef<HTMLButtonElement>(null);

  useEffect(() => {
    const initializeUploadWidget = () => {
      if (window.cloudinary && uploadButtonRef.current) {
        // Create upload widget
        uploadWidgetRef.current = window.cloudinary.createUploadWidget(
          {
	          cloudName: "your_cloud_name",
	          uploadPreset: "upload_preset_id"
          },
          (error: any, result: any) => {
            if (!error && result && result.event === 'success') {
              console.log('Upload successful:', result.info);
              onUpload?.(result.info.public_id);
            }
          }
        );

        // Add click event to open widget
        const handleUploadClick = () => {
          if (uploadWidgetRef.current) {
            uploadWidgetRef.current.open();
          }
        };

        const buttonElement = uploadButtonRef.current;
        buttonElement.addEventListener('click', handleUploadClick);

        // Cleanup
        return () => {
          buttonElement.removeEventListener('click', handleUploadClick);
        };
      }
    };

    initializeUploadWidget();
  }, [onUpload]);

  return (
    <button
      ref={uploadButtonRef}
      id="upload_widget"
      className="px-4 py-2 bg-blue-500 text-white rounded hover:bg-blue-600"
    >
      Upload
    </button>
  );
};
Code language: JavaScript (javascript)
The component we created will display a button that opens the Upload Widget.
Now that we have our Upload widget ready, we can add it to our user page. Let’s open the page up in our routes directory app/routes/users.$userId.tsx
Currently, this page just shows the user name and email. Let’s add our uploader button below them:
// existing code...
import { CloudinaryUploadWidget } from '~/components/CloudinaryUploadWidget'

// exisiting code...

function UserComponent() {
  const user = Route.useLoaderData()

  const handleUpload = (publicId: string) => {
    // In our real application we could update the user to set the avatar value in the database
    // IE: updateUser({ avatarPublicId: publicId });
    console.log(publicId);
  }

  return (
    <div className="space-y-2">
      <h4 className="text-xl font-bold underline">{user.name}</h4>
      <div className="text-sm">{user.email}</div>
      <CloudinaryUploadWidget />
    </div>
  )
}
Code language: JavaScript (javascript)
You can imagine using the onUpload prop to our CloudinaryUploadWidget to save the avatar id to our user record in the database. We added an example in the comments. We’ll use this example field to add avatar images to our User route.
Next we’ll create a UserAvatar component and use it to render optimized avatar images on our user route. We’ll use the AdvancedImage component from the @cloudinary/react SDK to render the image after we apply some transformations with @cloudinary/url-gen to optimize the image for user avatars.
import { AdvancedImage } from '@cloudinary/react'
import { thumbnail } from '@cloudinary/url-gen/actions/resize'
import { focusOn } from '@cloudinary/url-gen/qualifiers/gravity'
import { FocusOn } from '@cloudinary/url-gen/qualifiers/focusOn'
import { cld } from '../cloudinary'

interface UserAvatarProps {
  publicId?: string
  size?: number
  className?: string
}

export function UserAvatar({ publicId, size = 150, className = '' }: UserAvatarProps) {
  if (!publicId) {
    return (
      <div
        className={`bg-gray-200 rounded-full flex items-center justify-center ${className}`}
        style={{ width: size, height: size }}
      >
        <span className="text-gray-500 text-2xl">?</span>
      </div>
    )
  }

  const image = cld.image(publicId)
    .resize(thumbnail().width(size).height(size).gravity(focusOn(FocusOn.face())))

  return (
    <div className={className}>
      <AdvancedImage cldImg={image} />
    </div>
  )
}
Code language: JavaScript (javascript)
We’ll create a transformation pipeline for our user avatar images that uses AI to detect faces, crops the image to focus on the detected face, and resizes it to the specified dimensions. The AdvancedImage component serves and renders this image through Cloudinary’s CDN.
Now that we have our UserAvatar component, we can use it to add avatar images to our Users route.
// existing code...
import { UserAvatar } from '~/components/UserAvatar'

// exisiting code...

function UserComponent() {
  const user = Route.useLoaderData()

  return (
    <div className="space-y-4">
      <div className="flex items-center gap-4">
        <UserAvatar publicId={user.avatarPublicId} size={100} />
        <div>
          <h4 className="text-xl font-bold underline">{user.name}</h4>
          <div className="text-sm">{user.email}</div>
        </div>
      </div>
      <CloudinaryUploadWidget onUpload={handleUpload} />
    </div>
  )
}
Code language: JavaScript (javascript)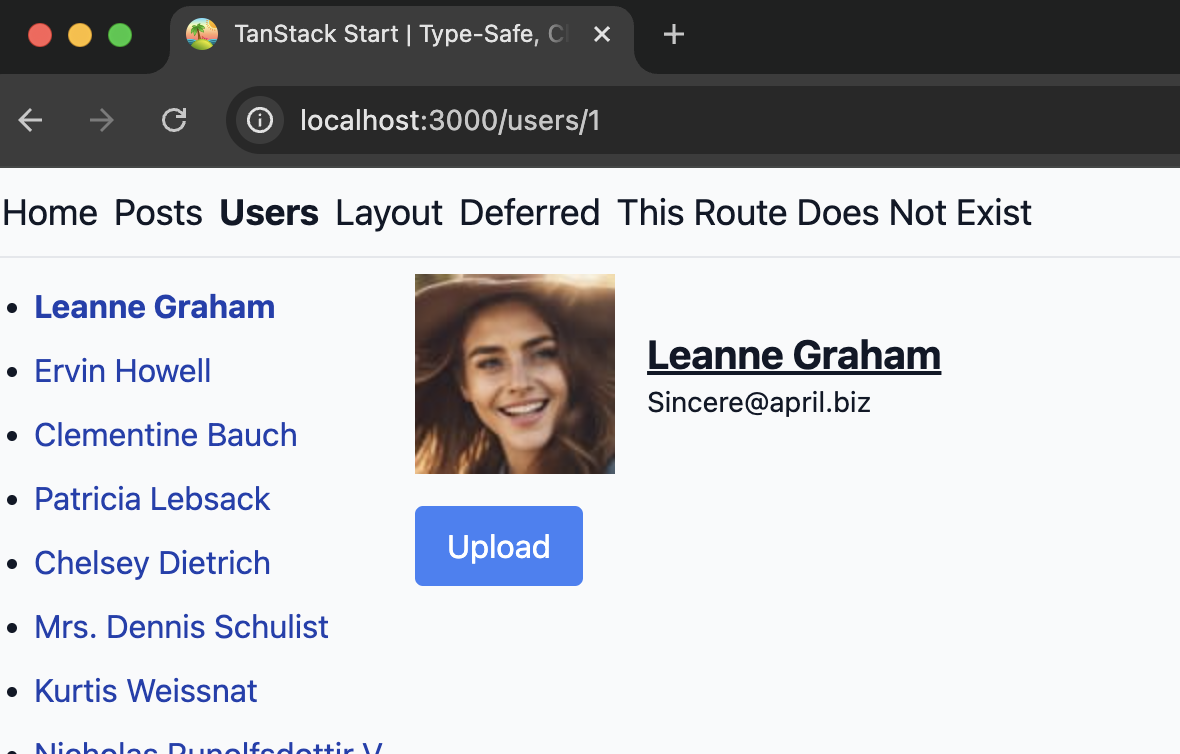
Cloudinary’s React SDK and Upload widget make integrating media optimizations and uploads a quick and simple process for any React framework. TanStack Start is a powerful new framework for building React applications and has quite a few stand-out features and a lot in common with the popular Remix framework.
In this post, we added the Cloudinary Upload widget to upload user avatar images in our application. After that, we created an optimized UserAvatar component using Cloudinary’s transformations and the AdvancedImage component.
This is a great starting point, so you can easily add optimizations for other images throughout your application. Check out other React sample projects to help you get started integrating Cloudinary and sign up for a free account today.


