
Videos are a powerful visual medium that fosters engagement by adding emotions and empathy. Web developers are often required to work with videos for websites or applications and must be equipped with the relevant knowledge and expertise.
This article shows you how to add videos to a Next.js app with Cloudinary.
Next.js is a React-based front-end development framework that enables functionalities like server-side rendering, static site generation, file-system routing (with no need to manually configure react-router-dom), and API endpoints for back-end features.
Cloudinary is a platform on which you can quickly and easily upload, store, manage, transform, and deliver images and videos for websites and apps. The platform offers a vast collection of SDKs for front-end frameworks and libraries.
This is part of a series of articles about video optimization.
To follow the steps in this article, you must know the basics of React.js. You also need the following:
- A web browser, such as Chrome, Edge, or Safari.
- Access to CodeSandbox, an online editor for software development.
- A Cloudinary account for video upload. Signup is completely free.
You can serve videos with Cloudinary on Next.js webpages in either of these two ways:
- With the
cloudinary-reactlibrary, which smoothly handles runtime rendering and offers native video functionalities with the innerRef properties. This library does not require a dynamic import. - With the JavaScript SDK of
cloudinary-video-playerand thecloudinary-corelibrary.cloudinary-video-playeroffers Cloudinary’s functionalities and built-in methods, including robust options for serving videos. Working with the player requires more code and a dynamic import.
The sections below step you through both methods.
First, go to https://codesandbox.io on a browser and click the Create Sandbox button. Enter Next.js in the Filter field and select a Next.js template from the search result. CodeSandbox will then scaffold a Next.js project.
Installing the Project Dependencies
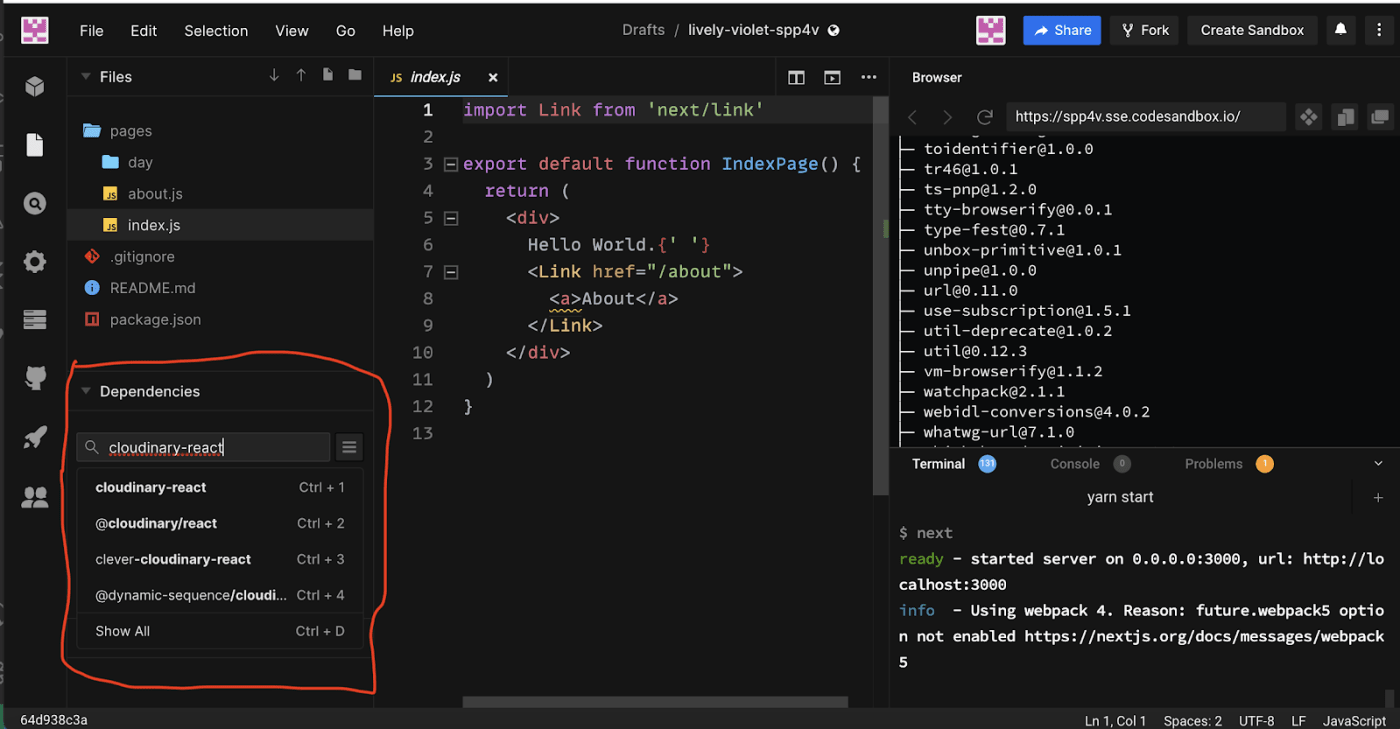
Cloudinary offers an SDK for React developers to integrate images and videos into their apps. To install a dependency on codesandbox, navigate to the Dependencies section, type in the library name (cloudinary-react in this case), and select it to install.
Configuring the Cloudinary Component
Create a components folder in the Files directory and, in the folder, create a VideoPlayer.js file with a VideoPlayer component, as shown below:
import { useRef } from "react";
import { Video, CloudinaryContext } from "cloudinary-react";
  const VideoPlayer = () => {
  const videoRef = useRef();
  return (

      <div>
        <Video width="100%" controls />
      </div>

  );
};
export default VideoPlayer;
Code language: JavaScript (javascript)
The VideoPlayer component does the following:
- Import the required dependencies and create a videoRef variable that gives the video component access to native HTML DOM methods and properties.
- Configure
CloudinaryContextas a wrapper withcloud_name(the name of your Cloudinary account). You can think ofCloudinaryContextas a parent that passes all its traits and genes to its offspring. The nested children then automatically have all the properties defined in the parent.
To get the value of cloud_name, log in to your Cloudinary account, navigate to the dashboard, and copy the value, as shown in the highlighted section below.
The Video element in the component contains the following:
-
publicId, which is a unique identifier with which Cloudinary generates the video URL. -
controls, which includes HTML video functionalities like play, pause, etc. -
innerRef, which accesses video functionalities through thevideoRefvariable you created earlier.

Using the Component
Now add the following code to the index.js file to use the Cloudinary component:
import Head from "next/head";
import VideoPlayer from "../components/VideoPlayer";
export default function IndexPage() {
  return (
    <div>

        <title>Video Player with Cloudinary</title>


      <header>
        <h1>Video Player</h1>
      </header>
      <section>
        <p>
          There is no one who loves pain itself, who seeks after it and wants to
          have it
        </p>
      </section>
      <section>

      </section>
    </div>
  );
}
You can now see the newly generated content and play the video.
For this method, you use the same CodeSandbox you created earlier but comment out the VideoPlayer component.
Installing the Project Dependencies
Just as you did earlier, navigate to the Dependencies section and install cloudinary-video-player and the cloudinary-core library.
To run cloudinary-video-player, you need Node.js version 12 and above. For details on how to change CodeSandbox’s Node.js version, see the CodeSandbox documentation.
Configuring the cloudinary-core Component
Next, go to the components folder and create a components/NativeVideoPlayer.js file. Add the following code to configure Cloudinary:
import "cloudinary-video-player/dist/cld-video-player.min.js";
import "cloudinary-video-player/dist/cld-video-player.min.css";
import { Cloudinary } from "cloudinary-core";
import { useEffect } from "react";
const NativeVideoPlayer = () => {
  const cld = new Cloudinary({ cloud_name: "chuloo" });
  useEffect(() => {
    const videoPlayer = cld.videoPlayer("video-player", {
      muted: true,
      controls: true
    });
    videoPlayer.source("video-blog/cat");
  });
  return (
    <div>
      <video id="video-player" />
    </div>
  );
};
export default NativeVideoPlayer;
The above code performs these tasks:
- Import the required dependencies.
- Create and configure a Cloudinary instance with your cloud name.
- Configure the Cloudinary instance with an ID (required by the SDK of the Cloudinary Video Player), mute the player, activate the controls, and specify the source.
Finally, the code returns a native HTML <video> element with the video-player instance.
Using the Component
Now add the following code to the index.js file to use the cloudinary-core component:
import Head from "next/head";
import styles from "../styles/Home.module.css";
import VideoPlayer from "../components/VideoPlayer";
import dynamic from "next/dynamic"; //add

//add
const NativeVideo = dynamic(
  () => import("../components/NativeVideoPlayer"),
  { ssr: false }
);
export default function IndexPage() {
  return (
    <div>

        <title>Video Player with Cloudinary</title>


      <header>
        <h1>Video Player</h1>
      </header>
      <section>
        <p>
          There is no one who loves pain itself, who seeks after it and wants to
          have it
        </p>
      </section>
      <section>
        {/*  */}

      </section>
    </div>
  );
}
The above code does the following:
- Import
dynamic, the built-in support in Next.js for dynamically working with JavaScript modules. - Create a
DynamicVideovariable to dynamically importNativeVideoPlayeron runtime and avoid any errors thrown by the browser’s window object. - Render
DynamicVideoas a component.
You can now see the newly generated video.
Related content: Read our guide to video subtitles and muted videos.
Serving videos with Cloudinary on Next.js webpages is a seamless, intuitive process. For more details on the code examples cited in this post, see the complete source code on CodeSandbox.