
Recently, I sharpened my React skills while creating a new course for our Cloudinary Academy. My experiences building this course solidified my love for React, and I believe learning to work with it alongside Cloudinary can offer immense advantages for developers engaged with media-rich applications or projects.
React is a widely used JavaScript library for building user interfaces. It gained popularity in the web development community shortly after its release in 2013.
React is used by major companies across the globe including Netflix and Uber. One of the main reasons for this popularity is the fact that the React.js library was created by Facebook (then Facebook, now Meta), is open source, and has a large user base of experts that continually contribute to its development and improvement.
React is built on a component-based architecture.
What does that mean?
Simply put, React allows you to create modular components or “chunks” of reusable code.
Why is this good?
Being able to build and focus on smaller individual components helps maintain more complex applications, especially when it comes to scalability.
React’s component-based architecture and Cloudinary’s powerful media management capabilities complement each other seamlessly. Together, React and Cloudinary help developers build visually appealing, responsive, high-performance web applications, so those developers can focus on creativity and innovation rather than infrastructure.
At Cloudinary, all of our frontend SDKs are based on the JavaScript SDK, so learning to work with our React SDK will also equip you with skills applicable to other JavaScript frontend frameworks like Vue and Angular, as well as our community-developed open source libraries — thanks to the ubiquity of the @cloudinary/url-gen package.
Whether you’re working on a personal project or developing solutions for clients, mastering React with Cloudinary will elevate your development skills.
To assist in your education, the Customer Education team created an application called The React SDK Playground specifically for our course, Introduction to Cloudinary for React Developers.

We used Sandpack to embed Sandbox.io directly into the React SDK Playground, allowing you to programmatically create transformations and instantly see results. This means easy experimentation with code.
Pretty cool, right?
Everything is open source, and you can experiment even more in this course’s GitHub repository.
Let’s jump in! All you need is a free Cloudinary account.
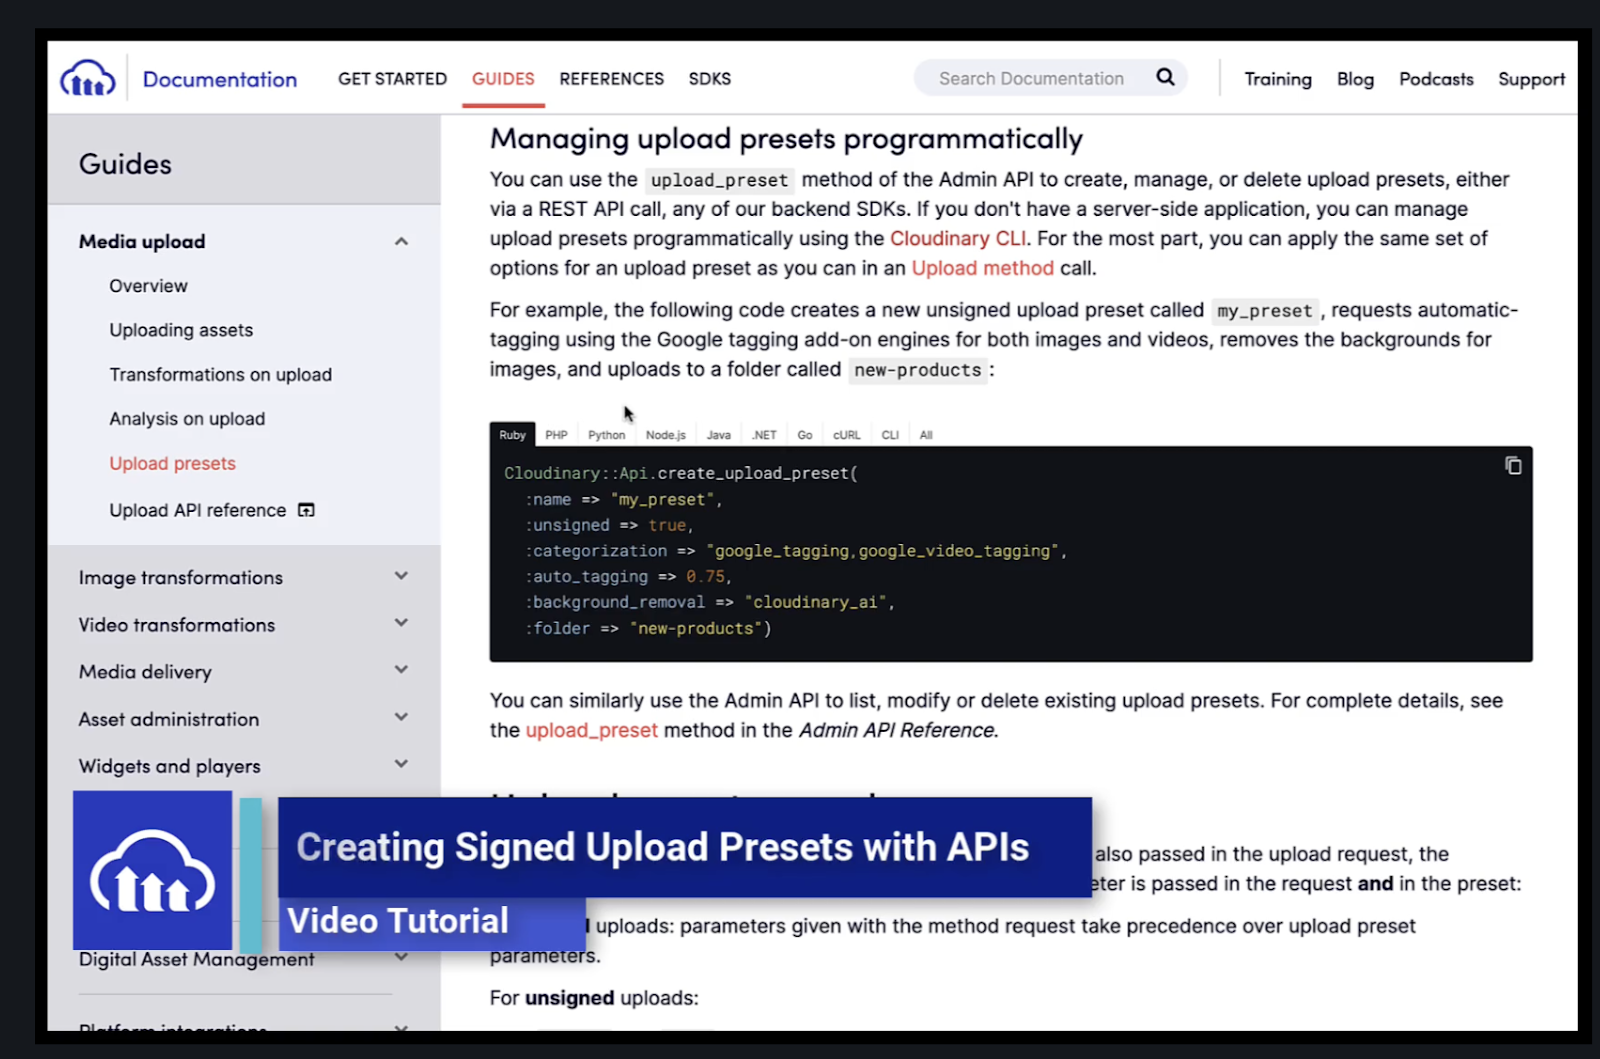
When you enter the playground, you’ll notice a space to input your Cloudinary Cloud Name and your Unsigned Preset Name.

To make uploads from the frontend, you’ll need this unsigned Upload Preset.
Unsigned presets can be used with unsigned upload calls, such as uploading directly from the browser, in the upload widget, or for Auto Upload settings.
Upload Presets are covered in the course, but if you’re interested, here’s a tutorial that can help you understand how to programmatically create upload presets:
Alternatively, you can also easily create these manually within your Product Environment Settings within your account.


In regards to the Sandbox Code layout, the majority of the code follows a consistent format. Once you become familiar with the pattern, you can focus on the specific details of what makes each transformation work the way it does, understand which modules to import, and what might be the best transformation for your use cases.
Here’s the format:
Firstly, we’ll import the necessary modules.

Secondly, we’ll instantiate asset objects, which can be either images or videos, and we’ll apply transformations to them.

And lastly, we’ll render the transformed assets.

It’s also worth noting that in addition to AdvancedImage, we also provide AdvancedVideo for handling video transformation.
Now that we know the format, it’s time to play!
There are also experiments within each Cloudinary React SDK Playground example! Each experiment involves prompts to modify a parameter in the code.

This allows you to observe the effect on the rendered asset. These are hands-on experiments that will assist you in determining whether or not the parameter is something you want to use when you’re writing your own code.
By actively engaging in these experiments, you’ll gain practical knowledge and develop a deeper understanding of how different parameters influence the desired outcomes with your media assets.
In my opinion, the best way to learn is by doing!
Introduction to Cloudinary for React Developers comprehensively addresses various aspects, including the generation of image and video URLs, the incorporation of diverse transformations for optimization and aesthetic enhancements, and the utilization of Advanced Image and Advanced Video components. These topics provide a deeper insight, which you’ll have the opportunity to delve into should you choose to enroll in the course!
React’s core concepts are relatively easy to learn, especially for developers who are already familiar with JavaScript and HTML. This lowers the entry barrier for newcomers and allows you to quickly start building user interfaces.
I’ve personally loved diving deeper into the React realm, and recommend you do as well!
P.S. Want to talk more about using React with Cloudinary? Head over to the Cloudinary Community forums or Discord and get all your questions answered!