Videos are an essential component of modern marketing campaigns, with 93% of video marketers reporting that video gives them a positive ROI. That same study links videos with users staying longer on a website.
The first few seconds of a video often determine overall engagement. Users decide whether or not to click on a video in seconds. They see titles, thumbnails, and video previews, and that’s all they need to make a decision. If the preview doesn’t hook them in, they’re unlikely to click through.
Testing different previews can help you get more clicks on your videos, and you’ll need to create a lot of them to test for impact. Scale your asset management with Cloudinary Assets, an API-first digital asset management (DAM), then edit and transform your videos either through the Video Player Studio or with dynamic URLs, which allow you to programmatically generate multiple variations of your high-quality, original videos on the fly.
In this blog post, you’ll learn how to create and test video previews using Cloudinary Assets, Video Player Studio, and dynamic URLs.
To follow this guide, you’ll need a Cloudinary account. Sign up for free, and when your account is ready, log in to access the Media Library.
Cloudinary enables you to edit video assets you upload with the Studio tool in the Media Library. To go to the library, click on Assets > Media Library:
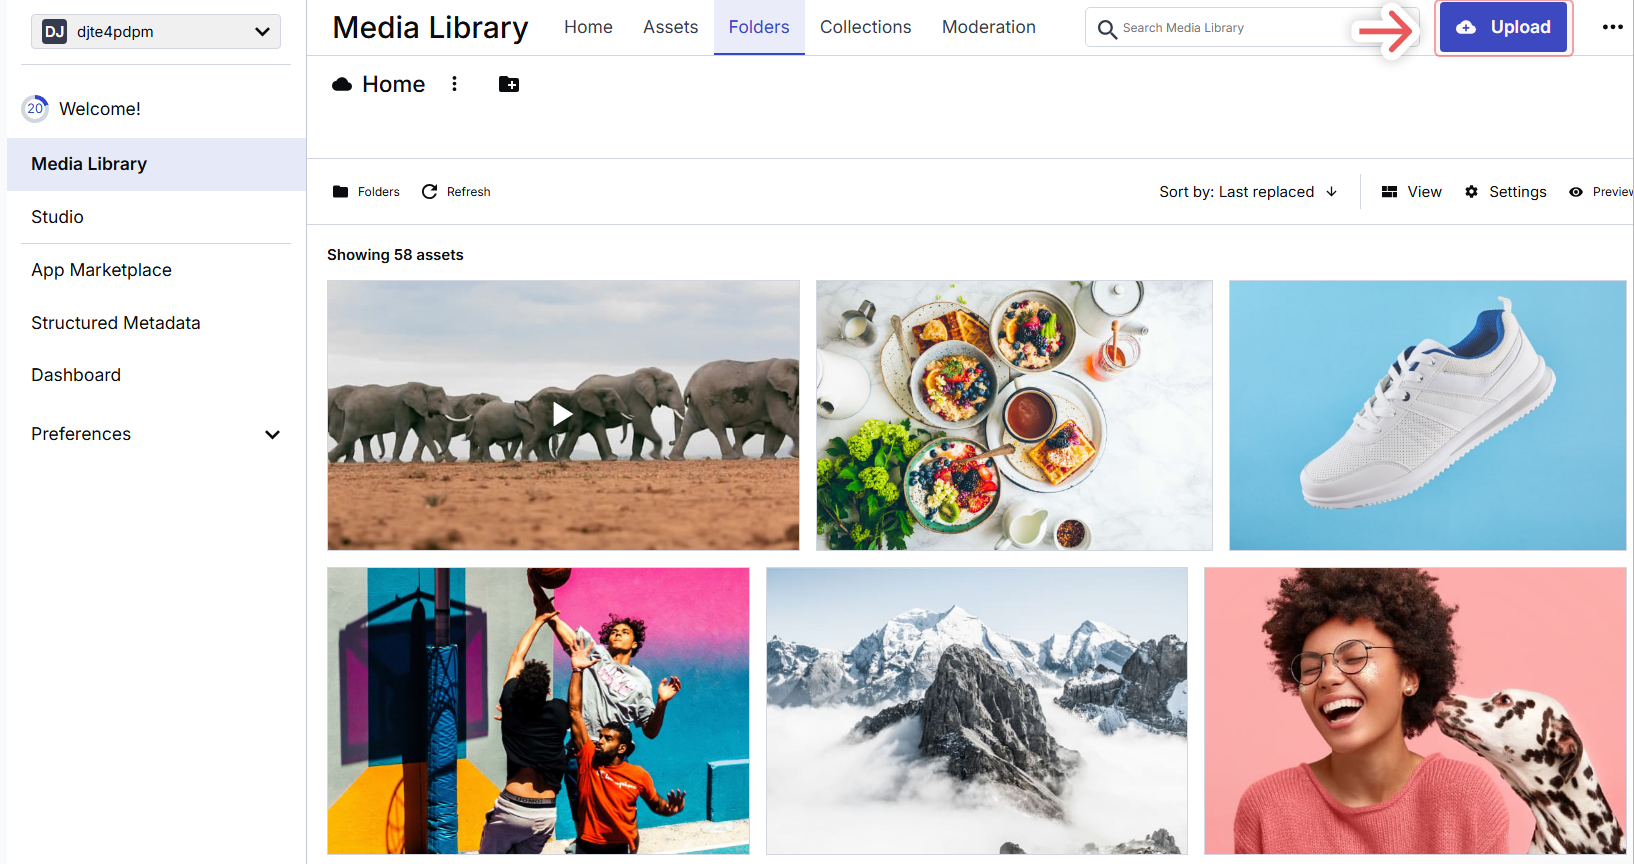
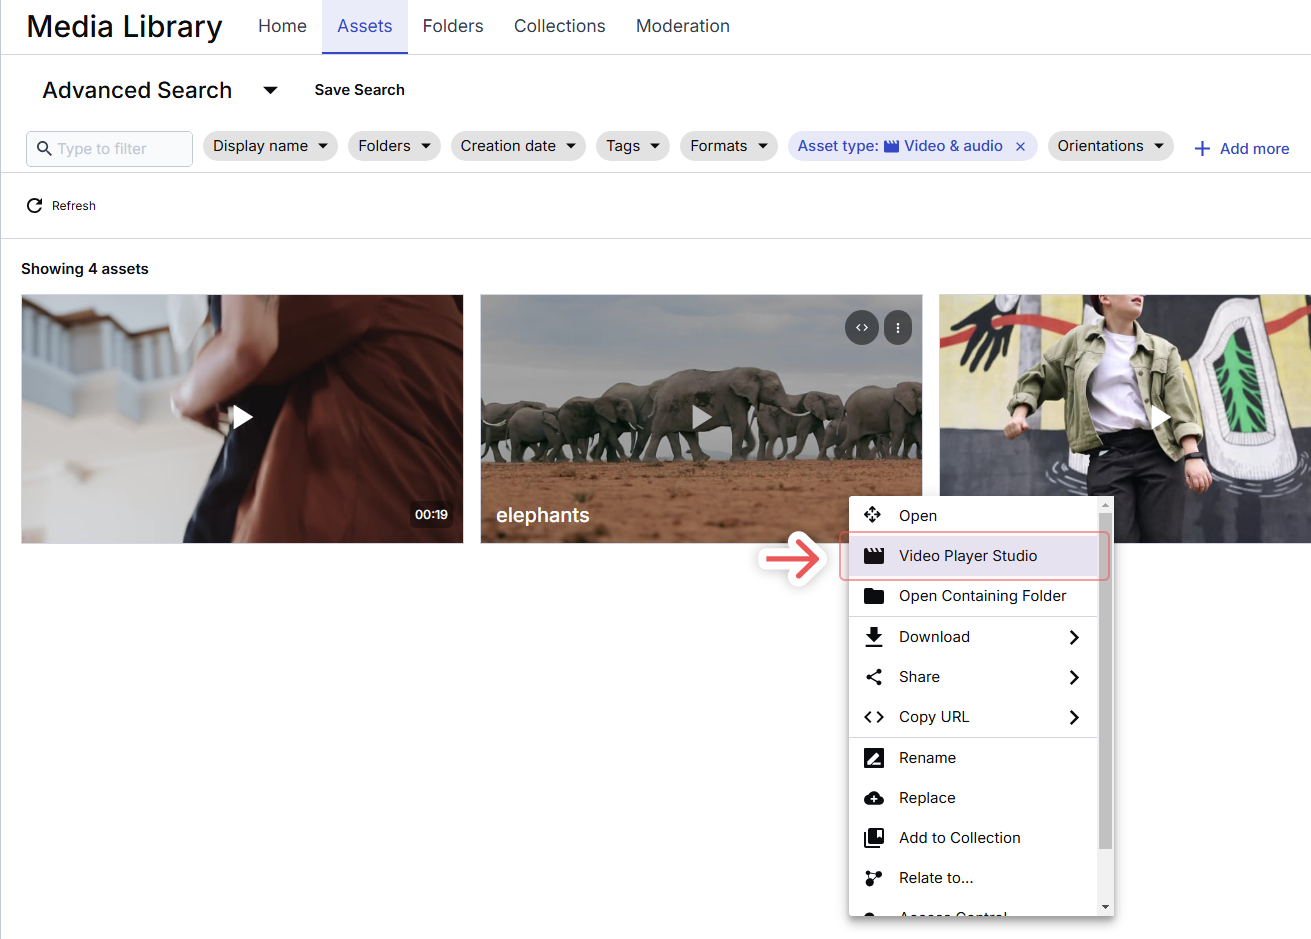
Now click Upload to upload the video assets you want to create previews for. If you already have videos in the library, select one of them by navigating to the Assets or Folder directories. Right-click the video file and select the Video Player Studio option:
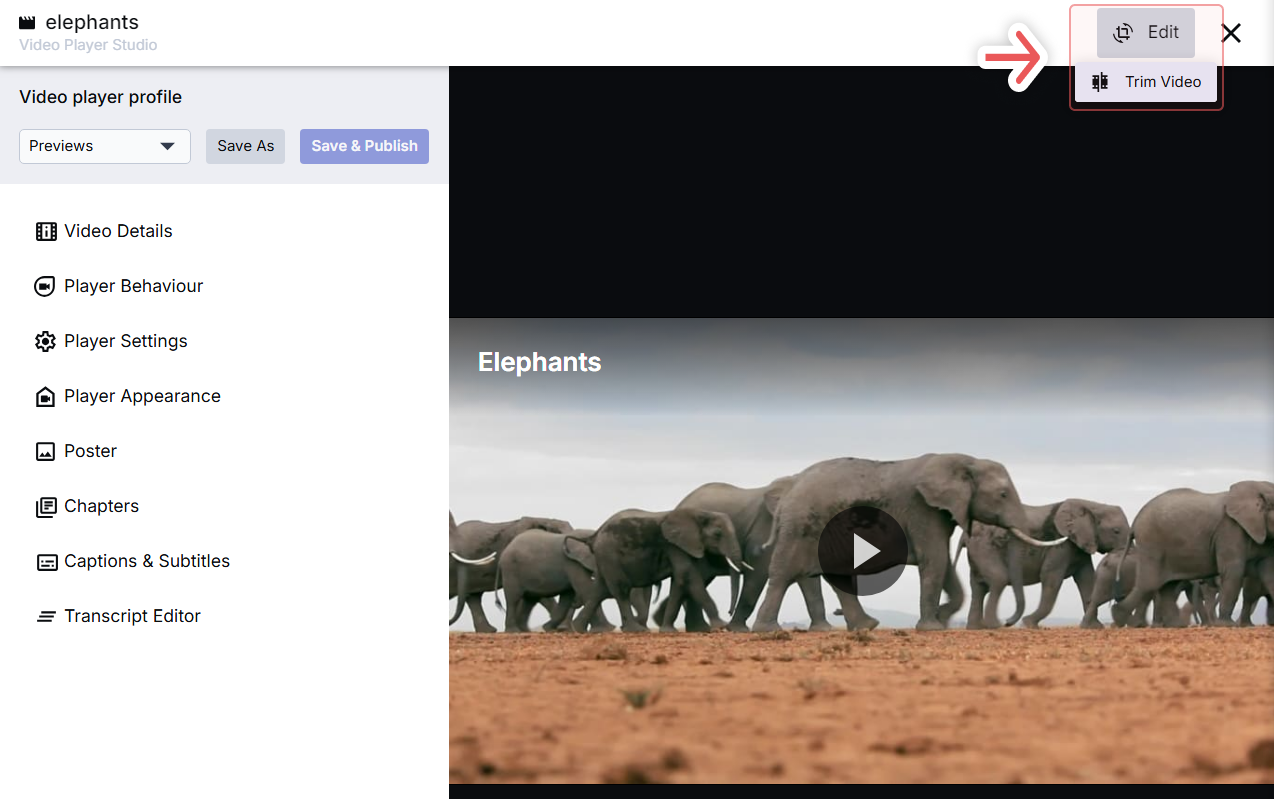
Once inside Studio, you can configure your video player settings and profiles, set titles and descriptions, posters (or thumbnails), and add chapters. It also includes tools that can help you generate transcripts and set subtitles for your videos.
Studio also includes a video trimming tool, which you can use to create previews. To create a preview, click Edit > Trim video:
Next, use the indicators in the video timeline to select the parts you want to trim. Video previews should be short (five to 15 seconds is a good rule of thumb) so users can get a quick idea of what to expect and click it to see the full version.

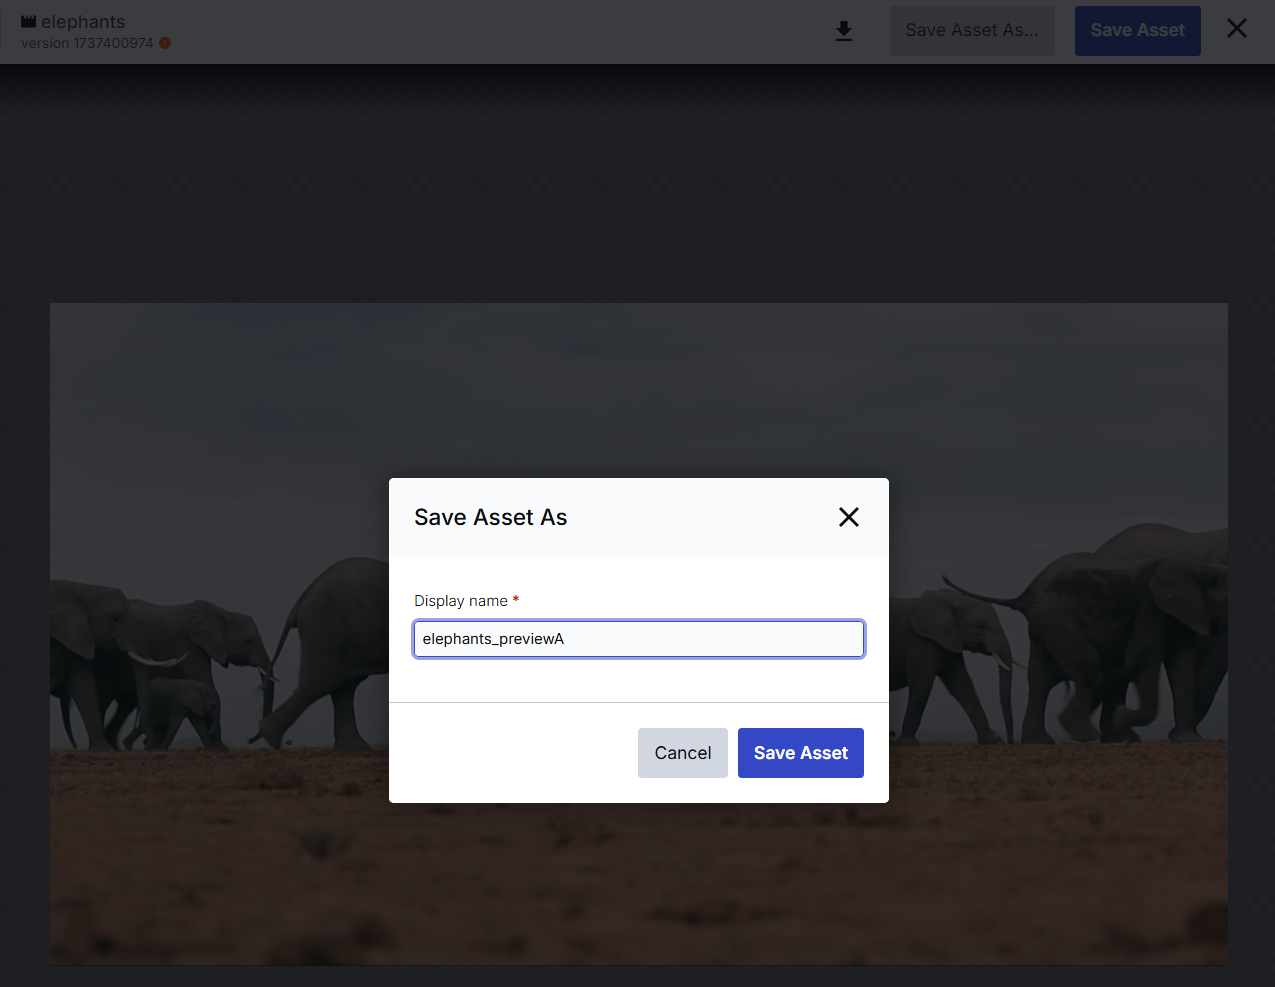
Click Save Asset As to save the preview as a unique asset:
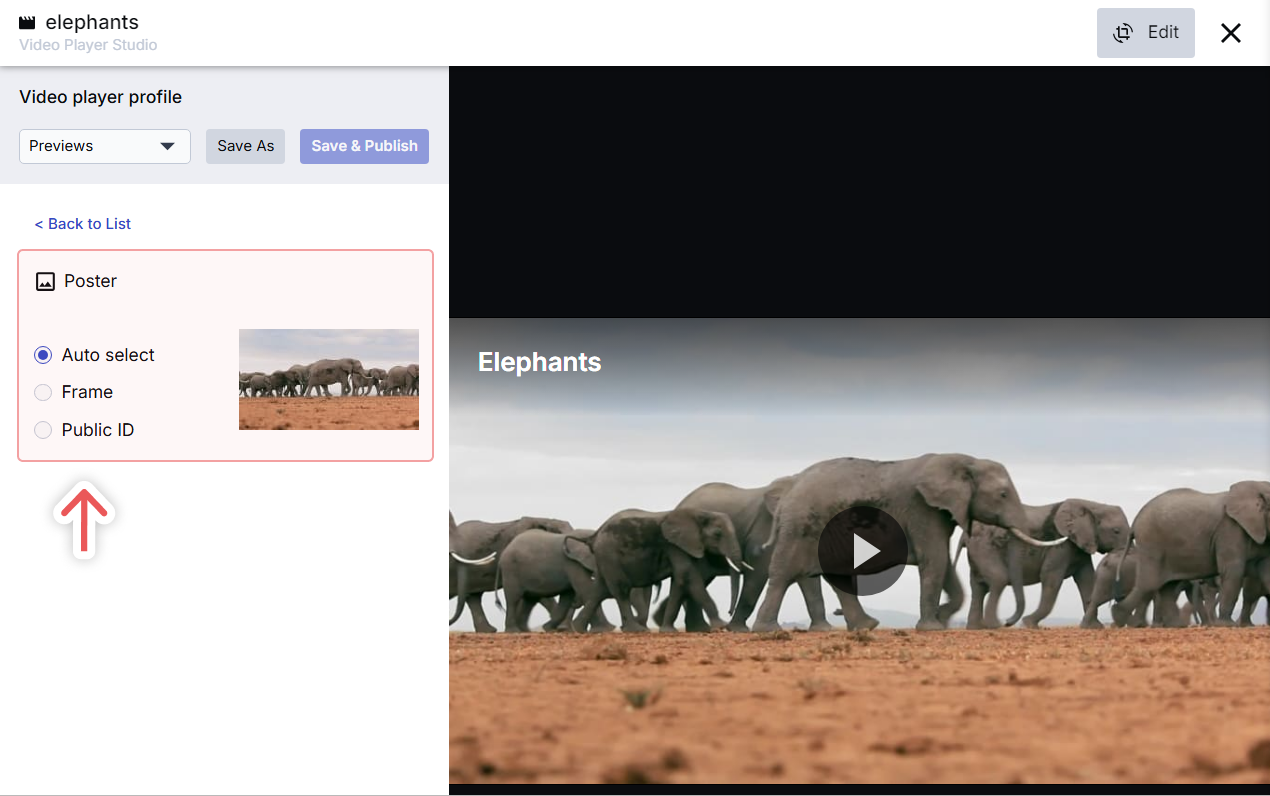
Before you leave the Studio, navigate to the Poster section to set up a new poster for the video. The Auto Select option uses AI to find a great frame. Alternatively, you can decide which frame to use manually:
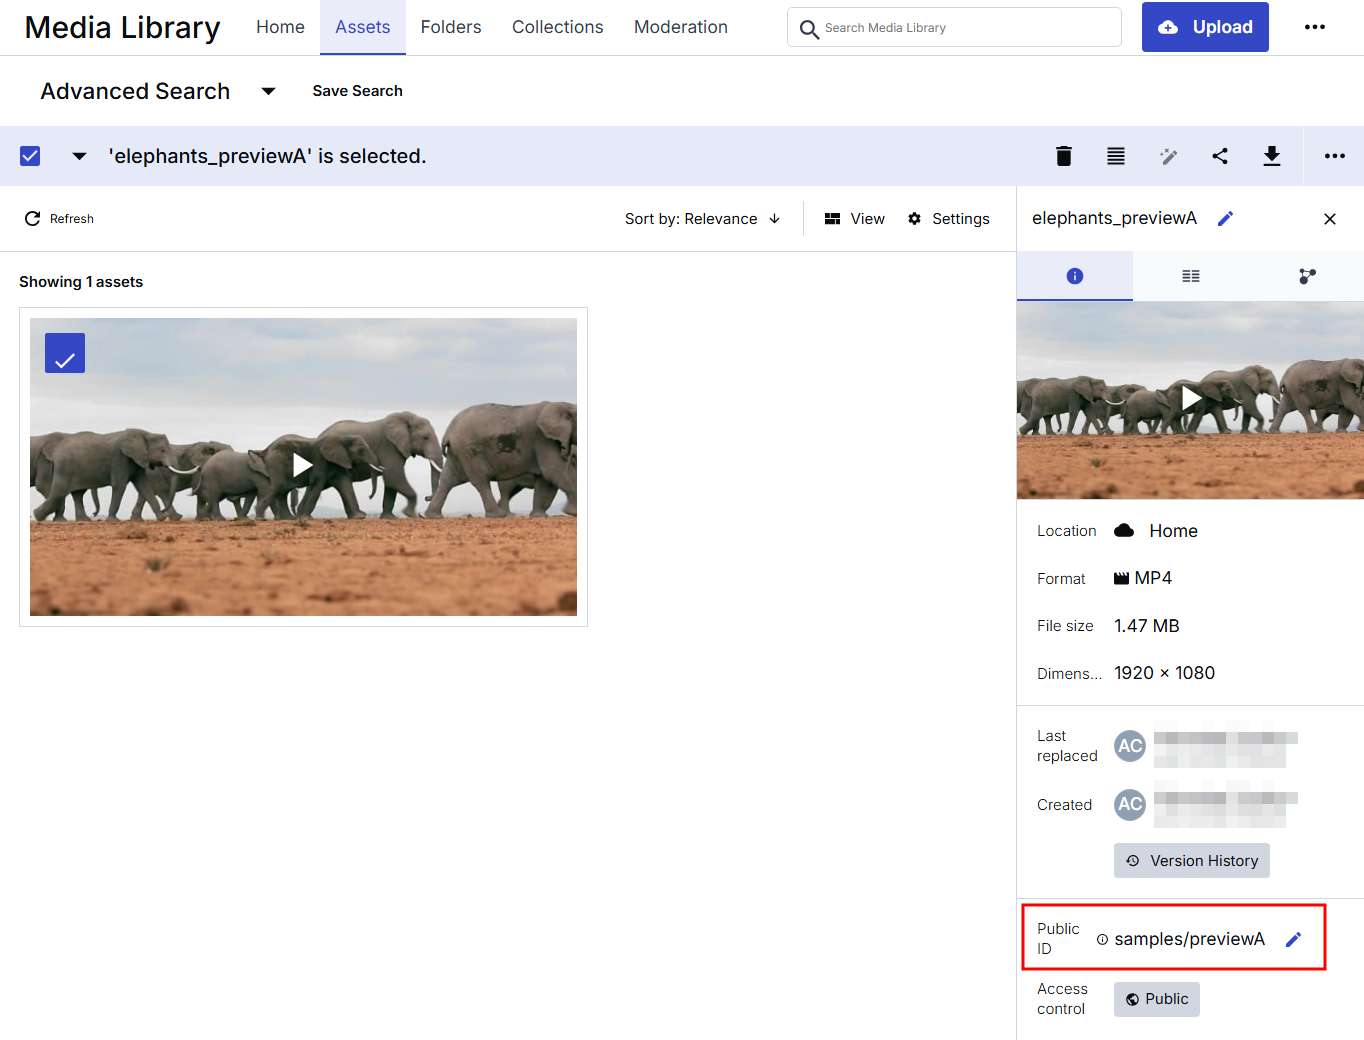
To get the link to the preview, exit the Studio and return to the Media Library. Look for the newly created asset and consider adding a Preview tag to it for easier identification.
Now select the asset and look for its public ID. If you plan on using dynamic URLs, you’ll need to know the public ID for selecting the video assets you want to transform:
You can embed the video file on a website or application using the Cloudinary Video Player. The Video Player will give you access to analytics, which makes it possible to track video engagement and run A/B tests.
If you want to see those instructions in action, watch the recording below on how to create a quick preview using the trimming tool:
You can use any video player to reproduce previews and full videos on your site. If you use the Cloudinary Video Player, you can get access to analytics, which makes it a great option for testing video previews.
So far, you’ve learned how to create video previews using the Cloudinary DAM and Studio. That’s a manual approach that works if you only need to create a small number of previews. At scale, Cloudinary dynamic URLs enable you to deliver assets while applying video transformations based on the address parameters.
To follow the next instructions, you’ll need to find your Cloudinary cloud name. Access your Cloudinary account and navigate to Programmable Media > Dashboard. Look for the Cloud name option and copy the value:

Dynamic URLs have a basic structure that includes your cloud name, the transformation parameters, the asset’s public ID, and the video format. Here’s an example:
https://res.cloudinary.com/<cloud_name>/video/upload/<transformations>/<public_id>.<format>Code language: HTML, XML (xml)You can use the trim parameter to create a preview of a video asset. To do so, you’ll include both a start (so_X) and an end offset (eo_X). With this dynamic URL, you’d retrieve ten seconds of video, starting at five seconds and ending at 15:
[video src="https://res.cloudinary.com/demo_cloud/video/upload/so_5,eo_15/marketing_video.mp4" /]Code language: JSON / JSON with Comments (json)If you don’t want to tinker with different trim parameters, you can use the preview transformation effect. This effect can generate an automatic video preview from your file using AI. You can set its length to ensure that you get a manageable file and configure a maximum of segments or different parts of the video.
Here’s an example of a dynamic URL using the preview effect to create a five-second video with a maximum of three segments (to show different parts of the video in the preview):
[video src="https://res.cloudinary.com/demo/video/upload/e_preview:duration_12:max_seg_3/marketing_video.mp4" /]Code language: JSON / JSON with Comments (json)In this URL, you have the following parameters:
demo. This is a placeholder for your cloud name.e_preview. This uses the preview transformation effect to generate an automatic preview using AI.duration. This sets the duration for the generated video.max_seg_3. This sets the maximum number of segments in the preview to three, meaning you can see scenes from up to three different parts of the video.
To see the preview transformation in action, let’s take a video and generate a video preview for it. First, the original video file is:
[video src="https://res.cloudinary.com/demo/video/upload/e_preview:duration_5/elephants.mp4" /]Code language: JSON / JSON with Comments (json)Now, use a dynamic URL that generates a five-second preview for the video using AI. The result will be:
[video src="https://res.cloudinary.com/demo/video/upload/e_preview:duration_5/elephants.mp4" /]Code language: JSON / JSON with Comments (json)Moving on, you can use the Cloudinary API to fetch information on uploaded video assets, return their public IDs, and generate previews based on the trimming parameters you choose.
To reproduce those video previews and collect data on engagement, consider using the Cloudinary Video Player.
With the video player initialized, you can use the Video Player API to listen for specific events, like plays, to evaluate the effectiveness of a preview. To start tracking analytics for a Cloudinary video, you’ll need to use startAutoTrackingmethod:
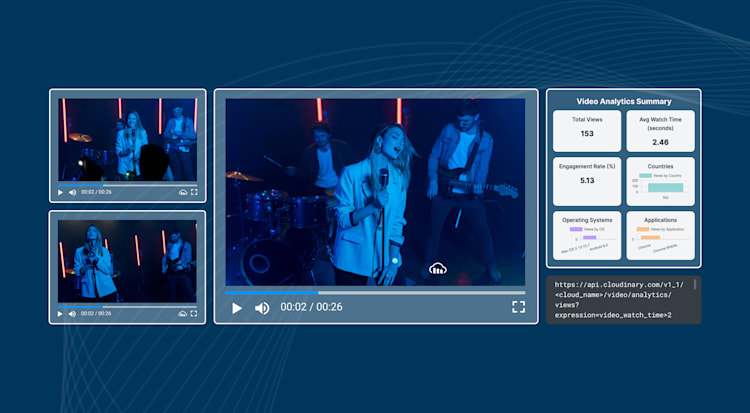
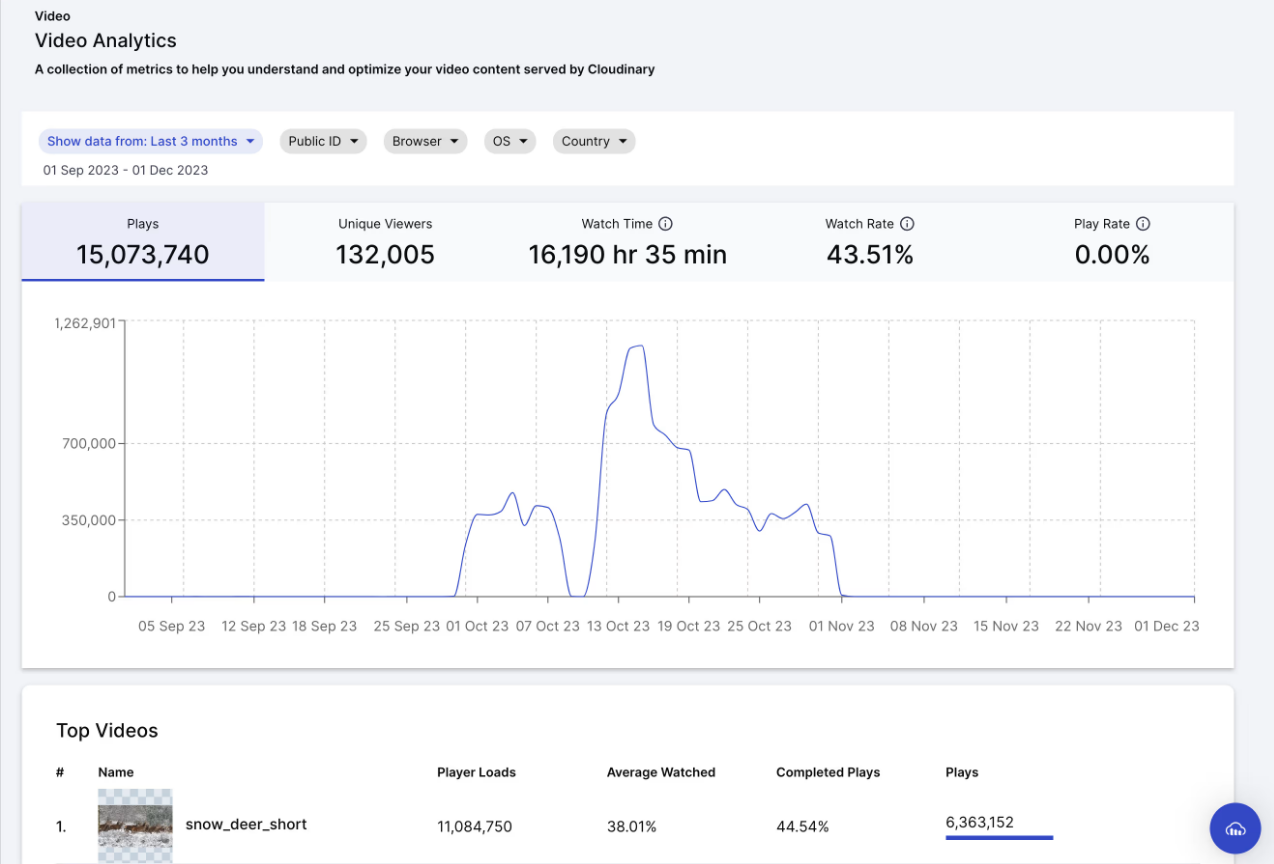
<code>cloudinaryAnalytics.startAutoTracking();</code>Code language: HTML, XML (xml)Cloudinary can help you track video analytics like overall watch time, average watched, and completed plays. You can access this information from the DAM dashboard and use it to see which previews are more effective at getting engagement:
Alternatively, you can retrieve video analytics data using the Video Analytics API with a simple curl or wget command. As shown below, replace the video_public_id value in the command with the public ID for the video asset you want to retrieve data for:
The Video Analytics API also enables you to retrieve playback data using custom expressions. For example, you can use the following code, which needs to include your cloud name, to get data for videos with a view_watch_time over two seconds:
https://api.cloudinary.com/v1_1/<cloud_name>/video/analytics/views?expression=video_watch_time>2Code language: HTML, XML (xml)The Cloudinary Analytics API will return a data array including the information, which you can use with a custom Next.js app. Each entry in the array represents a video interaction and looks something like this:
{

    "request_id": "017e1aa21244400dac90ad48ef43f461",

    "next_cursor": "2a54714067686dc630b44e3b863163dc",

    "data": [

        {

            "video_public_id": "previewA",

            "video_duration": 7,

            "viewer_application_name": "Chrome",

            "viewer_location_country_code": "GB",

            "viewer_os_identifier": "Mac OS X 10.15.7",

            "view_watch_time": 23,

            "view_ended_at": "2025-01-14T09:01:38.000Z"

        }

}Code language: JSON / JSON with Comments (json)
Alternatively, you can capture analytics data and pass it on to tools like Google Analytics to measure video engagement.
Cloudinary Assets enables you to manage media assets for your project at scale. You can use the DAM to host video content and Video Studio Player to create engaging previews. Using the Studio is simple, and it lets you trim videos quickly.
You can also use dynamic URLs to transform videos on the fly and create short previews of them, all using parameters. If you’re using the Cloudinary Video Player, you can also track analytics with the Video Analytics API. This means you can test video previews at scale, take some time to collect data, retrieve it using the API, and see what the best performers are.
Sign up for a free Cloudinary account today to get started.


