
Marketers often spend time and resources creating visual assets and launching them in campaigns, only to realize later that the assets need adjustments. A better approach is to A/B test the visual assets beforehand to identify which designs truly resonate with their audience before fully committing their budget to the campaign.
This guide will show you how to make data-driven decisions by creating asset variations and automating media workflows using Cloudinary’s dynamic URLs and MediaFlows. You’ll learn why using digital asset management (DAM) for A/B testing is helpful for campaign success and how to analyze performance data with Cloudinary’s AI-powered analytics.
A DAM system acts as the central repository for all your visual assets. It stores, organizes, and tracks your digital assets, making it easier to manage large volumes of files and versions. Using a DAM system with A/B testing, you can easily compare different visual assets, measure their effectiveness, and quickly implement changes for better results.
Cloudinary Assets takes it a step further. It not only stores and organizes visual assets but also provides you with tools for transforming them, including dynamic transformations, custom filters, and the ability to deliver optimized versions across multiple platforms. This enables more efficient management and smooth integration of A/B testing. Now, let’s explore how you can harness these capabilities.
A key part of A/B testing involves creating asset variations — different versions of an image or video with transformations such as resizing, cropping, or applying overlays. These variations serve as the test samples in your A/B workflow. Here’s how you can create asset variations in Cloudinary:
- Log in to Cloudinary. If you haven’t already, sign up for a free Cloudinary account. After logging in, go to Media Library, your central repository for managing all visual assets.
- Select an asset. Upload the image or video file you want to use as your original asset. Then, browse through the Media Library or use the search bar to locate the asset for which you want to create variations.
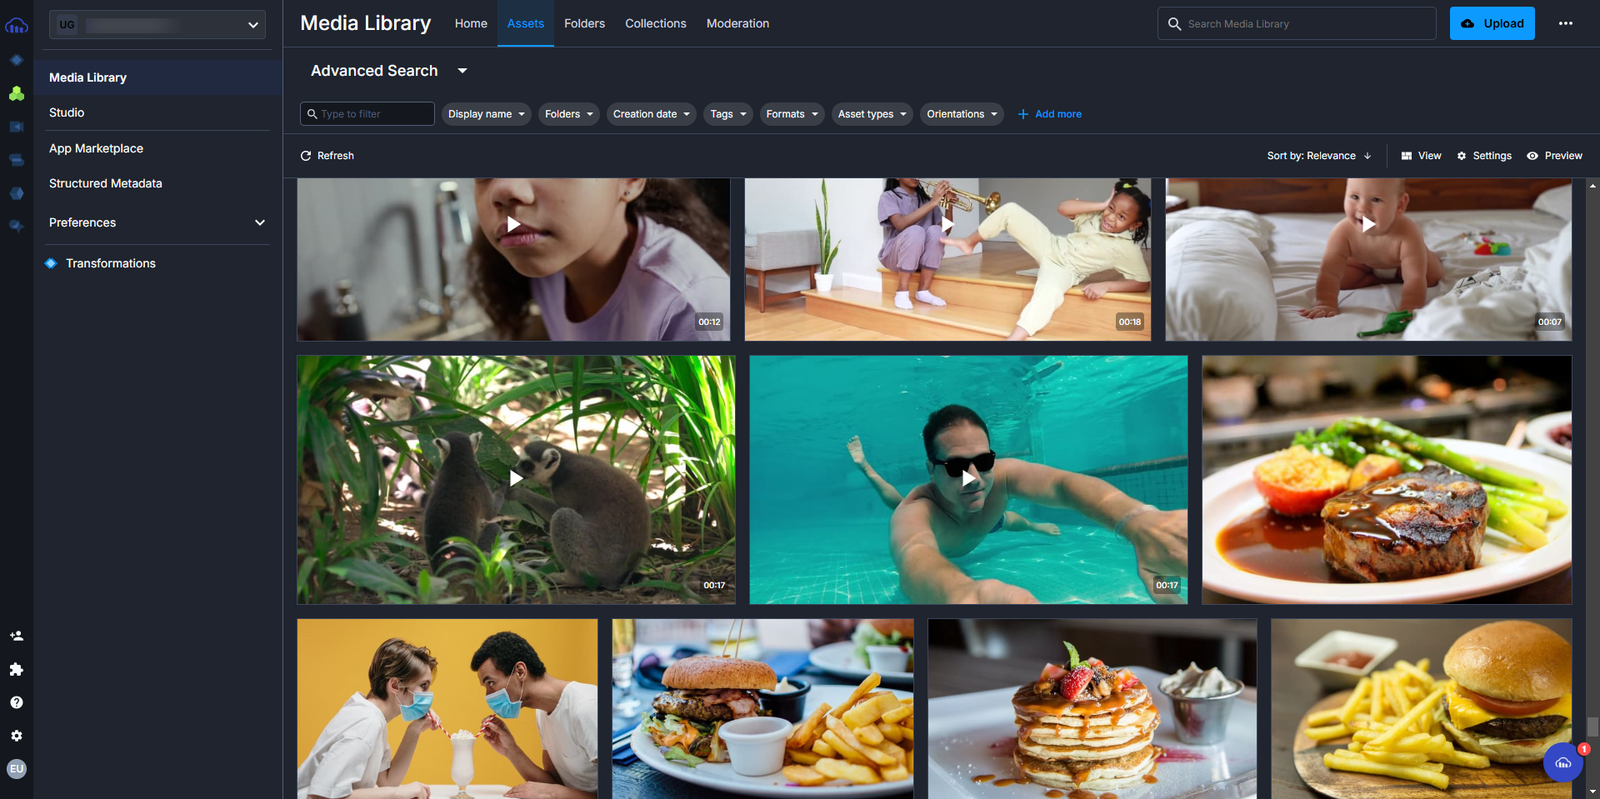
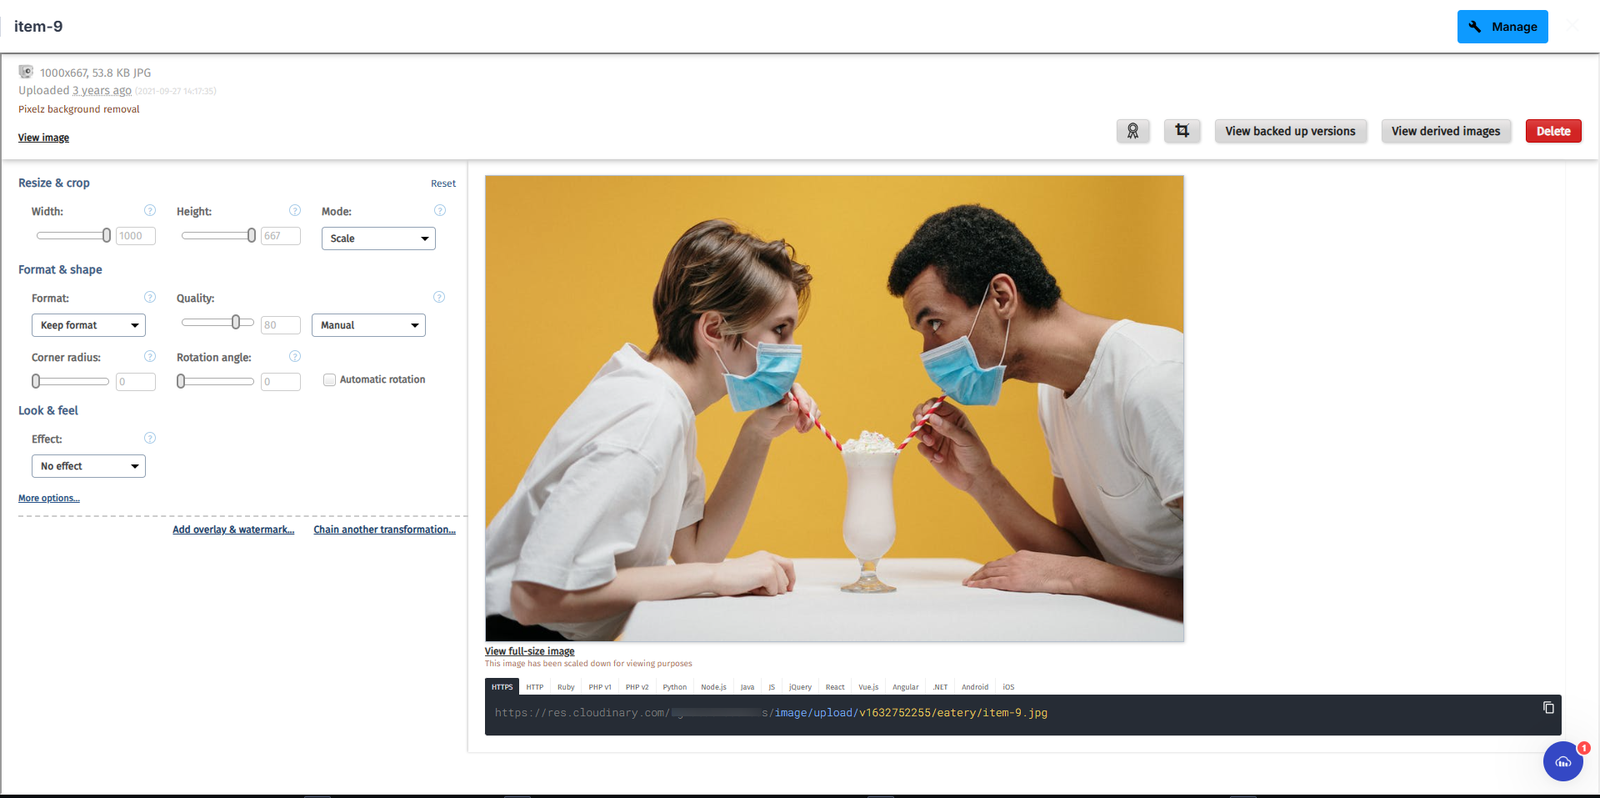
- Open the editor.In the asset’s details view, click Advanced Editing.

Here, you can apply changes to the asset. To create variations, modify the asset by resizing, changing formats, or adding overlays and effects.
- Apply transformations.Cloudinary provides a wide range of transformations. Here are common examples:
- Image transformations:
- Resizing. Use the “w”(width) and “h”(height) parameters to resize the image. You can also use “c”(crop) to specify how to crop the image (e.g., “fill,” “fit,” “limit”).
- Cropping. Use the “x” and “y” parameters to specify the coordinates for cropping the image.
- Effects. Apply filters like sepia, grayscale, blur, sharpen, and more.
- Adjustments. Adjust the brightness, contrast, saturation, and other image properties.
- Overlays. Add text, logos, or watermarks to your images.
- Video transformations:
- Trimming. Trim the beginning or end of the video.
- Resizing. Resize the video to different dimensions.
- Effects. Apply filters, adjust playback speed, and add audio overlays.
- Creating GIFs. Create GIFs from video clips.
- Image transformations:
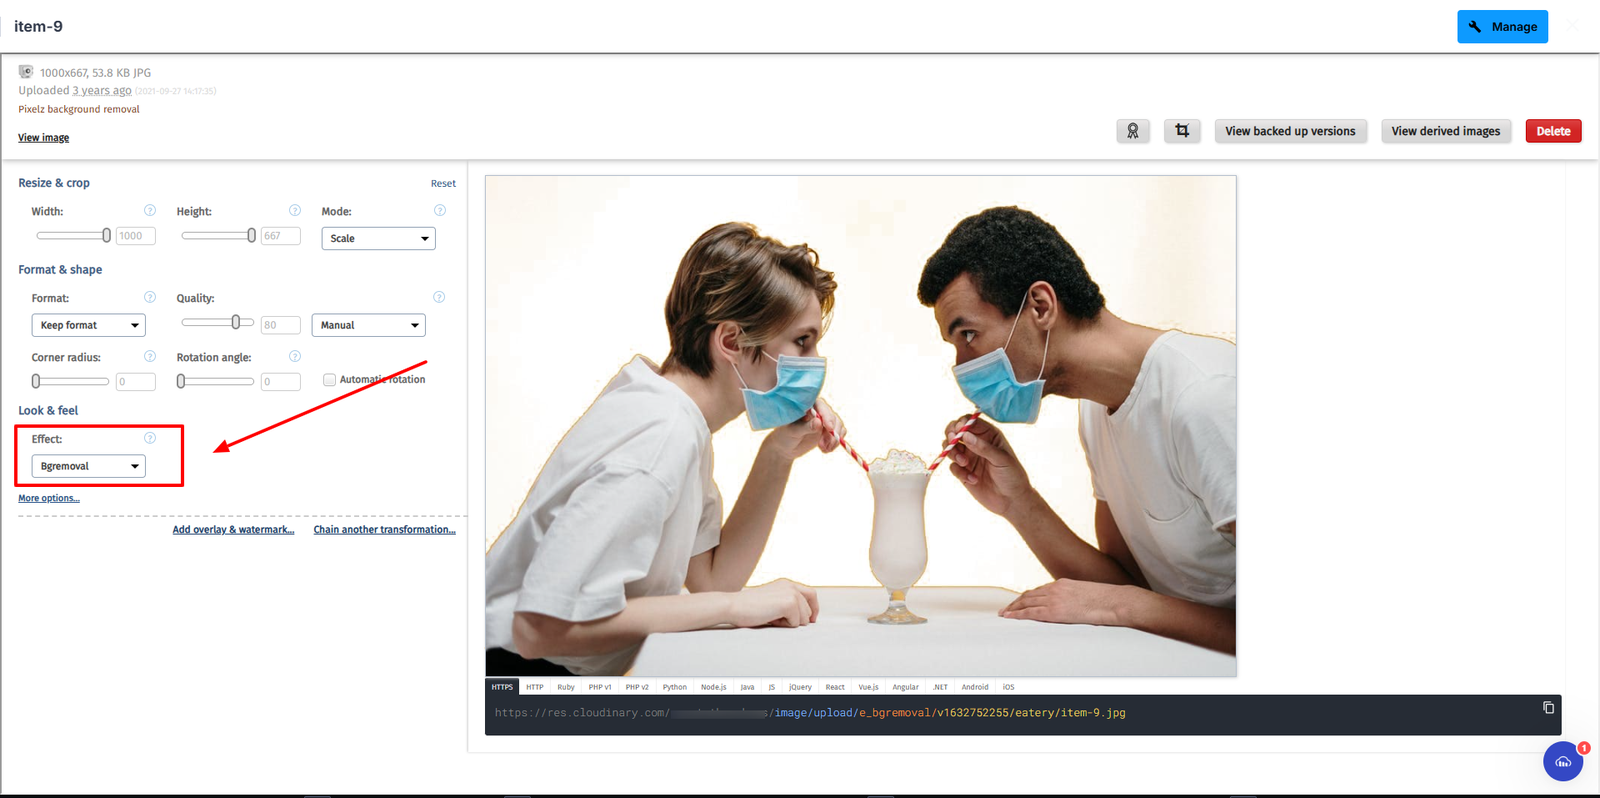
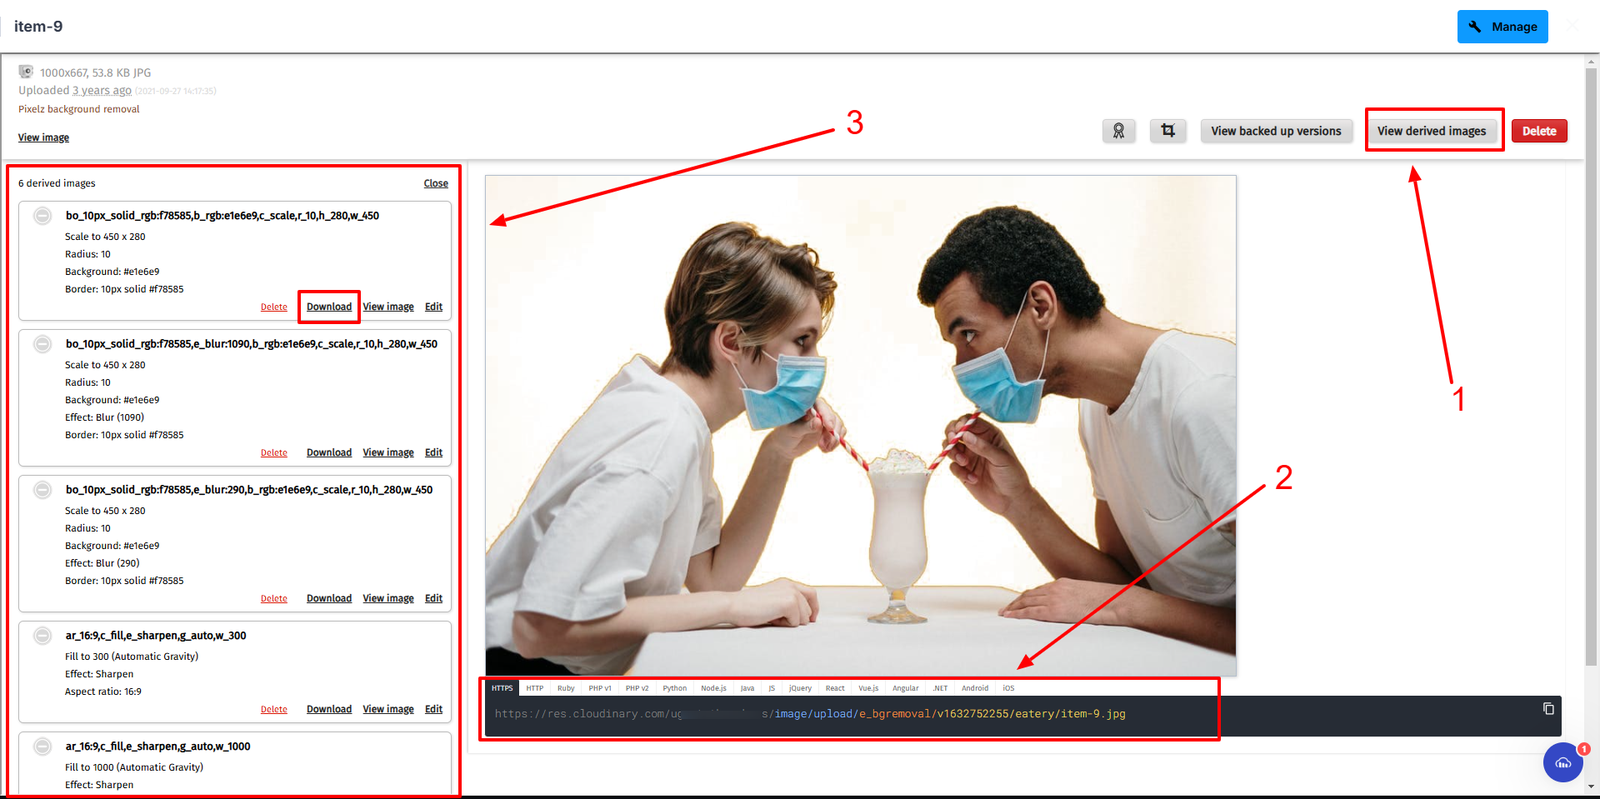
For example, add a background removal effect to an asset.
- Use the derived assets. Cloudinary generates a unique URL for the derived asset, embedding the transformation parameters within the URL path.
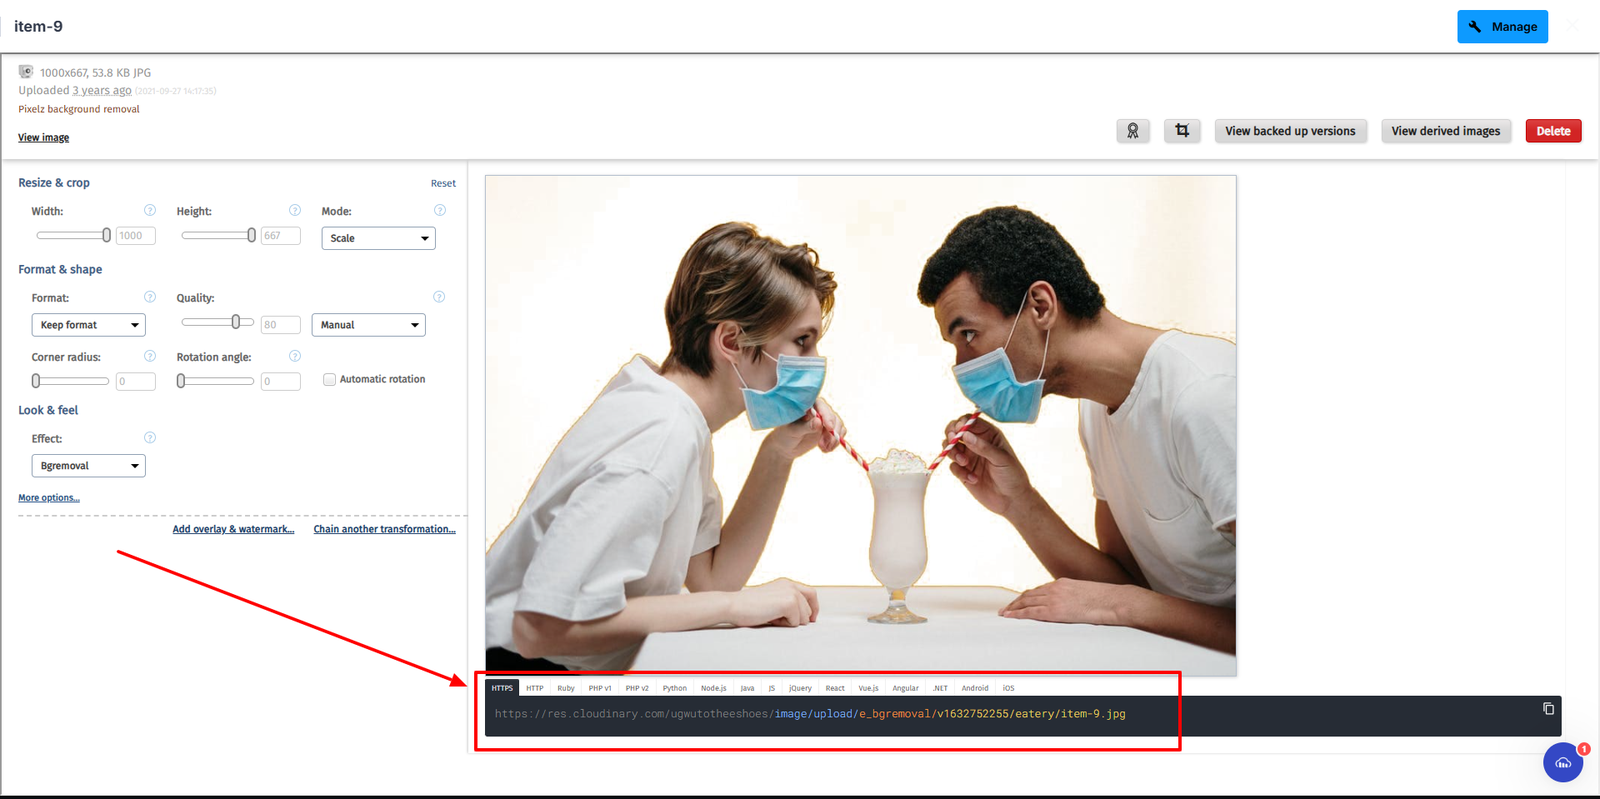
Select a derived version of the original asset, then copy its URL to use in your code. Additionally, you can download each variation of the asset to use externally.
- Integrate into A/B testing. You can use these variation URLs in your marketing or user interface experiments to measure which resonates more with your audience.
Following these steps above, you can efficiently create and manage a wide range of asset variations within the Cloudinary Media Library, which allows you to run effective A/B tests to deliver the best-performing assets.
Now, you can generate multiple versions of an image for A/B testing or marketing campaigns with ease. Next, let’s automate and optimize the testing process of the image variations using MediaFlows and dynamic URLs.
MediaFlows is a standalone product within Cloudinary that provides a flexible development environment for building and automating media workflows. It offers low-code and no-code options for users to create a set of functions using a drag-and-drop interface. Additionally, it offers prebuilt templates and logic tailored for managing, editing, and connecting visual media at scale. Whether you’re working on A/B testing, bulk processing, or content delivery, MediaFlows helps you achieve efficiency and scalability. MediaFlows offers two distinct experiences for your team:
EasyFlows offers a no-code, user-friendly interface designed for non-technical users. Through a simple, step-by-step process, it enables teams to easily automate essential media workflows, such as implementing standardized branding, managing asset expiration, and auto tagging. Follow these steps to create your first EasyFlow:
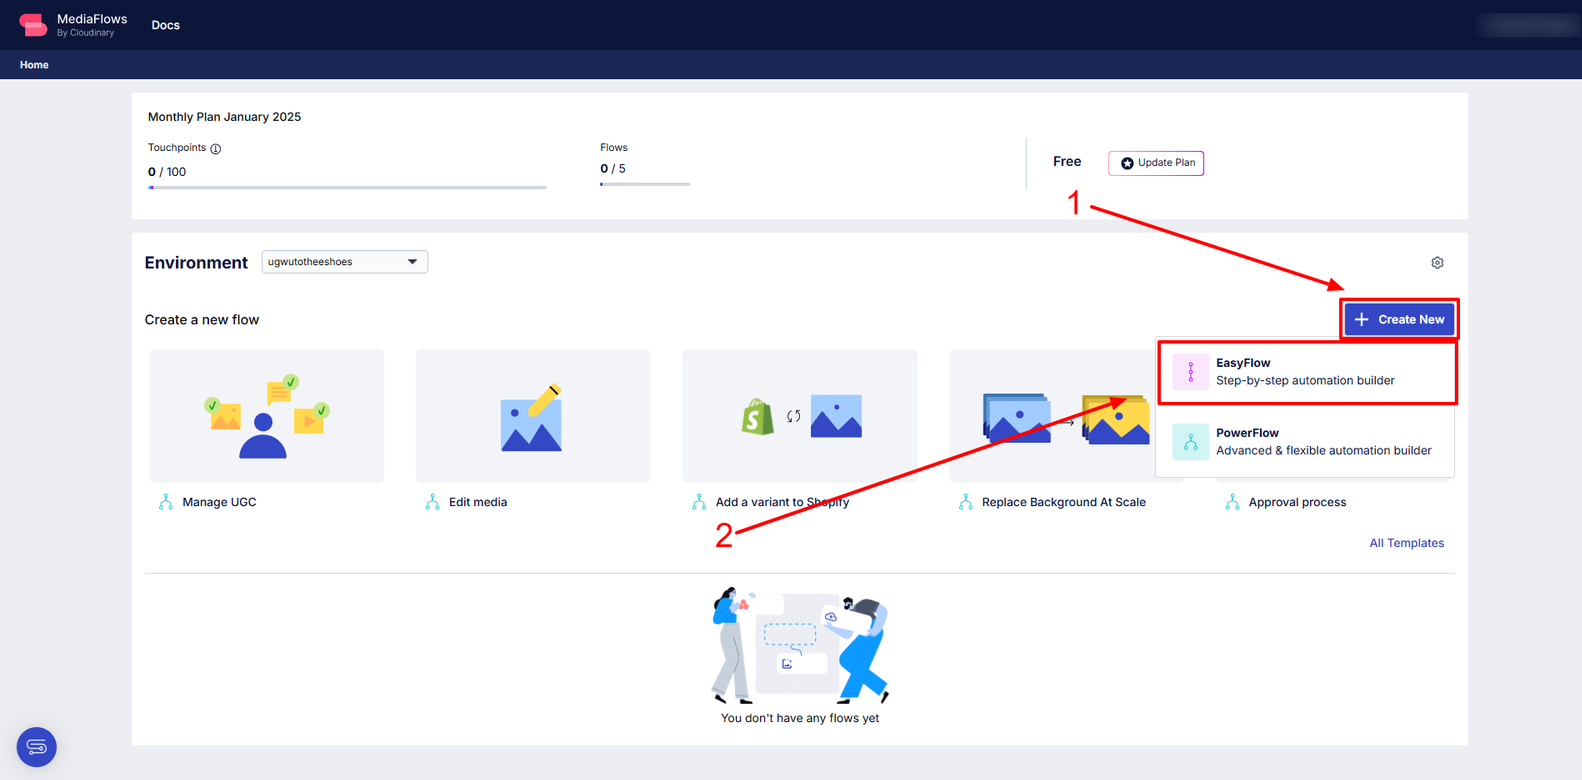
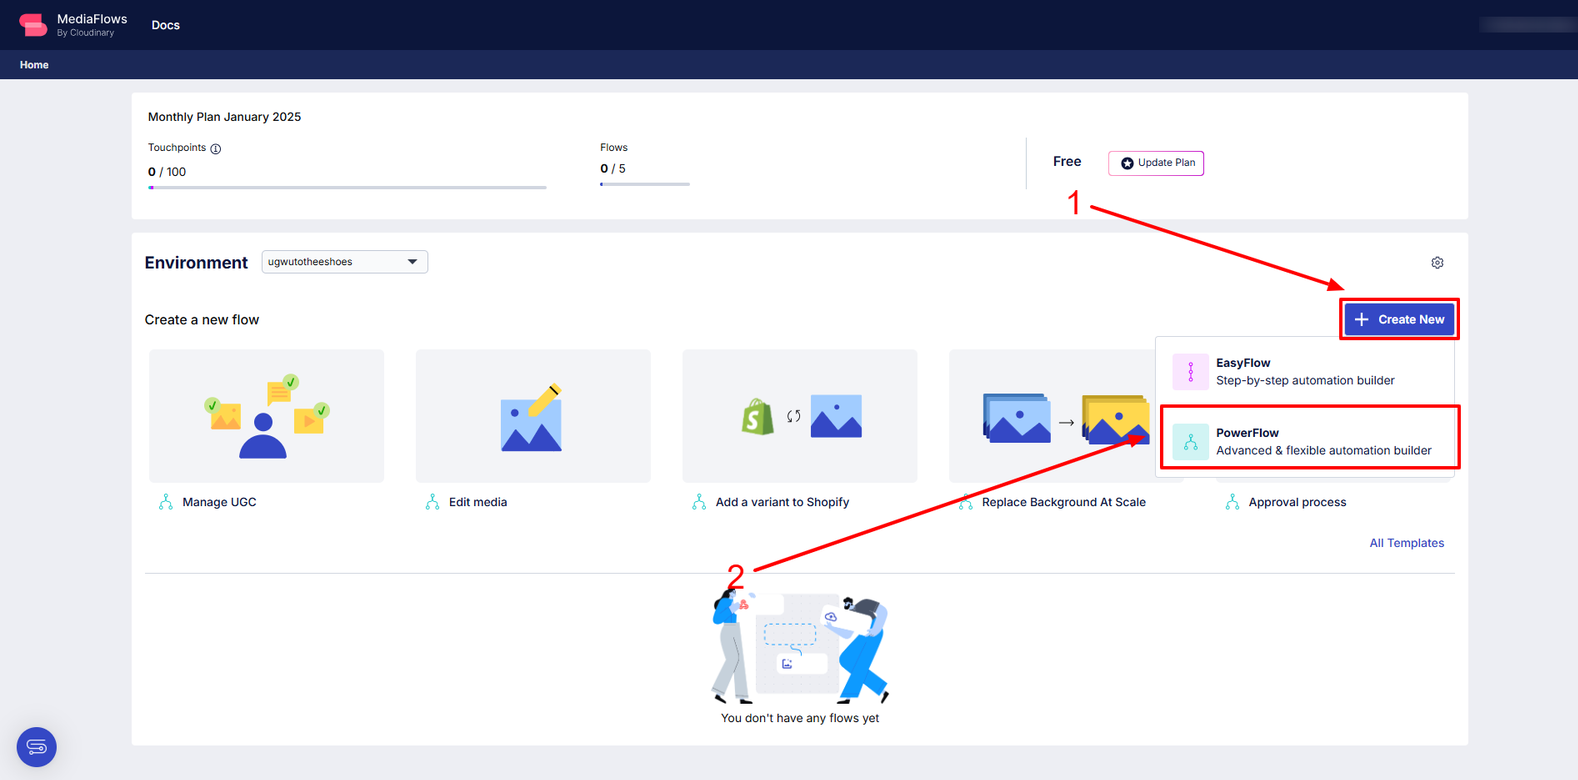
- Create a new flow. To start using MediaFlows, you need an active Cloudinary account. If you don’t have one, sign up here for free. Next, click + Create New and select EasyFlow to build a no-code workflow. There’s also an option to choose a prebuilt template instead of building from scratch.
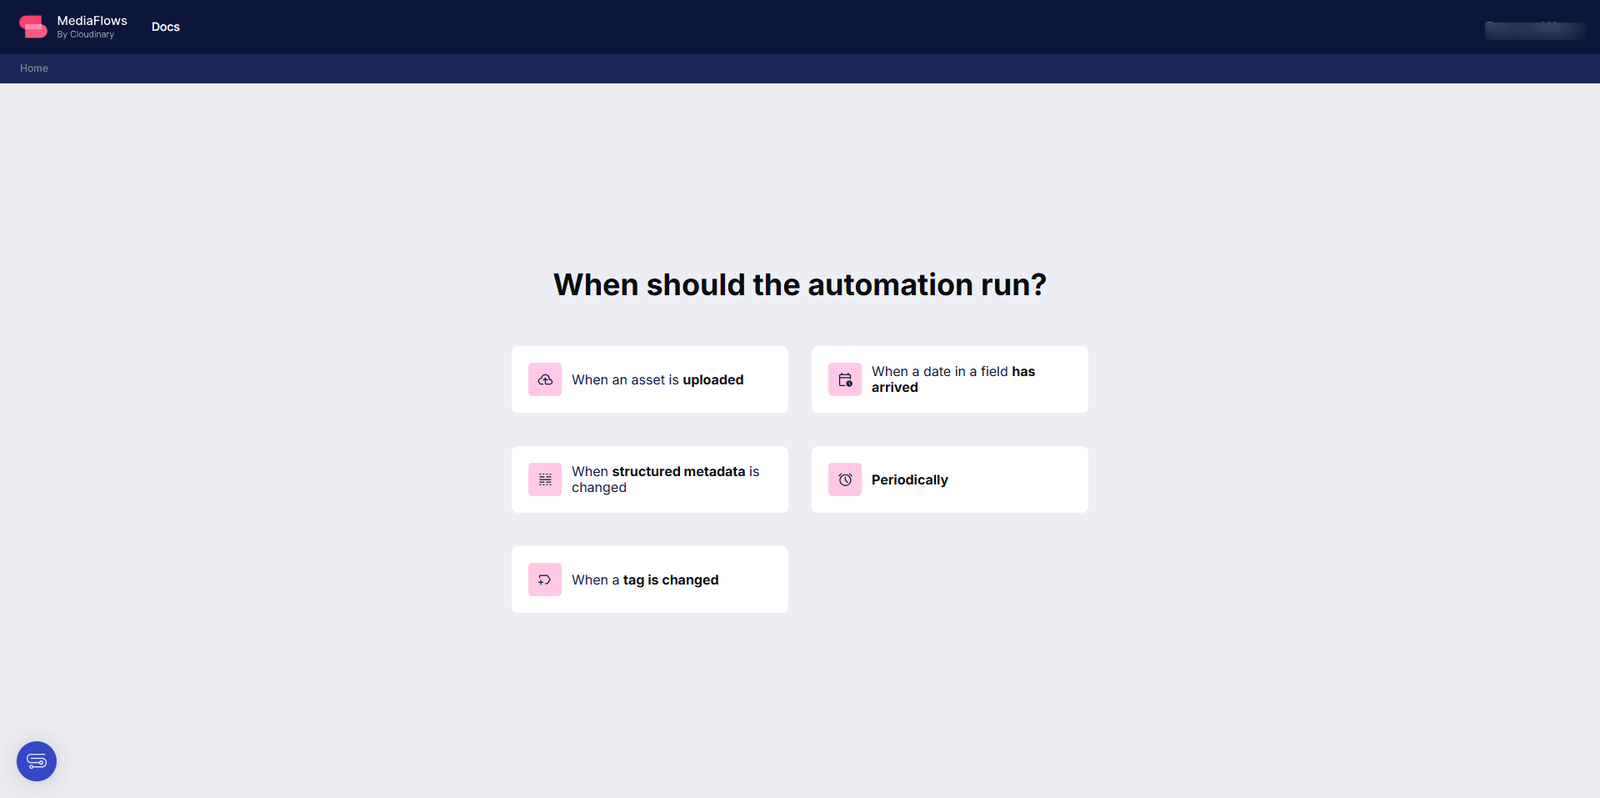
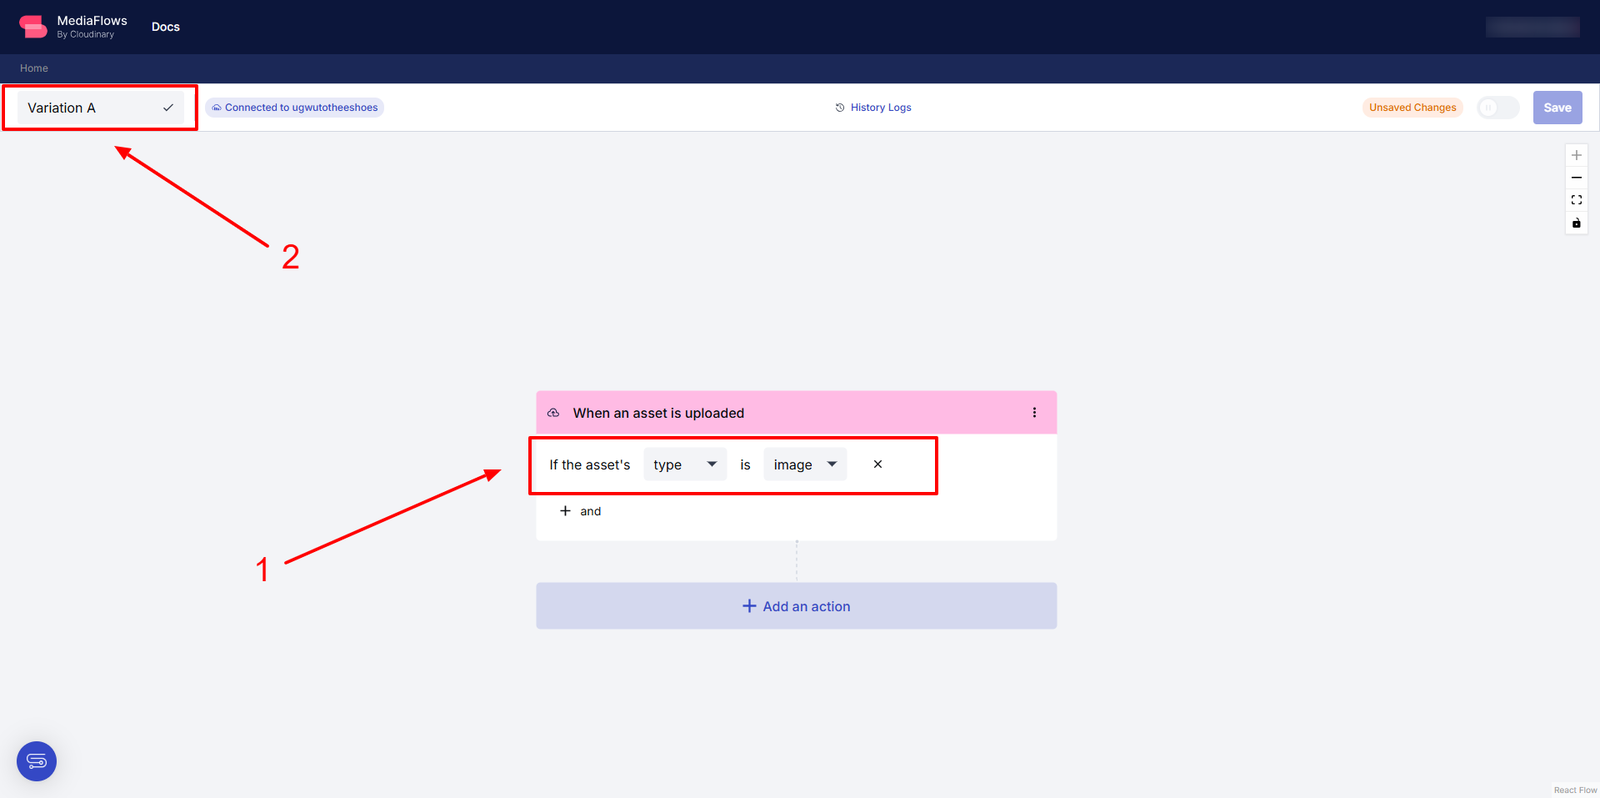
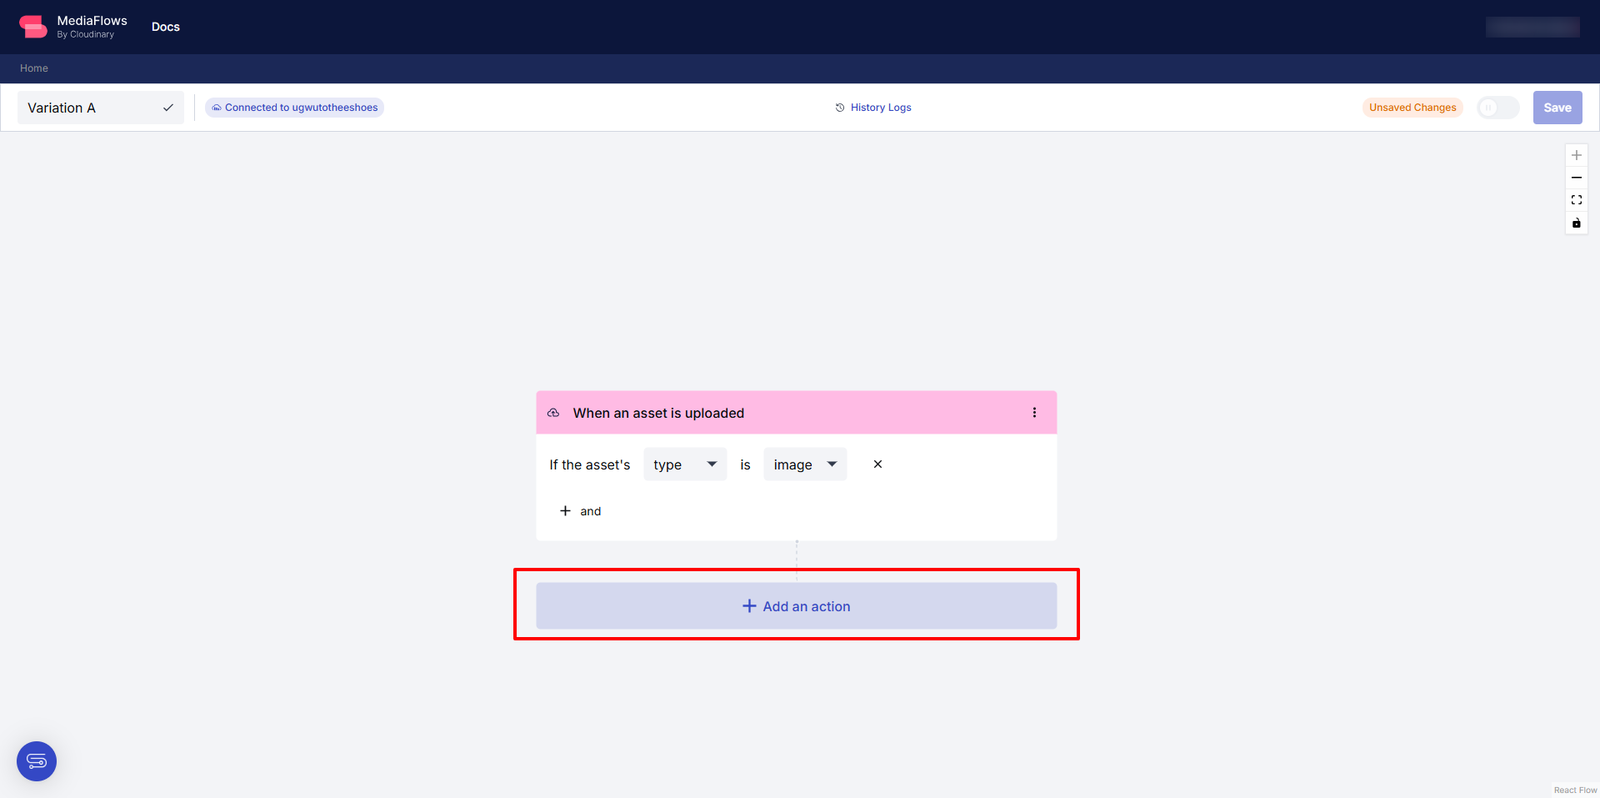
- Select a trigger. Select a trigger (e.g., when an asset is uploaded) to define when the automation will run.
Then, click the + and icon to narrow the criteria by adding conditions (e.g., apply only to image assets). Rename the flow by clicking the pen icon at the top left.
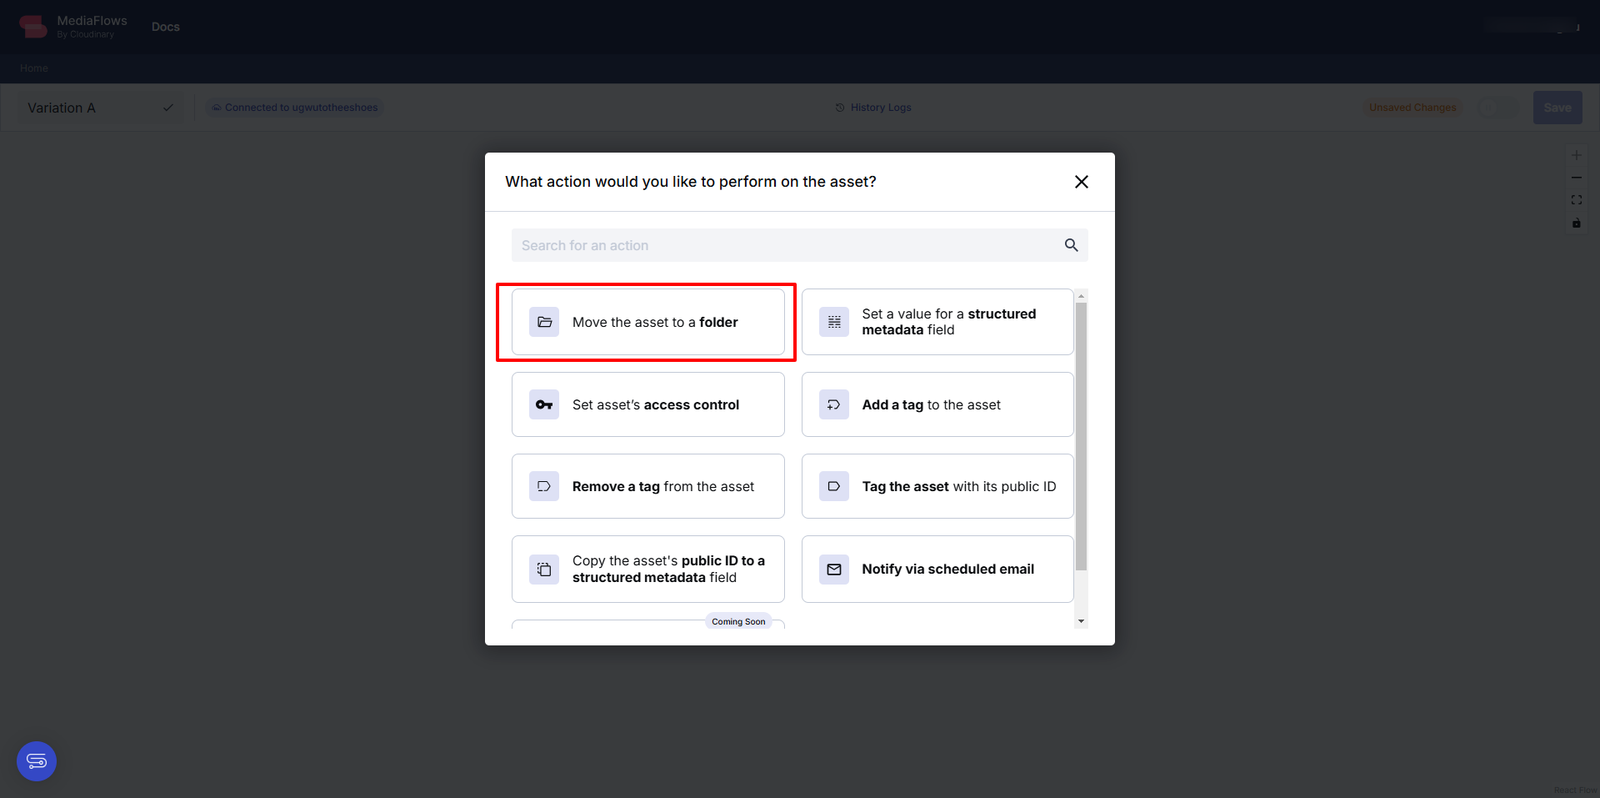
- Add actions. Click + Add an action block below the trigger block to choose and configure an action (e.g., moving the asset to a specific folder).
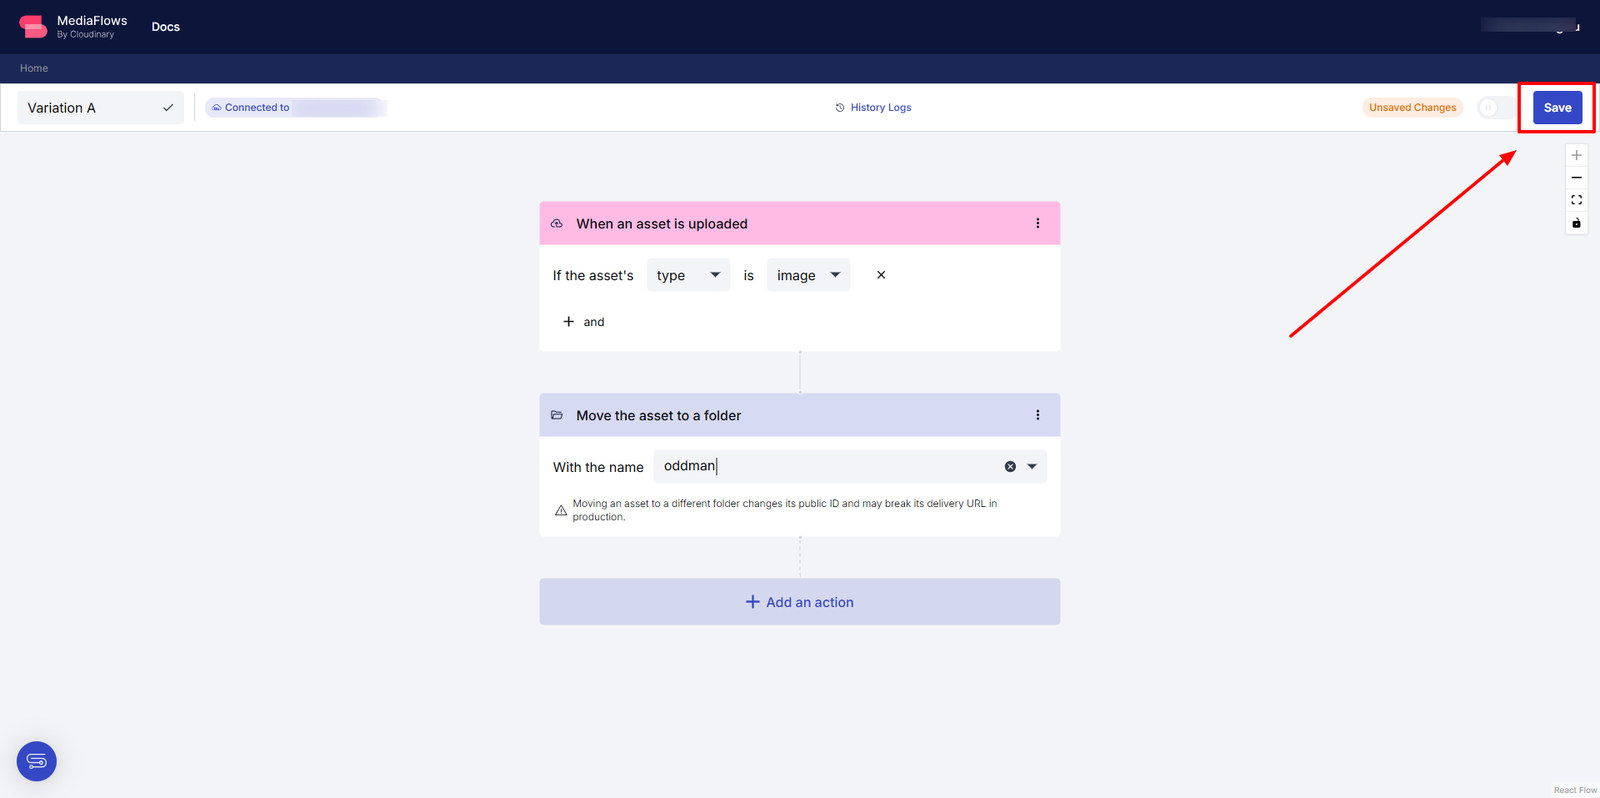
You can add more actions by clicking + Add an action block under the previous one.
- Save and activate your flow. Once your actions are set, click Save at the top right.
EasyFlow offers a no-code solution for automating media workflows, but for scenarios requiring greater flexibility and customization, PowerFlow provides advanced users or teams with complete control over complex media asset management. Let’s explore how PowerFlow allows you to take your media workflows to the next level.
PowerFlow’s low-code interface provides complete control and customization for advanced users to build complex workflows, integrate with third-party tools, and own the entire media asset management process end to end.
PowerFlow builds on the foundation of EasyFlow, helps you conduct A/B testing, automate asset transformations, and optimize media delivery, but with added precision and scalability. Here’s a step-by-step process on how to use PowerFlow:
- Step 1: Access PowerFlow. Log in to MediaFlows, click + Create New and select PowerFlow. The editor provides a visual environment for designing, debugging, and deploying workflows.
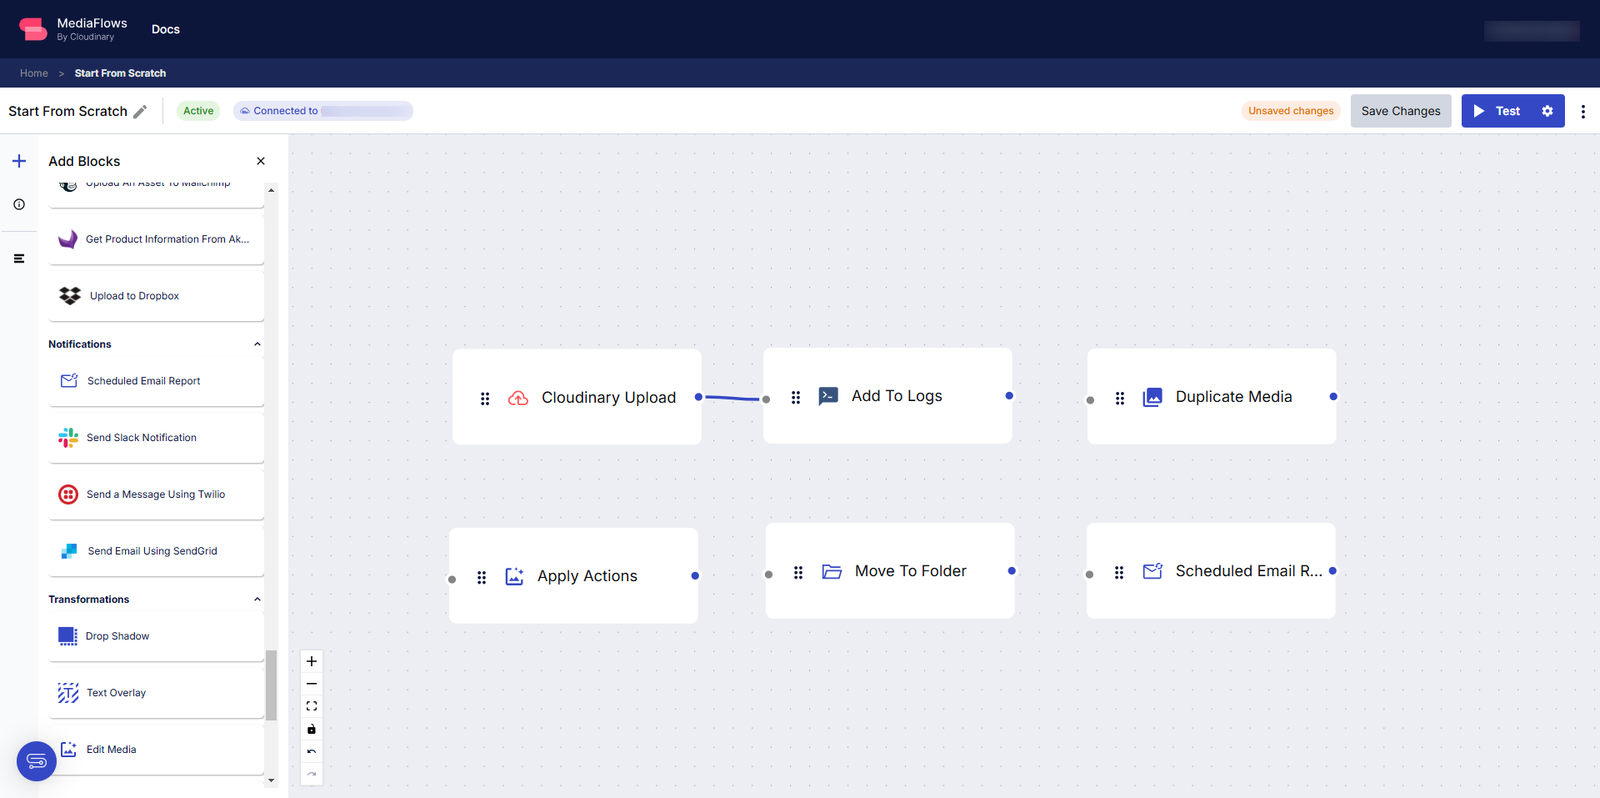
- Step 2: Add functional blocks. Open the Add Blocks sidebar from the navigation bar on the left. Then, drag blocks like Triggers, Flow Logic, or Developer Tools onto the canvas.
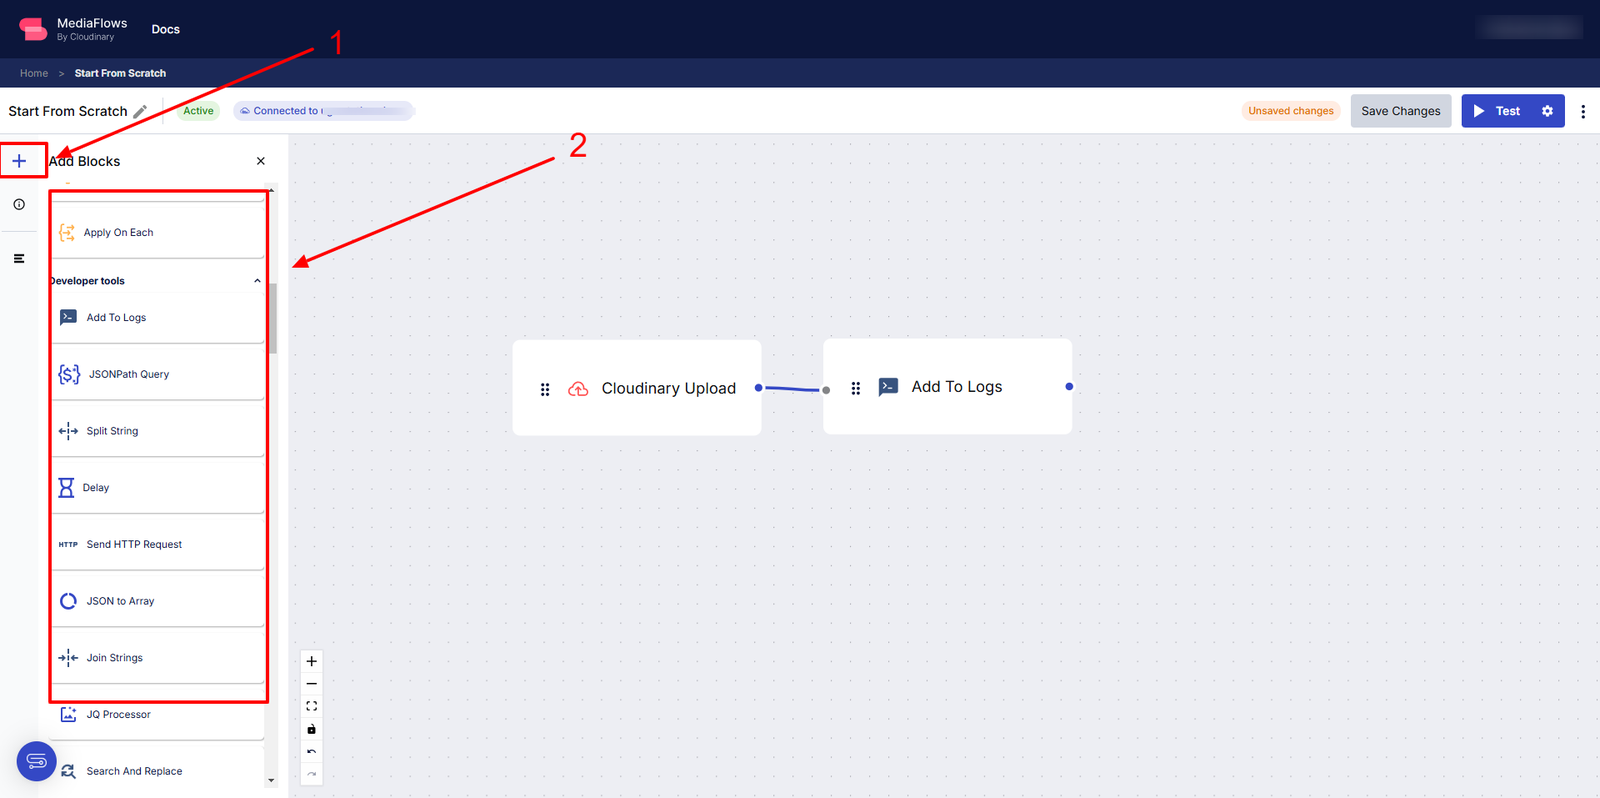
You can use the search bar to find specific blocks quickly.
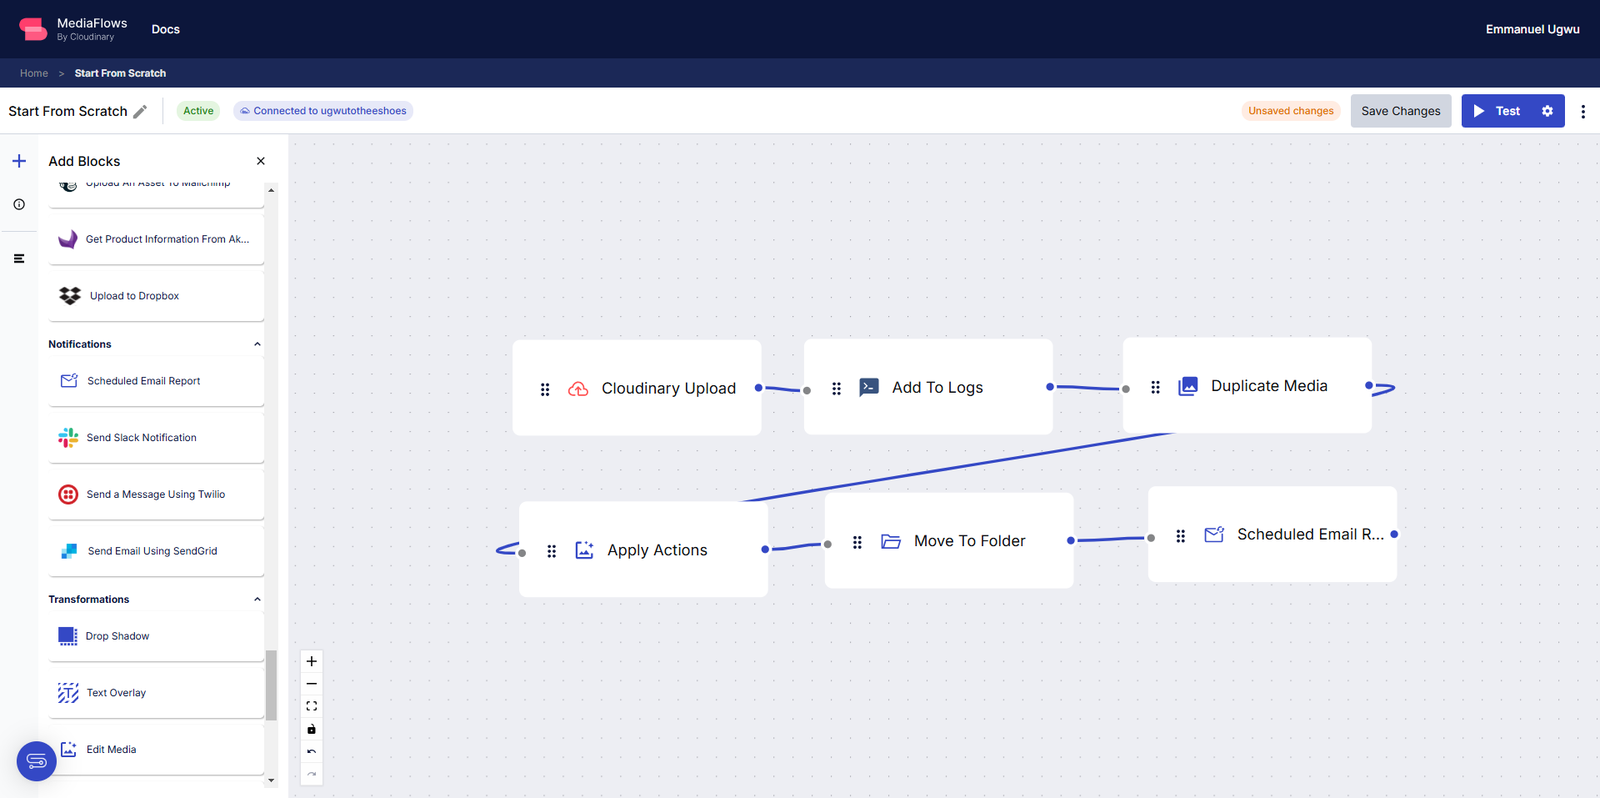
Step 3: Connect blocks. Drag the blue dots to link blocks in execution order. Connecting one block to multiple others adds parallel executions. Click the line and select the x icon to disconnect blocks.
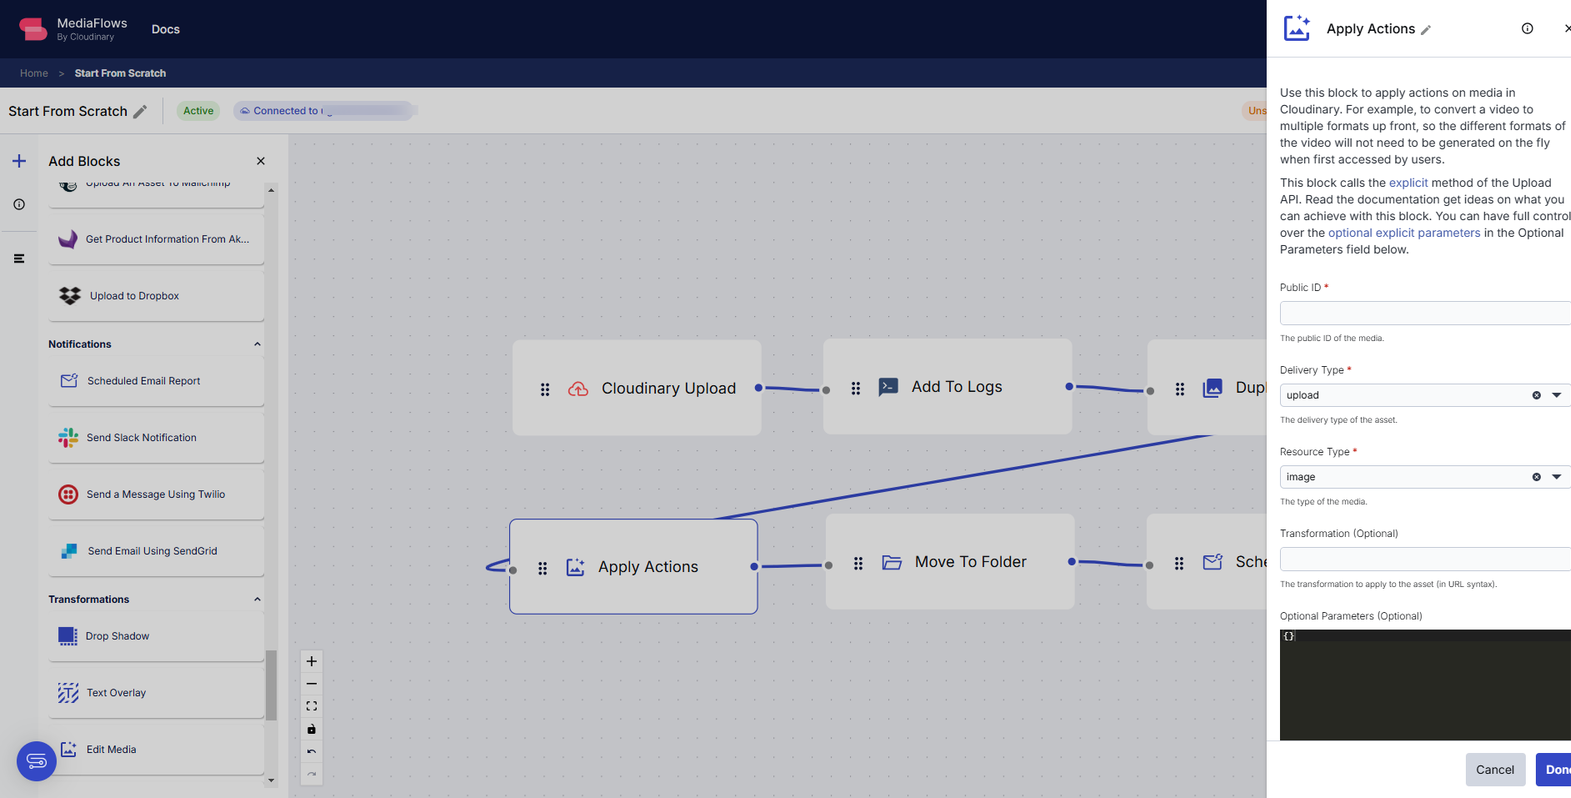
- Step 4: Configure blocks. Click a block to open its configuration sidebar and set its properties.
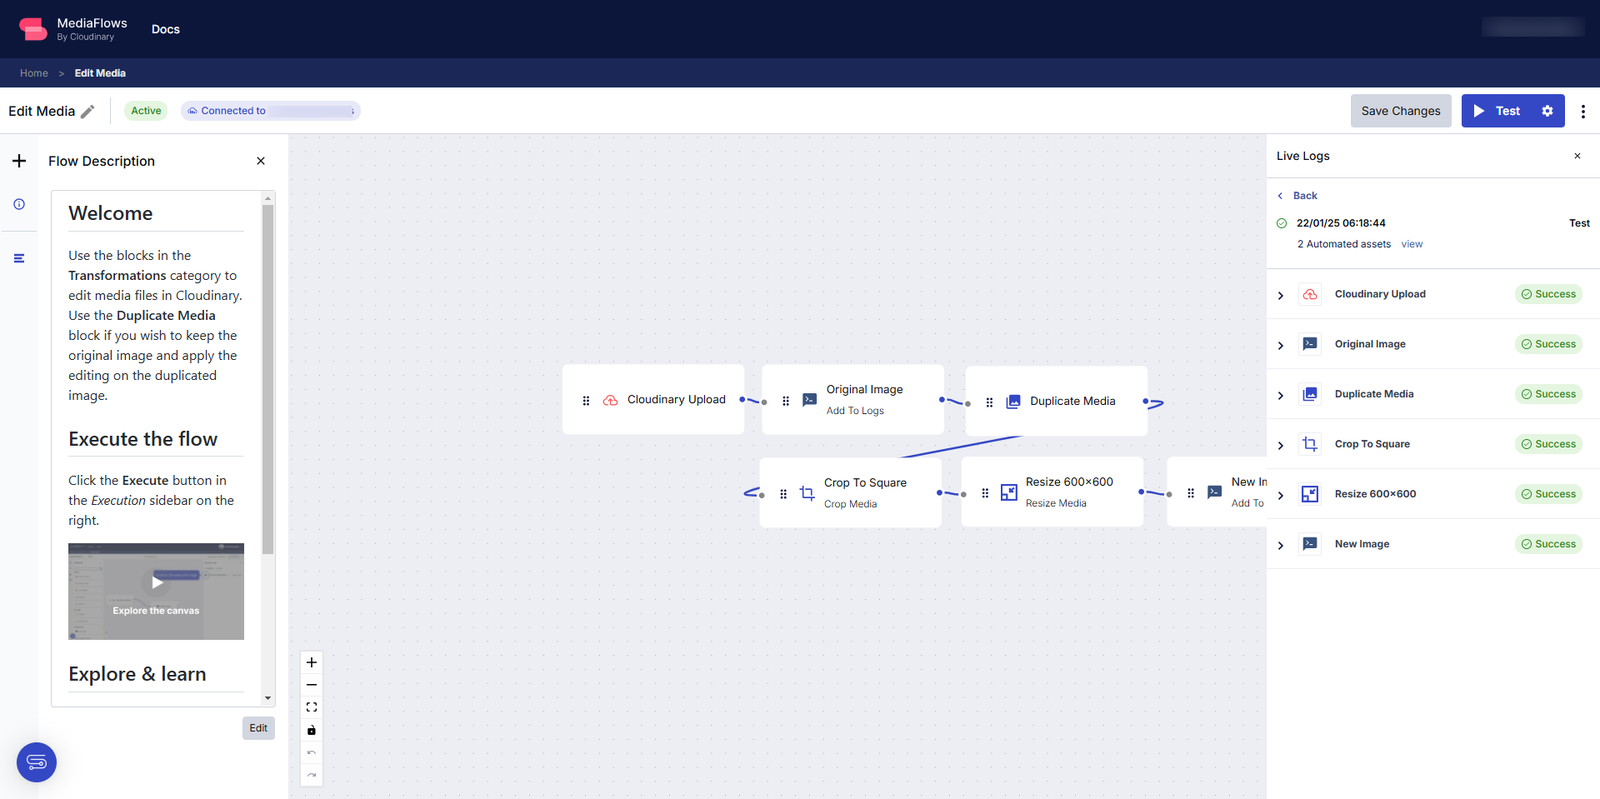
- Step 5: Run and debug flows. Manually trigger a flow by clicking the Run button above the canvas. You’ll see live logs showing details such as the media asset’s
public_id, URL, dimensions, and file format. These logs confirm that the workflow was executed successfully. Thoroughly test the workflow, debug any issues, and then deploy it to production.
MediaFlows simplifies the management and delivery of visual assets by automating workflows. Whether you utilize the user-friendly EasyFlows for quick automation or leverage the powerful customization of PowerFlows, MediaFlows helps you optimize asset handling at scale.
But automation is only one part of the equation. You’ll also want to take advantage of dynamic URLs for efficient asset management. This flexibility is especially valuable for A/B testing, where quick iterations and instant updates are key to identifying high-performing assets. Let’s go into how dynamic URLs work and how they can enhance your A/B testing strategy.
Dynamic URLs in Cloudinary allow you to manage and update visual assets without requiring code changes in your application. This is particularly beneficial for A/B testing, as it not only saves storage space but also allows for real-time experimentation and instant updates.
The default Cloudinary asset delivery URL follows this format:
https://res.cloudinary.com/<cloud_name>/<asset_type>/<delivery_type>/<transformations>/<version>/<public_id>.<extension>Code language: HTML, XML (xml)For example, a Cloudinary image URL might look like this:
https://res.cloudinary.com/demo/image/upload/c_thumb,g_face,h_200,w_200/r_max/f_auto/woman-blackdress-stairs.pngCode language: JavaScript (javascript)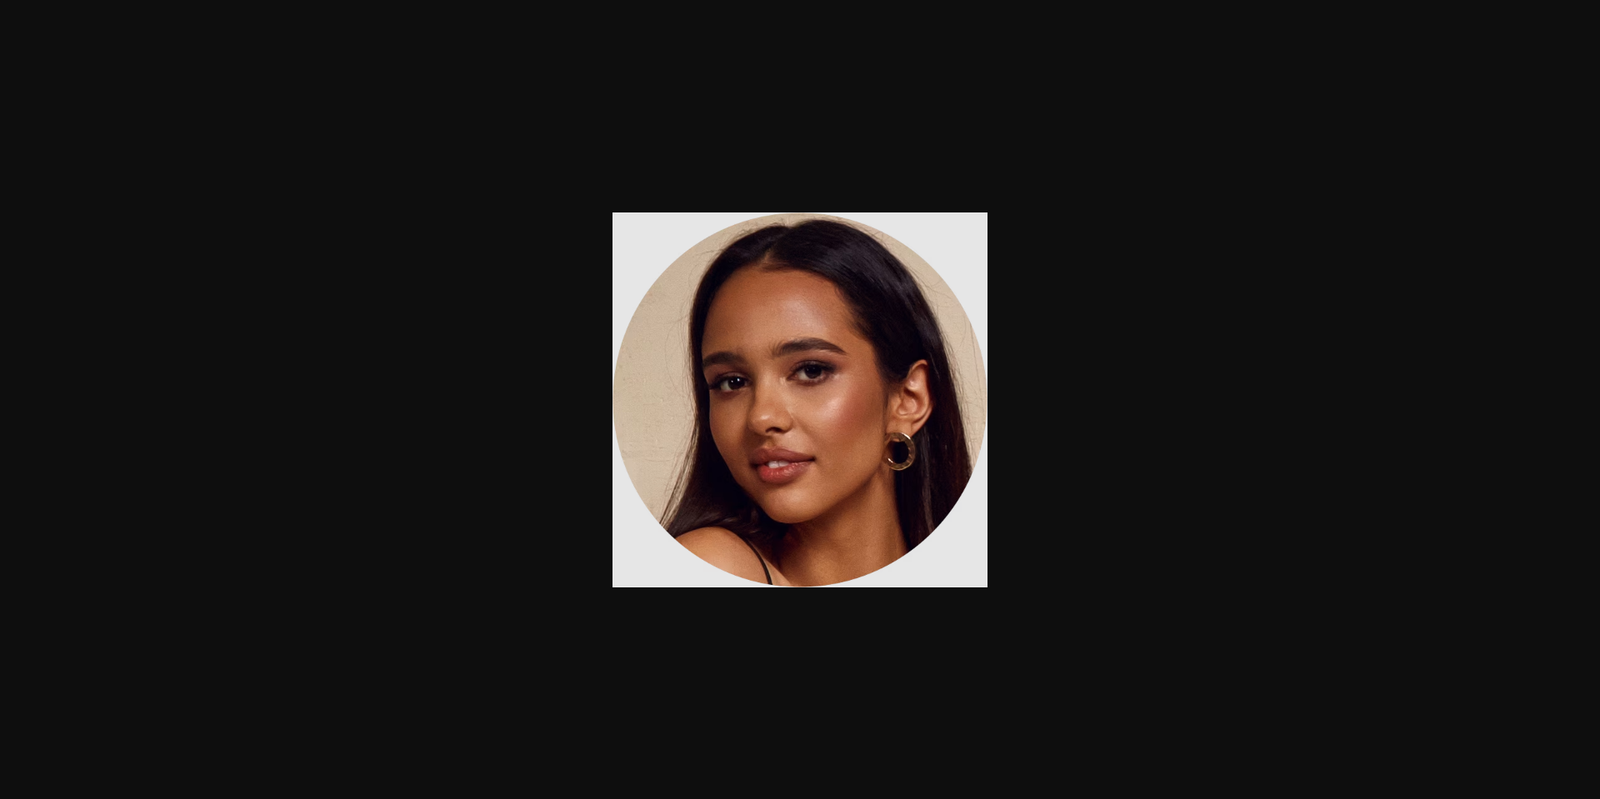
In this example:
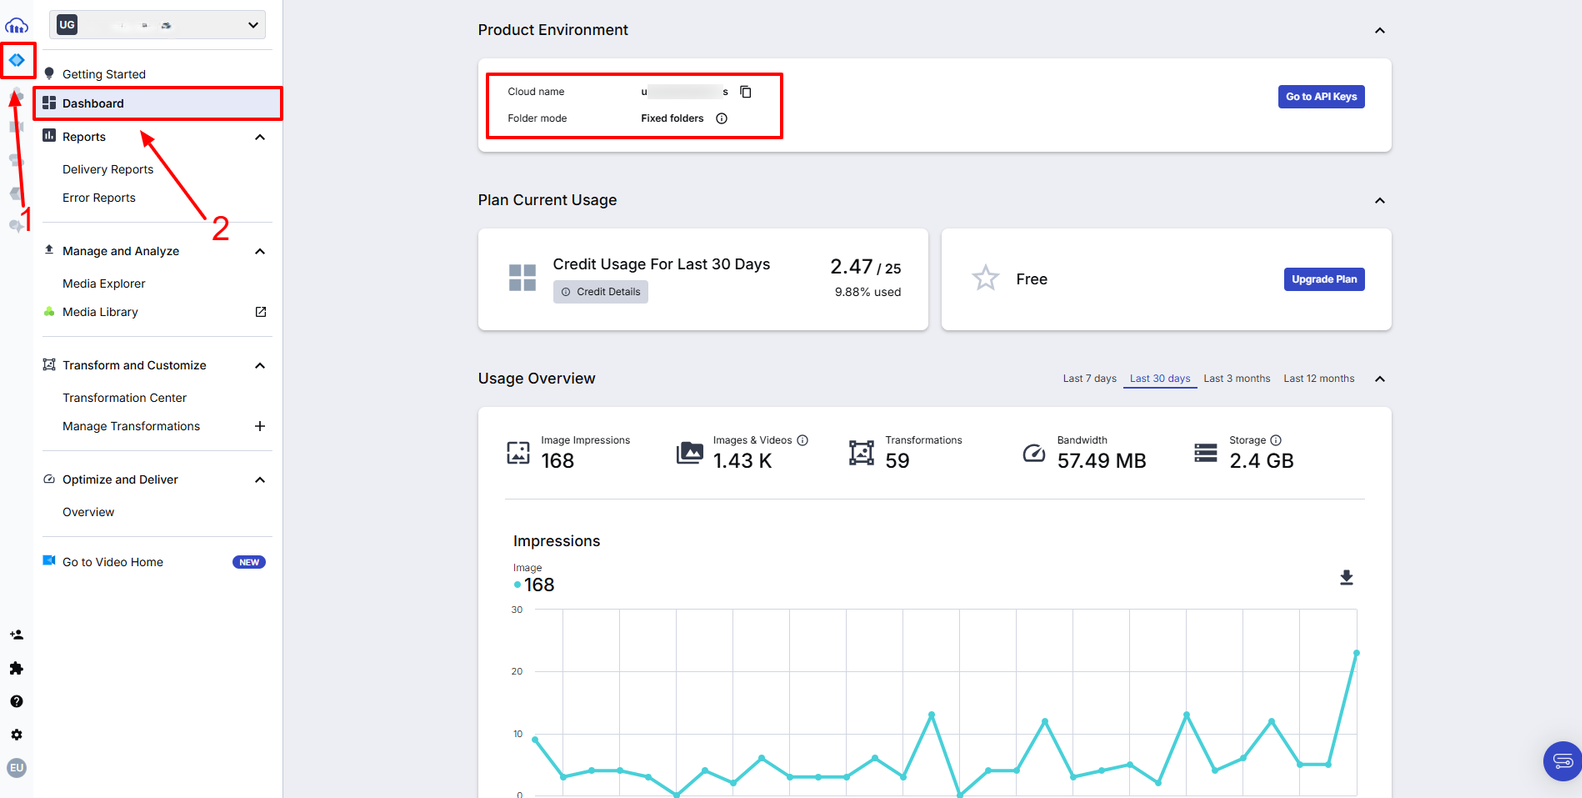
<cloud_name>. This refers to your Cloudinary account name (e.g., “demo”). To find your cloud name, navigate to your account Dashboard in Programmable Media. Your cloud name will be displayed at the top of the page.
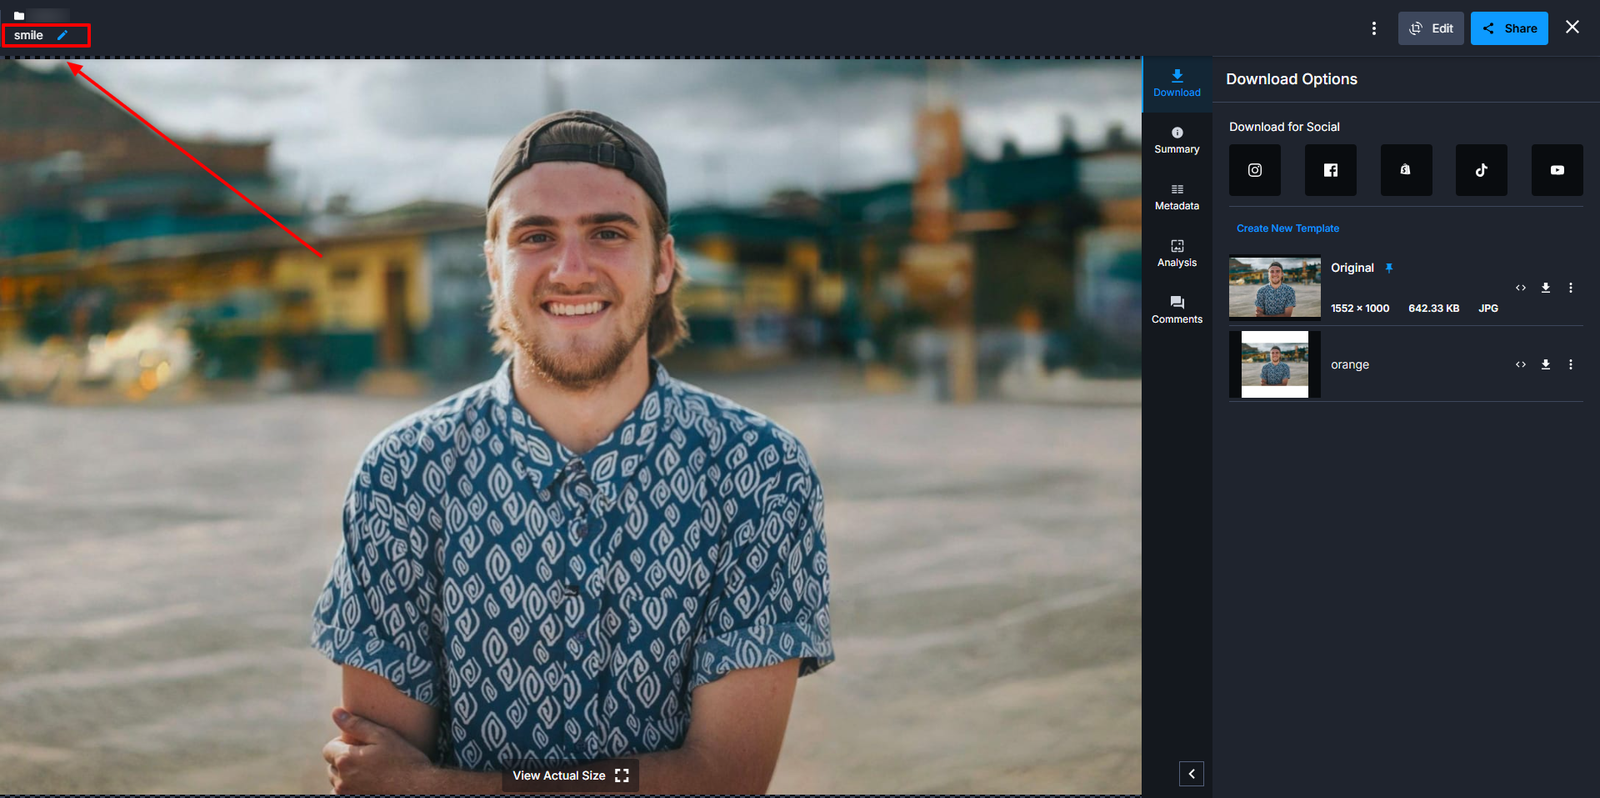
<asset_type>. This specifies the type of asset, such as image or video.<delivery_type>. It indicates how the asset is delivered, like upload.<transformations>. This contains all the transformations applied to the asset, such as resizing, cropping, or filters.<public_id>. The unique identifier for the asset in your Media Library. To locate the public ID of an asset, go to the Media Library, select the asset, and check the top-left corner.
<extension>. Represents the file type, such as JPG, PNG, or MP4.
This dynamic URL structure allows you to modify and optimize assets directly in the URL, offering flexibility for asset management. Here’s how to use Dynamic URLs for seamless asset swapping:
- Access the Media Library. Log in to your Cloudinary account and navigate to the Media Library, where you’ll find all your uploaded and managed visual assets.
- Locate and use asset URLs. Once you upload an asset to Cloudinary, find the asset you want to use and copy its URL directly from the interface. Then, paste the copied URL into your codebase to display the asset in your application. For example:
<code><img src="https://res.cloudinary.com/demo/image/upload/sample.jpg" alt="Example Image"></code>Code language: HTML, XML (xml)Using the asset’s URL ensures that updates made to the asset in Cloudinary automatically reflect in your application without requiring any code changes.
- Replace the asset. Upload a new asset in Cloudinary with a new Public ID. Then, alter the URL with the new asset’s Public ID in your codebase. The new asset will automatically be reflected in your application. For instance, the asset
sample1.jpgcan be replaced with a new asset, likeman-portrait.jpg, as shown in the example below:
https://res.cloudinary.com/<cloud_name>/image/upload/man-portrait.jpg`Code language: HTML, XML (xml)- Apply transformations dynamically. Modify the asset’s appearance in real-time by appending transformation parameters to the URL. Examples:
- Resize: This modifies the width and height of the image.
https://res.cloudinary.com/demo/image/upload/w_300,h_300/man-portrait.jpgCode language: JavaScript (javascript)
- Apply a filter: This applies a gray filter over the image.
https://res.cloudinary.com/demo/image/upload/e_grayscale/man-portrait.jpgCode language: JavaScript (javascript)
- Test changes in real time. Changes made through asset replacement or transformation are instantly reflected across your application, eliminating the need for redeployment.
Building upon this foundation, Cloudinary creates harmony between MediaFlows and Dynamic URLs, creating efficient asset management and A/B testing within your workflow. For instance, let’s test two product image variations to see which performs better in email newsletters.
First, create a customized EasyFlow within MediaFlows to automate tagging and organizing the image variations. For example, upload product images to a folder called “Campaign_Assets”. The flow can apply logic to tag files with names such as “Variation A” or “Variation B”. These tagged files can then be processed for email readiness, such as resizing to 600×400 pixels or applying enhancements.
This flow generates dynamic URLs that make it easier to incorporate image variations into your email content. They also allow you to swap or update the images without redeploying the email, maintaining a consistent link structure.
Assign “Variation A” to 50% of your recipient group and “Variation B” to the other 50% so you can track and analyze which version garners more engagement. This approach guarantees scalability and real-time adaptation, which are essential components of data-driven marketing strategies.
Let’s examine how performance metrics can help refine and enhance your campaigns further.
A/B testing is only as effective as the data you gather and analyze. Cloudinary’s AI-powered analysis provides details into the performance of your visual assets, helping you make data-driven decisions. Here’s how you can collect and analyze performance data on assets:
- Leverage Cloudinary’s AI-powered features. In the Cloudinary dashboard, go to the Media Library, locate your asset, and open it in the Editor.
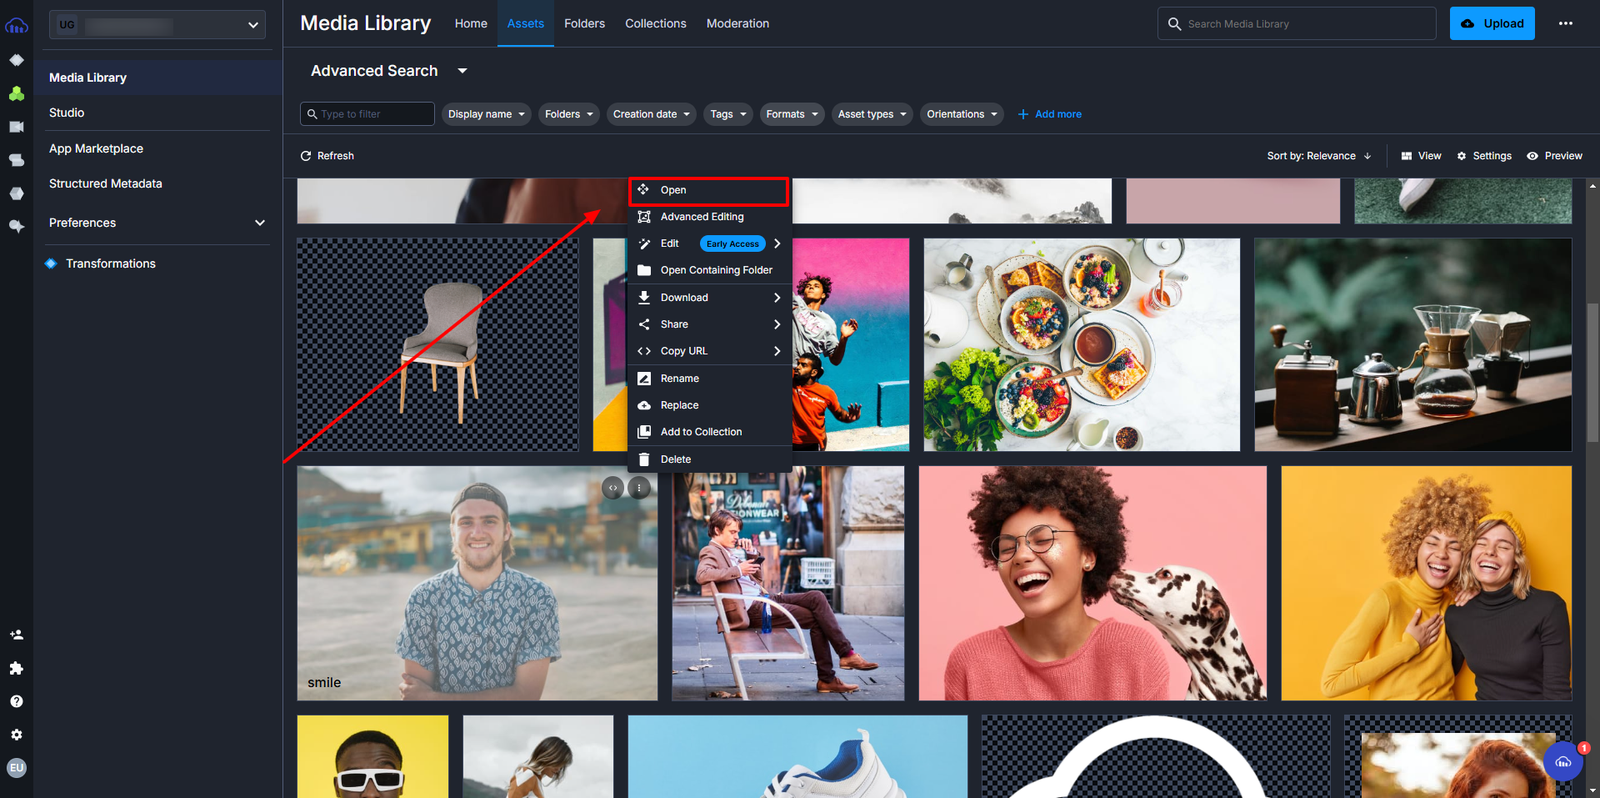
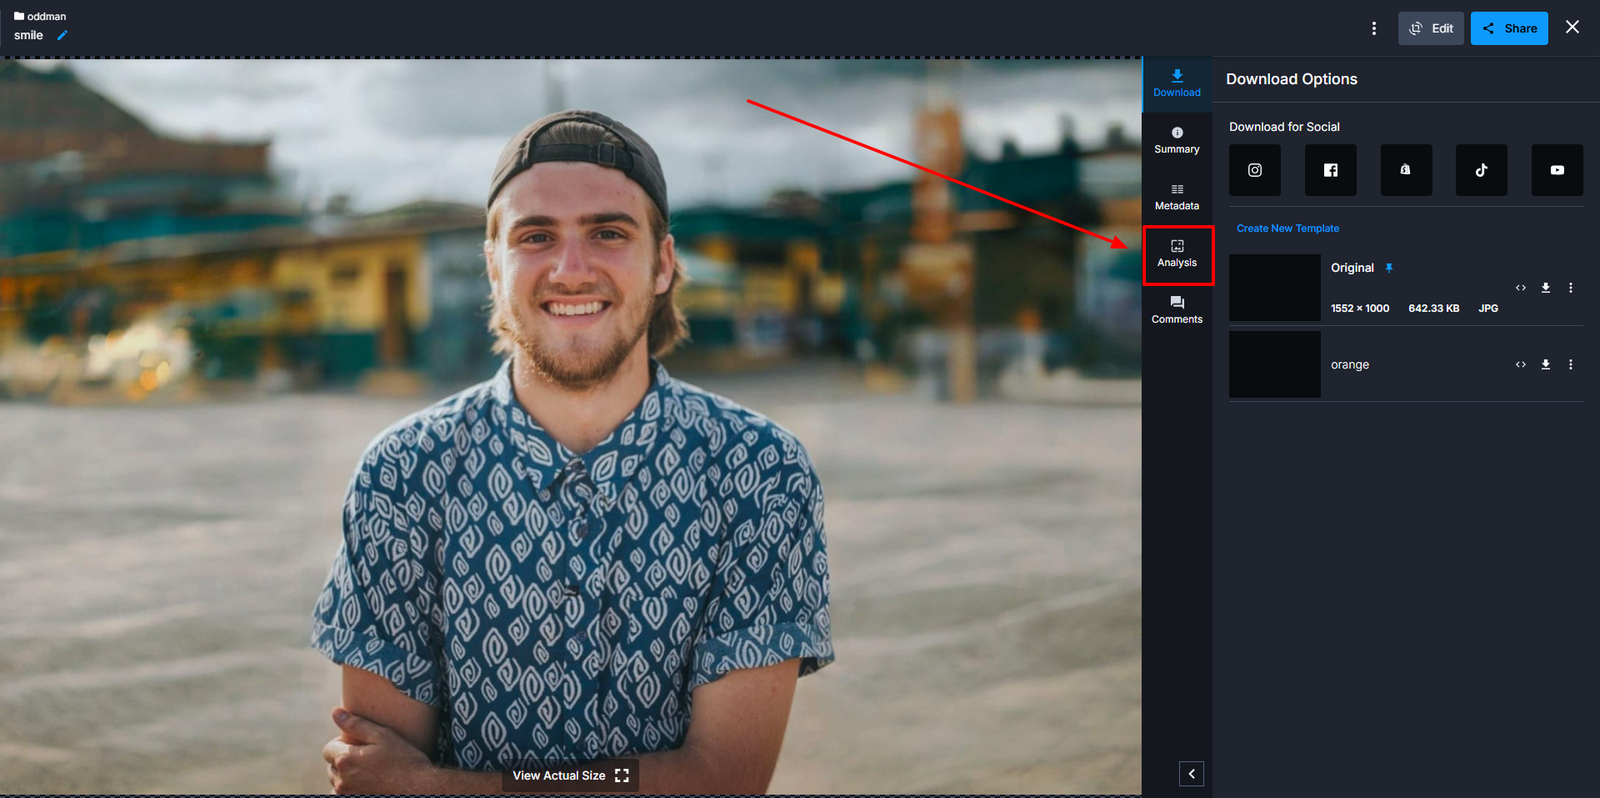
Once you’re in the editor, click the Analysis tab to enable the AI analysis features.
These features categorize your visual assets based on attributes like content type, dominant colors, or composition, giving you a deeper understanding of your media. Use Cloudinary AI Analysis tools, such as:
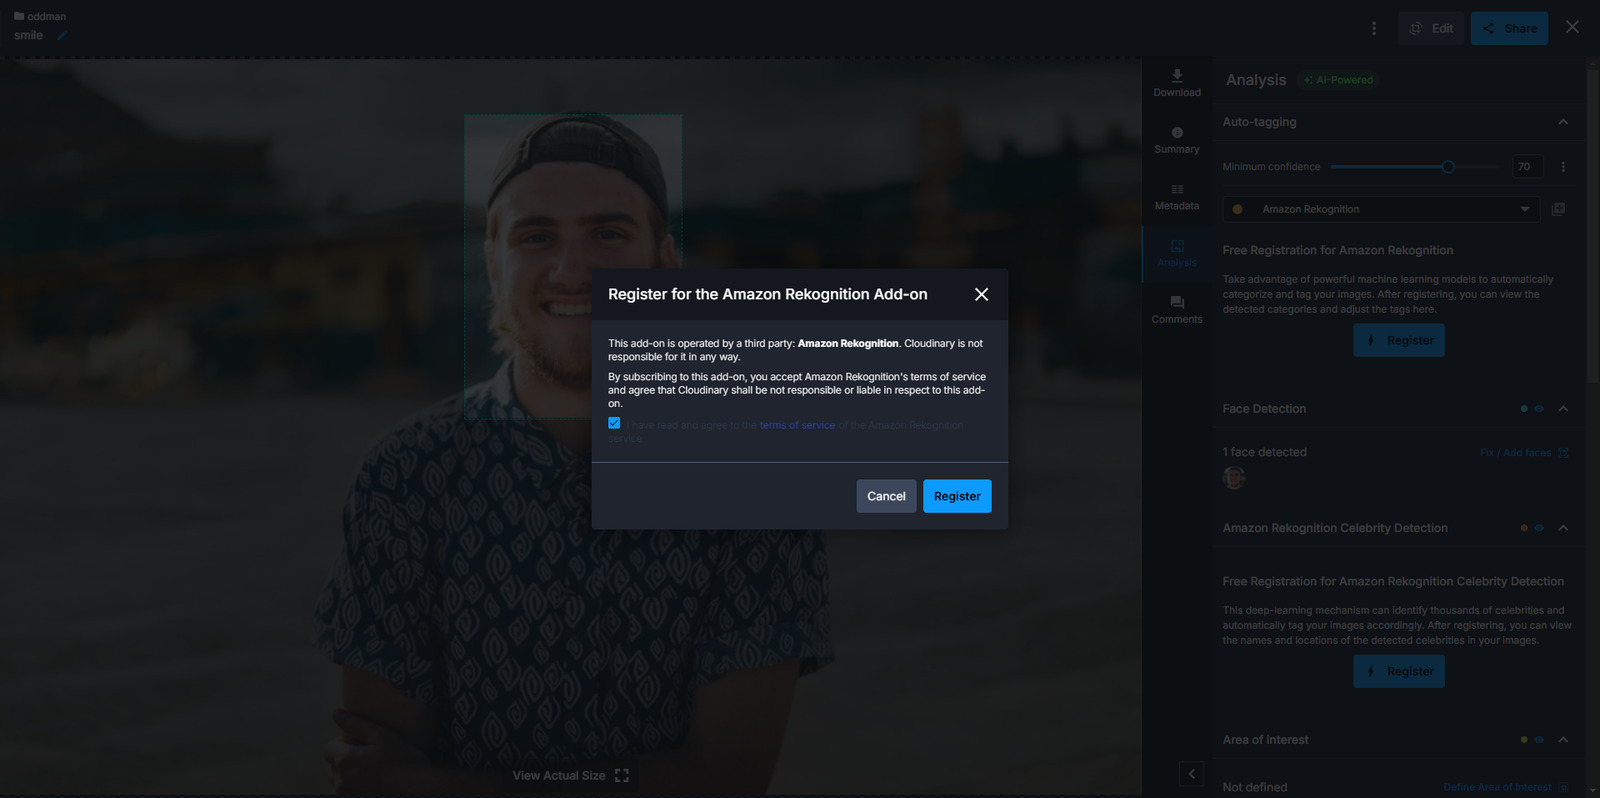
- Amazon Rekognition Auto Tagging add-on. Amazon Rekognition uses a deep learning-based image recognition model to automatically tag assets according to the categories detected in each image. To use the add-on, click the Register button.
Then, click Run to analyze your image asset. The analysis takes a while before generating a set of tags as categories detected in the image.
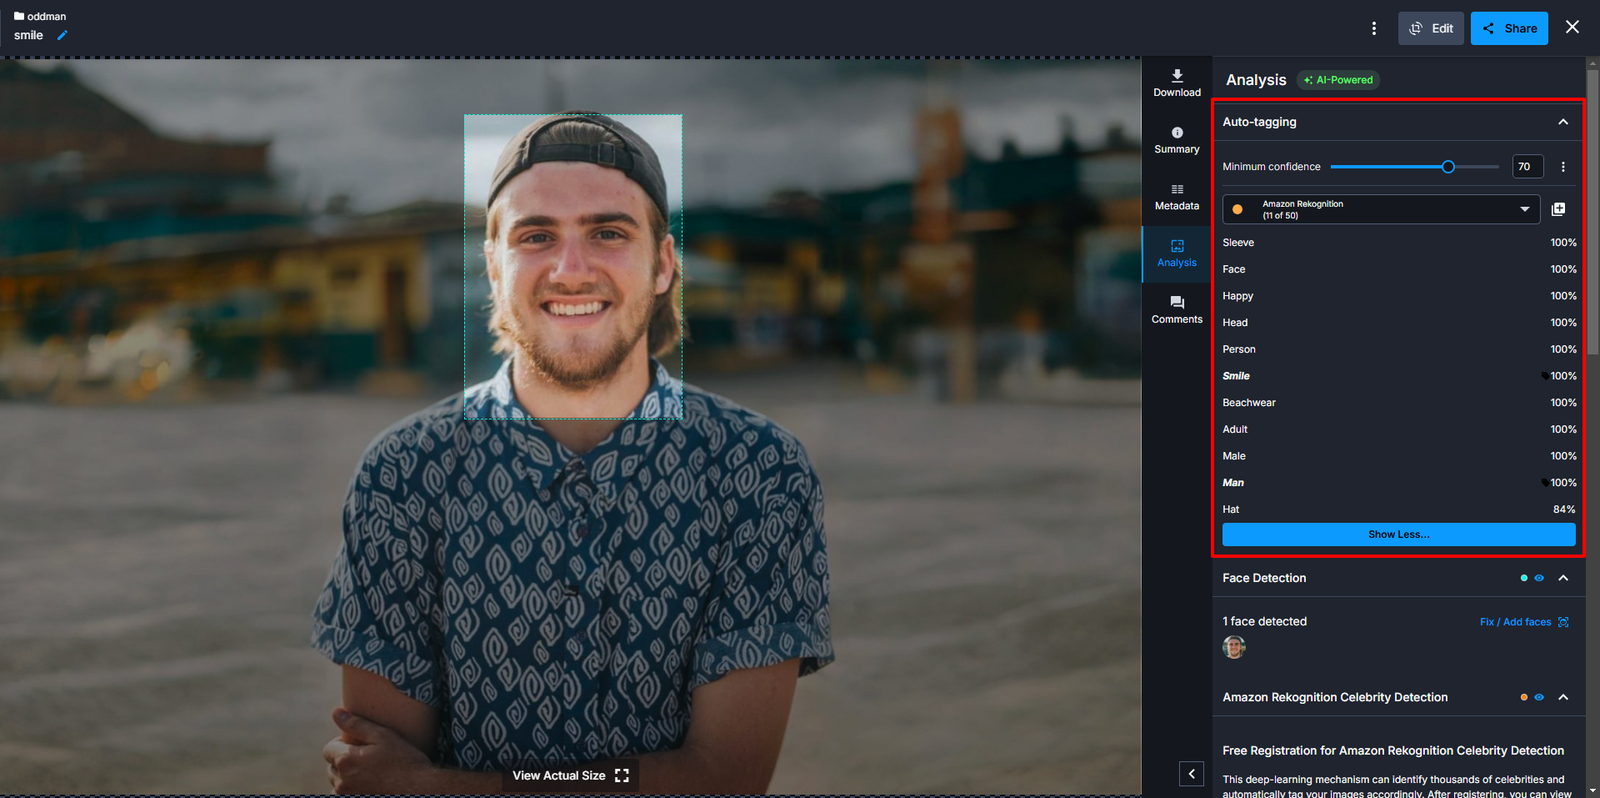
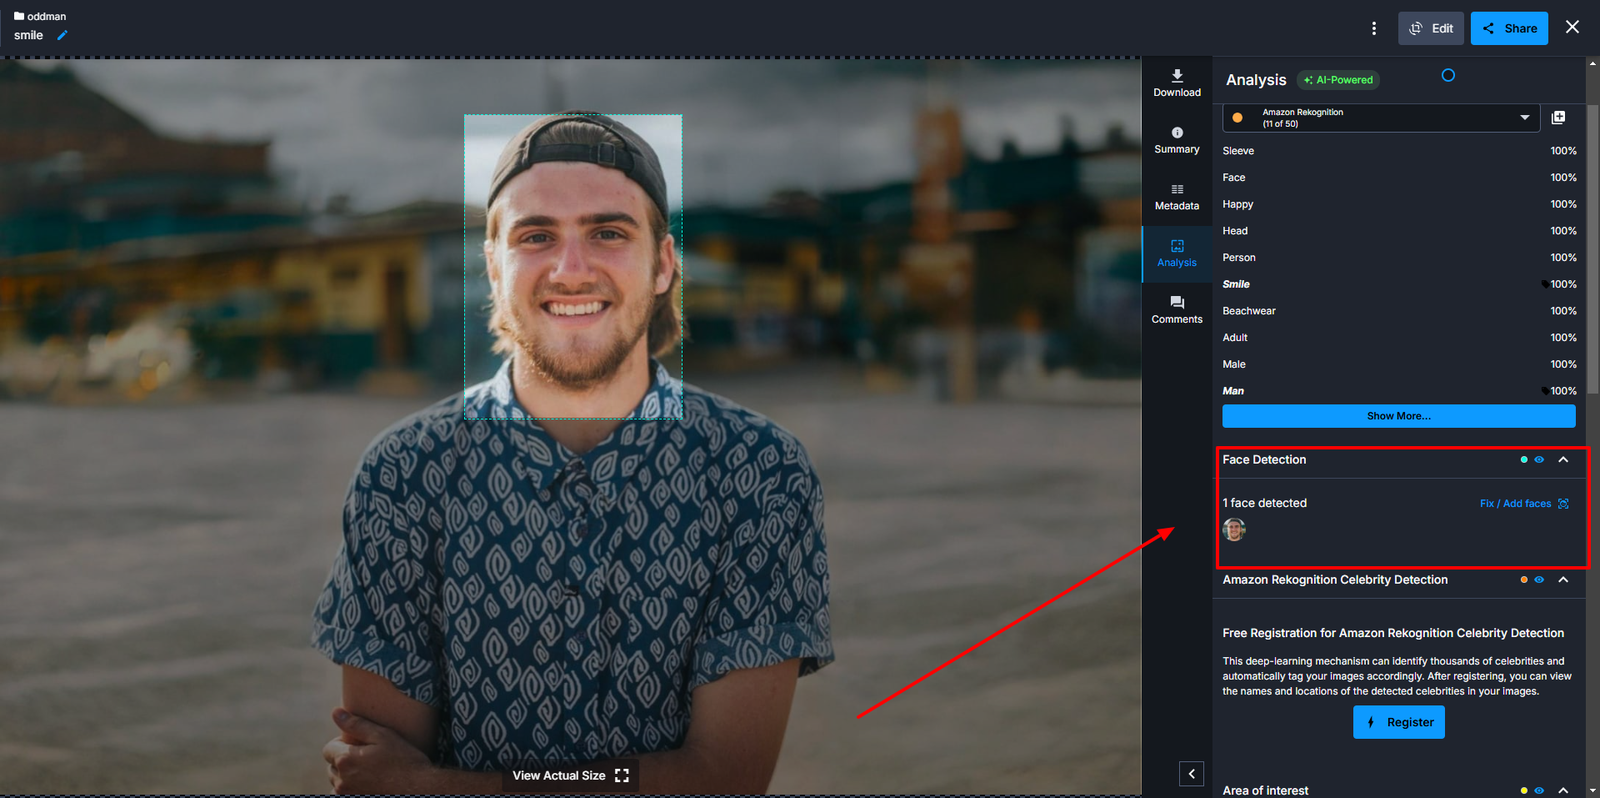
In the analysis, the image was categorized using tags detected in the image, such as “Sleeves”, “Face”, “Happy, Smile”, “Beachwear”, and “Hat”.
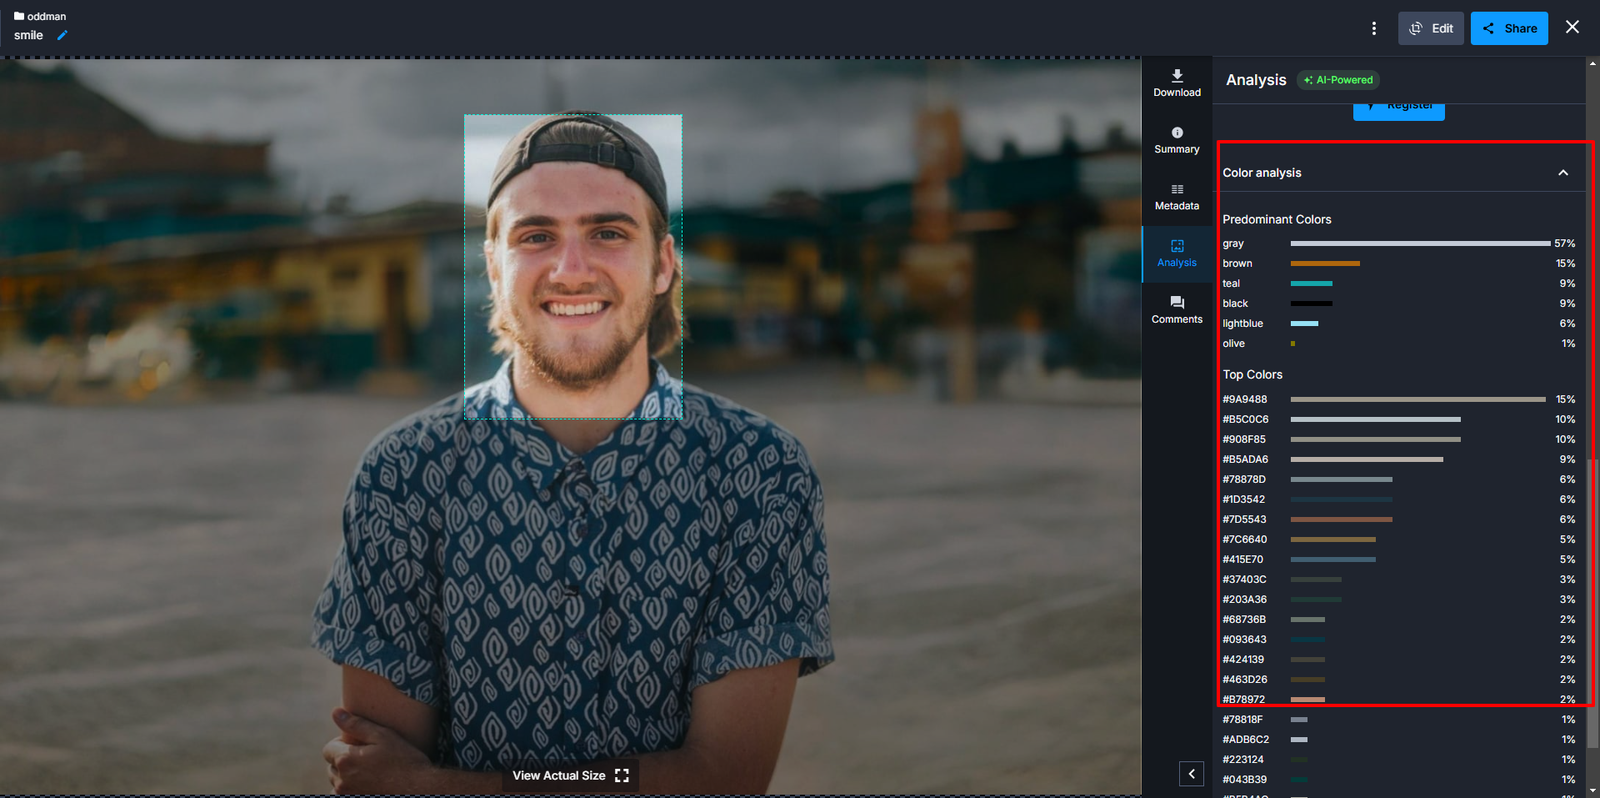
- Colors analysis. This identifies and extracts predominant color palettes from image assets to experiment with various styles to enhance audience engagement.
- Facial recognition. This feature automatically detects and auto-tags human faces to help assess subjects’ positioning and prominence.
- Develop A/B testing variations. Create multiple variations of an asset using the insights provided:
- Test color palettes that match user preferences.
- Experiment with layouts and compositions highlighted by AI analysis.
- Assess how different subject positions or focal points impact user interaction.
- Compare results using integrated analytics tools. Cloudinary‘s analytics tool provides analysis into image performance, such as transformation usage, delivery performance, and bandwidth consumption. Additionally, you can leverage third-party analytics tools that integrate with Cloudinary to measure the performance of each asset variation. These tools can provide metrics to help you identify which assets resonate most with your audience.
- Iterate based on AI-driven analysis. Refine your A/B testing strategy based on the insights gathered. For instance:
- If assets with a specific color palette consistently outperform others, prioritize similar styles in future tests.
- Use facial recognition data to optimize subject placements for better visual impact.
Cloudinary’s AI-powered analysis simplifies A/B testing, converting it from a manual process into a data-driven strategy. By utilizing tools like auto-tagging, color analysis, and facial recognition, you gain valuable analysis to enhance your visual assets for maximum impact.
Cloudinary’s DAM system and innovative tools convert A/B testing from a manual, time-intensive process into a refined data-driven strategy. Whether you’re testing images, videos, or other visual content, Cloudinary provides the tools and insights to improve your campaigns, achieve meaningful results, and stay ahead of the competition.