Imagine landing on an e-commerce page where each product instantly springs to life: You can swipe through high-res images, play looped videos, spin 360-degree views, or even inspect a 3D model without ever leaving the page. Now add AI-powered tagging that automatically categorizes every asset, so your search, filtering, and personalization become effortlessly smart.
That’s exactly what Cloudinary’s interactive Product Gallery + AI tagging delivers.
- Interactive Gallery. A fully customizable visual media carousel supporting images, video, 360-degree spinsets, and 3D models.
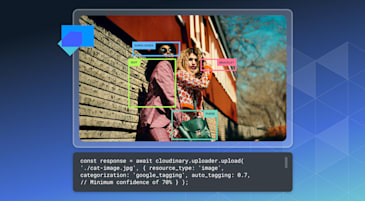
- AI Auto-Tagging. Use Cloudinary’s AWS Rekognition add-on to automatically extract scene categories and save them as tags no manual work required. Read our documentation here.
In this tutorial, you’ll build a Next.js 15 storefront that:
- Boots up a shared Cloudinary URL-Gen client for secure, optimized media URLs.
- Wraps the Product Gallery widget in a client-only component for zero hydration errors.
- Lazily applies Rekognition auto-tagging on first view and caches tags in Cloudinary.
- Exposes an API route and an
<AITags />component to fetch and display those tags as Shadcn-style pills.
Let’s get our Next.js storefront scaffolded and wired up for Cloudinary in just a few commands.
npx  create-next-app@latest  nextjs-cloudinary-storefront
Code language: CSS (css)
Choose the options you prefer (App Router, TypeScript, ESLint, Tailwind, import aliases, etc.).
npm  install  @cloudinary/url-gen  @cloudinary/react  cloudinary  motion  shadcn/ui  lucide-react  sonner
Code language: CSS (css)- @cloudinary/url-gen and @cloudinary/react. Generate and render optimized Cloudinary assets.
- cloudinary. Node SDK for Admin API calls (auto-tagging, metadata).
- motion. Framer-style React animations.
- shadcn/ui. Accessible UI components.
- lucide-react. Lightweight icon set.
- sonner. Toast notifications.
Create a file named .env.local in your project root:
NEXT_PUBLIC_CLOUDINARY_CLOUD_NAME=your-cloud-name
NEXT_PUBLIC_CLOUDINARY_FOLDER=cloudinary-storefront
CLOUDINARY_API_KEY=your_api_key
CLOUDINARY_API_SECRET=your_api_secret
Note: Never commit
.env.local, as it contains your private keys.
Edit next.config.js (or next.config.ts) to whitelist your Cloudinary domain:
/** @type {import('next').NextConfig} */
const nextConfig = {
  images: {
    remotePatterns: [
      {
        protocol: "https",
        hostname: "res.cloudinary.com",
        pathname: `/${process.env.NEXT_PUBLIC_CLOUDINARY_CLOUD_NAME}/**`,
      },
    ],
    formats: ["image/avif", "image/webp"],
  },
};

export default nextConfig;
Code language: JavaScript (javascript)
This ensures Next’s <Image /> optimizer can fetch and cache your Cloudinary assets.
In src/app/layout.tsx, add only the essential <head> snippets:
// src/app/layout.tsx (excerpt)
import Script from "next/script";
export default function RootLayout({ children }) {
return (
<html lang="en" suppressHydrationWarning>
<head>
{/* Preconnect to Cloudinary CDN */}
<link rel="preconnect" href="https://res.cloudinary.com" />
{/* Product Gallery bundle */}
<link
rel="stylesheet"
href="https://product-gallery.cloudinary.com/all.css"
/>
<Script
src="https://product-gallery.cloudinary.com/all.js"
strategy="beforeInteractive"
/>Code language: JavaScript (javascript)What each does:
- Preconnect. Speeds up fetching of Cloudinary-hosted assets.
- Product Gallery CSS. Styles for the interactive gallery widget.
- Product Gallery JS. Core bundle to initialize and render the cloudinary.galleryWidget.
- Upload Widget (opt-in). Enables you to add Cloudinary upload UI later without extra bundling.
-
<model-viewer>. Browser support for displaying GLB/3D models out of the box.
For the full layout component, see layout.tsx on GitHub.
Before we can build a smart product gallery, we’ll need two key helpers:
- A URL generator for rendering optimized, signed Cloudinary assets in the browser.
- A lazy auto-tagger that applies AWS Rekognition the first time we encounter an image.
Let’s set them up.
Create a shared Cloudinary client to generate image and video URLs from your configured account:
// src/lib/cloudinary.ts
import { Cloudinary } from '@cloudinary/url-gen';

export const cld = new Cloudinary({
  cloud: { cloudName: process.env.NEXT_PUBLIC_CLOUDINARY_CLOUD_NAME! },
  url:   { secure: true },
});
Code language: JavaScript (javascript)
Now, anywhere in your app, you can call cld.image('publicId') or cld.video('publicId') and transform it on the fly.
You’ll use this client inside display components like CloudinaryRawGallery or to generate thumbnails or transformations.
Now create src/lib/ensureTags.ts. This file exports a function we’ll call whenever an image appears in the gallery. It checks whether it’s been tagged before. If not, it triggers the AWS Rekognition add-on to extract high-confidence labels and save them as Cloudinary tags.
We’ll start by importing and configuring the Admin SDK:
import { v2 as cloudinary } from "cloudinary";

cloudinary.config({
  cloud_name: process.env.NEXT_PUBLIC_CLOUDINARY_CLOUD_NAME,
  api_key: process.env.CLOUDINARY_API_KEY,
  api_secret: process.env.CLOUDINARY_API_SECRET,
});
Code language: JavaScript (javascript)export async function ensureTags(publicId: string) {
const res = await cloudinary.api.resource(publicId, {
resource_type: "image",
});
const tags = res.tags || [];
const folder = process.env.NEXT_PUBLIC_CLOUDINARY_FOLDER;
// Only tag if the asset only has the folder tag
const isUntagged = tags.length === 1 && tags[0] === folder;
if (!isUntagged) return;
// Trigger Rekognition with a 70% confidence threshold
await cloudinary.api.update(publicId, {
categorization: "aws_rek_tagging",
auto_tagging: 0.7,
});
}
Code language: JavaScript (javascript)- This function gets called from your API or gallery display logic.
- It runs once per asset and avoids redundant tagging calls.
- Once Cloudinary saves tags, they’re cached and instantly available in future fetches.
With our helpers in place, let’s bring your storefront to life with Cloudinary’s Interactive Product Gallery. This widget lets visitors swipe through images, play videos, spin 360° views and inspect 3D models all in one sleek carousel.
In CloudinaryRawGallery.tsx, start by declaring the assets you’ve uploaded to your cloudinary-storefront folder:
const mediaAssets = [
  { publicId: "cloudinary-storefront/iphone_front", mediaType: "image" },
  { publicId: "cloudinary-storefront/iphone_back", mediaType: "image" },
  { publicId: "cloudinary-storefront/iphone_side", mediaType: "image" },
  { publicId: "cloudinary-storefront/iphone_video", mediaType: "video" },
  { publicId: "cloudinary-storefront/iphone", mediaType: "3d" },
];
Code language: JavaScript (javascript)
These publicId entries must match exactly what you see in your Cloudinary Media Library.
Wrap the widget initialization in a React effect so it only runs in the browser:
useEffect(() => {
  const widget = window.cloudinary.galleryWidget({
    container: "#my-gallery",
    cloudName: process.env.NEXT_PUBLIC_CLOUDINARY_CLOUD_NAME,
    mediaAssets,
    displayProps: { spacing: 15, mode: "classic" },
    thumbnailProps: {
      width: 130,
      height: 110,
      navigationFloat: true,
      spacing: 20,
    },
    navigationButtonProps: { shape: "round", size: 52 },
    transition: "fade",
    zoomProps: { level: 1.6 },
    secureDistribution: "res.cloudinary.com",
  });

  widget.on("mediachanged", (ev) => {
    if (ev.public_id) setActiveId(ev.public_id);
  });

  widget.render();
  return () => widget.destroy?.();
}, []);
Code language: JavaScript (javascript)
We’re listening for media changes to update our <AITags /> component with the new publicId.
-
Create a folder called
cloudinary-storefrontin your Cloudinary dashboard. -
Upload at least:
- One high-res image
- One video (MP4)
- One 3D model (
.glbor.gltf)
-
Name each asset’s Public ID to match the entries in your
mediaAssetsarray above.
Once that’s done, your gallery component will automatically display them in the order you defined.
See the full gallery wrapper on GitHub: CloudinaryRawGallery.tsx ›
Before your storefront can display smart, auto-generated tags, you’ll need to enable and configure Cloudinary’s AWS Rekognition add-on, then apply it to your existing assets.
- Log in to your Cloudinary account and open the Media Library.
- In the left sidebar, click App Marketplace > Add-on Marketplace.
- Search for AWS Rekognition Auto-Tagging, then click Enable.
- Verify it appears under Active Add-ons.
Tip: Once enabled, any Admin API calls using
categorization:  'aws_rek_tagging’
Code language: HTTP (http)
will automatically analyze and tag your images.
Familiarize yourself with the available parameters (e.g., confidence thresholds, categorization vs. tagging): https://cloudinary.com/documentation/aws_rekognition_auto_tagging_addon
For any asset you’ve already uploaded, call the Admin API’s update method to run Rekognition and persist high-confidence labels as tags.
// snippet from src/lib/ensureTags.ts (full file on GitHub)
import { v2 as cloudinary } from 'cloudinary';

cloudinary.config({
  cloud_name:  process.env.NEXT_PUBLIC_CLOUDINARY_CLOUD_NAME!,
  api_key:     process.env.CLOUDINARY_API_KEY!,
  api_secret:  process.env.CLOUDINARY_API_SECRET!,
});

await cloudinary.api.update('cloudinary-storefront/my-image', {
  categorization: 'aws_rek_tagging',
  auto_tagging:    0.7,   // only tags ≥70% confidence
});

Code language: JavaScript (javascript)
This will analyze my-image and merge all detected labels (with ≥ 70% confidence) into its tags array.
To automate tagging across your entire cloudinary-storefront folder, run our included CLI script:
chmod  +x  scripts/tag-assets.cjs
npm  run  tag-assets
Under the hood it loops through each public ID and invokes the same Admin API update call.
Next up: We’ll expose those tags via an API route and render them as Shadcn-styled badges in <AITags />.
With Rekognition tags now stored in Cloudinary, it’s time to expose them with an API route and surface them in the frontend UI. We’ll do that in two quick moves:
-
Build
/api/tags. Fetch and merge tags via Cloudinary’s Admin API. -
Show
<AITags />. Render them as colorful badges under each media item.
We’ll start by creating an API route at:
src/app/api/tags/route.ts
This handler accepts a publicId (e.g., cloudinary-storefront/iphone_front) and:
- Queries Cloudinary’s Admin API using
cloudinary.api.resource(...). - Merges
resource.tagswithinfo.categorization.aws_rek_tagging.data. - Returns a deduplicated tag list for your frontend.
const resource = await cloudinary.api.resource(publicId, {
  resource_type: "image",
  with_field: "aws_rek_tagging",
});

const rekTags = (
  resource.info?.categorization?.aws_rek_tagging?.data ?? []
).map((d) => d.tag);

const merged = Array.from(new Set([...(resource.tags || []), ...rekTags]));

return NextResponse.json({ tags: merged });
Code language: JavaScript (javascript)
This gives us both human tags (tags: [‘iphone’, …]) and machine tags (rekTags: [‘Electronics’, …]) in one payload.
Next, we’ll build a component that listens for a changing publicId, fetches the tags via our API route, and displays them as Badge components.
File:
src/components/AITags.tsx
The core idea:
useEffect(() => {
  if (!publicId) return;

  fetch(`/api/tags?publicId=${encodeURIComponent(publicId)}`)
    .then((res) => res.json())
    .then((data) => setTags(data.tags ?? []));
}, [publicId]);
Code language: JavaScript (javascript)
Then map those tags into stylish Shadcn <Badge> pills:
tags.map((t, i) => (
  <Badge key={t} className={`${COLORS[i % COLORS.length]} capitalize`}>
    {t}
  </Badge>
));
Code language: JavaScript (javascript)
The result: Your UI auto-updates to show fresh AI tags as users interact with the Product Gallery.
Next, you’ll need to hook everything up in page.tsx
At this point:
- You’ve configured Cloudinary and Rekognition.
- You’ve built a dynamic product gallery.
- You’ve exposed an API for fetching AI tags.
- You’ve styled the tags with Shadcn
<Badge>components.
Now it’s time to bring it all together on the homepage.
Open (or create):
src/app/page.tsx
This is your root landing page in a Next.js 15 app using the App Router.
All you need to do is import your wrapped Product Gallery component:
import  {  CloudinaryRawGallery  }  from  "@/components/CloudinaryRawGallery";
Code language: JavaScript (javascript)
Render it inside a centered layout:
<main className="container mx-auto px-4 py-14 space-y-10">
  <h1 className="text-3xl font-bold">Interactive Storefront Demo</h1>
  <CloudinaryRawGallery />
</main>;
Code language: HTML, XML (xml)
From here:
- The Cloudinary Product Gallery loads your images, video, and 3D assets.
- The currently visible asset updates
publicIdstate. -
<AITags />fetches and shows its AI-generated tags in real time.
It looks slick and works instantly with no hydration issues, no manual tagging.
You’ve just built a smart, immersive Next.js storefront that goes beyond static product displays:
- AI-powered tagging with AWS Rekognition.
- Cloudinary’s Interactive Product Gallery (images, video, 360-degree spinsets, 3D).
- Lazy auto-tagging on first view via
ensureTags.ts. - Shadcn/UI badge display with searchable, reusable tags.
- Admin API and App Router integration using modern
route.tsfiles.
Together, these features create an experience that’s not just visually rich, but also semantically aware.
Sign up for a free Cloudinary account today to get started.
- GitHub Repository: musebe/nextjs-cloudinary-storefront
- Live Demo: nextjs-cloudinary-storefront.vercel.app