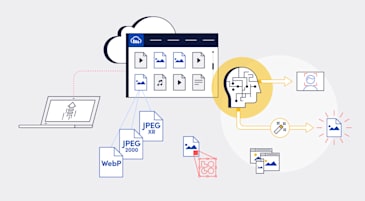
With more than one billion people using WhatsApp, the platform is becoming a go-to for reliable and secure instant messaging. Having so many users means that data transfer processes must be optimized and scalable across all platforms. WhatsApp technology is touted for its ability to achieve significant media quality preservation when traversing the network from sender to receiver, and this is no easy feat to achieve.
In this post, we will build a simple clone of WhatsApp with a focus on showcasing the background image upload process using Cloudinary’s Android SDK. The app is built using Pusher to implement real-time features.
We’ll do this in two parts, first we’ll build the app with primary focus on the file upload and delivery with Cloudinary. Then in the second part, we’ll show how to apply Cloudinary’s transformation and optimization features to the images.
To continue with the project, we’ll work on the assumption that you’re not new to Android development and you’ve worked with custom layouts for CompoundViews(a ListView in this case). If you have not, then check out this tutorial.
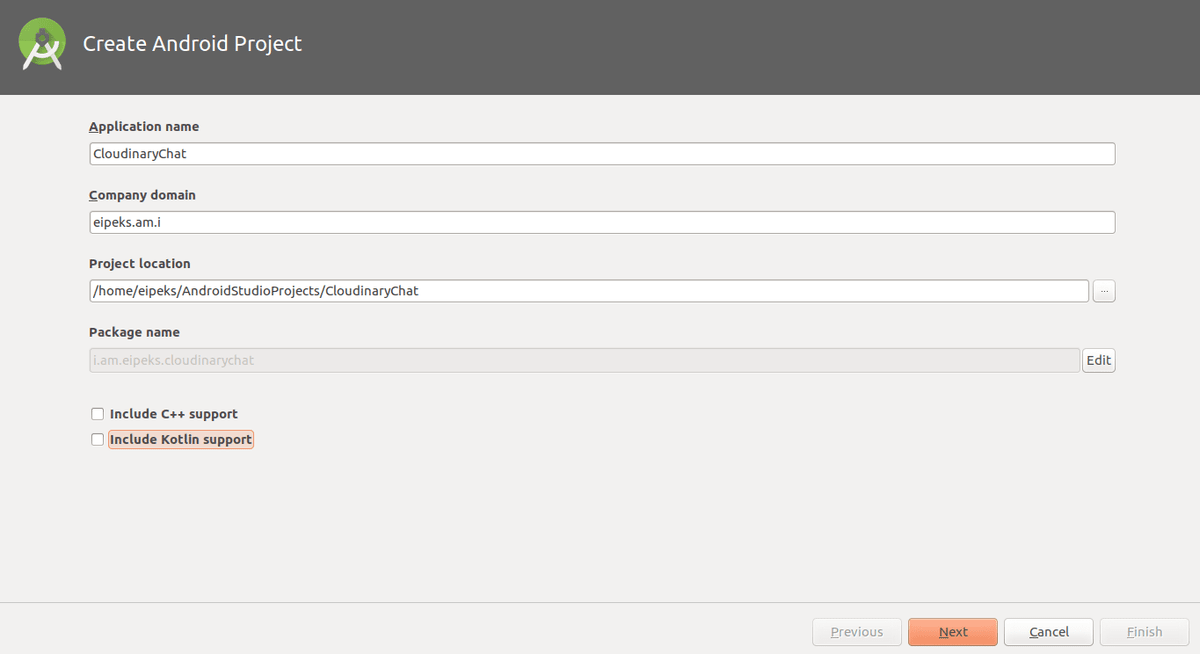
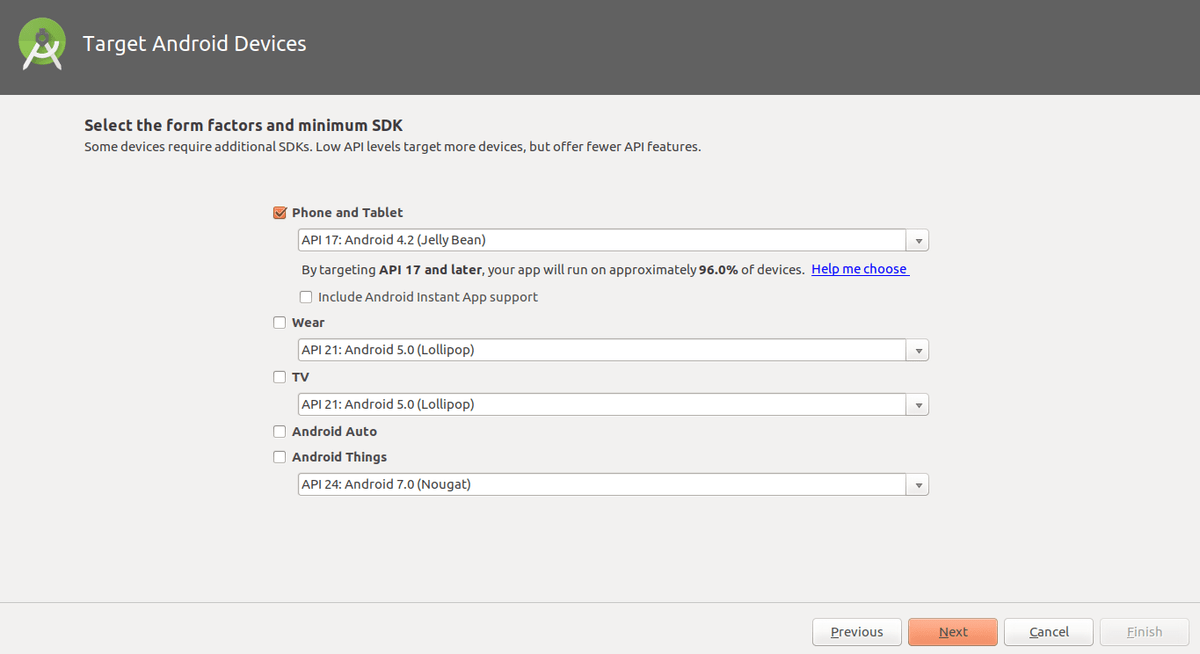
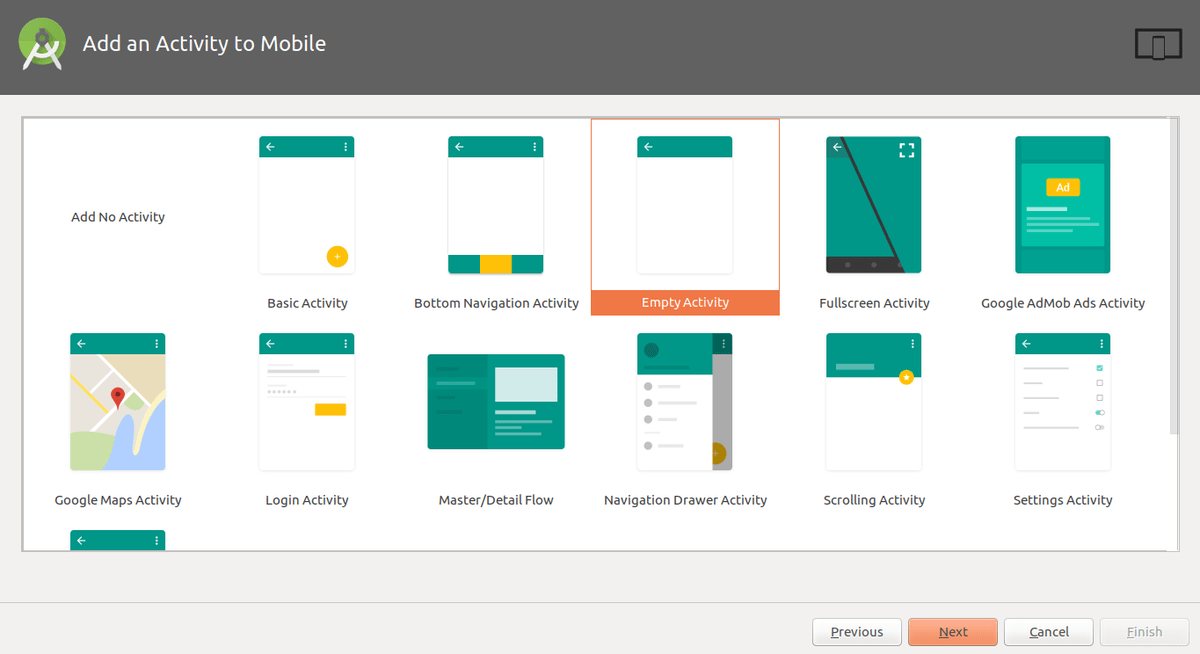
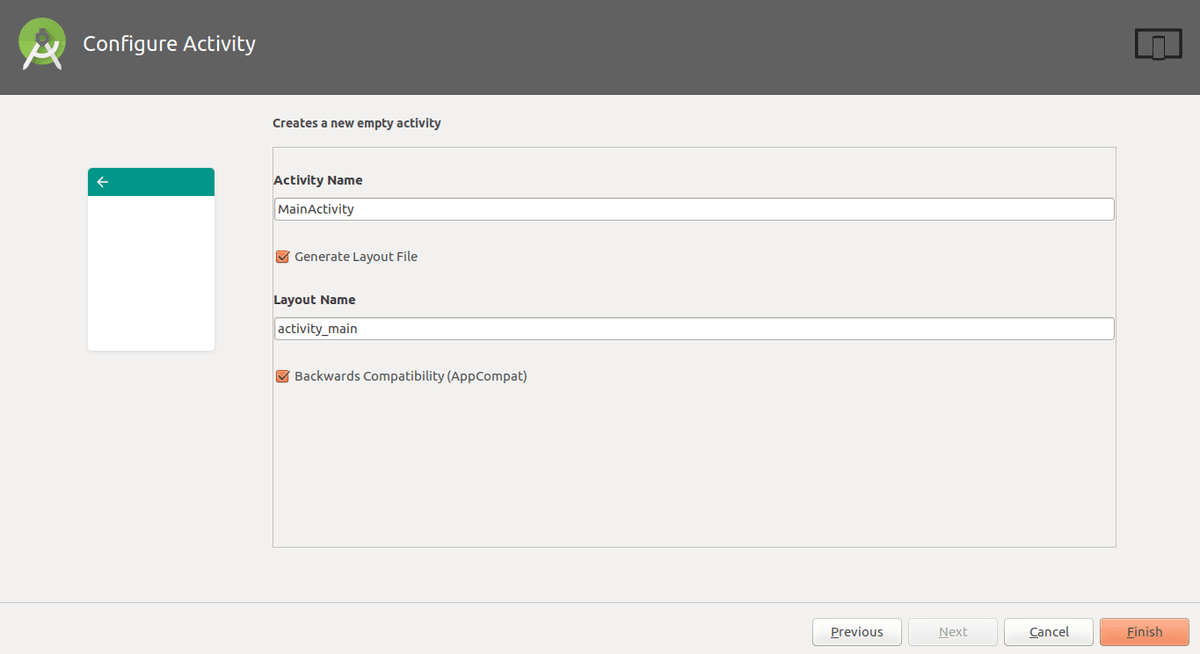
Follow the pictures below to set up your Android project.
For this tutorial, we will be using a number of third-party libraries including:
- Cloudinary Android SDK.
- Pusher Android SDK
- Picasso for asynchronous image loading
- Retrofit for making asynchronous HTTP requests
Open up your app level build.gradle file, add the following lines and sync your project :
implementation group: 'com.cloudinary', name: 'cloudinary-android', version: '1.22.0'
implementation 'com.pusher:pusher-java-client:1.5.0'
implementation 'com.squareup.retrofit2:converter-gson:2.3.0'
implementation 'com.squareup.retrofit2:retrofit:2.3.0'
implementation 'com.squareup.picasso:picasso:2.5.2'
Code language: JavaScript (javascript)
Before you proceed, create Cloudinary and Pusher accounts. You will need your API credentials to enable communication between your app and Cloudinary’s servers.
Open the AndroidManifest.xml file and add the following snippet:
<application...>
      ....
      <meta-data android:name="CLOUDINARY_URL"
      android:value="cloudinary://@myCloudName"

</application>
Code language: PHP (php)
The metadata tag will be used for a one-time lifecycle initialization of the Cloudinary SDK.
Replace the myCloudName with your cloud name, which can be found on your Cloudinary dashboard.
Next, you need to create a web server with your Pusher credentials to handle your HTTP requests. You can get them from your account dashboard.
Here’s a breakdown of what the server should do:
- The app sends a message via HTTP to the server
- Server receives message and emits a pusher event
- The app then subscribes to the Pusher event and updates view
Here’s a basic example using Node.js :
// Import Dependencies
const Express = require('express');
const bodyParser = require('body-parser');
const cors = require('cors');
const low = require('lowdb');
const FileSync = require('lowdb/adapters/FileSync');
const uuid = require('uuid/v4');
const Pusher = require('pusher');
const pusher = new Pusher({
  appId: 'APP_ID',
  key: 'APP_KEY',
  secret: 'APP_SECRET',
  cluster: 'us2',
  encrypted: true
});
// Create an Express app
const app = Express();
// Configure middleware
app.use(cors());
app.use(bodyParser.urlencoded({ extended: false }));
app.use(bodyParser.json());
// Configure database and use a file adapter
const adapter = new FileSync('db.json');
const db = low(adapter);
// Choose a port
app.set('port', process.env.PORT || 8050);
app.post('/messages', (req, res) => {
  // Assemble data from the requesting client
  // Also assign an id and a creation time
  const post = Object.assign({}, req.body, {
    id: uuid(),
    created_at: new Date()
  });
  // Create post using `low`
  db
    .get('messages')
    .push(post)
    .write();
  // Respond with the last post that was created
  const newMessage = db
    .get('messages')
    .last()
    .value();
  pusher.trigger('messages', 'new-message', newMessage);
  res.json(newMessage);
});
// Listen to the chosen port
app.listen(app.get('port'), _ => console.log('App at ' + app.get('port')));
Code language: PHP (php)
With that set, we are ready to start building the app. Let’s begin by customizing the xml files to suit our needs.
Open activity_chat.xml file and change its content to the one in the repository
Since we’re using ListView to show our chats, we need to create a custom ListView layout. So create a new layout resource file “`message_xml` “ and modify its content to feature the necessary view objects required to achieve the chat view.
Next, add two vector assets. We won’t be covering how to do that here. But you can check the official Android documentation on how to do it. Now our XML files are good to go. Next, we have to start adding the application logic.
To achieve the desired functionalities of the app, we’ll create two Java Classes M``essage and ListMessagesAdapter and an interface called Constants
So create a new java class called M``essage and modify its contents as:
public class Message {
    public String messageType, message, messageTime, user, image;
}
Code language: PHP (php)
Once that’s done, create the Adapter Class and modify its contents as well :
public class ListMessagesAdapter extends BaseAdapter {
private Context context;
private List<Message> messages;
public ListMessagesAdapter(Context context, List<Message> messages){
    this.context = context;
    this.messages = messages;
}
@Override
public int getCount() {
    return messages.size();
}
@Override
public Message getItem(int position) {
    return messages.get(position);
}
@Override
public long getItemId(int position) {
    return position;
}
public void add(Message message){
    messages.add(message);
    notifyDataSetChanged();
}
@Override
public View getView(int position, View convertView, ViewGroup parent) {
    if (convertView == null){
        convertView = LayoutInflater.from(context).inflate
        (R.layout.message_layout, parent, false);
    }
    TextView messageContent = convertView.findViewById(R.id.message_content);
    TextView timeStamp = convertView.findViewById(R.id.time_stamp);
    ImageView imageSent = convertView.findViewById(R.id.image_sent);
    View layoutView = convertView.findViewById(R.id.view_layout);
    Message message = messages.get(position);
    if (message.messageType.equals(Constants.IMAGE)){
        imageSent.setVisibility(View.VISIBLE);
        messageContent.setVisibility(View.GONE);
        layoutView.setBackgroundColor(context.getResources().getColor
        (android.R.color.transparent));
        timeStamp.setTextColor(context.getResources().getColor
        (android.R.color.black));
        Picasso.with(context)
                .load(message.image)
                .placeholder(R.mipmap.ic_launcher)
                .into(imageSent);
    } else {
        imageSent.setVisibility(View.GONE);
        messageContent.setVisibility(View.VISIBLE);
    }
    timeStamp.setText(message.user);
    messageContent.setText(message.message);
    return convertView;
}
}
// updating the ListView.
public void add(Message message){
    messages.add(message);
    notifyDataSetChanged();
}
/**
This method adds a new item to our List<Messages> container and subsequently
notifies the ListView holding the adapter of the change by calling the
“notifyDataSetChanged()” method.
**/
Code language: PHP (php)
Finally, let’s create an interface for our constant values:
public interface Constants {
    String PUSHER_KEY = "*******************";
    String PUSHER_CLUSTER_TYPE = "us2";
    String MESSAGE_ENDPOINT = "https://fast-temple-83483.herokuapp.com/";
    String IMAGE = "image";
    String TEXT = "text";
    int IMAGE_CHOOSER_INTENT = 10001;
}
Code language: JavaScript (javascript)
The interface file contains variables we will make reference to later in other classes. Having your constant values in the same class eases access to them. One crucial thing to note is that you need your own PUSHER_KEY (you can get it from your profile dashboard on Pusher) and MESSAGE_END_POINT(representing your server link).
Next, open your MainActivity.java file. Add the following method to your onCreate(``) method:
@Override
protected void onCreate(Bundle savedInstanceState){
  ...
  MediaManager.init(this)
}
Code language: CSS (css)
The entry point of the Cloudinary Android SDK is the MediaManager class. MediaManager.init(this) initiates a one-time initialization of the project with the parameters specified in our metadata tag earlier on. Suffice to say, this initialization can only be executed once per application lifecycle.
Another way to achieve this without modifying the AndroidManifest.xml file is to pass an HashMap with the necessary configuration details as the second parameter of the MediaManager.init() method:
Map config = new HashMap();
config.put("cloud_name", "myCloudName");
MediaManager.init(this, config);
Code language: JavaScript (javascript)
For this project, we will be sticking with the former method since we already modified our AndroidManifest.xml file.
It’s time to configure our Pusher library. Add the following lines of code to your onCreate() method below.
PusherOptions options = new PusherOptions();
options.setCluster(Constants.PUSHER_CLUSTER_TYPE);
Pusher pusher = new Pusher(Constants.PUSHER_KEY, options);
Channel channel = pusher.subscribe("messages");
Code language: JavaScript (javascript)
The snippet above is self explanatory.
messages is the name of the channel you created in your server. Now, we need to subscribe to an event in the messages channel. Hence, we’ll subscribe to the new-message event.
channel.bind("new-message", new SubscriptionEventListener() {
    @Override
    public void onEvent(String channelName, String eventName, final String data) {
        /..../
    }
});
pusher.connect();
Code language: JavaScript (javascript)
Now, we have successfully tagged to our messages channel and subscribed to the new-messag****e event. So, each time we send an HTTP request to the server, it redirects it to Pusher and we get notified of this “event” in our app, and we can then react to it appropriately in the onEvent(…) method.
Before we continue, we need to initialize the Retrofit library to communicate with our server.
To do this, we will create to Java files:
- RetrofitUtils
- Upload(an Interface)
Modify the the RetrofitUtils.java file :
public class RetrofitUtils {
    private static Retrofit retrofit;
    public static Retrofit getRetrofit(){
        if (retrofit != null){
            return retrofit;
        }
        retrofit = new Retrofit.Builder()
                .baseUrl(Constants.MESSAGE_ENDPOINT)
                .addConverterFactory(GsonConverterFactory.create())
                .build();
        return retrofit;
    }
}
Code language: PHP (php)
In the Upload.java file, we also set it up as so:
public interface Upload {
    @FormUrlEncoded
    @POST("messages")
    Call<Void> message(@Field("message") String message, @Field("user")
    String user);
    @FormUrlEncoded
    @POST("messages")
    Call<Void> picture(@Field("message") String message, @Field("user")
    String user, @Field("image") String imageLink);
}
Code language: JavaScript (javascript)
This is not a Retrofit tutorial, so I won’t be covering the basics of using the library. There are a number of Medium articles that provide those details. But you can check this article from Vogella or this one by Code TutsPlus. What you need to know, however, is the reason we are making two POST requests. The first POST request will be triggered in the case the user sends only a text. The second will be triggered in the case of picture upload.
Hence we’ll use this second POST request to handle this part of the tutorial for Image Upload and Delivery using Cloudinary.
Now we’ll start adding the logic and discussing how to achieve the Android file upload features using the Cloudinary account we’ve set up.
Given the code complexity of this part, we’ll be walking through it with snippets and providing explanations as we go. To handle the image upload features, we’ll head back to the MainActivity.java file and set it up the onClick() method :
case R.id.load_image:
  Intent  chooseImage = new Intent();
  chooseImage.setType("image/*");
  chooseImage.setAction(Intent.ACTION_GET_CONTENT);
  startActivityForResult(Intent.createChooser(chooseImage, "Select Picture"), Constants.IMAGE_CHOOSER_INTENT);
  break;
Code language: JavaScript (javascript)
Here we sent an implicit intent for images upload. This would pop up a new activity to select pictures from your phone. Once that is done, we want to get the details of the selected image. This is handled in the onActivityResult(…) method. Here’s how we set up the method:
@override
protected void onActivityResult(int requestCode, int resultCode, Intent data) {
super.onActivityResult(requestCode, resultCode, data);
if (requestCode == Constants.IMAGE_CHOOSER_INTENT && resultCode == RESULT_OK){
    if (data != null && data.getData() != null){
        uri = data.getData();
        hasUploadedPicture = true;
        String localImagePath = getRealPathFromURI(uri);
        Bitmap bitmap;
        try {
            InputStream stream = getContentResolver().openInputStream(uri);
            bitmap = BitmapFactory.decodeStream(stream);
            localImage.setVisibility(View.VISIBLE);
            localImage.setImageBitmap(bitmap);
        } catch (FileNotFoundException e) {
            e.printStackTrace();
        }
        imagePath = MediaManager.get().url().generate(getFileName(uri));
        typedMessage.setText(localImagePath);
    }
}
}
Code language: JavaScript (javascript)
Next we set up a method that will be triggered whenever the user selects an image. Once this method executes, we will have the URI of the selected image stored in the “uri” variable. We monitor the image upload with hasUploadedPicture variable. This will be useful in determining which upload interface method to trigger. so we set it up as:
@Override
public void onClick(View v) {
    switch (v.getId()){
        case R.id.send:
//                makeToast("Send clicked");
            if (hasUploadedPicture){
//                unsigned upload
                String requestId = MediaManager.get()
                  .upload(uri)
                  .unsigned("sample_preset")
                  .option("resource_type", "image")
                  .callback(new UploadCallback() {
                    @Override
                    public void onStart(String requestId) {
                        makeToast("Uploading...");
                    }
                    @Override
                    public void onProgress(String requestId, long bytes,
                                           long totalBytes) {
                    }
                    @Override
                    public void onSuccess(String requestId, Map resultData) {
                        makeToast("Upload finished");
                        imagePath = MediaManager.get().url()
                        .generate(resultData.get("public_id").toString()
                        .concat(".jpg"));
                        uploadToPusher();
                    }
                    @Override
                     public void onError(String requestId, ErrorInfo error) {
                        makeToast("An error occurred.\n" + error
                        .getDescription());
                    }
                    @Override
                     public void onReschedule(String requestId,
                                              ErrorInfo error) {
                        makeToast("Upload rescheduled\n" + error
                        .getDescription());
                }).dispatch();

            } else {
                upload.message(typedMessage.getText().toString(), "Eipeks"
                ).enqueue(new Callback<Void>() {
                @Override
                public void onResponse(@NonNull Call<Void> call,
                                       @NonNull Response<Void> response) {
                     switch (response.code()){
                      case 200:
                      typedMessage.setText("");
                      break;
                }
            }
                @Override
                public void onFailure(@NonNull Call<Void> call,
                @NonNull Throwable t) {
                   Toast.makeText(Chat.this, "Error uploading message",
                   Toast.LENGTH_SHORT).show();
                }
            });
         }
         break;
      case R.id.load_image:
         Intent  chooseImage = new Intent();
         chooseImage.setType("image/*");
         chooseImage.setAction(Intent.ACTION_GET_CONTENT);
         startActivityForResult(Intent.createChooser(
         chooseImage, "Select Picture"),
         Constants.IMAGE_CHOOSER_INTENT);
         break;
  }
}
Code language: JavaScript (javascript)
At this point we have the URI of the selected image stored in the uri variable and the hasUploaded variable should now let us know whether the image upload was successful or not. With this information, we can head on back to the onClick method and upload the selected image to pusher:
@Override
public void onClick(View v) {
    switch (v.getId()){
        case R.id.send:
//                makeToast("Send clicked");
            if (hasUploadedPicture){
                String requestId = MediaManager.get()
                .upload(uri)
                .unsigned("myPreset")
                .option("resource_type", "image")
                .callback(new UploadCallback() {
                      @Override
public void onStart(String requestId) {
   makeToast("Uploading...");
}
.........
Code language: JavaScript (javascript)
To further explain what went on here, it is worth noting that this method is used for building our image upload request. It contains five synchronized methods:
- get()
- upload()
- option()
- callback()
- dispatch()
-
upload()is an overloaded method however, we’ll be usingupload(Uri uri)since we already have the uri of the image we want to upload.
We need to set an unsigned upload preset to upload images to our cloud without a secret key.
-
option()takes in two parameters:nameandvalueIf you are uploading a video, then your value will be video instead of image. -
callback()method. This method is used in tracking the progress of the upload. We are using theUploadCallback(){…}as its method -
onSuccess()method is triggered upon successful completion of the the media upload. This method contains two parameters:String requestIdandMap resultData
The resultData contains information about the uploaded picture. The information we need is the uniquely generated picture name, which can be accessed from the resultData using the public_id as the key.
Cloudinary also enables unique url() generation for easy access of the uploaded picture. That’s what we achieved with this bit of code
imagePath = MediaManager.get().url().format("webp"). generate(resultData.get("public_id"));
Code language: JavaScript (javascript)
The line ensures that we can access the image we’ve uploaded using the Retrofit library. With this, we then call the uploadToPusher() method.
private void uploadToPusher(){
    upload.picture(typedMessage.getText().toString(), "Eipeks", imagePath)
        .enqueue(new Callback<Void>() {
            @Override
            public void onResponse(@NonNull Call<Void> call,
                                   @NonNull Response<Void> response) {
                switch (response.code()){
                    case 200:
                        localImage.setVisibility(View.GONE);
                        typedMessage.setText("");
                        break;
                }
            }
            @Override
           public void onFailure(@NonNull Call<Void> call, @NonNull Throwable t) {
               Toast.makeText(Chat.this, "Failed to upload picture\n" +
               t.getLocalizedMessage(), Toast.LENGTH_SHORT).show();
           }
        });
}
Code language: JavaScript (javascript)
Once this method executes, our HTTP requests reaches the server, which in turn redirects the information we’ve uploaded to Pusher. This information goes to the “messages” channel. Since, we have subscribed to the “new-messages” event, our application is notified of this event. All that’s left is for our app to react appropriately to this event. Next, we will modify our onEvent() method.
@Override
public void onEvent(String channelName, String eventName, final String data) {
    Gson gson = new Gson();
    final Message message = gson.fromJson(data, Message.class);
    if (hasUploadedPicture){
        message.messageType = Constants.IMAGE;
    } else {
        message.messageType = Constants.TEXT;
    }
    hasUploadedPicture = false;
    messages.add(message);
    runOnUiThread(new Runnable() {
        @Override
        public void run() {
            messagesList.setSelection(messagesList.getAdapter().getCount() - 1);
        }
    });
}
Code language: JavaScript (javascript)
This brings us to the end of this part of this tutorial, on the next part we’ll be discussing how to manipulate our uploaded images with Cloudinary to add transformations and optimizations. Here’s an image showing how the image upload works thus far:
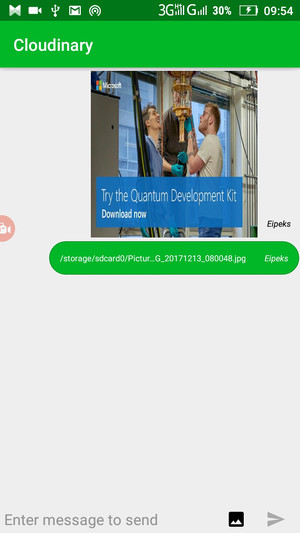
Feel free to check the official documentation here. The source code for the project is on GitHub. In the next part of this article, we will cover how uploaded images can be transformed and what we can get from Cloudinary’s optimization features.
- Automating File Upload and Sharing
- Uploading PHP Files and Rich Media the Easy Way
- AJAX File Upload – Quick Tutorial & Time Saving Tips
- Impressed by WhatsApp technology? Clone WhatsApp Technology to Build a File Upload Android App
- Direct Image Uploads From the Browser to the Cloud With jQuery
- File Upload With Angular to Cloudinary
- Uploading Vue Files and Rich Media in Two Easy Steps
- Node.js File Upload To a Local Server Or to the Cloud
- Laravel File Upload to a Local Server Or to the Cloud
- JavaScript File Upload in Two Simple Step