
Typically, with Cloudinary, you want to do two complementary things for a remarkable user experience: save bandwidth and load your site as fast as possible because the smaller the sizes of the resources, the faster your site loads. And it’s been proven time and again that the longer your site takes to load, the smaller the number of visitors who will return. No matter whether you’re a developer or content creator, you will find Cloudinary’s tools that optimize digital media (aka digital assets) simple, intuitive, and effective.
Below are 10 tips for using Cloudinary that are sure to reduce page-loading times and make your audience happy.

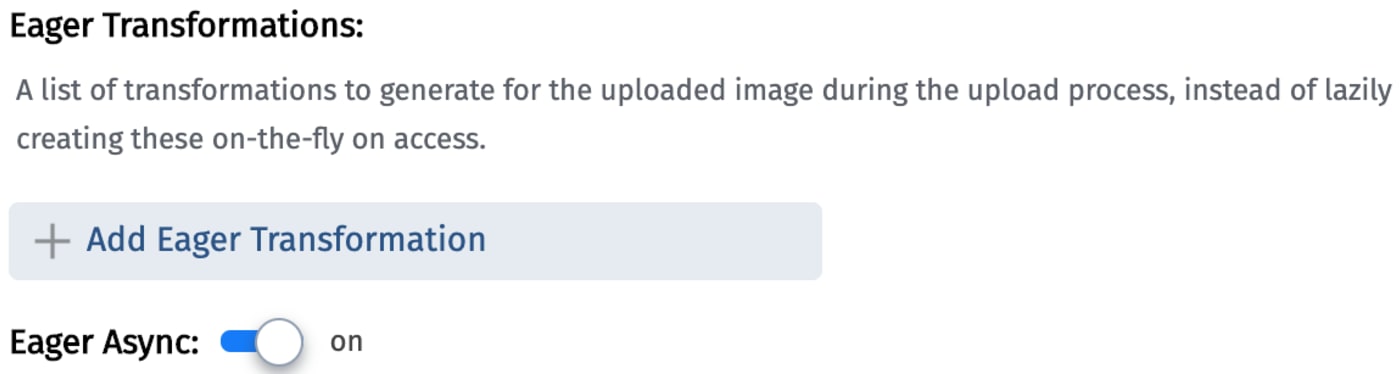
Whenever a transformation is requested for the first time, Cloudinary generates it on the fly. Compared to subsequent pre-generated and cached requests, that initial request always takes longer to fulfill. Plus, loading times depend on other factors, such as the original file size, the requested dimensions, and the applied effects. In light of all that, why not generate eager transformations ahead of time? Do that in either of these two ways:
- In the Media Library with upload presets. Here, you specify the desired eager transformations in the upload call. A good practice is to turn on Eager Async to have the transformations occur in the background instead of as part of the upload call itself.
-
In the
uploadAPI. Here, you generate eager transformations with theuploadmethod and, in the case of pre-existing resources, theexplicitmethod. See this example:
At times, developers load original images on to a page and then resize on the client side with CSS. You want to avoid this because not only would you increase the page-loading time by loading larger assets, but you’d also waste your and your users’ bandwidth. Besides, you might lose the images’ main focus with CSS resizing.
Instead, generate using Cloudinary img or video tags in HTML with the desired dimensions and then embed the transformed images or videos in your site with a simple call to the cl_image_tag or cl_video_tag methods.
For example, calling
cl_image_tag(“sample.jpg”, :width=>300, :height=>100, :crop=>”scale”)
Code language: JavaScript (javascript)
results in this HTML code
<img src=”https://res.cloudinary.com/demo/image/upload/w_300,h_100,c_scale/sample.jpg”>
The requirements for optimal display of images vary, depending on the browser. For example, you could potentially deliver a further compressed image by delivering the WebP version instead of a JPG when rendering it on Chrome. Fulfilling that requirement is a breeze with Cloudinary, which detects what browser is requesting the image, automatically converting the image to the optimal format or delivering it as-is if no format optimizations are required. Please note that using f_auto may result in the generation of up to 4 transformations per image (original format, webp, awebp and wdp) depending on which formats are requested.
For example, to apply f_auto to your image, it’s this simple:
With q_auto applied to your images, Cloudinary automatically analyzes them, ultimately delivering a version with the optimal quality and file compression level as well as encoding settings—with no detectable changes in visible quality.
Here’s an example of an image URL with q_auto applied:
 Original – 1.49 MB
 q_auto – 929.63 KB
When applying any transformations to your images, Cloudinary further optimizes them by performing the pertinent tasks, such as metadata stripping and more. No manual effort is required.
You can specify auto for the format and quality transformations, in which case Cloudinary applies the optimum algorithms. Alternatively, specify a quality level; the default is 80.
The user interface can’t be more straightforward:.

With Cloudinary’s smart-cropping capability, available with the Object-Aware Cropping add-on, you can pick from a list of supported categories and objects what to focus on in your image, optionally applying transformations afterwards. You can specify an object (such as handbag, cake, motorbike) or an object category (such as electronic, appliance, sports) to set as the focal point of the image.
Here you can see the difference between our g_auto:classic and new g_auto:bicycle:
 Original
 g_auto:classic
 g_auto:bicycle
Viewing high-quality images often requires longer page loading times, which can cause users to shy away from. To alleviate that scenario, when lazy-loading images, save bandwidth and loading time by using Cloudinary to generate Low Quality Image Placeholders (LQIP). This way you won’t load your high-quality images unless they’re coming into the viewport.
Below are two examples:
A low-quality, blurry image, about 1 KB in size. The original size is 486.91 KB.

An SVG placeholder using our e_vectorize feature, about 1 KB in size. The original size is 397.33 KB.

To make it easier for search engines to index and rank your site, ensure that your image URLs having meaningful public IDs. An example being the following image which uses the public ID “basketball_shot” to give an accurate depiction of what the image is, thus making it easier to index. You can also shorten the path of the image by deleting the default image/upload portion of the URL as so:
Alternatively, if you use non-descriptive public IDs, replace image/upload with images to utilize Cloudinary’s dynamic SEO suffixes that allow for multiple descriptions. In the examples below, both images have the public ID “ltepu4mm0qzw6lkfxt1m” but are still able to describe the image in two different languages allowing for further indexing:
Image with a dynamic SEO suffix

Image with a dynamic SEO suffix in Spanish
Furthermore, if you’d like your images to be delivered under your company’s domain, you can set up a CNAME, such as cdn.example.com. Please note that CNAMEs are available on the Advanced plan and up.
Cloudinary’s Adaptive Bitrate Streaming (ABS) capability adjusts video quality in real time to deliver the best-possible quality for the current viewing device and network connection. You can then—
- Eliminate buffering time.
- Save bandwidth by displaying a lower-resolution video to keep the audience engaged if the network connection is too weak to display the high-resolution version.
As an example, the following code eagerly and asynchronously generates the video “big_buck_bunny.mp4” in HLS format, one of the two supported adaptive streaming formats, using the “full_hd” streaming profile.
Note that you want to deliver the video using the corresponding file format, such as .m3u8 (HLS) here, and include the streaming profile (sp_
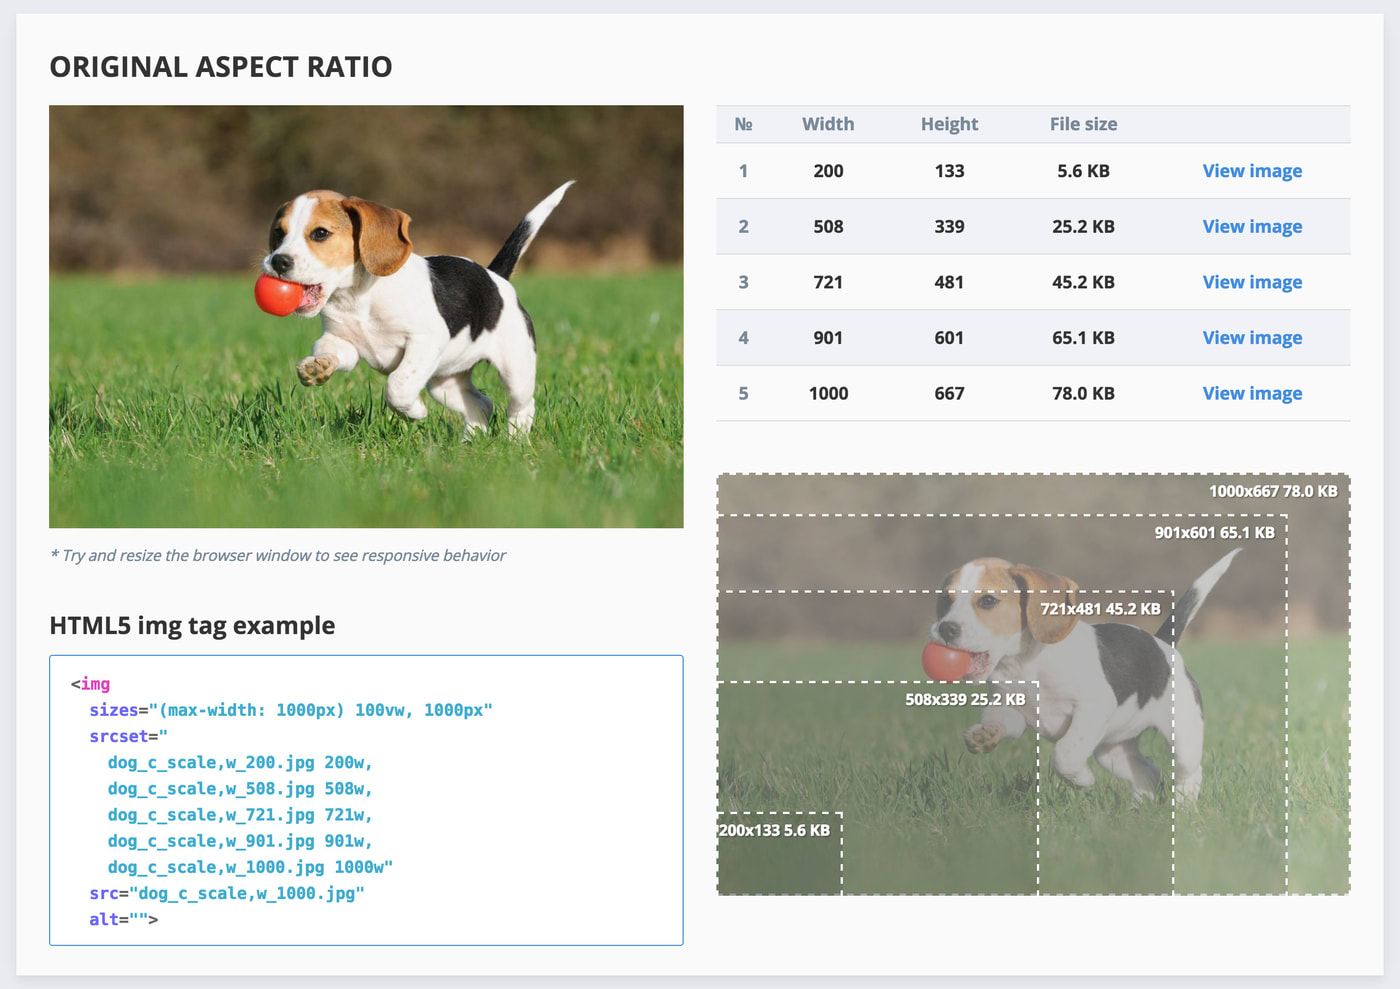
By using Cloudinary’s breakpoints you can utilize responsive viewing by generating a defined number of images to match the image width and DPR of each device requesting your images. The closest sized image will then be delivered to each device based on the viewing width detected for that device. You can do this by defining the number of steps in bytes to take per image, the maximum and minimum widths for your images, and the maximum number of images to be generated, as in this example:
This code generates at most 20 images starting at the minimum width of 200, increasing the size by the specified 20000 bytes per image with the max width of the largest image being no larger than the specified 1000 max width.
Additionally, Cloudinary’s responsive breakpoint generator creates an HTML5 img, which you can copy paste into your code to easily embed in your site. The srcset attribute of the img tag is set to list the image versions and width values according to the selected breakpoints. See this example of the generated img tag matching the calculated images:
Cloudinary delivers as advertised. Do familiarize yourself with the above tips; you’ll marvel at the impressive results.
- Learn the top 10 mistakes made with website images that increase your site load time – and how you can solve them for faster site performance.
- Discover the 10 top website video challenges for developers and how they can be solved for faster website performance and load times.
- With Cloudinary, mobile optimization is simple, not only reducing your mobile page loading speed, but also improving your SEO and boosting customer experience.