
Remix is a full-stack React framework for building web applications that provides several useful features such as server-side rendering, file-system-based routing, TypeScript support, built-in support for cookies and sessions, and more.
In this article, we will build an e-commerce product gallery with Remix and Cloudinary’s Product Gallery widget.
The completed project is on CodeSandbox. Fork it and run the code.
The source code is also available on GitHub.
Knowledge of React, Remix, and a Cloudinary account is required to get the most out of this article.
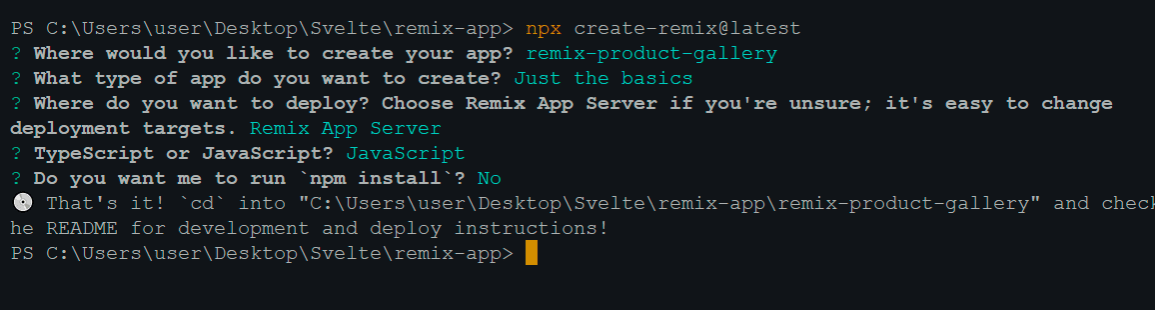
Run the command below in the terminal to set up a new Remix application.
npx create-remix@latest
Code language: CSS (css)
The command above triggers a command-line interface (CLI) where we can configure the application. The images below show the configuration options the CLI provides:
Next, navigate into the project directory.
cd remix-product-gallery
Then, run the command below to start the application.
npm run dev
Navigate to the Media Library section of the Cloudinary dashboard and create a new folder called image gallery.

Upload some images into the image gallery folder.

We can dynamically display images, videos, 3D models, and 360-degree animations on our websites using Cloudinary’s Product Gallery widget.
The following steps are required to integrate the widget into our application:
-
Tag the media assets we want to render in the widget
-
Provide access to client-side resource lists
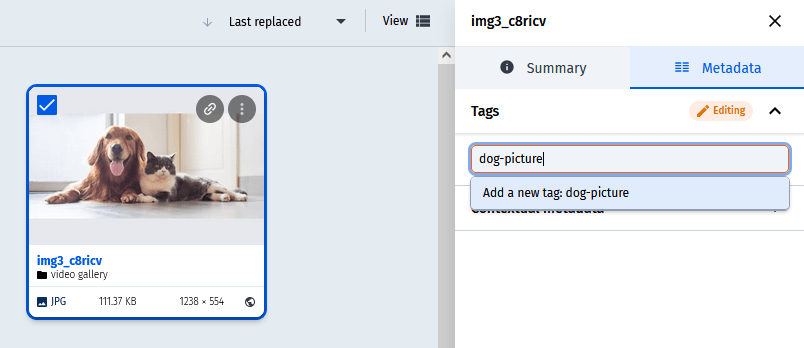
To add tags to the images, click on any of them, and a sidebar will appear on the right side of the dashboard.
Next, click on the “metadata” setting in the sidebar. We’ll set the tag of the images to dog-picture and then save the tag.
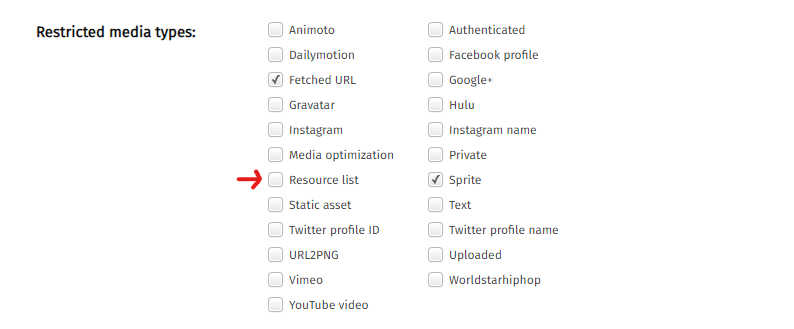
Cloudinary supports listing resources from the client side by their tags. However, the resource list is restricted by default, so we need to enable it on our account’s security settings page.
On the security settings page, scroll down to ‘Restricted media types’, uncheck ‘Resource list’, and then save.
Navigate to the app/routes/index.tsx file and update it with the code below.
import { useEffect } from "react";

export default function Home() {
  useEffect(() => {
    const productGallery = cloudinary.galleryWidget({
      container: "#product-gallery",
      cloudName: "OUR-ACCOUNT-CLOUD-NAME",
      mediaAssets: [{ tag: "dog-picture", mediaType: "image" }],
    });

    productGallery.render();
  }, []);

  return (
    <div className="container">
      <h1>Remix Ecommerce Product Gallery</h1>
      <div className="gallery-container">
        <div id="product-gallery"></div>
      </div>
    </div>
  );
}
Let’s break down the code above:
-
We imported
useEffectfrom React, and from there, initialized the widget -
We set up a
divwith an ID ofproduct-gallery, this is the element with which we will render the product gallery -
cloudinary.galleryWidget(options): Initializes the widget, takes in acontainer,cloudName, andmediaAssetas required parameters -
container: References thedivwith the ID ofproduct-gallery -
cloudName: The cloud name of our Cloudinary account -
mediaAssets: An array of the media assets we want to display; we populate the widget with all images tagged withdog-pictureand set themediaTypeof the images toimagewhich will enable the widget to render the files in their appropriate formats -
productGallery.render(): Renders the product gallery widget
Navigate to the app/root.tsx file and add the widget’s script there.
export default function App() {
  return (
    <html lang="en">
      <head>
        <Meta />
        <Links />
      </head>
      <body>
        <Outlet />
        <ScrollRestoration />
        <script
          type="text/javascript"
          src="https://product-gallery.cloudinary.com/all.js"
        ></script>
        <Scripts />
        <LiveReload />
      </body>
    </html>
  );
}
With this, we see the product gallery widget.
This article taught us how to build an e-commerce product gallery with Remix and Cloudinary’s Product Gallery widget.