 Ask AI
Figma Plugin
Last updated: Oct-06-2026
The Cloudinary Figma plugin streamlines your workflow and enhances team collaboration by integrating Cloudinary's media management capabilities directly into the Figma environment, including Figma, Figma Buzz, and Figma Slides. Using Cloudinary as the central source of truth for media files within your organization enables efficient management of large volumes of media.
Easily upload images from a Figma layer or artboard to Cloudinary, where others can access them through the Cloudinary Media Library, even outside of Figma. You can also insert images and videos shared with you from the Media Library, all without leaving the Figma interface. The plugin helps keep media assets organized and easily accessible within your design workflow.
In addition to facilitating collaboration, the plugin offers a rich set of media management capabilities and AI-powered tools, including auto-tagging, advanced search, editing, optimization, and fast delivery for images used on websites or apps. By optimizing media, you can enhance performance, improving loading times and user experience in your designs.

Get started
Before you install the extension, make sure you have a Cloudinary account. You can start by signing up for a Free plan. When your requirements grow, you can upgrade to a plan that best fits your needs.
Once you have your Cloudinary account, download and install the extension from the Figma marketplace.
Restart Figma and you should see Cloudinary listed in the Plugins menu.
Log in and connect
- Select Cloudinary from your Plugins menu.
- Click Login from the dialog box.

- In the OAuth Application Login page, enter your Cloudinary email and password, and click LOG IN.

- From the drop-down list in the An application requests access to your data! page, select the cloud name for the product environment you want to connect.
 TipFind your product environment's Cloud Name on the Dashboard.
 - Once you're successfully authenticated, you'll see an indication in the browser. Close the browser window, return to Figma, and start the plugin.


Using the plugin
Once you've successfully logged in, you can use the Cloudinary Figma plugin to seamlessly upload images from Figma to Cloudinary and insert images and videos from Cloudinary into Figma.
You move between the plugin's features using the tabs in the navigation bar at the bottom of the plugin panel. You can choose which tabs appear there, and Settings is always shown.
Insert in Figma
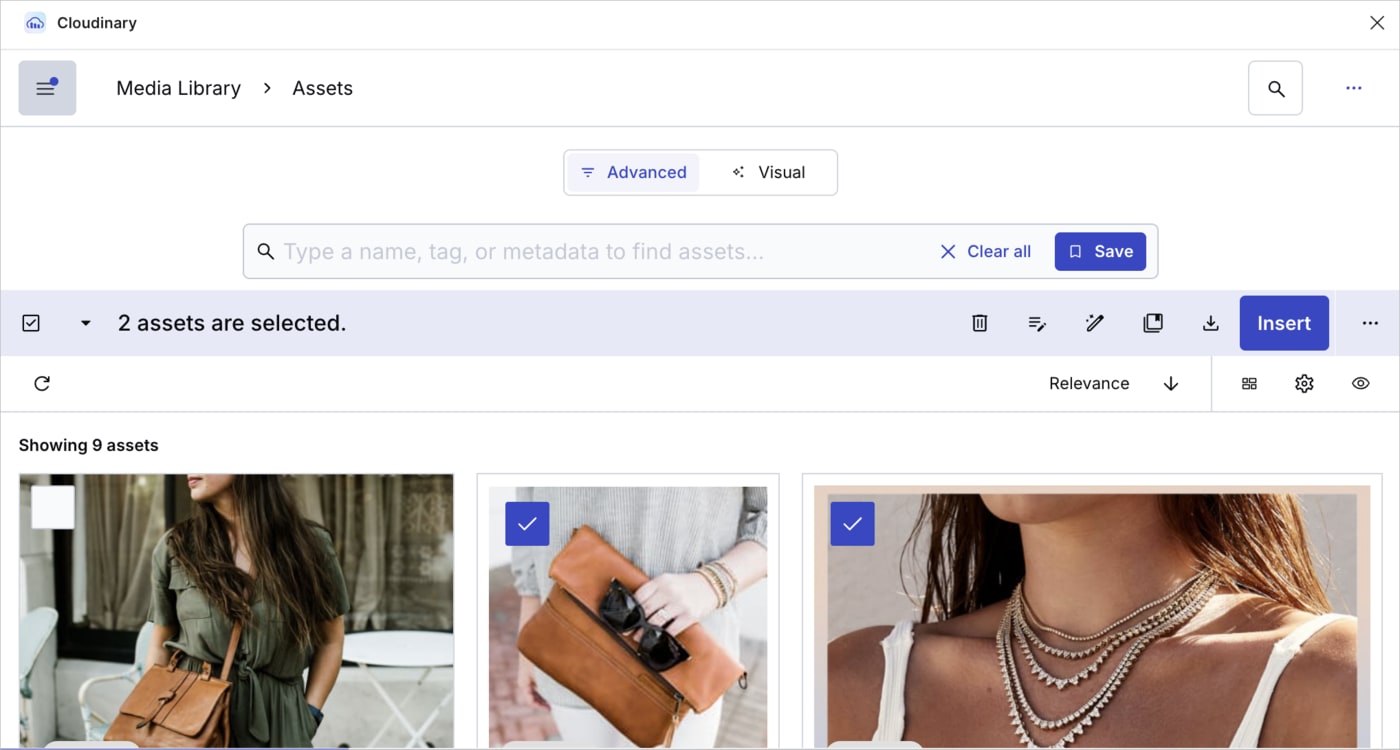
To find and insert images from Cloudinary into your Figma designs, open the Library tab in the plugin's navigation bar. The Library tab opens the Media Library Widget, where you can browse and search for assets in your Cloudinary Media Library.
You can insert original images, optimized images, or images with Cloudinary templates applied.
Insert images
To insert an image:
- Make sure your Figma plugin is open and connected.
- Select a frame or artboard where you want the asset to appear.
- In the navigation bar, click the Library tab.
- Browse and search for the asset you'd like to insert.
- Click Insert. The original image is inserted. Or, if you selected optimize for web, an optimized version, compressed without losing any visual quality, is inserted.
Insert images with templates applied
Transformation templates are preset configurations that let you adjust things like format, size, aspect ratio, and effects before inserting an image. Using a transformation template is a quick way to customize how an image or video looks or behaves without manually editing or coding transformations later.
To insert transformed images:
- Select a frame or artboard where you want the asset to appear.
- In the navigation bar, click the Library tab.
- Browse and search for the asset you'd like to insert.
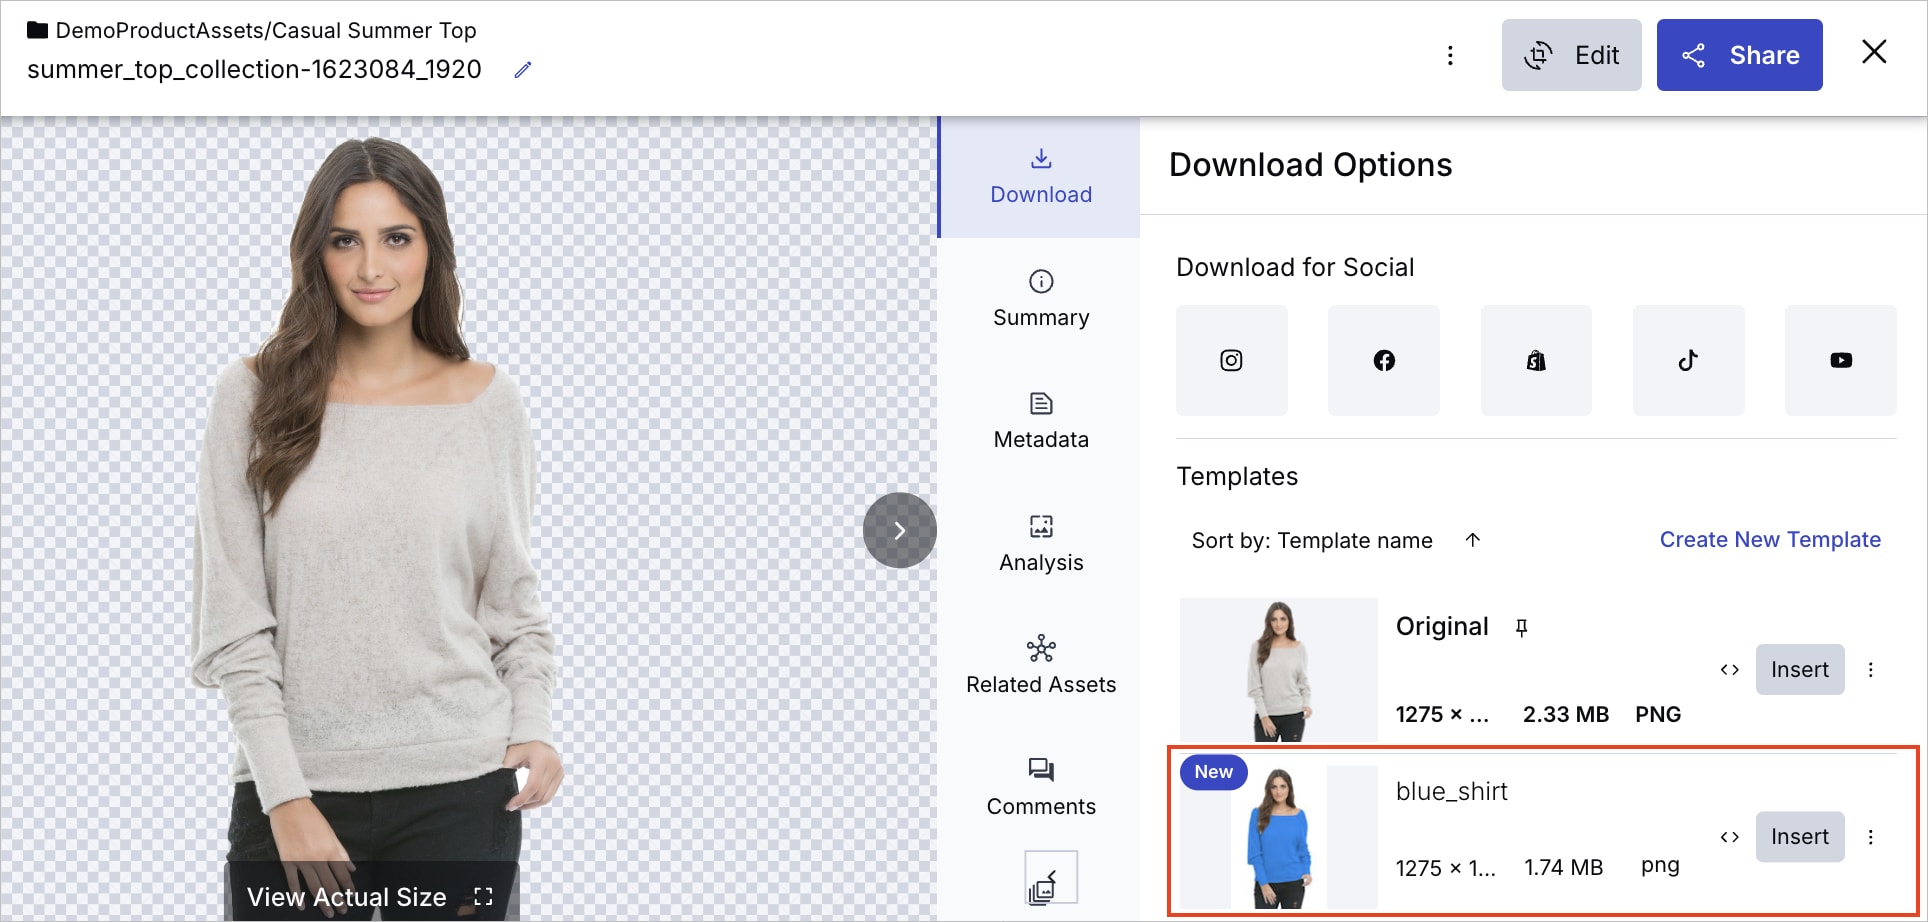
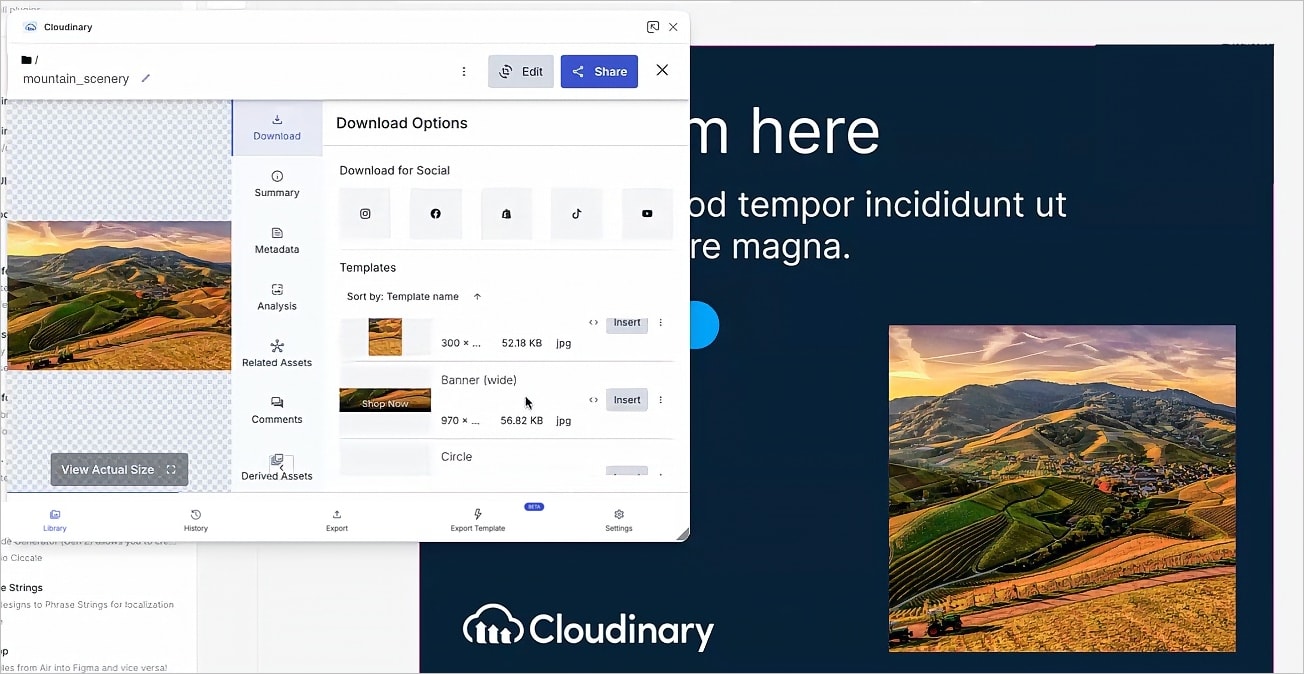
- Double-click the asset to open the Download Options tab of its manage page.
- In this view, explore the available transformation templates.NoteIf you want to create transformation templates for images, see Studio for instructions. Administrators can also create transformation templates for both images and videos. See Named transformations for more details.
- Choose the template you want to use and click Insert next to it to add the transformed version to your entry.
History
The History tab displays the last 20 Cloudinary assets you've inserted into your Figma designs, making it easy to quickly reuse assets without searching for them again.
To insert an asset from your history:
- Make sure your Figma plugin is open and connected.
- Click the History tab in the navigation bar.
- Browse your recently used assets.
- Click Insert to add the asset to your design.

This feature is particularly useful when you're working on multiple related designs and need to maintain consistency across your work.
Export to Cloudinary
You can export one or more layers and artboards at a time from Figma directly to Cloudinary using the Figma plugin.
To export a layer or artboard to Cloudinary:
- Make sure your Figma plugin is open and connected.
- Navigate to the Export tab in the navigation bar.
- Select the layers or artboards you want to export using one of two methods:
- By selection: Select layers directly on the Figma canvas — the plugin reflects your selection automatically.
-
By text: Type part of a layer name to find and select it — useful for targeting specific layers in complex designs.

- Set Display Name and Destination Folder.
- Fill in structured metadata for the assets. The plugin automatically shows the fields that your product environment requires, and you can also fill in optional fields.
- Adjust File settings, including Format, Export Size, Destination Folder, Upload Preset (predefined upload behavior), and File Name Template (variables that determine the asset's public ID in Cloudinary).
- Upload the assets. If any metadata is missing or invalid, the plugin shows an error and takes you directly to the field that needs fixing.
- Review the upload results. From here you can review the uploaded assets, open their folder in Cloudinary, or copy their delivery URLs one at a time or all at once.
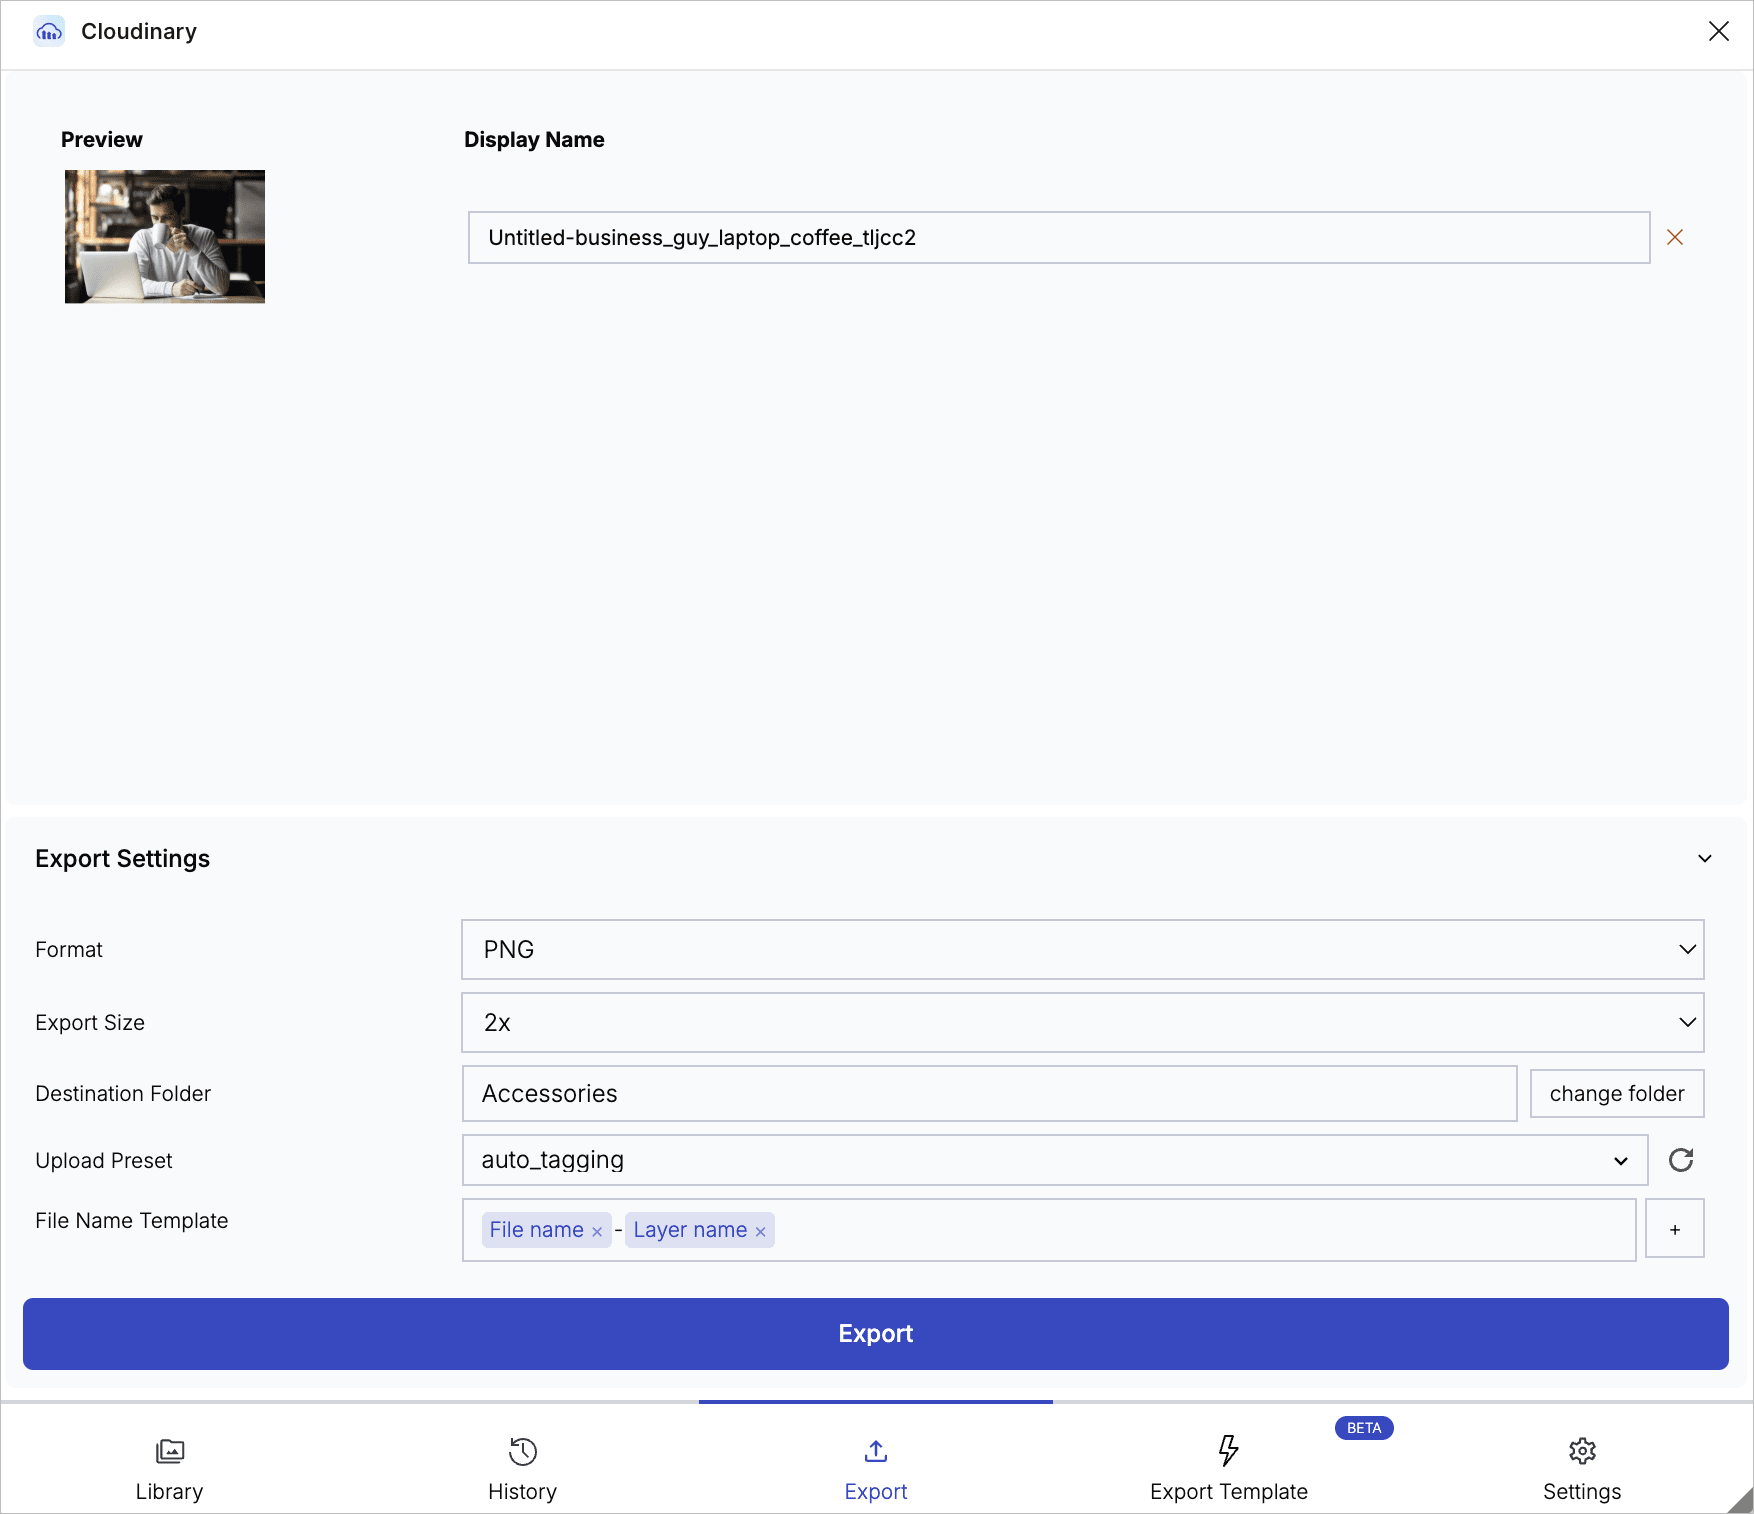
Once the upload is complete, the image is accessible in the Cloudinary Media Library, which you can access via the Library tab in the navigation bar. See Insert in Figma.
Add structured metadata on export
When you export assets or dynamic images, you can add Cloudinary structured metadata to them, so assets exported from Figma meet the same metadata standards as assets uploaded directly to Cloudinary.
- Required and optional fields: The plugin automatically shows any metadata fields that your product environment requires. You can also fill in optional fields.
- Validation before upload: The plugin checks the metadata before uploading. If a value is missing or invalid, a clear error takes you directly to the field that needs fixing.
- Remember values between uploads: Optionally keep the metadata values you entered for your next upload, to speed up repetitive workflows.
Dynamic Image (Beta)
The Dynamic Image workflow bridges the gap between design and delivery by translating Figma designs into Cloudinary transformation URLs. This enables creative automation workflows for various use cases:
- Creative editing: Non-technical content editors can easily update creatives by modifying variables and embedding the resulting URL in a CMS or e-commerce platform.
- Website embedding: Developers can integrate the URL pattern into their code to programmatically generate design variations. For more information about using variables in Cloudinary transformations, see User-defined variables.
- DXP content management: Content managers can use the URL in Digital Experience Platforms (such as Braze templates) to dynamically personalize content.
This is distinct from a transformation template, which is a named transformation you apply to an asset as you insert it. Transformation templates keep their name.

How it works
When you export a dynamic image, the plugin analyzes your Figma design, identifies dynamic and static layers, and generates a Cloudinary transformation URL that recreates your design.
The Dynamic Image interface features a two-column layout:
- Left column: A single list of every layer in your frame, together with variable field data. Hover any layer to highlight it in the preview, and select the ones you want to make dynamic.
- Right column: Live frame preview. Click any layer to toggle it between dynamic and static, or hover to highlight it in the layer list.
- Draggable divider: Resize columns to suit your workflow; scrolling and window state are preserved.
During export, the plugin:
- Analyzes your Figma design layers and identifies text, images, and fonts
- Uploads fonts required for your text layers (fonts taken from the design and any custom font files you add) together with image assets to a transformations folder in your Cloudinary account
- Generates a Cloudinary transformation URL that recreates your design
- Marks layers with variable names; your design layers are never modified (dynamic fields are tracked via plugin metadata, not layer renaming)
Variable naming convention
Use the following prefixes when naming your Figma layers to control how they're handled during export:
Dynamic layers (# prefix) — These layers are exported as variables and can be replaced via URL:
-
#heroImage- Marks an image layer as replaceable -
#headline- Marks a text layer as replaceable
-
#button- Marks any layer as a variable
Static layers (#! prefix) — These layers remain fixed in the dynamic image but are rasterized to the background. Use this when you want to control the layer ordering or z-index positioning without making the layer replaceable:
-
#!logo- Keeps a logo in a specific position (not replaceable) -
#!watermark- Adds a watermark that stays in place -
#!border- Adds a decorative border element
Static layers are useful when you want specific control over how dynamic layers stack on top of or behind fixed design elements.
Exporting a dynamic image from Figma
To export a Figma frame or artboard as a Cloudinary transformation URL:
- Create your design in Figma. Optionally name layers with the
#prefix (e.g.,#heroImage,#headline) to designate them as dynamic, or use the#!prefix (e.g.,#!logo) for static layers. See Variable naming convention for details. You can also designate layers after opening the export interface. - Select the frame or artboard you want to export.
- Make sure your Figma plugin is open and connected.
- In the navigation bar, click the Dynamic Image tab. The interface displays your frame with a two-column layout:
- Left: Layer list and variable field data
- Right: Live preview of your frame
- Draggable divider: Resize columns as needed; your layout preference is preserved
- Designate dynamic and static layers. The left panel lists every layer in your frame, so you can choose what should be dynamic from one place:
- Select a layer in the list to make it dynamic
- Hover any layer in the left panel or preview to highlight it in both views
- Click a layer in the preview to toggle it between dynamic and static
- Click a dynamic layer again to remove it (you'll be prompted to confirm)
- Click the Highlight all toggle to see all available layers at once
- (Optional) Rename variable field names:
- Double-click any field name in the left panel to edit it inline
- Names must start with a letter; the plugin validates as you type
- Drag fields to reorder them smoothly; updates appear instantly in the preview
- Review and upload fonts:
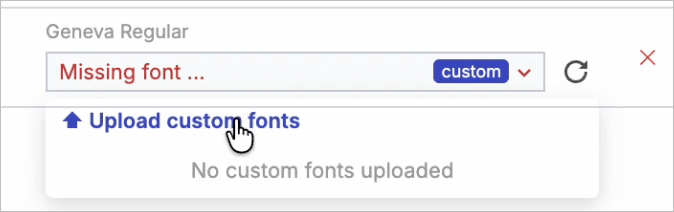
- If custom fonts are detected, you'll be prompted once for the upload destination (default:
/templates/fonts)
- Fonts already uploaded to Cloudinary are skipped
- Upload only fonts you are licensed to host and serve with Cloudinary
- If custom fonts are detected, you'll be prompted once for the upload destination (default:
- Choose the export resolution: 1x, 2x, or 3x. The default 2x (144 DPI) gives crisp results on most high-DPR displays, while 1x produces smaller files for faster delivery.
- Save your dynamic image:
- If your product environment requires structured metadata, fill in the required fields first
- The save button shows Create dynamic image (for a new dynamic image) or Save dynamic image (for updates to an existing one)
- The button is disabled if an existing dynamic image has no unsaved changes
- Click the button to upload fonts, export layers, and generate the transformation URL
- A deep link appears, allowing you to open the saved dynamic image directly in Cloudinary
- Click to open the Template Editor widget for final review and use.
To load a previously saved dynamic image:
When you open the Dynamic Image tab, any saved dynamic images from your Cloudinary account are available. Select one to pull its variable names, settings, and layer bindings into the export interface. The panel shows who last updated it and when, allowing your team to stay aligned on its history.
Using the Template Editor
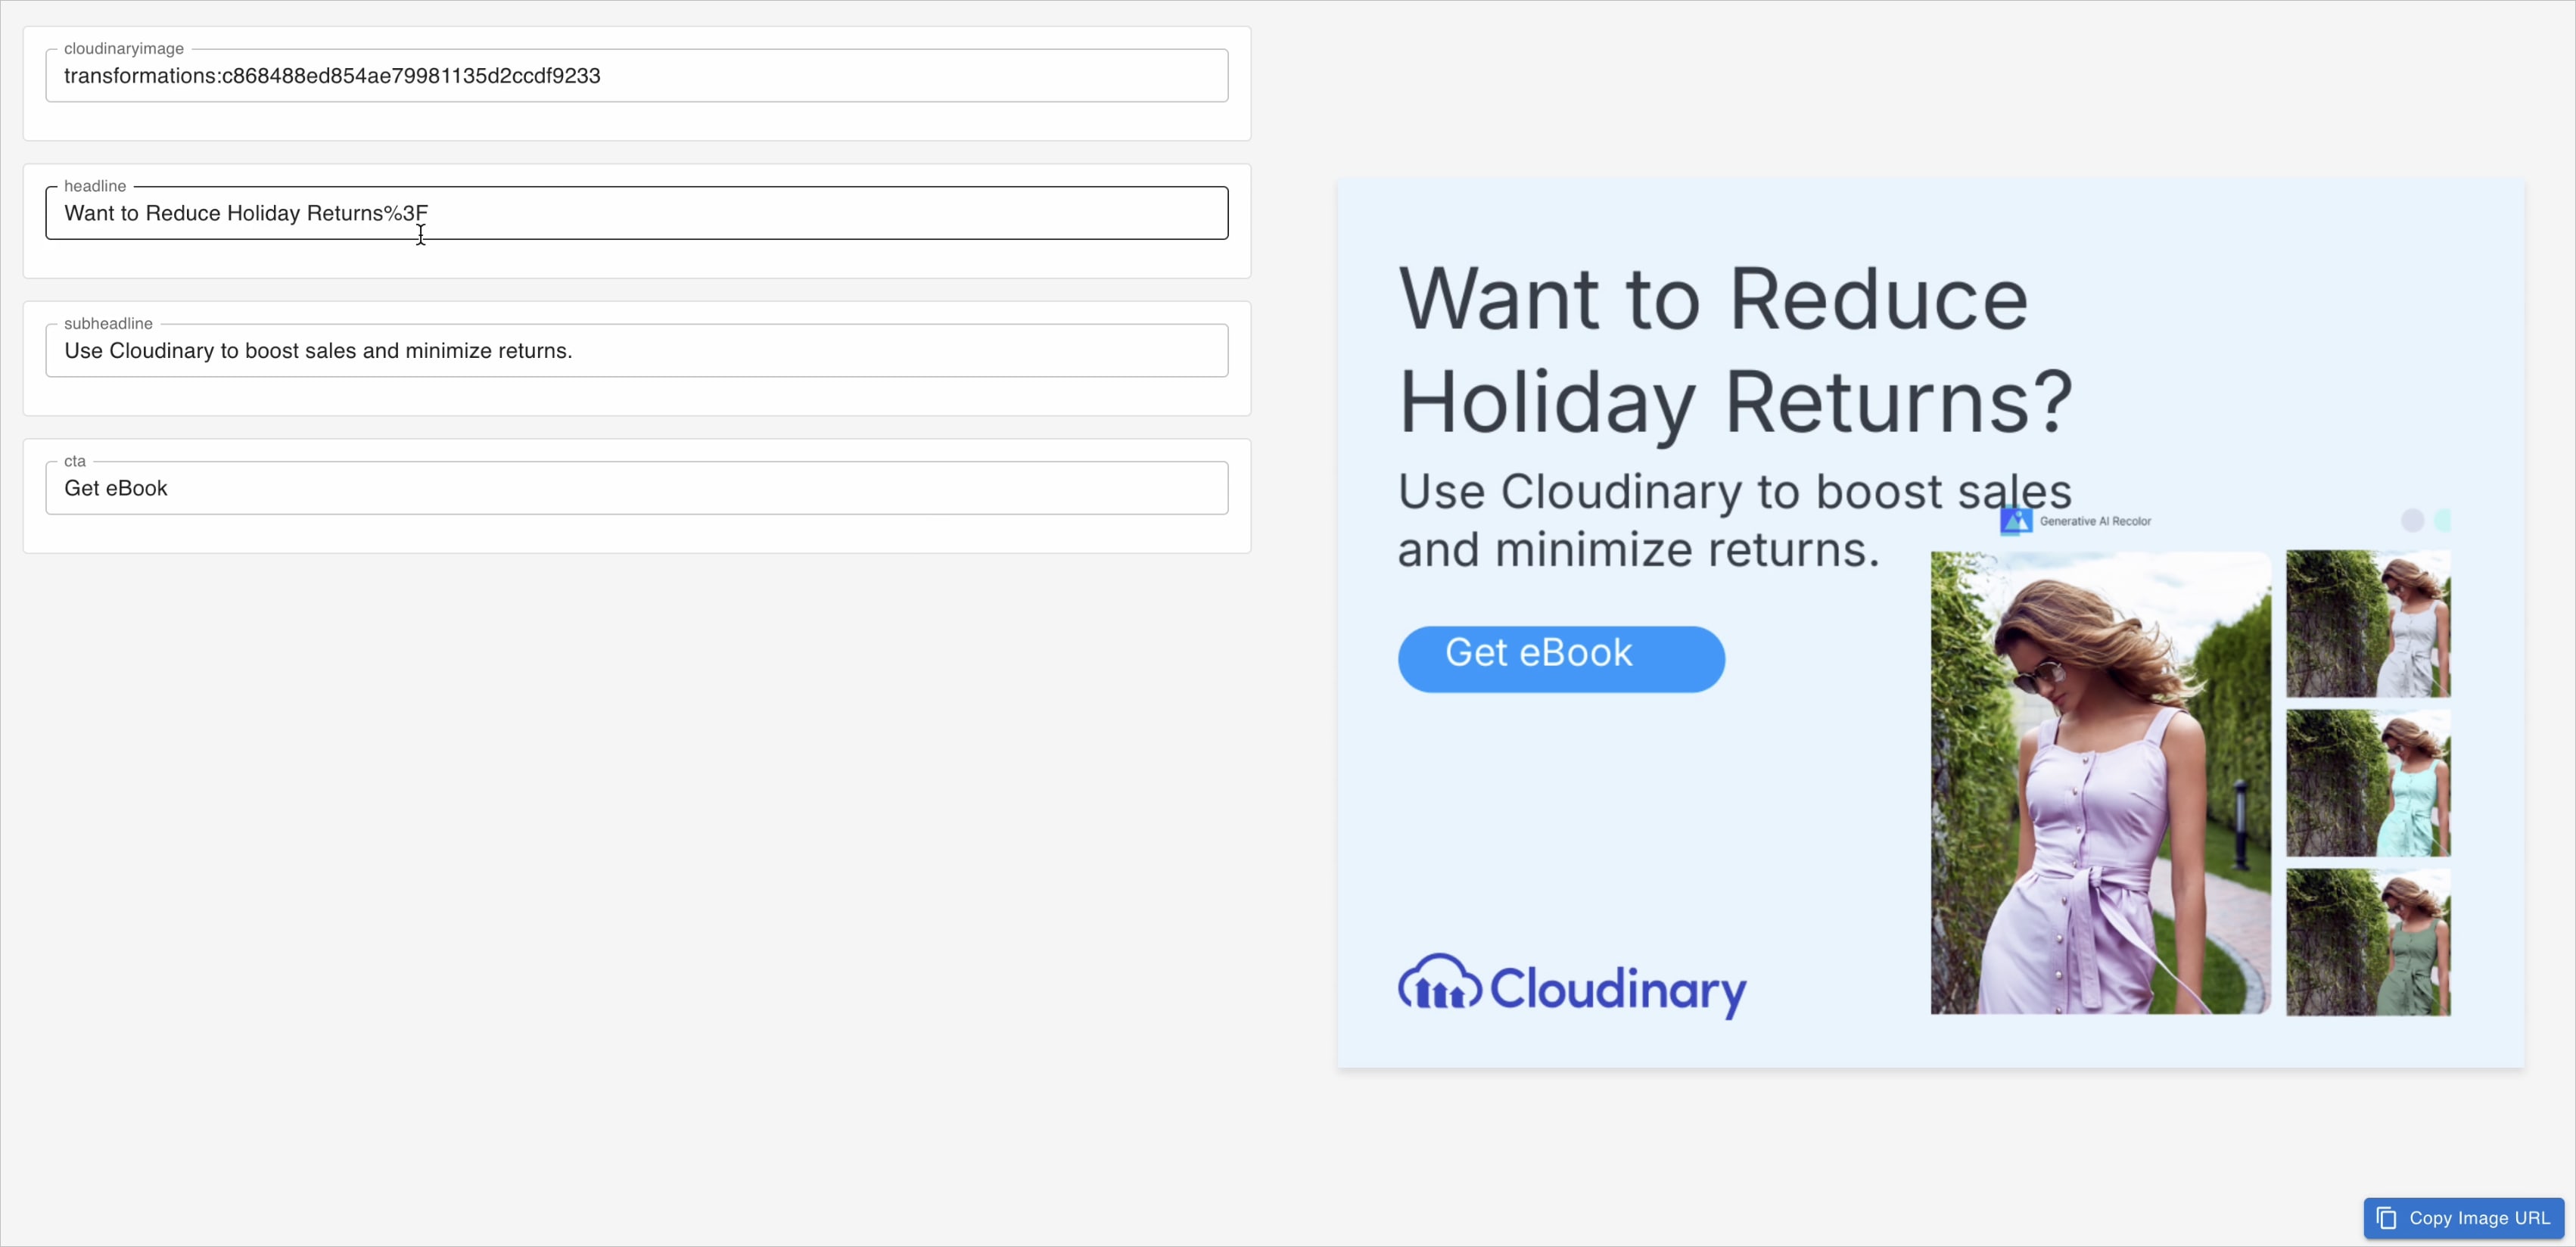
The Template Editor provides a user-friendly interface for modifying the dynamic layers defined in your Figma design. This allows anyone, regardless of technical skill, to generate new variations of the design without editing the URL manually.
The editor displays input fields for each variable identified in your design:
- Image variables: Enter the public ID of a new image to replace the original.
- Text variables: Enter new text to replace the original content.
As you update these values, the preview updates instantly to show your customized design. Once satisfied, you can copy the generated URL for use in your website or application.
Using the transformation URL
The generated URL is a standard Cloudinary transformation URL that includes:
- Variable definitions: Placeholders for your dynamic layers (e.g.,
$heroImage,$headline). These often use conditional logic (e.g.,if_!isndef!) to apply default values from your original design if no new value is provided. - Layer positioning: Transformation components that position each layer.
- Uploaded assets: References to fonts and images stored in your
transformationsfolder.
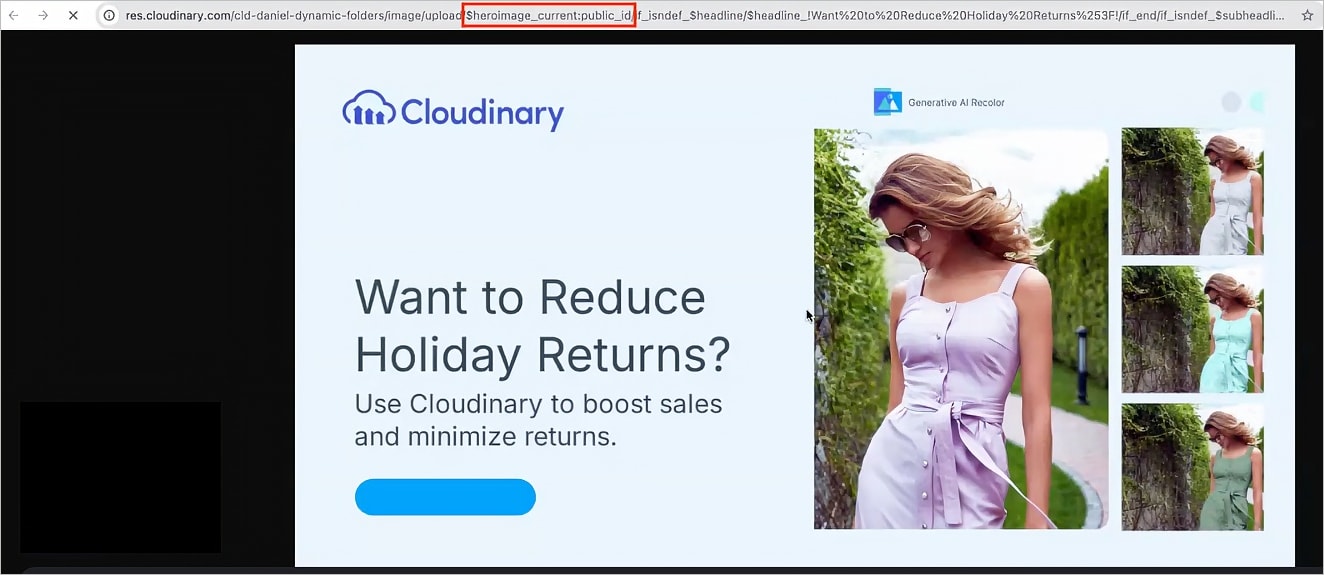
To customize the transformation:
Developers can integrate the URL pattern into their applications and dynamically generate design variations by substituting variable values. You can define these variables anywhere in the URL before they are used.
For example:
1. Replace an image layer
You can replace an image layer (e.g., #heroImage) by setting the corresponding variable (e.g., $heroImage).
-
Using the asset at the end of the URL: Set the variable to
current:public_id. This captures the public ID of the image specified at the end of the URL (the base asset) and assigns it to your variable. -
Using a specific public ID: Assign a specific public ID string directly to the variable.
2. Replace text
Change text content (e.g., #headline) by setting the variable to a new string.
Change:
to your own text:
For more information on variables in URLs, see Assigning values to variables.
cldt-, so you can identify them among the named transformations in your account.Limitations
- Maximum frame size: 3,000 x 3,000 pixels
- Dynamic images work best for banner and hero image designs
Info
The Info tab shows you the Cloudinary details behind the layers you've selected in Figma, so you can check a design without switching back and forth between Figma and Cloudinary.
To inspect a layer:
- Make sure your Figma plugin is open and connected.
- Select a layer on the Figma canvas.
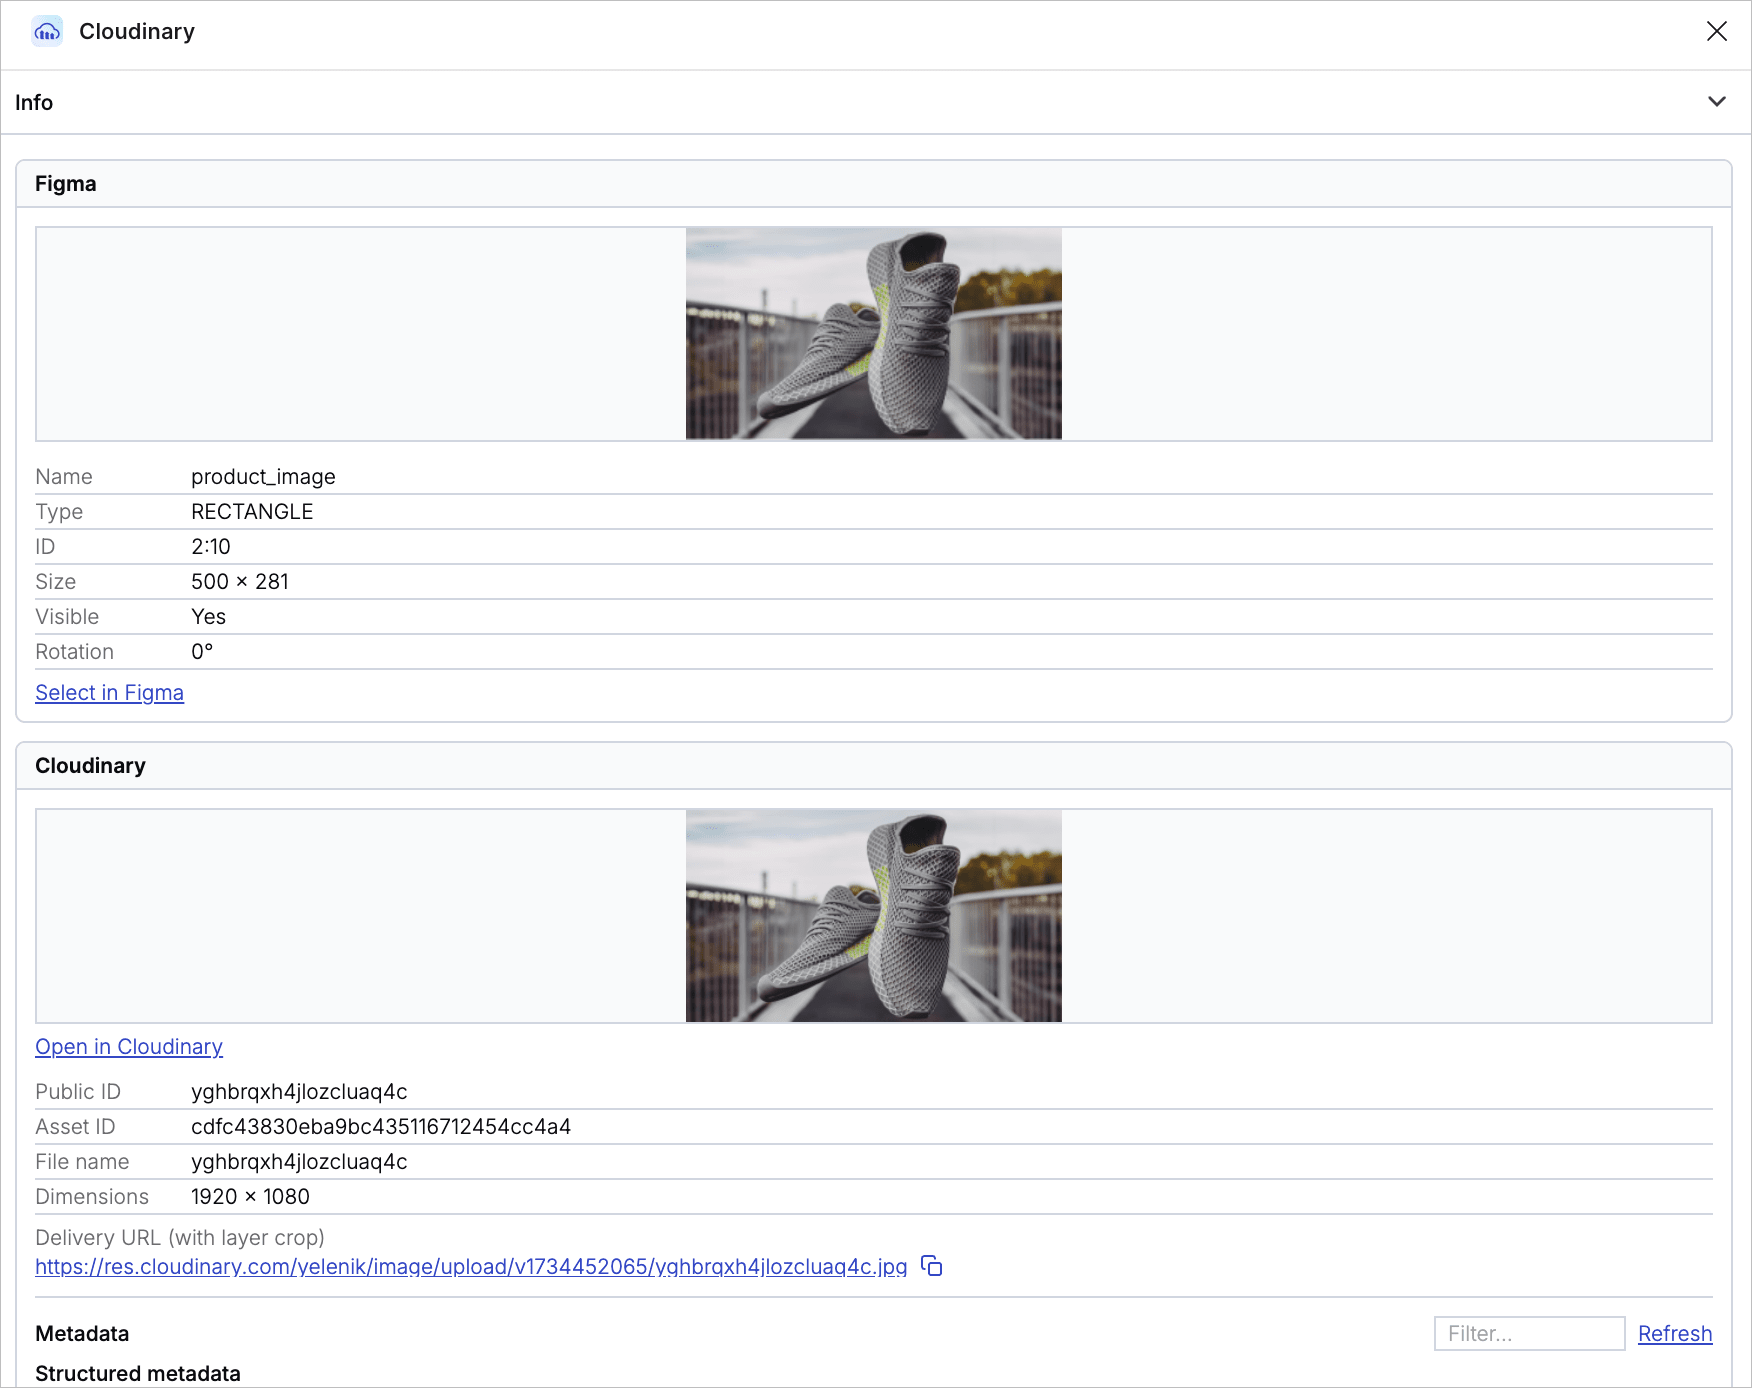
- Click the Info tab in the navigation bar. For each Cloudinary-backed layer in your selection, the tab lists a preview, the Figma layer name, and the Cloudinary file name and public ID.NoteIf your selection also contains layers that didn't come from Cloudinary, the tab lists only the Cloudinary layers among them and prompts you to pick one.
- Click Inspect to see the full details for that layer:
- Figma: the layer's name, type, ID, size, visibility, and rotation. Click Select in Figma to select the layer on the canvas.
- Cloudinary: the asset's public ID, asset ID, file name, and dimensions, plus the delivery URL for the layer crop, which you can copy. Click Open in Cloudinary to open the asset in your Media Library.
- Metadata: the asset's structured and contextual metadata, and an import audit recording which user and cloud the layer came from, and when.
- Metadata inspector: click Show plugin data or Show context to see the raw data the plugin holds for the layer.
Track asset usage in a document
When you insert an asset, the plugin records where it's placed in Figma: the document, page, and layer. Each Figma file keeps its own Cloudinary identity, so this usage stays connected to the correct design, even when you duplicate or rename the file.
Once you connect a document, the Info tab can show all the Cloudinary assets used in it, so you can review the document's asset usage in one place and navigate to where each asset is placed.
To connect a document:
- In the Info tab, click Connect.
- In Figma, press ⌘L (Ctrl+L on Windows), or right-click the file tab and choose Copy link.
- Paste the link in the dialog box and click Connect.
After you connect the document, you can run an Integrity sweep to find and clear stale Cloudinary records left by replaced or deleted layers. Click Check now, and the tab reports how many placements it checked and whether it found any stale records.
Settings
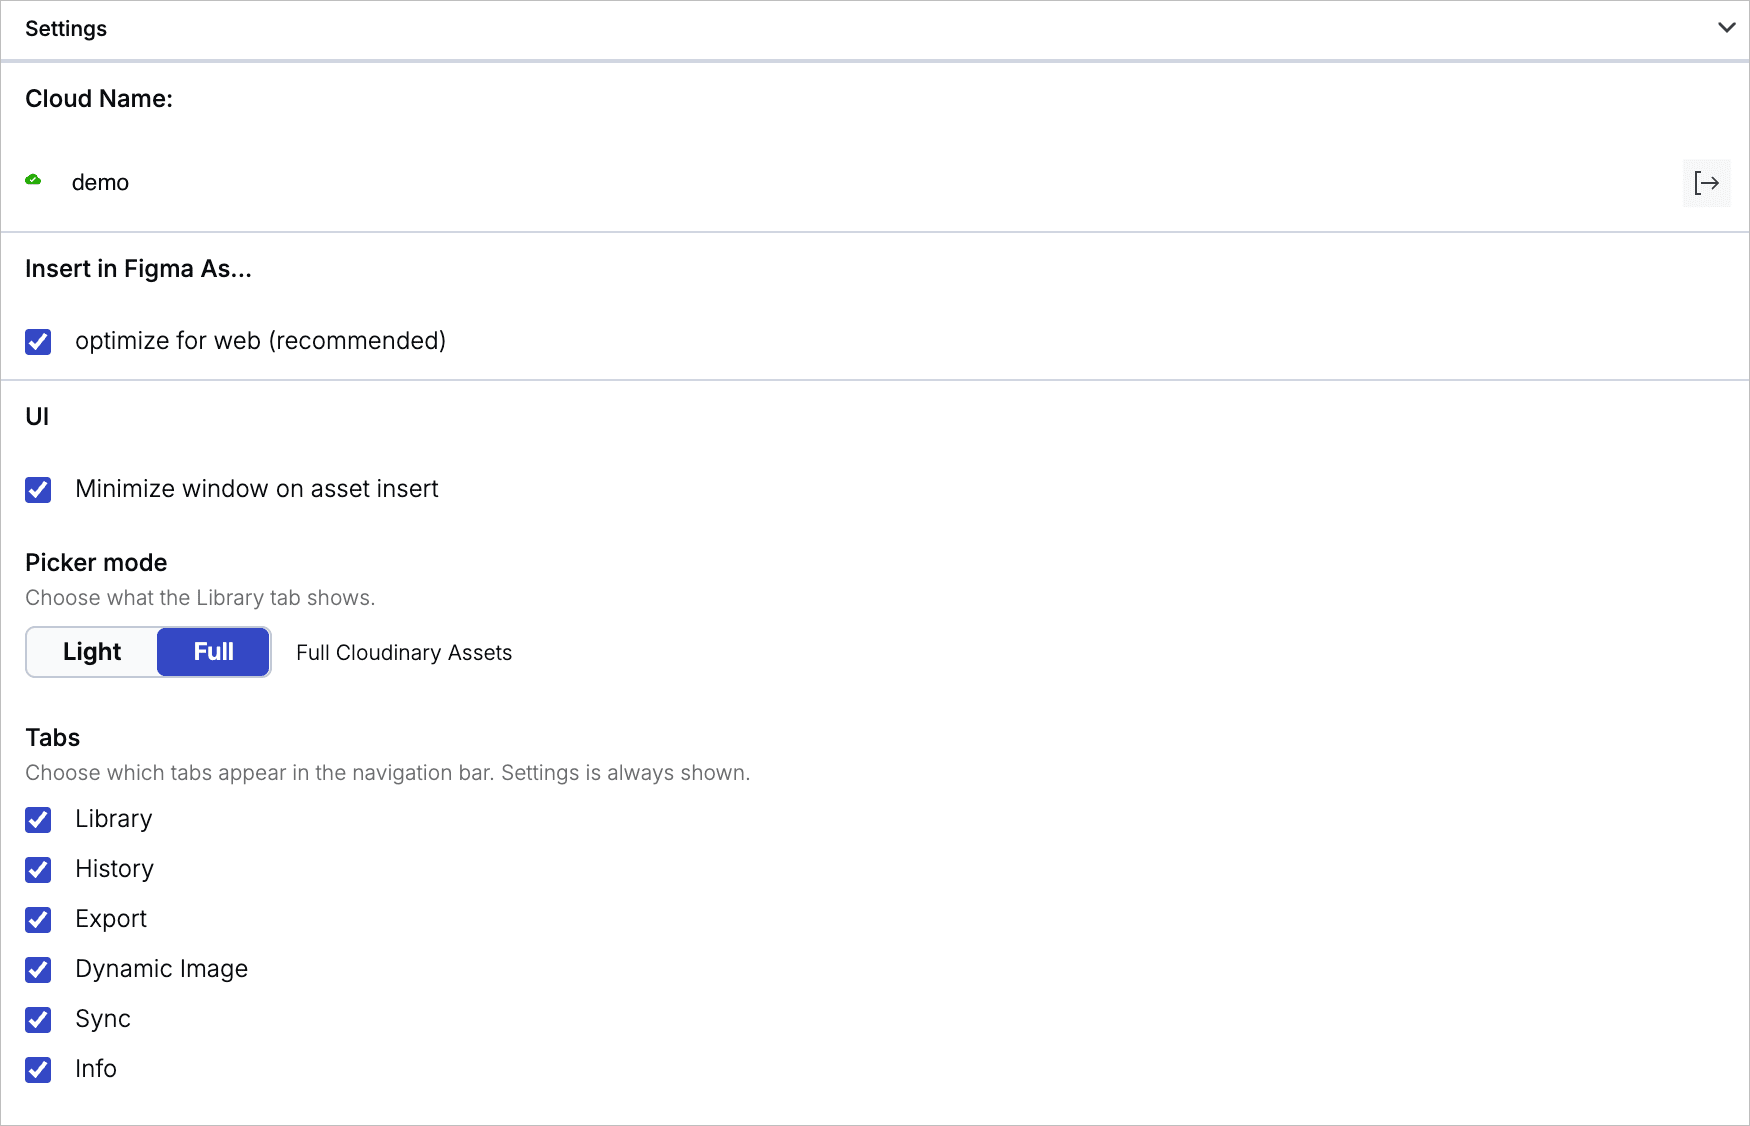
The Settings tab controls how the plugin inserts assets and how it lays out the plugin panel. Settings always appears in the navigation bar.
Switch product environment
Cloud Name shows the product environment the plugin currently uses. To work in a different one, log out using the icon next to the cloud name, then log in again and select another cloud name during the login process. See How can large companies use multiple product environments?
Optimize images as you insert them
Under Insert in Figma As..., select optimize for web (recommended) so the plugin compresses each image as you insert it, without losing any visual quality. Clear the setting to insert original images instead.
Minimize the plugin after inserting an asset
Under UI, select Minimize window on asset insert to collapse the plugin automatically once you've inserted an asset, so it doesn't sit over the design you're working on.
Choose what the Library tab shows
Under UI, set Picker mode to Full to browse in the full Cloudinary Media Library widget, or to Light to use the lightweight Asset Selector, which fits the plugin's vertical panel.
Choose which tabs appear
Under UI, use Tabs to select which tabs the navigation bar shows, keeping the panel focused on the tools your team uses most. Settings is always shown.
Figma Buzz templates
Figma Buzz is a collaboration tool within Figma that enables designers to create templates and make specific layers locked or editable. Designers can control which content editors can modify, making it easy to maintain design consistency while enabling non-designers to update content.
When working with Buzz templates, content editors can use the Figma plugin to insert and manage their images.
To insert a Cloudinary image into a Buzz template:
- Open a Buzz template.
- Select an editable image placeholder in your template.
- From the Plugins menu, select Cloudinary.
- By default, the plugin opens in a vertical panel view. For a better experience, click the expand icon to open the plugin in a modal window.TipThe modal view provides the full Cloudinary interface optimized for media browsing and selection.
- In the navigation bar, click the Library tab.
- Browse and search for the asset you'd like to insert.
- Click Insert to replace the placeholder with your selected asset.
Figma Slides
The Figma plugin supports Figma Slides, enabling you to use the same Cloudinary-powered workflows for slide-based designs that you use in regular Figma files.
To use the Figma plugin in Figma Slides:
Follow the same process as you would in regular Figma files:
- Export to Cloudinary - Export layers or slides to your Cloudinary account
- Insert in Figma - Insert images from your Cloudinary Media Library into your slides
- Optimize for web - Enable automatic optimization for inserted images
The plugin interface and functionality work identically in Figma Slides as they do in standard Figma files.
Managing media
The Cloudinary Figma plugin allows you to make use of a number of advanced media management features provided as part of the plugin. By using Cloudinary as your principal media source, you'll get all benefits that come with a dedicated media platform.
Cloudinary Media Library
You can access a compact version of the Cloudinary Media Library which provides almost all of the same functionality that's available in the full Media Library in your Cloudinary Console. You can access the Media Library when you select the Library tab from the Figma plugin panel.
If you've set Picker mode to Light in the Settings tab, the Library tab opens the lightweight Asset Selector instead, which gives you folder browsing, search, and grid or list views in a vertical layout, but not the full set of Media Library features described below.
With the Cloudinary Media Library you can take advantage of all the features listed below.
- Safari: The Safari browser may require additional steps when logging in to the Media Library. If you encounter an issue, follow the prompts to log in separately and attempt to open the Media Library again. Alternatively, use one of the other recommended browsers when working with Cloudinary.
-
Third-party cookies: Some browsers (such as Firefox) may block third-party cookies by default, which can prevent the Media Library Widget from functioning properly. Users may need to explicitly allow third-party cookies for the Cloudinary domain (
https://cloudinary.com) in their browser settings.
Advanced Search
The Advanced Search feature lets you search by filters such as tags, metadata, format, orientation, resolution, or (if supported for your account), even by image analysis characteristics, such as prominent colors, presence of faces, or image location.

For more details, see Advanced Search in the Assets user guide.
Collections
Collections are ad-hoc groupings of assets. Assets can be added to and from collections without affecting or moving the asset itself, and assets can be included in multiple collections. You can create your own collections (assuming you have the required permissions) or other Cloudinary users can share collections with you. You can also share collections with external stakeholders by sending a URL to a dedicated collection webpage, which is available to those with a link during an optionally specified date range.
Collections can often be a convenient way to group all assets that you might want to use on a particular project or campaign.

For more details, see Collection management in the Assets user guide.
Tagging and metadata
Assets that have tags and other metadata enable all Media Library users to better organize and search for assets in the Media Library.
In addition to the option to specify tags when you upload an image or video, you can also add or edit tags and other metadata after images and videos are uploaded via the embedded Media Library, and even set the same tags or metadata on multiple images and videos at once.
You can view and set this data using the Asset toolbar or in the Asset management page.
Asset toolbar
You can set tags and metadata for several selected assets at once from the Media Library using the Tag or Edit Structured Metadata options in the asset toolbar. You can Edit Contextual Metadata via the (3-dot) options menu. The type of metadata available for editing (contextual or structured) depends on the setup for your organization's account.

Asset management page
You can view or edit tags and metadata as well as view embedded image metadata for a specific asset from the Summary and Metadata tabs of the Asset management page.
To open the Asset management page either double-click the asset or select Open from the asset's context (right-click) menu.

Media editors
You can edit your images in Studio and trim videos in the Trim videos tool. Both are accessible from the asset management drill-down page by clicking the Edit pull-down button and selecting the action you want to perform.
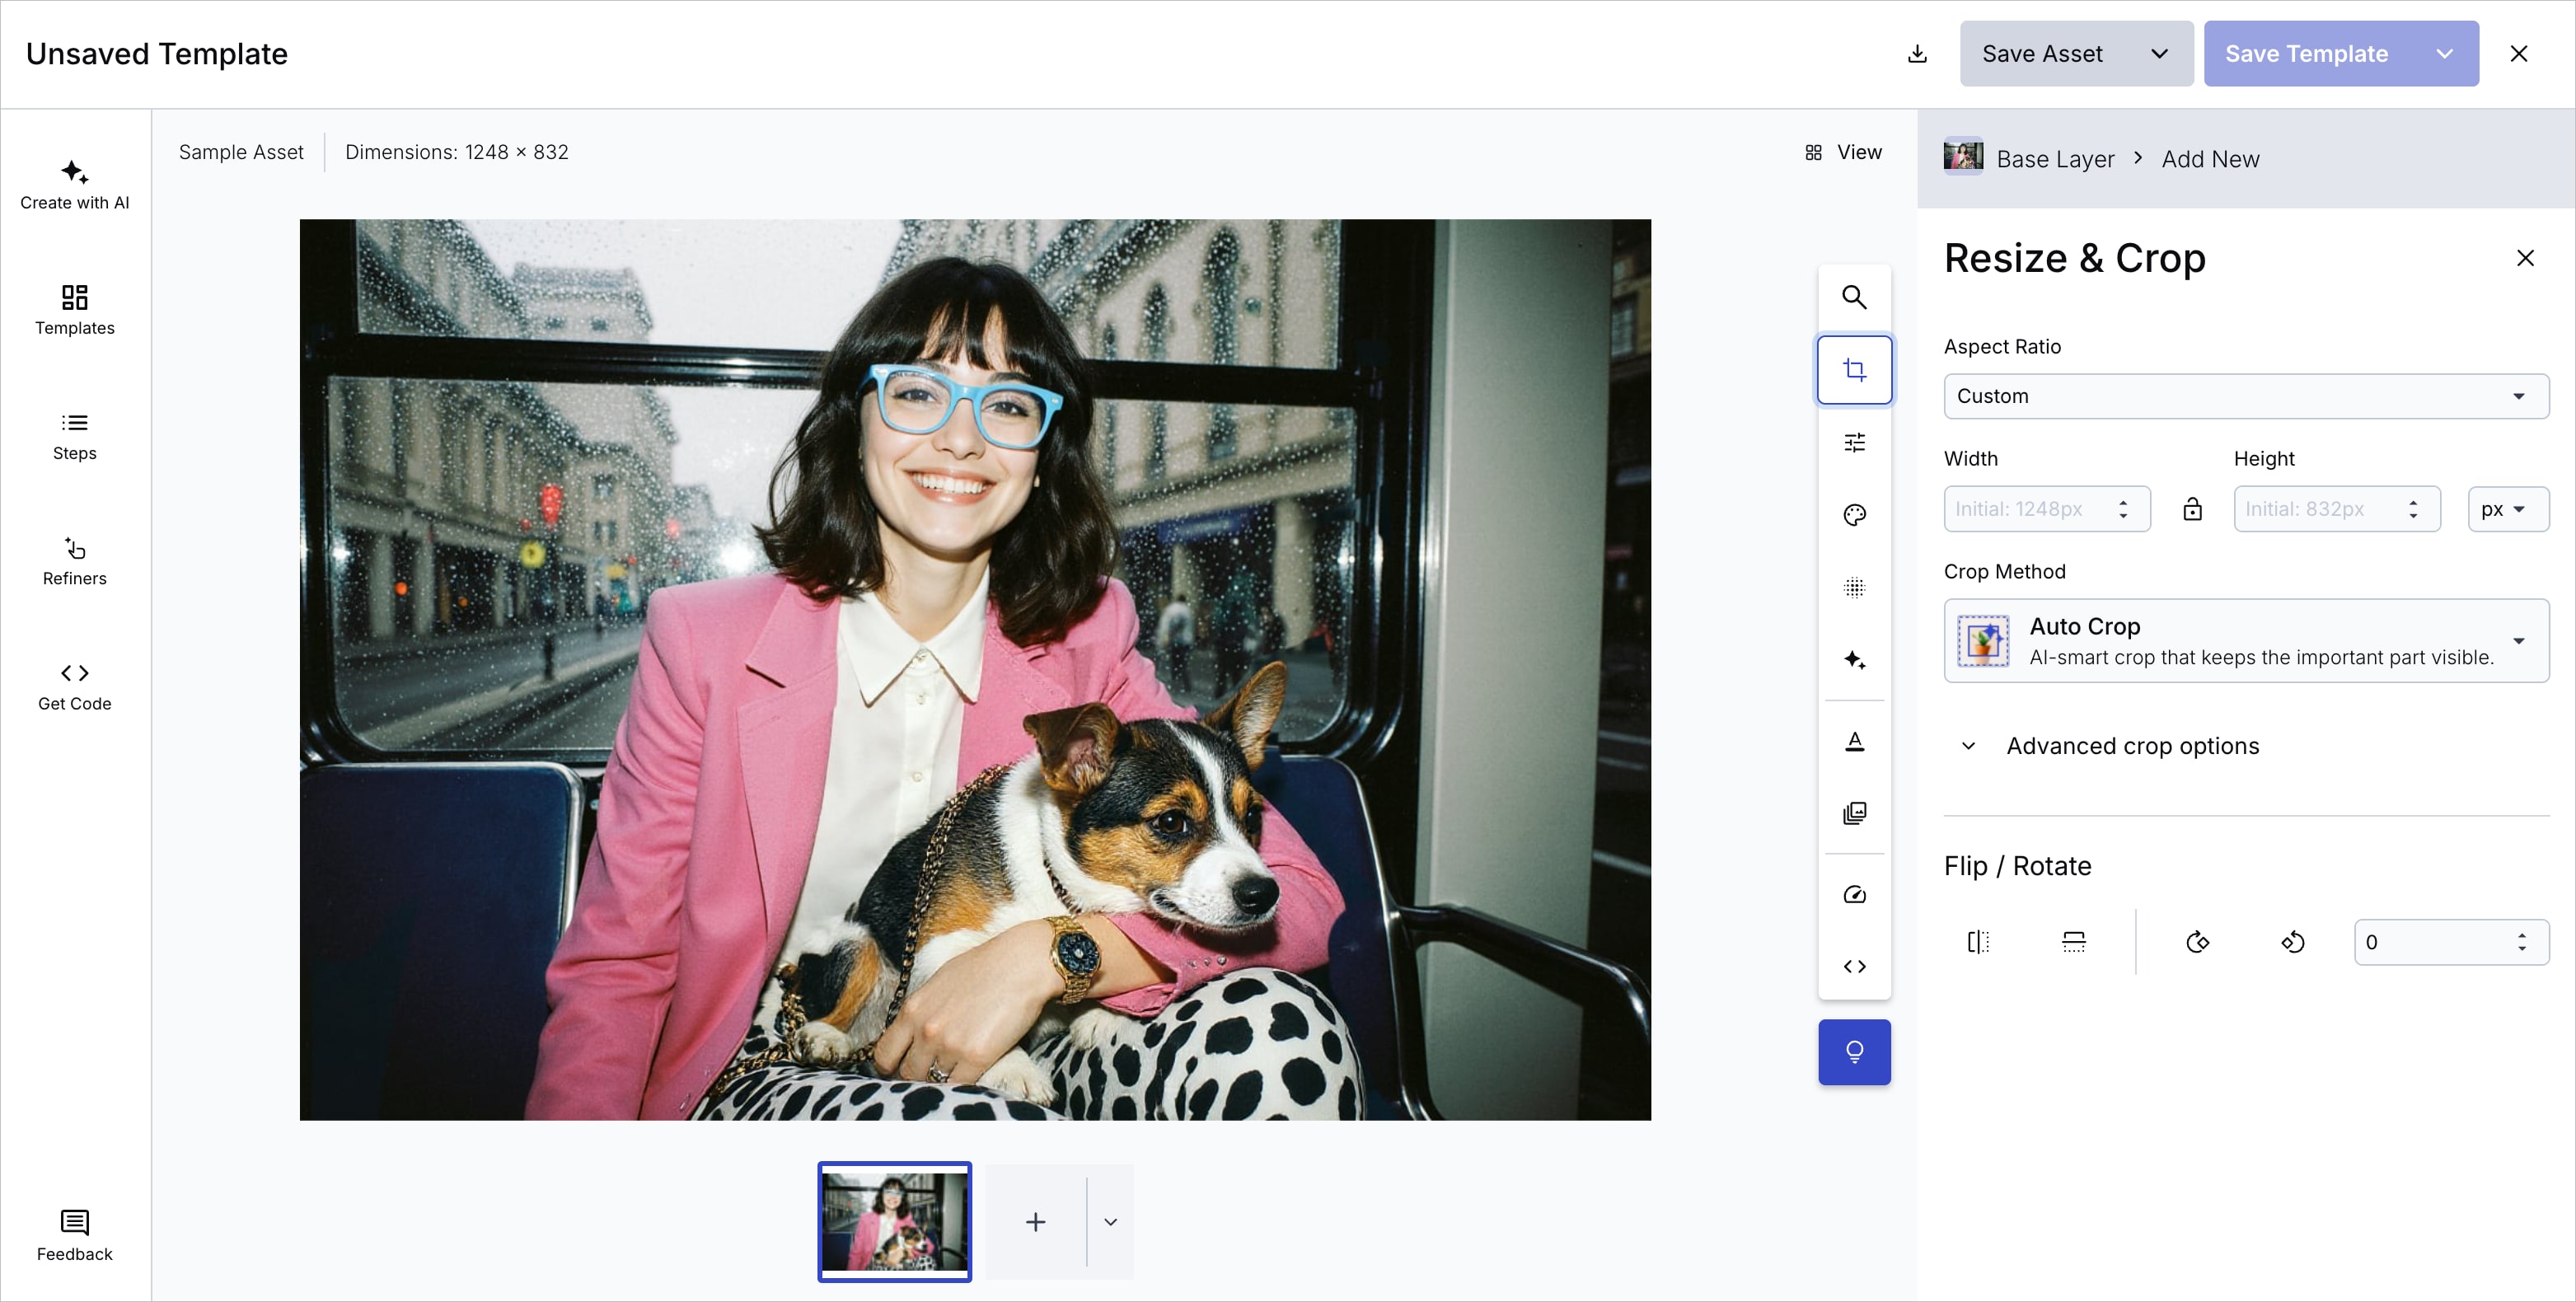
Studio allows you to edit images (crop, resize, flip, rotate, apply effects, and more), either individually or in bulk. The Trim Video tool lets you trim videos one asset at a time. When you're finished editing, you can download the edited version without modifying the original, save it to overwrite the original asset (you can retrieve the original if you have backups enabled), or save the edited version as a new asset.
Transformation editor (videos only)
The Advanced Editor (Transformation Builder) provides a user-friendly interface, accessible to Assets Enterprise plans in the Media Library, for creating transformed video asset variations. You can start with an original asset or build on an asset that has already been transformed. Preview and customize a wide range of transformations using intuitive UI controls, then generate transformation URLs for delivering, downloading, or sharing transformed versions of your assets without changing the original.

For more details, see Advanced Editor in the Assets user guide.
Cloudinary Professional Services configuration support
The Figma Plugin is part of Cloudinary's Standard Professional Services integration configuration package.
If you need assistance setting up this integration and you're on an Enterprise plan with a professional services package in your contract, Cloudinary's professional services can help you set it up as part of your contracted package.
Learn more: Cloudinary Professional Services packages
Error
Rate this page:
