
YouTube is a video-sharing platform owned by Google. The YouTube team offers an API that can be used to integrate the YouTube video playback experience into web applications.
In this post, we will go through the process of embedding a YouTube player in a React application. We’ll build a simple blog and use the react-youtube package to embed a YouTube player in it. react-youtube provides a React component that acts as an abstraction layer over the traditional YouTube IFrame Player API. Let’s get started!
Here is a link to the demo on CodeSandbox.
Run this command in your terminal to create a simple React application:
npx create-react-app youtube-player-demo
Next, navigate into the newly created directory and run the command below to install the dependencies we’ll need for our app.
    npm install react-youtube react-router-dom@6
Code language: CSS (css)
After the installation, create a folder called components in the /src directory to hold the application’s components.
First, let’s create a component called Home that will serve as the index page and hold a list of all blog posts in the application. Create a file called Home.js in the src/components folder and add the following to it:
import React from 'react';
import { Link } from 'react-router-dom';
export default function Home({ data }) {
return (
<div className="cards">
{data.posts.map((post) => (
<div className="card" key={post.id}>
<div className="img-wrapper">
<img
src={`https://ytimg.googleusercontent.com/vi/${
post.url.split('v=')[1]
}/sddefault.jpg`}
alt={post.title}
></img>
</div>
<div>
<h3>{post.title}</h3>
<p>{post.content.slice(0, 100) + '...'}</p>
<Link to={`/blog/${post.id}`}>Learn more...</Link>
</div>
</div>
))}
</div>
);
}
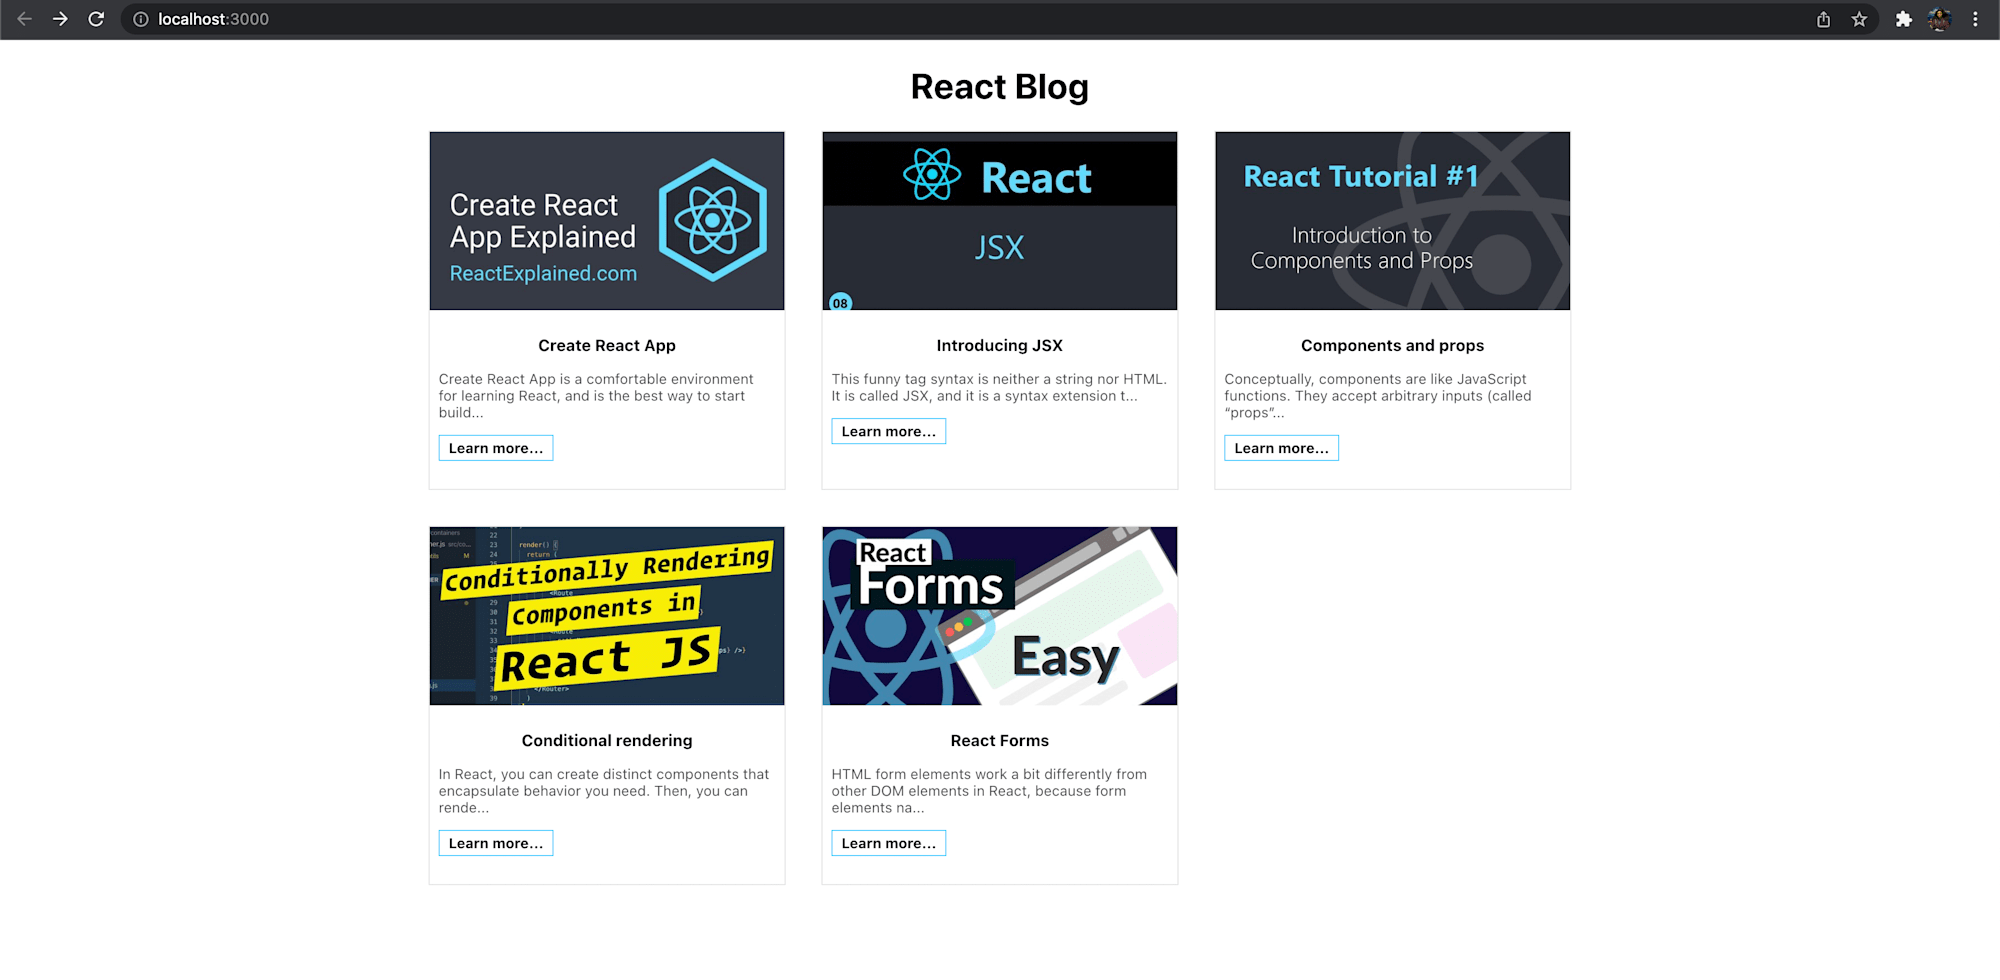
Code language: JavaScript (javascript)The Home component accepts a data prop and renders a list of blog post cards. Each card has an automatically generated YouTube video thumbnail, details about the post, and a link to the post’s page.
To keep things simple, we will be working with locally generated sample data. Create a file called data.json in the /src directory and populate it with the JSON data from this codeSandbox file.
The file holds a JSON object made up of an array of sample posts. Now replace the code in your App.js file with the following:
    import { Routes, Route, Link } from 'react-router-dom';
    import Home from './components/Home';
    import BlogPost from './components/BlogPost';
    import data from './data.json';
    import './App.css';
    function App() {
      return (
        <div className="App">
          <div>
            <Link to="/">
              <h1>React Blog</h1>
            </Link>
          </div>
          <main>
            <Routes>
              <Route path="/" element={<Home data={data} />} />
              <Route path="/blogpost/:id" element={<BlogPost data={data} />} />
            </Routes>
          </main>
        </div>
      );
    }
    export default App;
Code language: JavaScript (javascript)
We imported the basic routing components, the previously created Home component, and the sample data in the code above. Then we configured our route inside the App component. Route accepts an element prop set to the Home component.
With that done, we need to wrap our application with the BrowserRouter component as required by React Router. Update your index.js file in the /src folder with the following:
    import React from 'react';
    import ReactDOM from 'react-dom';
    import './index.css';
    import App from './App';
    import { BrowserRouter } from 'react-router-dom';
    ReactDOM.render(
      <React.StrictMode>
        <BrowserRouter>
          <App />
        </BrowserRouter>
      </React.StrictMode>,
      document.getElementById('root')
    );
Code language: JavaScript (javascript)
Let’s add some styles to give the application a decent look. Add the following to your App.css file:
    .App {
      width: 1024px;
      max-width: 90%;
      margin: 0 auto;
    }
    .App > div {
      display: flex;
      justify-content: center;
    }
    .App > div > a {
      color: inherit;
      text-decoration: none;
    }
    .cards {
      display: grid;
      grid-template-columns: repeat(auto-fit, minmax(250px, 1fr));
      grid-gap: 2rem;
    }
    .card {
      height: 20rem;
      border: 1px solid rgba(0, 0, 0, 0.1);
    }
    .card > .img-wrapper {
      height: 50%;
    }
    .card > .img-wrapper > img {
      width: 100%;
      height: 100%;
      object-fit: cover;
    }
    .card > div:last-child {
      padding: 0.5rem;
      height: 50%;
    }
    .card > div > h3 {
      text-align: center;
      font-size: 0.9rem;
    }
    .card > div > p {
      font-size: 0.8rem;
      color: #555;
    }
    .card > div > a {
      text-decoration: none;
      padding: 0.2rem 0.5rem;
      border: 1px solid #4cf;
      color: inherit;
      font-weight: 700;
      font-size: 0.8rem;
      display: inline-block;
    }
    .blog > h3 {
      margin-bottom: 1rem;
    }
    .blog * {
      width: 100%;
    }
    .btn {
      display: inline;
      padding: 0.5rem 2rem;
      margin: 0.7rem 0;
      width: auto;
      background: #fff;
      border: 1px solid #4cf;
      cursor: pointer;
      font-size: 1rem;
      font-weight: 600;
    }
Code language: CSS (css)
Save the changes, and your application should now look like this:
The react-youtube package simplifies the integration of the YouTube player into React applications by providing a utility React component, <YouTube />, which accepts a videoId prop, an onReady prop, and some other optional props. The videoId prop gives the id of a particular YouTube video, while onReady hold a function that will be executed when the player is ready.
The following code illustrates the basic use of the component as well as its available props:
    <YouTube
      videoId={string} // defaults -> null
      id={string} // defaults -> null
      className={string} // defaults -> null
      containerClassName={string} // defaults -> ''
      title={string} // defaults -> null
      opts={obj} // defaults -> {}
      onReady={func} // defaults -> noop
      onPlay={func} // defaults -> noop
      onPause={func} // defaults -> noop
      onEnd={func} // defaults -> noop
      onError={func} // defaults -> noop
      onStateChange={func} // defaults -> noop
      onPlaybackRateChange={func} // defaults -> noop
      onPlaybackQualityChange={func} // defaults -> noop
    />;
Code language: JavaScript (javascript)
Open your App.js file and add a dynamic route to configure a dynamic path based on the id of each blog post.
    import BlogPost from './components/BlogPost';

    //...

    <Routes>
      <Route path="/" element={<Home data={data} />} />
      <Route path="/blogpost/:id" element={<BlogPost data={data} />} />
    </Routes>
Code language: JavaScript (javascript)
Now, let’s create a BlogPost.js file in the src/components directory and add the following to it:
    import React from 'react';
    import YouTube from 'react-youtube';
    import { useParams } from 'react-router';
    export default function BlogPost({ data }) {
      const params = useParams();
      const post = data.posts.find((dataItem) => dataItem.id === params.id);
      const youtubeID = post.url.split('v=')[1];
      const onReady = (e) => {
        console.log(e.target);
      };
      return (
        <div className="blog">
          <h3>{post.title}</h3>
          <p>{post.content}</p>
          <div className="player">
            <YouTube videoId={youtubeID} onReady={onReady} />
          </div>
        </div>
      );
    }
Code language: JavaScript (javascript)
We imported the useParams hook, which is used to extract the params object from the dynamic path. Then we created a BlogPost component that accepts our sample local data as a prop. The data is then traversed to find the post object whose id matches the params id.
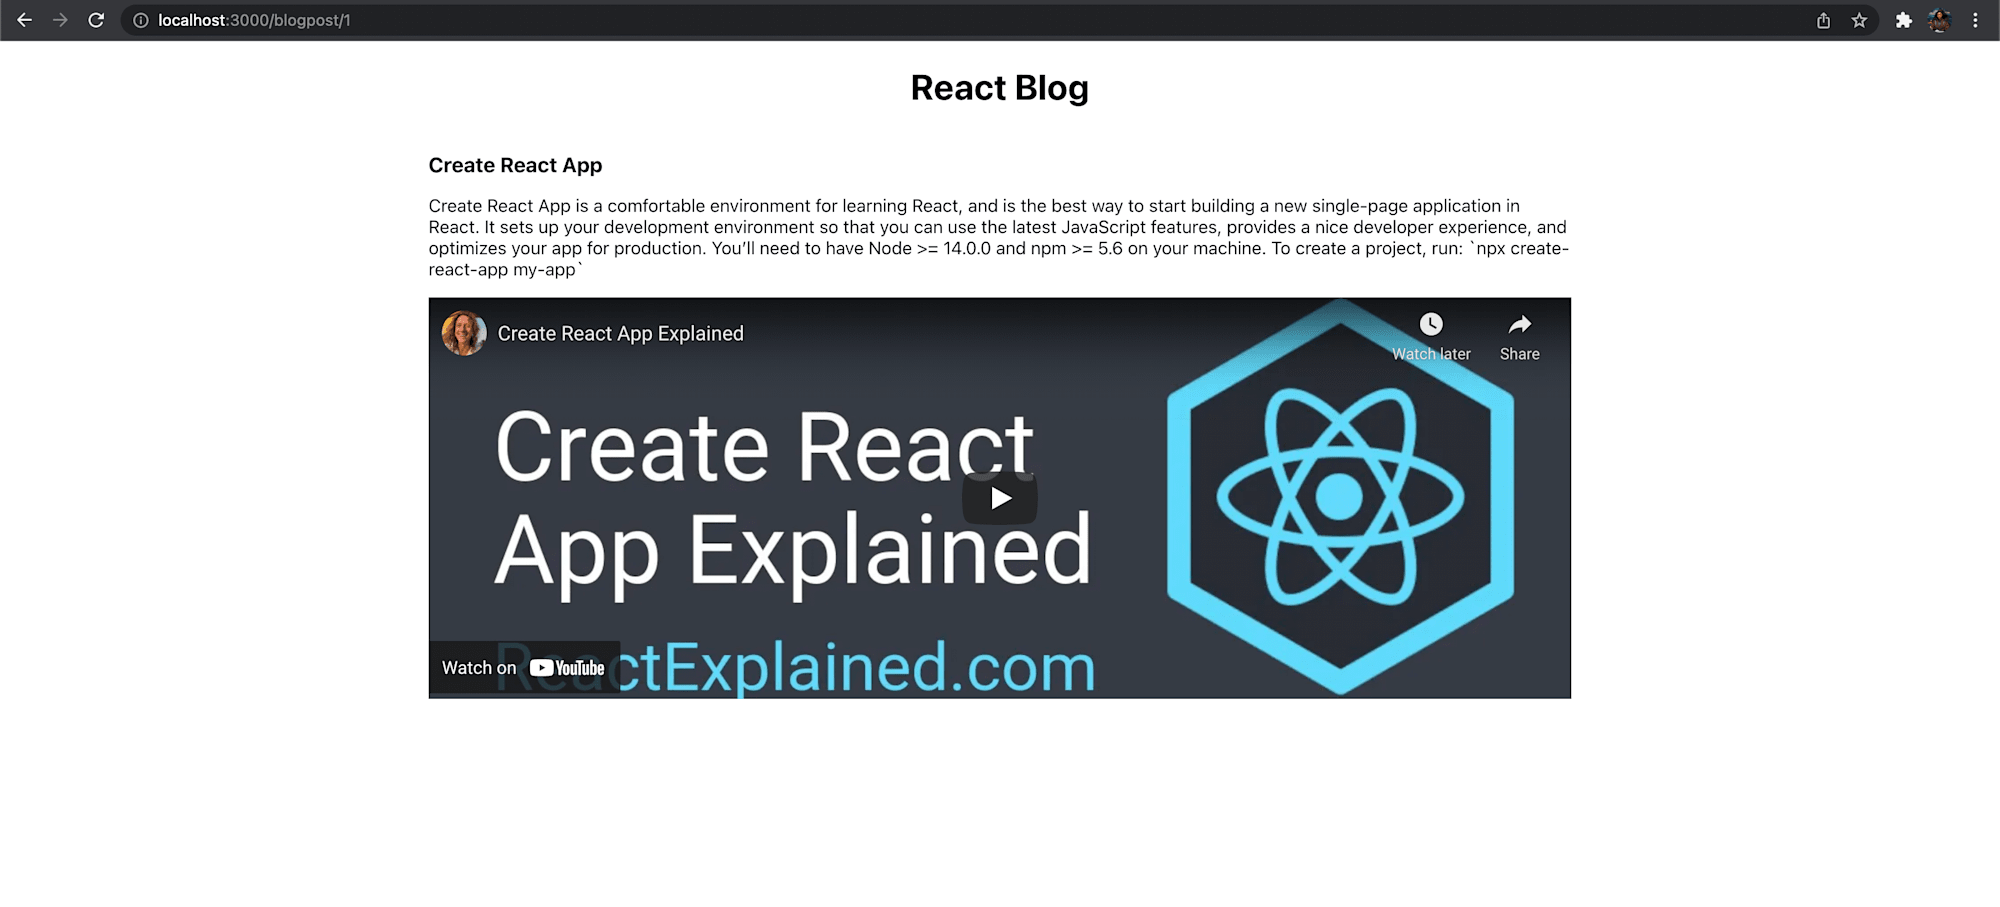
The video id of a YouTube video is usually contained in the video URL, mostly specified as a query parameter v. We performed some JavaScript string manipulation to extract the video id from the URL. The component then renders some content and, most importantly, the YouTube Player that takes the videoId and an onReady prop as props.
To view a blog post, save the changes and click on any blog post on the home page. You should see the embedded YouTube Player with an already loaded video.
The YouTube IFrame API provides a lot of freedom by defining many parameters that make the YouTube player more customizable. For example, you can easily define the player controls externally, set the video to play repeatedly, cause the player to play the loaded video automatically after rendering, etc.
However, the react-youtube package has an opts object prop that can help manage the video player’s preferences. The opts prop has a playerVars nested object that allows you to utilize the usual YouTube IFrame API parameters and set a custom width and height for the player.
Let’s look at some of the customization possibilities.
Users can disable the default player controls and then create their logic by altering the API’s state. For simplicity, we will include only the pause and play controls.
Update the code in your BlogPost.js file to look like this:
    import React, { useState } from 'react';
    import YouTube from 'react-youtube';
    import { useParams } from 'react-router';
    export default function BlogPost({ data }) {
      const [player, setPlayer] = useState(null);
      const params = useParams();
      const post = data.posts.find((dataItem) => dataItem.id === params.id);
      const youtubeID = post.url.split('v=')[1];
      const onReady = (e) => {
        setPlayer(e.target);
      };
      const onPlayHandler = () => {
        player.playVideo();
      };
      const onPauseHandler = () => {
        player.pauseVideo();
      };
      return (
        <div className="blog">
          <h3>{post.title}</h3>
          <p>{post.content}</p>
          <div className="player">
            <YouTube
              videoId={youtubeID}
              onReady={onReady}
              opts={{
                playerVars: {
                  controls: 0,
                },
              }}
            />
          </div>
          <button onClick={onPlayHandler} className="btn">
            Play
          </button>
          <button onClick={onPauseHandler} className="btn">
            Pause
          </button>
        </div>
      );
    }
Code language: JavaScript (javascript)
We created a new state variable called player to hold the player state in the onReady function when rendering the YouTube player component. We then use this player state to call the playVideo and pauseVideo methods in their respective play and pause handlers.
The controls key in the playerVars object takes 0 and 1 as values. When set to 0, the player controls do not display in the player and vice versa.
The API has an autoplay parameter which indicates whether the video should start playing automatically when the player loads or not. It takes the values 0 and 1 as well. When set to 1, it enables autoplay, allowing instant video playing without any human interaction with the player. While 0, which is the default value, disables autoplay.
To enable autoplay, set the value of the autoplay key in the playerVars object to 1.
    <YouTube
      videoId={youtubeID}
      onReady={onReady}
      opts={{
        playerVars: {
          autoplay: 1,
        },
      }}
    />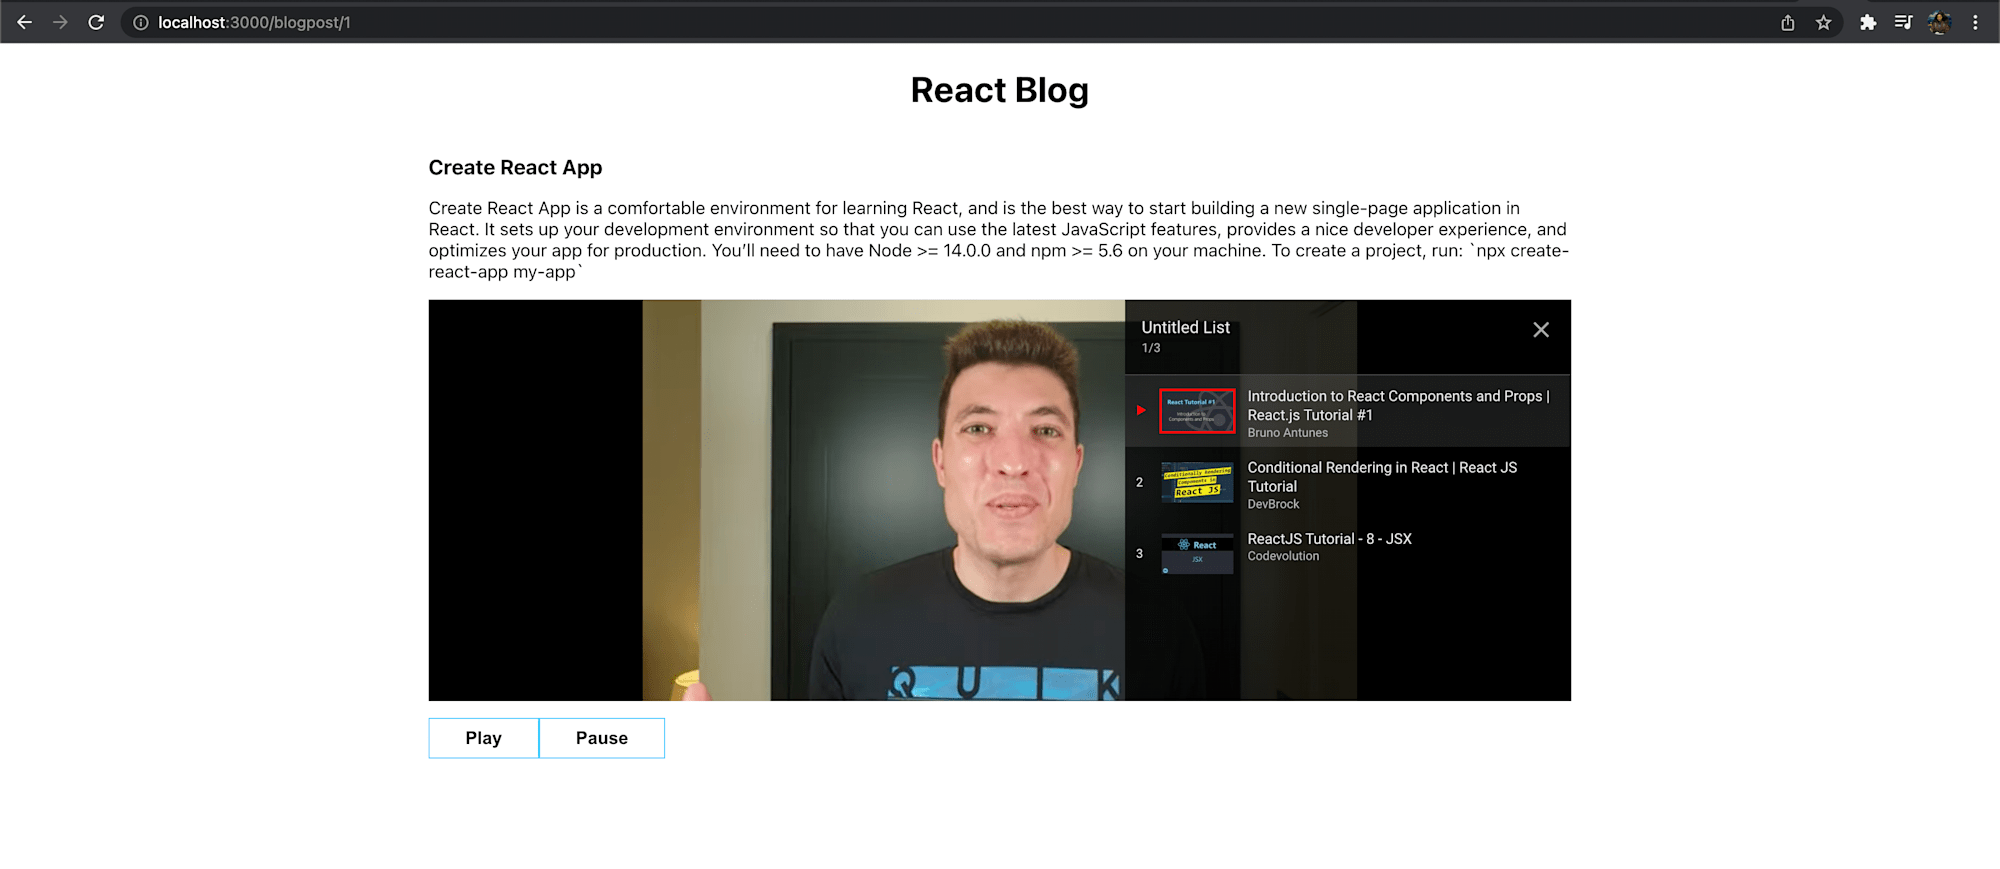
Code language: HTML, XML (xml)The YouTube IFrame API also provides a playlist parameter that allows you to create a playlist of videos. To create a playlist, add a playlist object key to the playerVars object with a string value containing comma-separated IDs of the videos to form the playlist.
To demonstrate this in our application, update the opts props in the rendered YouTube component to look like this:
    <YouTube
      videoId={youtubeID}
      onReady={onReady}
      opts={{
        playerVars: {
          playlist: '00AkMN9IAAY,4oCVDkb_EIs,7fPXI_MnBOY',
        },
      }}
    />;
Code language: HTML, XML (xml)
In the code, we used hardcoded video ids to define the playlist. Save the file to view the changes in the browser.
Manually Set the Start and Stop Time.
The API accepts start and stop parameters that help determine when the player should start or stop playing the provided video in seconds relative to the start of the video.
    <YouTube
        videoId={youtubeID}
        onReady={onReady}
        opts={
          { playerVars: {
            start: <<start-time>>,
            stop: <<stop-time>>
          } }
        }
    />
There are so many customization settings in the YouTube IFrame API that we can’t possibly cover them all in this article. However, you can click here to learn more about other parameters to personalize your YouTube player.
You can find the complete project here on Github.
In this post, we saw how to embed a YouTube player into a React app using the react-youtube package. In addition, we looked at a few of the options for personalization.
Resources you may find helpful: