
How can we know if our efforts are worth the time and resources if we don’t measure the most crucial digital analytics metrics? Understanding and tracking the correct metrics is critical in ensuring that marketing activities are effective.
Impression as a form of metric refers to the number of times a web content was displayed to users. This metric vastly differs from reach, which only measures the number of people that have viewed your content. It is important not to confuse an impression with an engagement.
This article demonstrates how to track image impressions using Gatsby.js and Supabase — a serverless database.
We completed this project in CodeSandbox. Fork it to get started quickly.
The source code is on GitHub.
To get the most out of this article, the following requirements apply:
Create a Gatsby.js app in a new folder by running the following command in the terminal:
npm init gatsby
It will request a project title and the directory name for the project. Continue to follow the prompts to select a preferred language (JavaScript or TypeScript), CMS, styling tools, and other features. Then Gatsby.js will ask to create a Gatsby site in the directory of the project:
    Create a new Gatsby site in the folder <project-name>
    Shall we do this? <Y/n> : Yes
Code language: JavaScript (javascript)
Navigate into the project directory and install Cloudinary React SDK, Supabase, and react-intersection-observer dependencies.
    cd <project-name>
    npm install cloudinary-react @supabase/supabase-js react-intersection-observer
Code language: HTML, XML (xml)
Running npm run develop starts the project on the local development server at https://localhost:8000 in our browser.
Supabase is an open-source Firebase alternative made up of tools that help developers build projects faster by handling backend functions.
Behind the scenes, Supabase uses the PostgreSQL database and it is regarded widely as one of the best tools based on Postgres – a highly scalable relational database. The platform develops a REST API from the database’s tables and columns. Its autogenerated APIs include built-in features like filtering and sorting.
To get started, create an account in Supabase here. We’ll also need a GitHub account; click here to create one.
After logging in, we’ll be redirected to the Supabase dashboard, as shown below, where we’ll create a new Supabase project for the demo application.
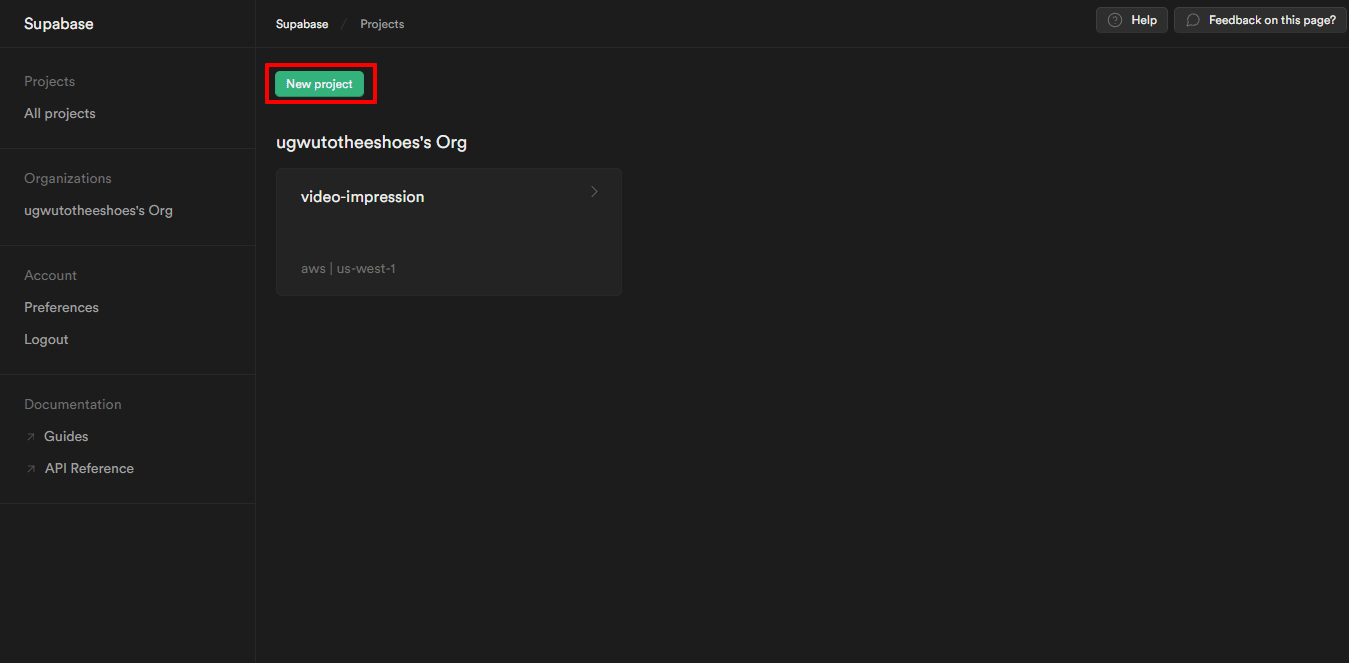
Set a name and password for the new project and click on the “New project” button to create the project as shown below.
As the project is being built, we’ll create the database for the image impressions by clicking on the database icon shown on the sidebar. After that, click on the “New” button at the top right of the screen to create a table for the database.
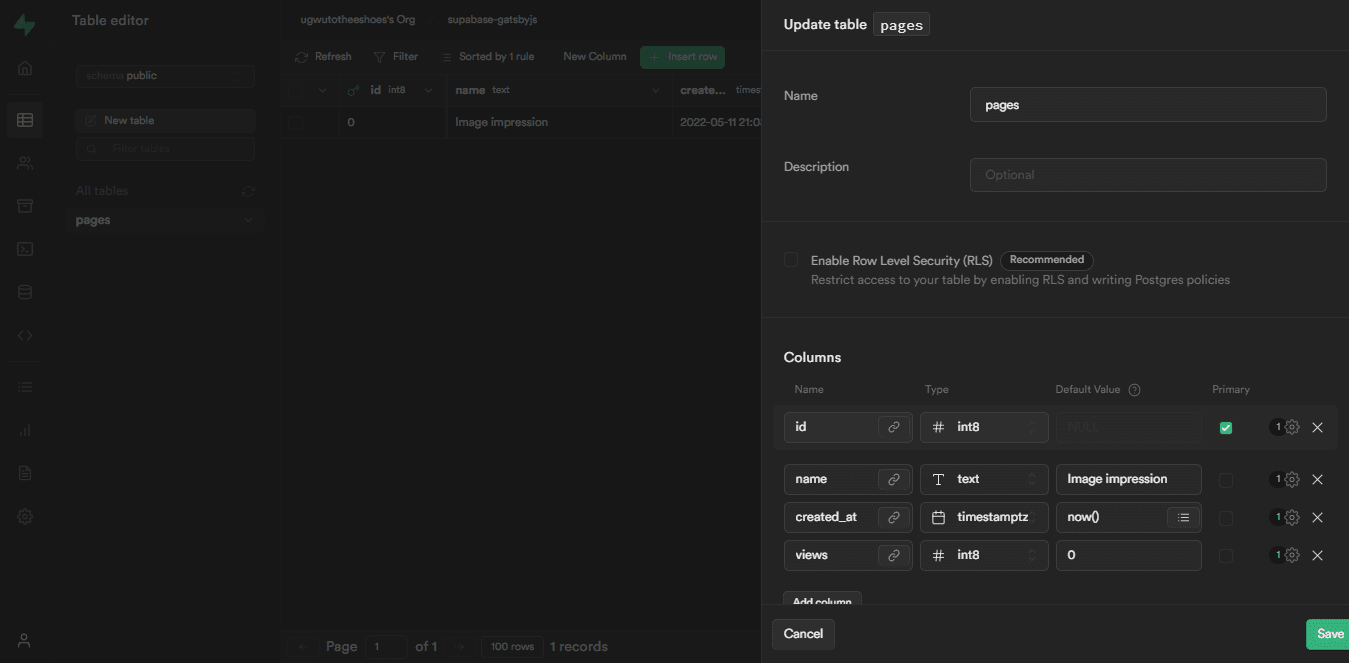
We created multiple columns for the database table in the above image. The created columns represent the following:
-
id– key value to access the database -
name– name of the database -
created_at– time stamp for creating the database -
views– number of image impressions
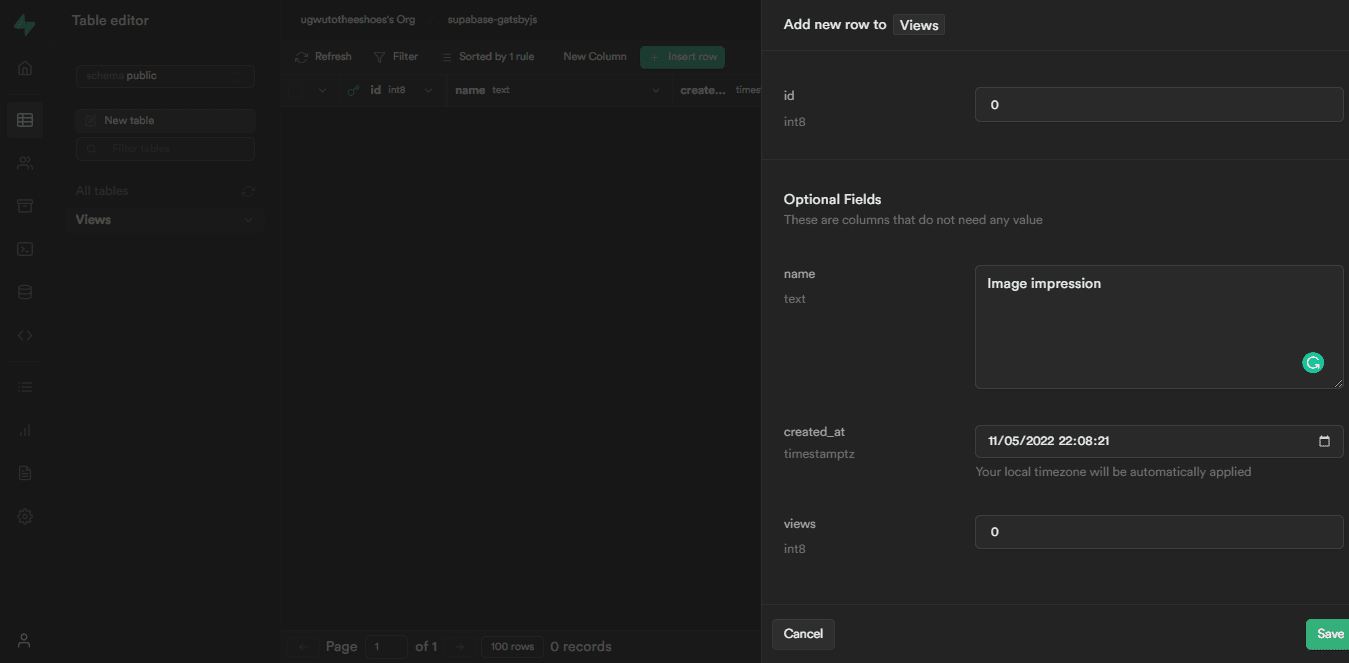
After creating these columns, we’ll access the Table editor by clicking the Table icon shown on the sidebar to add a default value for our table. Click on “insert row” and add the default values below.
Navigate to the SQL editor and create a query tab to add a stored procedure to our database. A stored procedure allows us to add or extend functionality to the database.
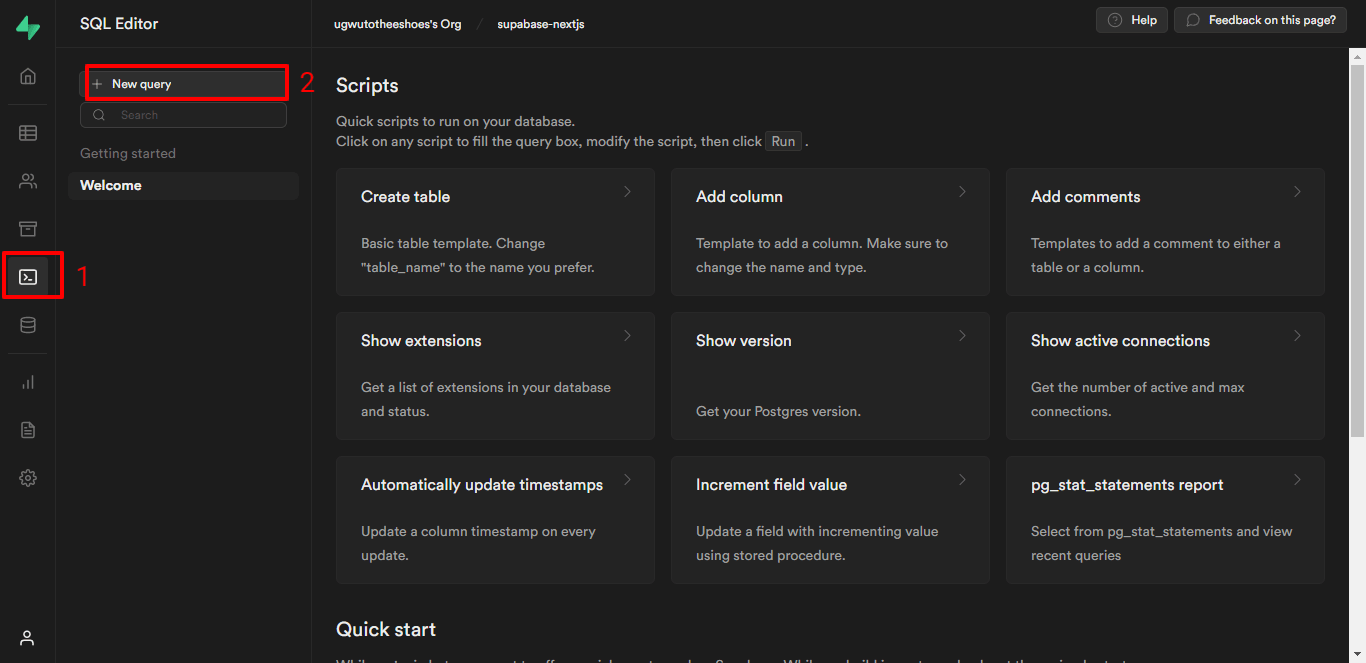
Add the code snippet below to the new query to create the stored procedure for our database:
    create function increment (row_id int)
    returns void as
    $$
      update pages
      set views = views + 1
      where id = row_id;
    $$
    language sql volatile;

Code language: JavaScript (javascript)
Let’s break down the query above:
- Creates an increment function, with the row
idas an argument -
set views = views + 1updates/increases the image impressions value calledviewsin the database table by 1
Then, click the “RUN” button to create the function. Later we’ll utilize the function to update the image impressions.
Cloudinary is a cloud-based picture and video management service that includes uploads, storage, manipulations, optimizations, and distribution. It also enables developers to include video players in their apps that properly handle video events.
After successfully creating an account, Cloudinary will redirect us to our account’s dashboard page, where we can upload the demo image.
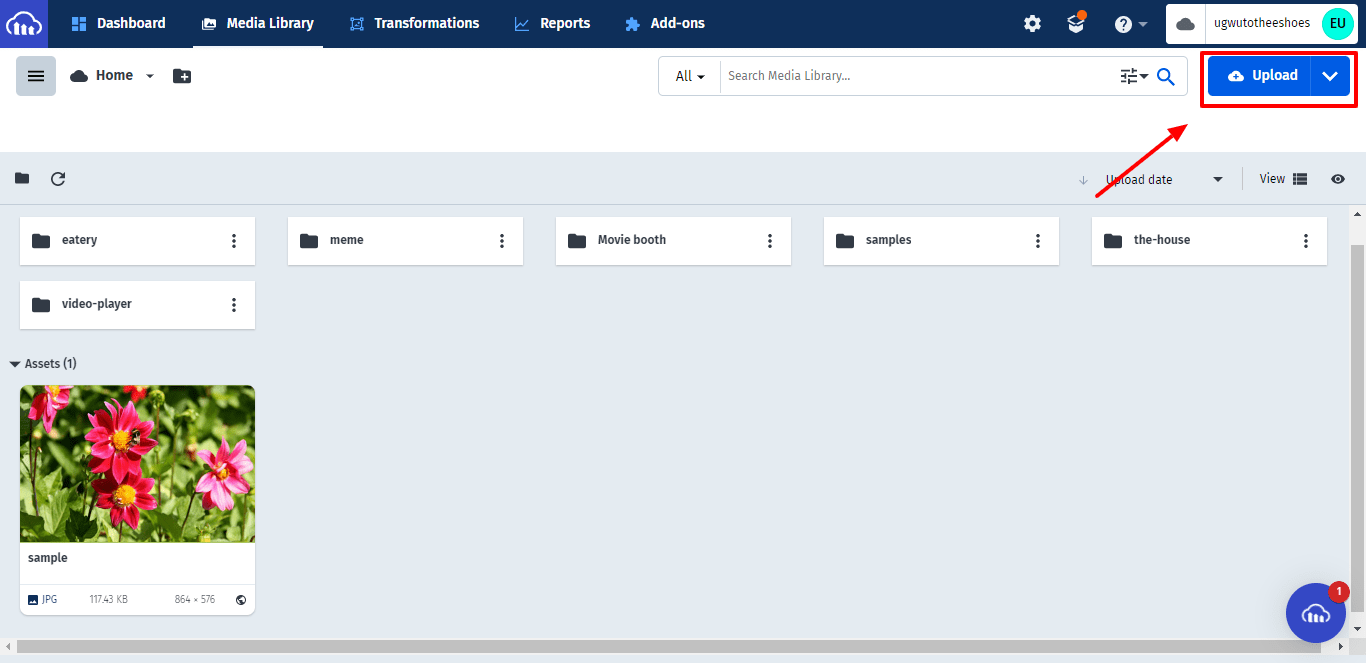
Click on the “Upload” button as shown above and select the image file to be uploaded.
In the index.js file, we’ll import the required components from Cloudinary React SDK and integrate the Cloudinary image, as shown below:
    //pages/components/index.js

    import React from "react";
    import { Image, CloudinaryContext } from "cloudinary-react";

    const IndexPage = () => {
    return(
    <CloudinaryContext cloud_name="OUR-CLOUD-NAME">
    <div className="image-container">
        <Image
         publicId="OUR-IMAGE-NAME"
         width="300px"
         height="400px"
        />
    </div>
    </CloudinaryContext>
    )};

    export default IndexPage;
Code language: JavaScript (javascript)
In the code above, we do the following:
- Apply the Cloud name from our Cloudinary account details on the dashboard page
- Include the name of the image from Cloudinary in the Image component
- Give the image a width of 300px and a height of 400px
Next, we’ll loop through an array of dummy text to make the app look better:
    const IndexPage = () => {
    return(
     <main className="container">
          <title>Track Image impressions in Gatsby.js with Supabase</title>
          <h1>tracking image impressions in gatsby.js with supabase</h1>
          {Array.from(Array(5).keys()).map((i) => (
            <p key={i}>
              Irure pariatur velit est anim ipsum anim aliquip officia velit
              consectetur. Duis sint ut consectetur ea anim. Sit proident culpa
              velit officia do incididunt Lorem in deserunt non adipisicing occaecat
              magna. Occaecat occaecat esse excepteur consequat occaecat cupidatat
              aliquip labore esse ad ea. Laboris id excepteur nisi voluptate sunt
              anim commodo amet reprehenderit.
            </p>
          ))}

     // ... { Cloudinary Image }

      {Array.from(Array(8).keys()).map((i) => (
            <p key={i}>
              Irure pariatur velit est anim ipsum anim aliquip officia velit
              consectetur. Duis sint ut consectetur ea anim. Sit proident culpa
              velit officia do incididunt Lorem in deserunt non adipisicing occaecat
              magna. Occaecat occaecat esse excepteur consequat occaecat cupidatat
              aliquip labore esse ad ea. Laboris id excepteur nisi voluptate sunt
              anim commodo amet reprehenderit.
            </p>
          ))}
        </main>
      );
    };
    export default IndexPage;
Code language: JavaScript (javascript)
After configuring the dummy text, the demo application will look like this:
Integrating react-intersection-observer
react-intersection-observer is the React implementation of the Intersection Observer API that indicates when an element enters or leaves the viewport. It contains a hook, renders props, and plain children implementation.
It provides a useInView hook, which makes it easy to monitor the state of our components. We’ll use the custom InView component, which will be called whenever the state changes, with a ref that should be assigned to the element root. The InView component uses a default state of true or false, so if the image enters the viewport, its state is true, and if it leaves the viewport, its state is false.
//index.js

import React from "react";
import { Image, CloudinaryContext } from "cloudinary-react";

const IndexPage = () => {
return(

//array of dummy text

<CloudinaryContext cloud_name="OUR-CLOUD-NAME">
    <InView>
          {({ ref }) => (
            <div className="image-container" ref={ref}>
              <Image
                publicId="OUR-IMAGE-NAME"
                width="300px"
                height="400px"
              />
            </div>
          )}
        </InView>
      </CloudinaryContext>

// array of dummy text

)};
export default IndexPage;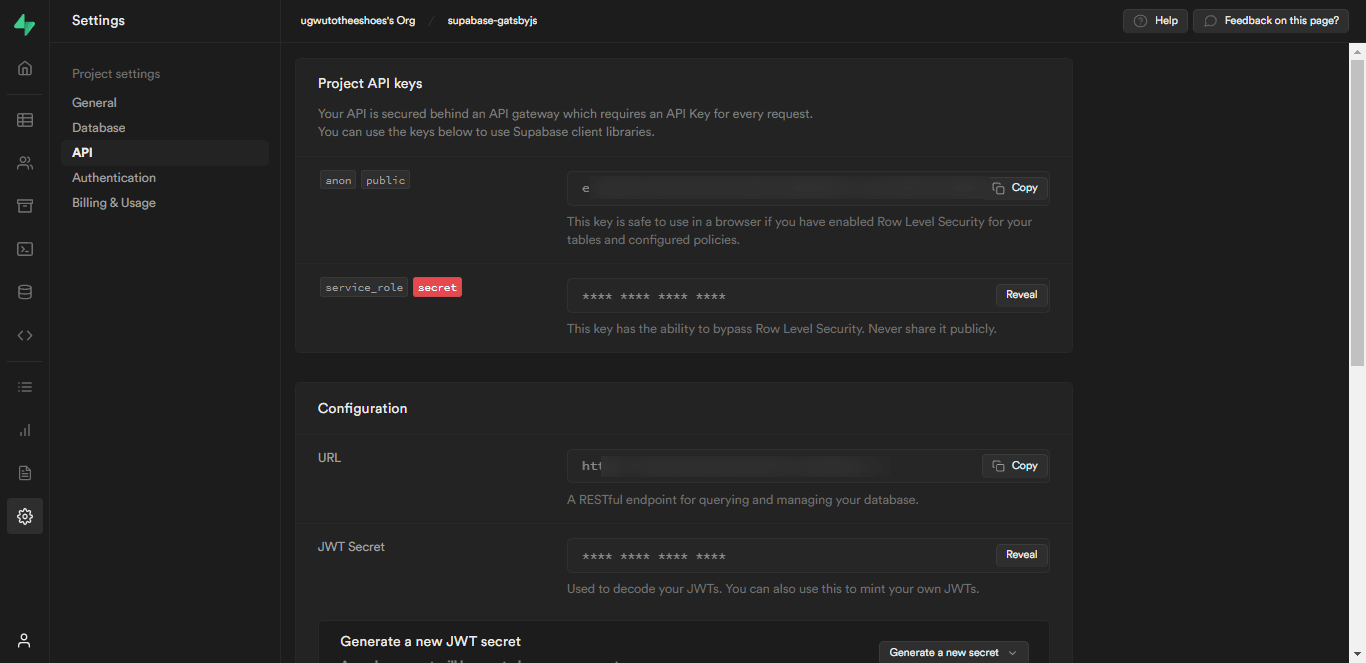
Code language: JavaScript (javascript)We’ll need to link our Supabase API URL and API Key to the demo application. First off, head to Supabase’s settings, then go to the “API” section, where we can access our Supabase project’s API URL and API Key as shown below:
Then, create a .env file in the app’s root directory to store the API URL and API Key:
    #.env
    SUPABASE_URL= OUR_PUBLIC_SUPABASE_URL
    SUPABASE_KEY= OUR_PUBLIC_SUPABASE_KEY
Code language: PHP (php)
Next, we’ll add the API URL and API Key to the index.js file:
    //pages/components/index.js
    import { createClient } from "@supabase/supabase-js";

    const IndexPage = () => {
    const supabase = createClient(
      process.env.SUPABASE_URL,
      process.env.SUPABASE_KEY
    );
     return (
        // Cloudinary Image
    )};
Code language: JavaScript (javascript)
To update the Supabase database, we’ll create the function, endFunction, which is triggered anytime the state of the InView component changes. The function uses a Supabase Remote Procedure Call (RPC) to increase the number of impressions at Supabase’s database by 1:
    //index.js
    import React, { useState } from "react";
    import { Image, CloudinaryContext } from "cloudinary-react";

    const IndexPage = () => {
    const supabase = createClient(
      process.env.SUPABASE_URL,
      process.env.SUPABASE_KEY
    );
      const endFunction = async (inView) => {
        if (inView) {
          const { data, error } = await supabase.rpc("increment", { row_id: 1 });
        }
      };
     return (
        <CloudinaryContext cloud_name="OUR-CLOUD-NAME">
            <InView onChange={(inView) => endFunction(inView)}>

              // .....

            </InView>
          </CloudinaryContext>
    )};

Code language: JavaScript (javascript)
After testing the demo application, it should look like this:
This article discussed what Supabase is, the advantages of implementing it in applications, and, more importantly, how to integrate Supabase into web applications.