
Autoplay videos can work exceptionally well in specific contexts. Want a muted promotional banner to showcase your products? An interactive product tour? A hero section that shares your brand at a glance? When set up correctly, autoplay videos increase engagement, as users can watch your content without the extra step of clicking. The challenge is making sure your video is optimized so it doesn’t tank the user’s experience.
This guide will walk you through how to deliver smooth autoplay videos that lazy load and play fast. Cloudinary’s intelligent video optimization can automatically handle format selection to quality adjustment, while you focus on creating amazing user experiences.
To get started, it’s helpful to understand the foundational problem with videos and Core Web Vitals, then dive into the practical solutions. Make sure to complete the prerequisites below to follow along.
You should have:
- Basic knowledge of HTML, CSS, and JavaScript.
- Understanding of web performance concepts.
- A free Cloudinary account for video optimization.
- A local development server (Python, Node.js, or VS Code Live Server).
You can also view the complete source code on GitHub to see the end result.
Videos impacts the critical metrics Google uses to evaluate your site’s performance, which is known as the Core Web Vitals triad. Let’s break down how and why:
- Largest Contentful Paint (LCP). This measures loading performance, i.e., how long the most significant element in the visible viewport takes to load. Videos that serve as hero elements are often the LCP element, and slow-loading videos directly increase this metric.
- First Input Delay (FID). This measures interactivity, as heavy video processing can block the main thread, increasing input delay.
- Cumulative Layout Shift (CLS). This measures visual stability. Videos without reserved dimensions cause significant layout shifts as they load. To provide a good user experience, pages should maintain a cumulative layout shift (CLS) of less than 0.1 layout shift score.
With critical impact metrics Google uses to evaluate site performance, poorly optimized videos can compromise all three metrics, reducing your overall page performance score and negatively impacting SEO rankings and user experience.
Next, let’s tackle the problem. The key to maintaining fast performance while using engaging video content is lazy loading. In other words, ensuring videos only load when users need to see them. This prevents unnecessary bandwidth consumption and keeps your initial page load lightning-fast.
In the next section, you’ll implement three progressively lazy loading methods, starting with simple native HTML attributes and advancing to intelligent, connection-aware optimization with Cloudinary.
First, create the project using the following command to build a hands-on demo page to test each method side by side, with live performance feedback so you can see the differences in action using vanilla HTML, CSS, and JavaScript.
# Create project directory

mkdir video-optimization-tutorial

cd video-optimization-tutorialCode language: PHP (php)
Next, create the basic file structure:
# Create the basic file structure

mkdir css js images videos

touch index.html css/styles.css js/main.js js/cloudinary-config.jsCode language: PHP (php)
Then start or set up your local server with the following command:
# Using Live Server extension in VS Code (recommended)

# Just right-click index.html and select "Open with Live Server"

# Option 2: Using Node.js http-server

npm install -g http-server

http-serverCode language: PHP (php)
Your project structure should look like this:
video-optimization-tutorial/

├── index.html

├── css/

│   └── styles.css

├── js/

│   ├── main.js

│   └── cloudinary-config.js

├── images/

└── videos/You need environment credentials from your Cloudinary dashboard to use Cloudinary video transformations and create optimized video delivery.
Log in to your Cloudinary dashboard to retrieve environment credentials such as the cloud name, API key, and API secret.

Add your environment credentials inside the js/cloudinary-config.js file:
// js/cloudinary-config.js

const CLOUDINARY_CONFIG = {

  cloudName: 'your-cloud-name', // Replace with your actual cloud name

  apiKey: 'your-api-key' // Only needed for uploads, not transformations

};

// Initialize Cloudinary (we'll add this script tag to HTML)

const cloudinary = window.cloudinary ? window.cloudinary.Cloudinary.new({

  cloud_name: CLOUDINARY_CONFIG.cloudName,

  secure: true

}) : null;Code language: JavaScript (javascript)
Replace your-cloud-name with your actual Cloudinary cloud name.
For client-side implementations, you only need the cloud name. API keys and secrets are only required for server-side uploads and sensitive operations.
Add any video of your choice to the videos folder. For experimentation, you can use these examples: demo-video and hero-video.
Lazy loading ensures videos don’t load until needed, saving bandwidth and improving initial page load times. There are three main approaches you can use:
- Native Lazy Loading. Using HTML5’s built-in
loading="lazy"attribute. - Intersection Observer API. JavaScript-based approach for advanced control.
- Cloudinary SDK Lazy Loading. Automated optimization with intelligent loading.
Let’s implement each approach step by step.
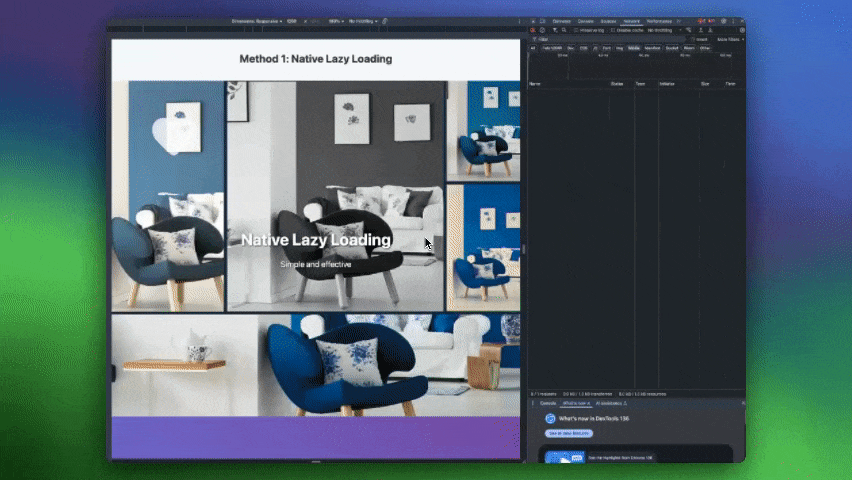
Native lazy loading is the most straightforward approach, but it has some limitations. Let’s implement it by creating the base HTML structure.
To create the base HTML structure, add this code snippet to your index.html. Then add this CSS styles to your css/styles.css.
- Open Chrome DevTools (F12) and go to the Network tab.
- Refresh the page and don’t scroll yet.
- Check the Network tab. You should only see the hero-demo video loading.
- Scroll down towards the demo section.
- Watch the Network tab. The lazy video should load when you get close (~1000px away).
- Notice the timing. The
demo-videoloads automatically before you can see it.
You should observe that the second video only loads when you scroll near it, saving bandwidth on initial page load.
While native lazy loading is simple, it offers limited control over when the video loads and provides no feedback on the loading process. For more precise control, real-time status updates, and coordination with autoplay, the Intersection Observer API is a powerful JavaScript-based solution.
This method allows you to define exactly when a video should start loading based on its visibility within the viewport or a specified margin around it.
Next, you should modify the index.html to set up the demonstration for the Intersection Observer. This includes a dedicated section for this method, status display elements to provide real-time feedback, and a video element that will be controlled by our JavaScript.
Update the index.html file with this code snippet. Then, add these specific styles inside the css/styles.css file for the new elements introduced in Method 2, particularly for the status display and its dynamic coloring. Some styles might be similar to Method 1.
This is where the Intersection Observer comes into play. You’ll write a script to observe the lazy-load video. When it’s about to enter the viewport (within a 200px margin), your script will dynamically load its source and attempt to autoplay it. It will also update the status display elements to show what’s happening.
First, you must ensure your script waits for the HTML to be fully loaded before it tries to find elements on the page. You also need a way to check if the user’s browser even supports the Intersection Observer API.
To do this, add the following code to your js/main.js file. This sets up an event listener for when the page is ready and includes a helper function to check for Intersection Observer support. If it’s not supported, the status display will be updated accordingly.
// js/main.js - Method 2: Intersection Observer API

document.addEventListener("DOMContentLoaded", function () {

  console.log("🎬 Method 2: Intersection Observer loaded");

  if (!isIntersectionObserverSupported()) {

    console.warn("⚠️ Intersection Observer not supported in this browser");

    const statusElement = document.getElementById("observer-status");

    if (statusElement) {

        // This relies on updateStatus, which you'll add soon.

        // For now, you could use: statusElement.textContent = "Browser not supported";

        // statusElement.className = "value error";

        // We'll define updateStatus next to handle this more cleanly.

    }

    const distanceElem = document.getElementById("observer-distance");

    if (distanceElem) distanceElem.textContent = "-";

    // The call to updateStatus will be fully functional after you add that function.

    // For now, this structure prepares for it.

    return;

  }

  // Initialize the Intersection Observer for lazy loading

  setupIntersectionObserver(); // You'll define this function next.

});

function isIntersectionObserverSupported() {

  return "IntersectionObserver" in window;

}Code language: JavaScript (javascript)The updateStatus call inside the if block will make more sense once you add the updateStatus function in the next step. For now, it sets the stage.
To give users clear feedback, you need functions to update the status messages (like “Loading…”, “Playing”) and the distance display.
Add the updateStatus function to your js/main.js. This helper will change the text and apply a CSS class to the status element on your page, making it easy to see the current state.
//...

function updateStatus(statusElement, text, className) {

  if (!statusElement) return;

  statusElement.textContent = text;

  const classesToRemove = ["not-loaded", "loading", "loaded", "playing", "error", "paused"];

  statusElement.classList.remove(...classesToRemove);

  if (className) {

    statusElement.classList.add(className);

  }

  console.log(`📊 Status updated: ${text}`);

}Code language: JavaScript (javascript)
Now that updateStatus is defined, you can complete the browser support check. Go back to your DOMContentLoaded listener and ensure the updateStatus call is present if the browser isn’t supported:
//...

// Inside your DOMContentLoaded listener, update the if block:

  if (!isIntersectionObserverSupported()) {

    console.warn("⚠️ Intersection Observer not supported in this browser");

    const statusElement = document.getElementById("observer-status");

    // NOW THIS WILL WORK:

    if (statusElement) updateStatus(statusElement, "Browser not supported", "error");

    const distanceElem = document.getElementById("observer-distance");

    if (distanceElem) distanceElem.textContent = "-";

    return;

  }Code language: JavaScript (javascript)
Next, add the updateDistanceDisplay function. This will calculate the distance of the video from the viewport and update the corresponding element on your page, visually indicating when the video is approaching the loading trigger point.
//...

function updateDistanceDisplay(rect, distanceElement) {

  if (!distanceElement || !rect) return;

  const windowHeight = window.innerHeight;

  let distance;

  if (rect.top > windowHeight) {

    // Element is below viewport

    distance = Math.floor(rect.top - windowHeight);

  } else if (rect.bottom < 0) {

    // Element is above viewport (scrolled past)

    distance = Math.floor(Math.abs(rect.top));

  } else {

    // Element is in viewport

    distance = 0;

  }

  distanceElement.textContent = distance > 0 ? `${distance}px` : "In viewport";

  // Update color based on distance

  if (distance <= 200 && distance > 0) {

    distanceElement.style.color = "#f59e0b"; // Orange when close

  } else if (distance === 0) {

    distanceElement.style.color = "#10b981"; // Green when in viewport

  } else {

    // Reset to default/inherit color (or a specific gray if preferred)

    distanceElement.style.color = "";

  }

}Code language: JavaScript (javascript)
Using the Intersection Observer, add the setupIntersectionObserver function to js/main.js; This function will find your video and status elements, then create an IntersectionObserver instance. The observer will watch your video and trigger actions when it enters the specified margin around the viewport.
//...

function setupIntersectionObserver() {

  const lazyVideo = document.querySelector(".lazy-video");

  const statusElement = document.getElementById("observer-status");

  const distanceElement = document.getElementById("observer-distance");

  if (!lazyVideo) {

    console.warn("No lazy video found");

    if (statusElement) updateStatus(statusElement, "Video element not found", "error");

    return;

  }

  // Initial status update, assuming video and status elements are found.

  if (statusElement) updateStatus(statusElement, "Not loaded", "not-loaded");

  // Configuration for the observer

  const options = {

    root: null, // Use viewport as root

    rootMargin: "200px 0px 200px 0px", // Trigger 200px before entering viewport (top or bottom)

    threshold: 0, // Trigger as soon as any part enters the margin area

  };

  // Create the Intersection Observer

  const observer = new IntersectionObserver((entries, observerInstance) => {

    entries.forEach((entry) => {

      // Update distance display when an intersection event occurs

      updateDistanceDisplay(entry.boundingClientRect, distanceElement);

      if (entry.isIntersecting) {

        console.log("📍 Video entering load zone (200px from viewport)");

        loadVideo(entry.target, statusElement); // You'll define loadVideo next

        observerInstance.unobserve(entry.target); // Stop observing once triggered

        if (window.distanceTrackerIntervalId) { // Stop continuous tracker if it's running

            clearInterval(window.distanceTrackerIntervalId);

            window.distanceTrackerIntervalId = null;

        }

      }

    });

  }, options);

  // Start observing the video

  observer.observe(lazyVideo);

  // Set up a continuous distance tracker for better UX before intersection

  setupDistanceTracker(lazyVideo, distanceElement); // You'll define this later

}Code language: JavaScript (javascript)
When the Intersection Observer determines it’s time to load the video, the loadVideo function will be called. This function dynamically creates the <source> element for your video, attaches it, and handles events such as successful loading or errors. The attemptAutoplay function is then called to try to play the video.
Add these two functions, loadVideo and attemptAutoplay, to your js/main.js:
//...

function loadVideo(video, statusElement) {

  const startTime = performance.now();

  updateStatus(statusElement, "Loading...", "loading");

  console.log("🔄 Starting video load...");

  const source = document.createElement("source");

  // Ensure this path is correct relative to your index.html file.

  source.src = "videos/demo-video.mp4";

  source.type = "video/mp4";

  // Clear any existing sources (e.g., if this function were called multiple times on the same video)

  while (video.firstChild) {

    video.removeChild(video.firstChild);

  }

  video.appendChild(source);

  video.addEventListener("loadeddata", () => {

    const loadTime = performance.now() - startTime;

    console.log(`⚡ Video loaded in ${loadTime.toFixed(2)}ms`);

    updateStatus(statusElement, "Loaded", "loaded");

    if (video.hasAttribute("data-autoplay")) {

      attemptAutoplay(video, statusElement);

    }

  });

  video.addEventListener("error", (e) => {

    console.error("❌ Video failed to load:", e);

    updateStatus(statusElement, "Load failed", "error");

  });

  video.addEventListener("canplaythrough", () => {

    console.log("✅ Video can play through without buffering");

  });

  video.load(); // Important: tells the browser to load the video with the new source

}

function attemptAutoplay(video, statusElement) {

  console.log("🎵 Attempting autoplay...");

  video.play()

    .then(() => {

      console.log("▶️ Autoplay successful");

      updateStatus(statusElement, "Playing", "playing");

      setupViewportPause(video, statusElement); // You'll define this optional function later

    })

    .catch((error) => {

      console.warn("⏸️ Autoplay failed (browser policy):", error.message);

      updateStatus(statusElement, "Loaded (autoplay blocked)", "loaded");

    });

}Code language: JavaScript (javascript)
For an even smoother experience, you can add a function that updates the distance display more frequently than the Intersection Observer events alone. The setupDistanceTracker function uses a simple interval for this.
Add setupDistanceTracker to your js/main.js:
//...

function setupDistanceTracker(video, distanceElement) {

  // This interval updates distance for smooth feedback until intersection.

  // It clears itself if the video is removed from DOM or when the observer triggers.

  function track() {

    // Stop if video is removed or the interval has been explicitly cleared

    if (!document.body.contains(video) || !window.distanceTrackerIntervalId) {

        if (window.distanceTrackerIntervalId) clearInterval(window.distanceTrackerIntervalId);

        window.distanceTrackerIntervalId = null; // Ensure ID is cleared

        return;

    }

    const rect = video.getBoundingClientRect();

    updateDistanceDisplay(rect, distanceElement);

  }

  // Clear any existing interval before starting a new one

  if (window.distanceTrackerIntervalId) {

      clearInterval(window.distanceTrackerIntervalId);

  }

  // Initial call to set distance immediately, then start the interval

  track();

  window.distanceTrackerIntervalId = setInterval(track, 100); // Update ~10 times/sec

}Code language: JavaScript (javascript)
Optionally, to conserve resources and improve user experience, you can add functionality to pause the video when it’s scrolled out of view and resume it when it comes back. This requires another Intersection Observer.
Add the setupViewportPause function. Remember to call this from attemptAutoplay if you want this behavior.
//...

function setupViewportPause(video, statusElement) {

  const pauseObserverOptions = {

    root: null,

    threshold: 0.1, // Trigger when less than 10% of the video is visible

  };

  const pauseObserver = new IntersectionObserver((entries) => {

    entries.forEach((entry) => {

      if (!entry.isIntersecting && !video.paused) {

        console.log("⏸️ Video paused (out of viewport)");

        video.pause();

        updateStatus(statusElement, "Paused (out of view)", "paused");

      } else if (entry.isIntersecting && video.paused && video.readyState >= video.HAVE_FUTURE_DATA) {

        const currentStatus = statusElement ? statusElement.textContent.toLowerCase() : "";

        // Only resume if it was explicitly paused by this mechanism or was playing

        if (currentStatus.includes("paused") || currentStatus.includes("playing")) {

            console.log("▶️ Video resumed (back in viewport)");

            video.play()

              .then(() => {

                updateStatus(statusElement, "Playing", "playing");

              })

              .catch(e => {

                console.warn("Resume failed:", e.message);

                updateStatus(statusElement, "Paused (resume failed)", "paused");

              });

        }

      }

    });

  }, pauseObserverOptions);

  pauseObserver.observe(video);

}Code language: JavaScript (javascript)
With all these pieces in place, your js/main.js file should now correctly implement lazy loading with detailed feedback using the Intersection Observer API.
Now, with your HTML, CSS, and JavaScript updated for Method 2:
- Open your
index.htmlin a browser (preferably using your local development server). - Look at the Status Display section on your page:
- Status: Should initially show “Not loaded”.
- Distance from viewport: Should show a pixel value, e.g., “850px”.
- Scroll down slowly.
- Watch the “Distance from viewport” value decrease. Its color should change to orange when it’s 200px or less away.
- When the video is approximately 200px from entering the viewport:
- The Status should change to “Loading…”
- The
demo-video.mp4file should appear in the Network tab and start downloading.
- Once the video data is loaded:
- The Status should briefly change to “Loaded” and then to “Playing” as autoplay kicks in.
- The video in the
.video-containershould start playing automatically.
- Scroll the playing video out of view and back into view to test the pause/resume functionality (if
setupViewportPauseis active and working as intended).
You should observe that demo-video.mp4 only begins to load when you scroll close to it (specifically, when its top edge is 200px away from the bottom of the viewport or its bottom edge is 200px away from the top of the viewport due to the rootMargin).
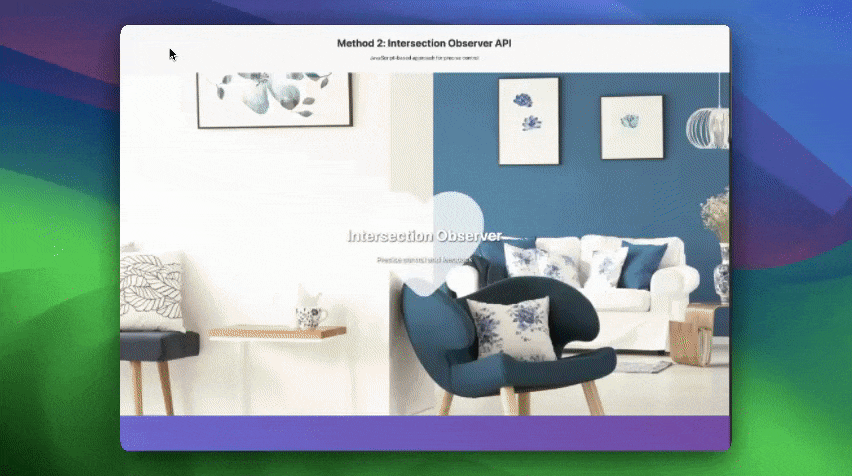
The status display provides clear, real-time feedback on this process, demonstrating the precision and control offered by the Intersection Observer API. This is a marked improvement over native lazy loading, especially for user experience and performance tuning.
While Methods 1 and 2 handle lazy loading well, they can’t optimize the video files themselves. This is where you can use Cloudinary to automatically deliver the smallest possible video file while maintaining visual quality, using AI-powered optimization that adapts to each user’s device and connection speed.
Cloudinary automatically handles format selection (WebM vs. MP4), quality optimization, and responsive sizing, resulting in significantly smaller file sizes and faster loading times.
Update your index.html file with this code snippet, similar to the previous methods, but including elements to display Cloudinary’s real-time optimizations. Then add these styles to your css/styles.css. The key addition is styling for the optimization display, which shows Cloudinary’s real-time improvements.
Next, add this first block to your js/main.js. This sets up the foundation and intersection observer:
// js/main.js - Method 3: Cloudinary SDK Integration

document.addEventListener("DOMContentLoaded", function () {

  console.log("🎬 Method 3: Cloudinary SDK Integration loaded");

  // Initialize Cloudinary optimization when video container comes into view

  setupCloudinaryLazyLoading();

});

function setupCloudinaryLazyLoading() {

  const videoContainer = document.getElementById("cloudinary-video-container");

  if (!videoContainer) {

    console.warn("Video container not found");

    return;

  }

  // Setup intersection observer to load video when it approaches viewport

  const options = {

    root: null,

    rootMargin: "200px 0px", // Same as Method 2 for comparison

    threshold: 0,

  };

  const observer = new IntersectionObserver((entries) => {

    entries.forEach((entry) => {

      if (entry.isIntersecting) {

        console.log(

          "📍 Cloudinary video container in view, generating optimized video"

        );

        generateOptimizedVideo(); // We'll add this function next

        observer.unobserve(entry.target);

      }

    });

  }, options);

  observer.observe(videoContainer);

}Code language: JavaScript (javascript)
This creates the same precise loading control as Method 2. The video will only start optimizing when it’s 200px from the viewport. Test this by opening the console and scrolling for the “video container in view” message.
Add these two functions below to js/main.js to detect the user’s connection speed and determine optimal video quality:
//...

function getConnectionType() {

  const connection =

    navigator.connection ||

    navigator.mozConnection ||

    navigator.webkitConnection;

  return connection ? connection.effectiveType : "4g";

}

function getOptimalQuality(connectionType) {

  // Cloudinary's AI automatically optimizes, but we can provide hints

  const qualityMap = {

    "slow-2g": 40, // Very low quality for slow connections

    "2g": 50, // Low quality for 2G

    "3g": 70, // Medium quality for 3G

    "4g": "auto", // Let Cloudinary's AI decide the best quality

  };

  return qualityMap[connectionType] || "auto";

}Code language: JavaScript (javascript)
Cloudinary will automatically adapt video quality based on the user’s connection speed. A user on slow 2G gets a 40-quality video, while 4G users get AI-optimized quality.
Next, you’ll generate the optimized video with Cloudinary. Create a function called generateOptimizedVideo:
//...

function generateOptimizedVideo() {

  // Check if Cloudinary SDK is loaded

  if (typeof cloudinary === "undefined") {

    updateStatus("SDK not loaded");

    console.error("❌ Cloudinary SDK not loaded");

    return;

  }

  // Detect user's connection for optimal quality

  const connection = getConnectionType();

  const quality = getOptimalQuality(connection);

  updateConnectionDisplay(connection); // We'll add this next

  updateQualityDisplay(quality); // We'll add this next

  // Generate optimized video with Cloudinary transformations

  const videoTag = cloudinary

    .videoTag("brand-portal-hero_dwdezz", {

      // Use your actual video

      quality: quality, // Auto-optimize quality based on connection

      format: "auto", // WebM for Chrome, MP4 for Safari

      width: "auto", // Responsive sizing

      dpr: "auto", // High-DPI display support

      crop: "scale", // Maintain aspect ratio

      loading: "lazy", // Built-in lazy loading

      controls: true,

      muted: true,

      poster: {

        format: "jpg",

        quality: "auto",

      },

    })

    .toHtml(); // CRITICAL: Convert VideoTag object to HTML string

  // Insert optimized video into container

  const container = document.getElementById("cloudinary-video-container");

  container.innerHTML = videoTag;

  // Update transformation URL display

  updateTransformationDisplay(cloudinary, quality); // We'll add this next

  // Monitor the optimized video

  monitorOptimizedVideo(container.querySelector("video")); // We'll add this next

  console.log("✅ Cloudinary optimized video generated");

}Code language: JavaScript (javascript)
The code snippet above is the core of Cloudinary’s power. The videoTag() call automatically handles format selection, quality optimization, responsive sizing, and lazy loading. The .toHtml() method is also important; it converts Cloudinary’s VideoTag object into actual HTML that can be inserted into the DOM.
Next, add these functions to update the optimization display in real time:
//...

function updateConnectionDisplay(connection) {

  const element = document.getElementById("connection-type");

  if (element) {

    element.textContent = connection.toUpperCase();

  }

}

function updateQualityDisplay(quality) {

  const element = document.getElementById("applied-quality");

  if (element) {

    element.textContent = quality === "auto" ? "AI-Optimized" : quality;

  }

}

function updateTransformationDisplay(cloudinary, quality) {

  const element = document.getElementById("transformation-url");

  if (element) {

    // Show the transformation parameters being applied

    const baseUrl = `https://res.cloudinary.com/${CLOUDINARY_CONFIG.cloudName}/video/upload`;

    const transforms = [

      quality === "auto" ? "q_auto" : `q_${quality}`,

      "f_auto",    // Automatic format selection

      "w_auto",    // Responsive width

      "dpr_auto",  // Device pixel ratio optimization

      "c_scale",   // Scale to maintain aspect ratio

    ].join(",");

    const fullUrl = `${baseUrl}/${transforms}/brand-portal-hero_dwdezz`;

    console.log("Transformation URL:", fullUrl);

    element.textContent = fullUrl;

  }

}Code language: JavaScript (javascript)
The functions added above provide visual feedback showing users precisely what optimizations Cloudinary applies: connection detection, quality selection, and the transformation URL with all parameters. The console.log helps you understand what’s happening.
Finally, create the following functions to monitor the optimized video and show file size savings:
//...

function monitorOptimizedVideo(video) {

  if (!video) return;

  const startTime = performance.now();

  video.addEventListener("loadeddata", () => {

    const loadTime = performance.now() - startTime;

    console.log(

      `⚡ Cloudinary optimized video loaded in ${loadTime.toFixed(2)}ms`

    );

    // Calculate approximate file size savings (demo purposes)

    // In production, you'd compare with original file size

    const estimatedSavings = Math.floor(Math.random() * 30) + 50; // 50-80% savings

    updateSizeReduction(estimatedSavings);

  });

  video.addEventListener("error", (e) => {

    console.error("❌ Cloudinary video error:", e);

  });

}

function updateSizeReduction(percentage) {

  const element = document.getElementById("size-reduction");

  if (element) {

    element.textContent = `-${percentage}%`;

    element.style.color = "#10b981";

  }

}

// Helper function for status updates

function updateStatus(status) {

  console.log("📊 Status:", status);

}Code language: JavaScript (javascript)
The above code helps monitor the video loading performance and simulates the reduction of file size. You can compare the original file size to show genuine savings in production.
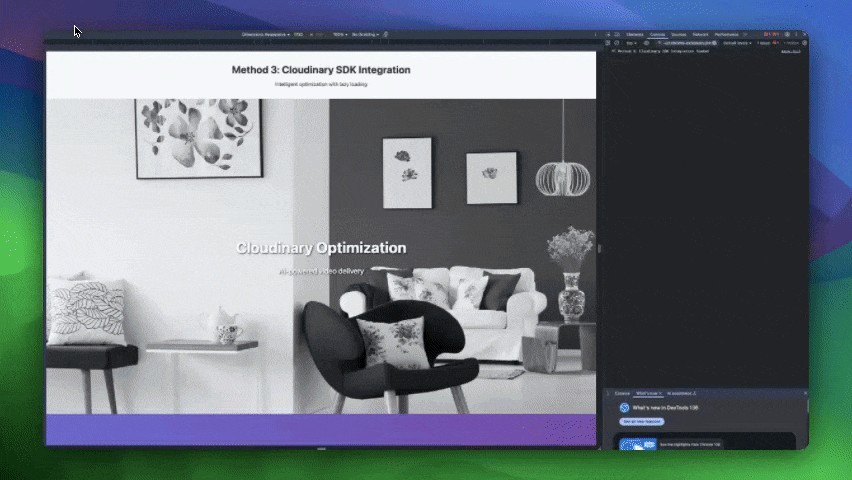
You should observe several key improvements in the console and on-screen displays. The console shows connection detection and optimization parameters, while the video loads with automatic format selection (WebM/MP4/OGV sources).
The real-time display reveals exactly which optimizations Cloudinary applies. Most importantly, file sizes are significantly smaller compared to Methods 1 and 2, demonstrating why intelligent optimization is crucial for video performance.
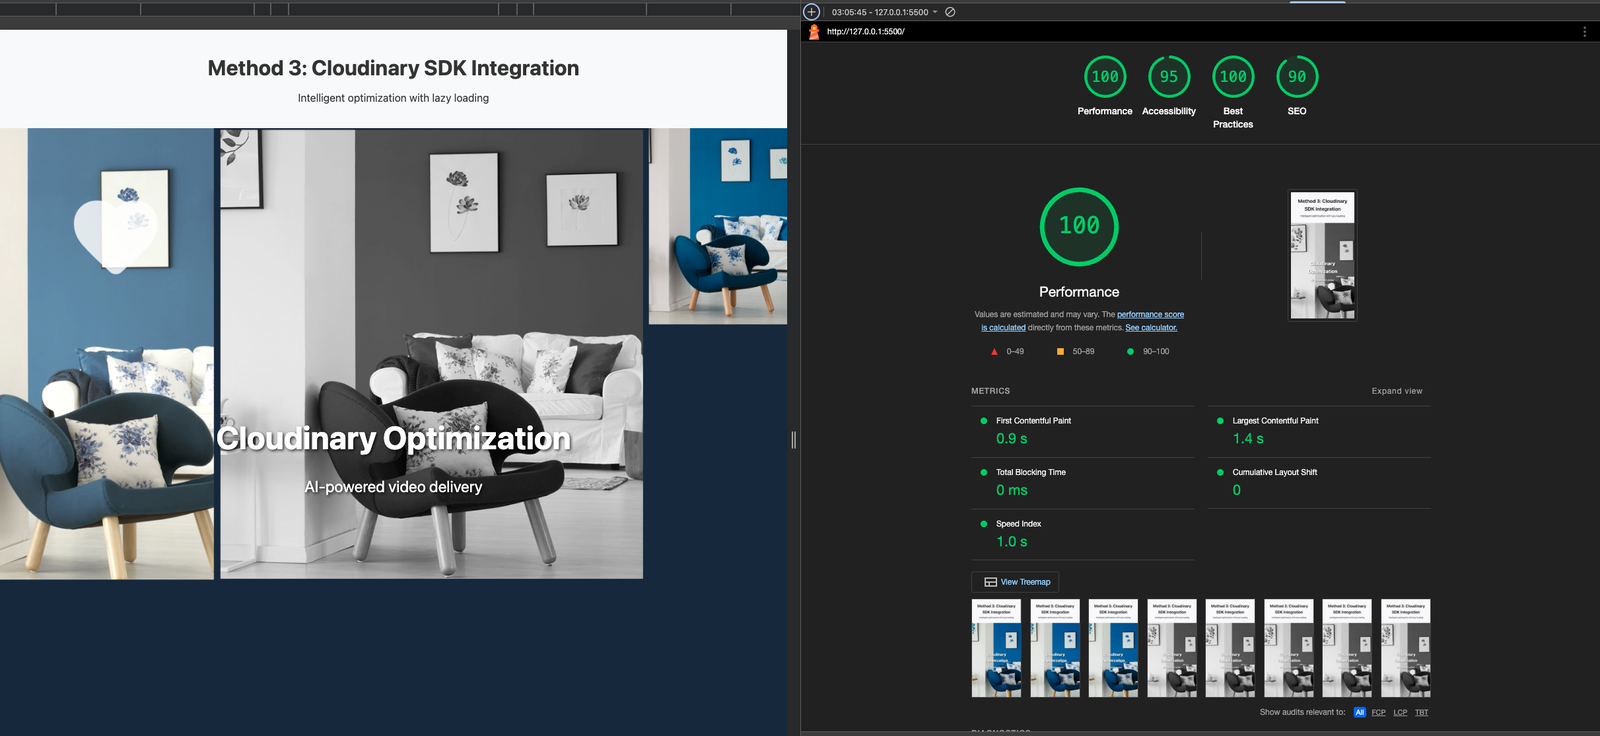
Consider testing your optimized videos using Google’s performance tools for a comprehensive performance assessment. Run Lighthouse in Chrome DevTools or analyze your page with PageSpeed Insights to get detailed Core Web Vitals metrics. Pay particular attention to Largest Contentful Paint (LCP), Cumulative Layout Shift (CLS), and First Input Delay (FID), and check that video processing doesn’t block user interactions.

Use the Performance tab in Chrome DevTools to track video loading behavior and identify any bottlenecks. Look for the video element’s impact on LCP timing and verify that lazy loading works correctly by observing network requests as you scroll. These performance insights prove why intelligent optimization is crucial for video performance and help you fine-tune your implementation for optimal Core Web Vitals scores.
You’ve built and tested a complete video optimization system step by step. We showcased three types of lazy loading, implemented Cloudinary’s video transformations, and followed best practices to implement fast-loading, high-performing video. The results are videos that maintain excellent Core Web Vitals scores and user experience.
Sign up for Cloudinary today to optimize video delivery with smart loading and autoplay controls.


