Creative elements, such as hero images, headlines, or call-to-action buttons, impact user engagement and conversion rates, which can make or break a marketing campaign’s success. For example, you might think that swapping out the hero image could improve conversion, but you’re also unsure whether the headline or button color might be what gets a potential customer to click. Traditional A/B testing approaches, while valuable, can fall short when teams need to evaluate multiple creative elements simultaneously. This is where multivariate testing shines, particularly when integrated with an intelligent digital asset management (DAM) like Cloudinary Assets to store, optimize, and deliver asset variations at scale.
This guide will show you how to build an efficient multivariate testing workflow using Cloudinary Assets. You’ll learn practical steps for setting up structured metadata, automating your testing workflows with MediaFlows, and using AI tagging to streamline asset management. By the end, you’ll have a systematic, data-driven approach that transforms how you test and optimize your visual content.
A/B testing allows you to compare a control (A) against a proposed change (B) to better understand how your content is being received. However, relying solely on A/B testing can feel like trying to solve a puzzle with only half the pieces. When testing one element at a time, you miss how multiple elements interact, potentially overlooking more impactful combinations that could significantly enhance performance. A/B tests also tend to focus on averages, masking important differences among customer segments, i.e., a change might boost engagement for one group while decreasing it for another. Additionally, running separate tests for each element becomes more resource-intensive as you scale.
Multivariate testing evaluates multiple components simultaneously: headlines, images, call-to-action buttons, and more. The benefits are substantial:
- Enhanced conversion optimization. Identify the most effective combination of elements to maximize conversion goals, whether it’s increasing sign-ups, clicks, form completions, or social shares.
- Greater efficiency. Conduct multiple tests concurrently, reducing the time and resources needed to identify the best-performing combinations.
- More comprehensive insights. Get a deeper understanding of how different elements work together, uncovering interactions that single-variable tests might miss.
- Reduced risk. By testing multiple variations simultaneously, you minimize the risk of implementing changes that could negatively impact user experience or conversion rates.
- Scalability. Increase your testing to include numerous variables without the exponential uptick in time and resources required by sequential A/B tests.
A practical tip for teams considering multivariate testing: While testing every possible combination of elements (known as full factorial testing) is possible, many teams found success by first focusing on the most promising variations. This partial factorial approach helped reach statistically significant conclusions faster while still uncovering valuable insights about user behavior and preferences.
You can use Cloudinary Assets to manage your digital content and provide controlled access for employees, clients, contractors, and other stakeholders. Automate your visual media workflows, creating an ideal foundation for your multivariate testing workflow, so you can optimize your visual content strategy.
Log in to your Cloudinary dashboard. If you don’t have a Cloudinary account, you can set one up for free. Then, in the next step, set up Structured Metadata to categorize your images useful for multivariate testing.
Let’s break down how structured metadata can help you organize your test assets.
Using Cloudinary Assets’ Structured Metadata, you can organize and search for assets based on predefined categories. This feature is useful for multivariate testing variables like size, style, or format.
Structured metadata helps you:
- Categorize assets. Assign descriptive fields to your assets for easier categorization. For example, you can classify images based on size (small, medium, large), style (modern, vintage), or format (JPEG, PNG, SVG).
- Enable faster searches. Structured fields like “Collections” or “Seasons” can be used as advanced search filters, reducing the time spent locating specific assets.
- Consistency. Standardized metadata fields create a consistent organizational structure across your team, eliminating confusion during testing.
Navigate to your Cloudinary dashboard and upload images in different sizes or formats to create structured metadata for them.
Next, create the structured metadata for your asset. In this example, you’ll create the following metadata for the images:
- Size: Small (300×250), Medium (728×90), Large (160×600)
- Style: Corporate, Creative
- Format: JPEG, PNG
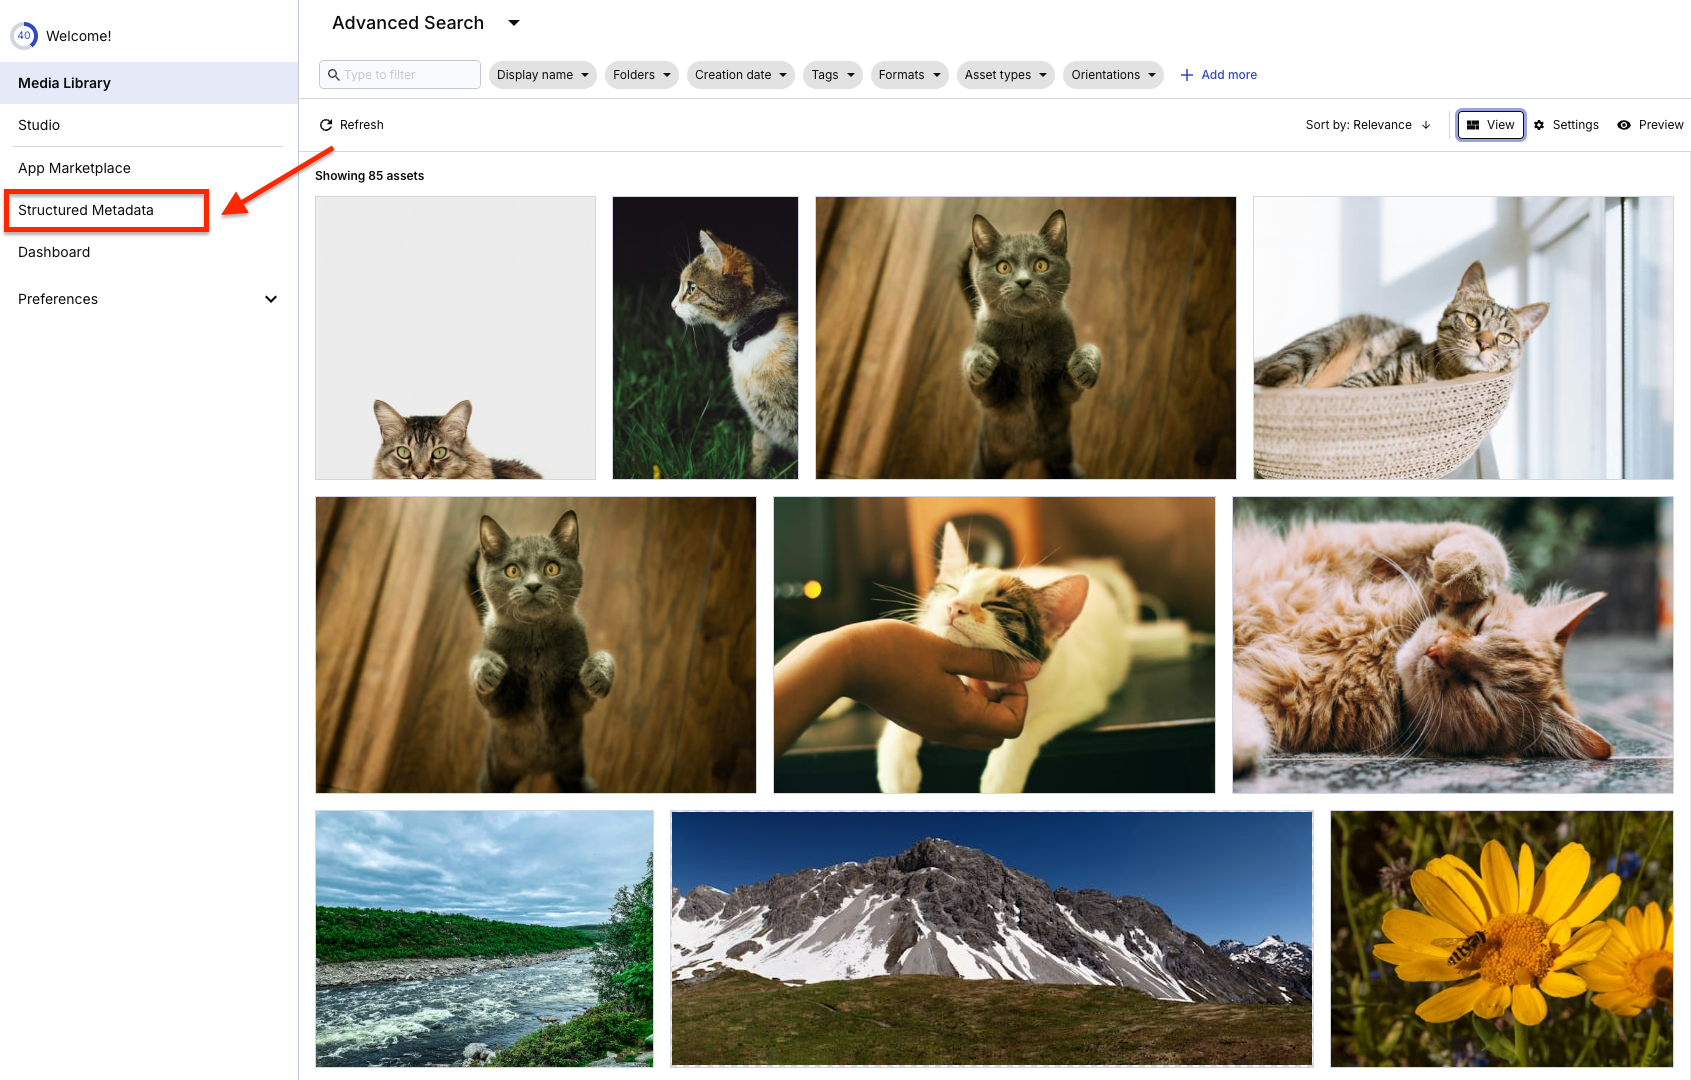
Select the Structured Metadata tab.

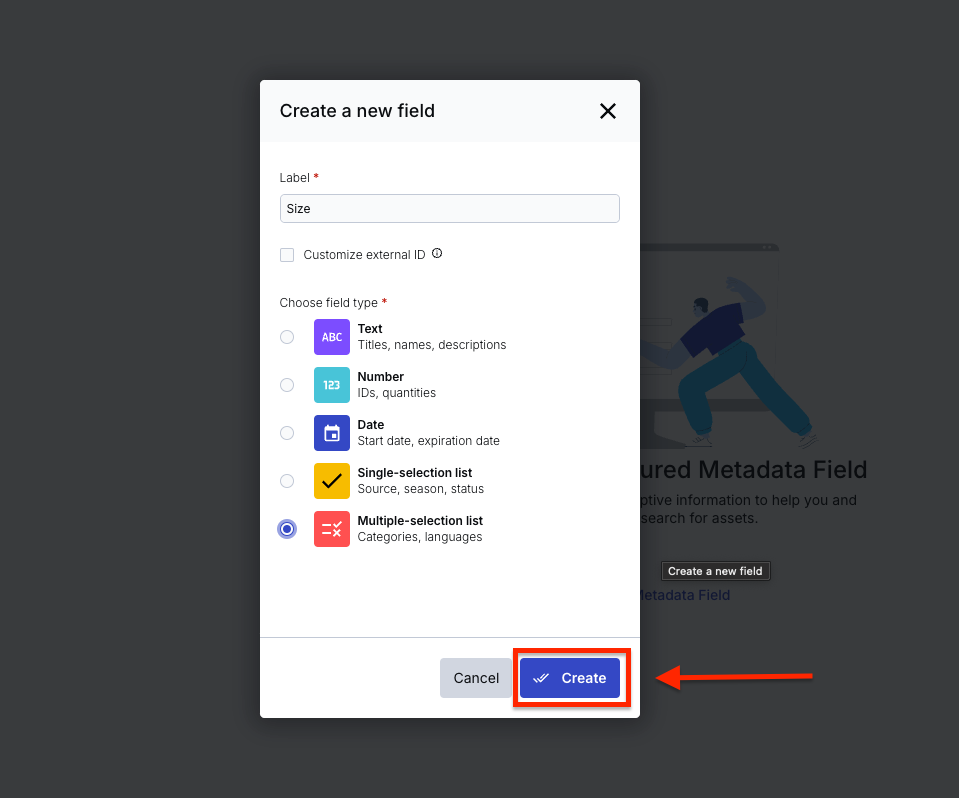
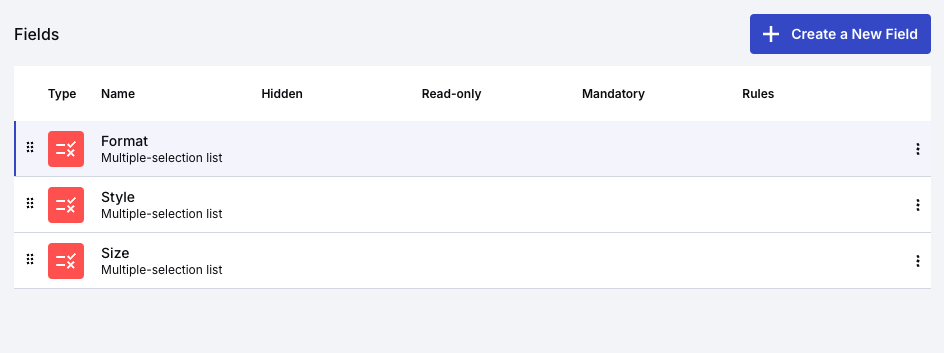
Create a field labeled Size and choose the option for Multiple-selection list.
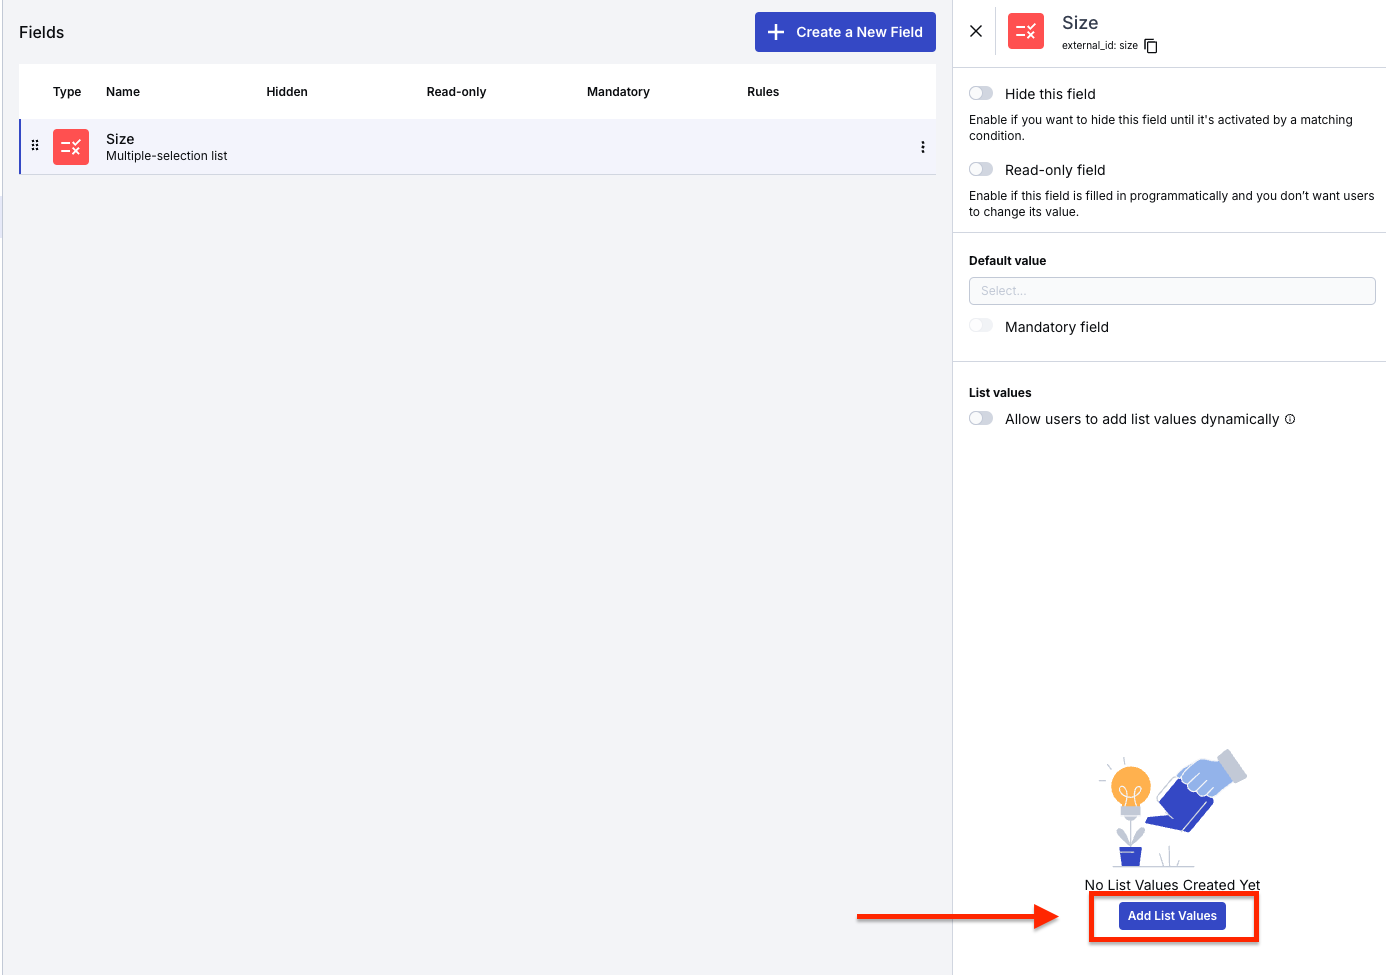
After creating the field, you should add the list of values that will be included in the size field’s metadata. In this example, include the following list: Small (300×250), Medium (728×90), and Large (160×600).

Do the same for the remaining styles and formats. You should have something similar to what’s shown below.
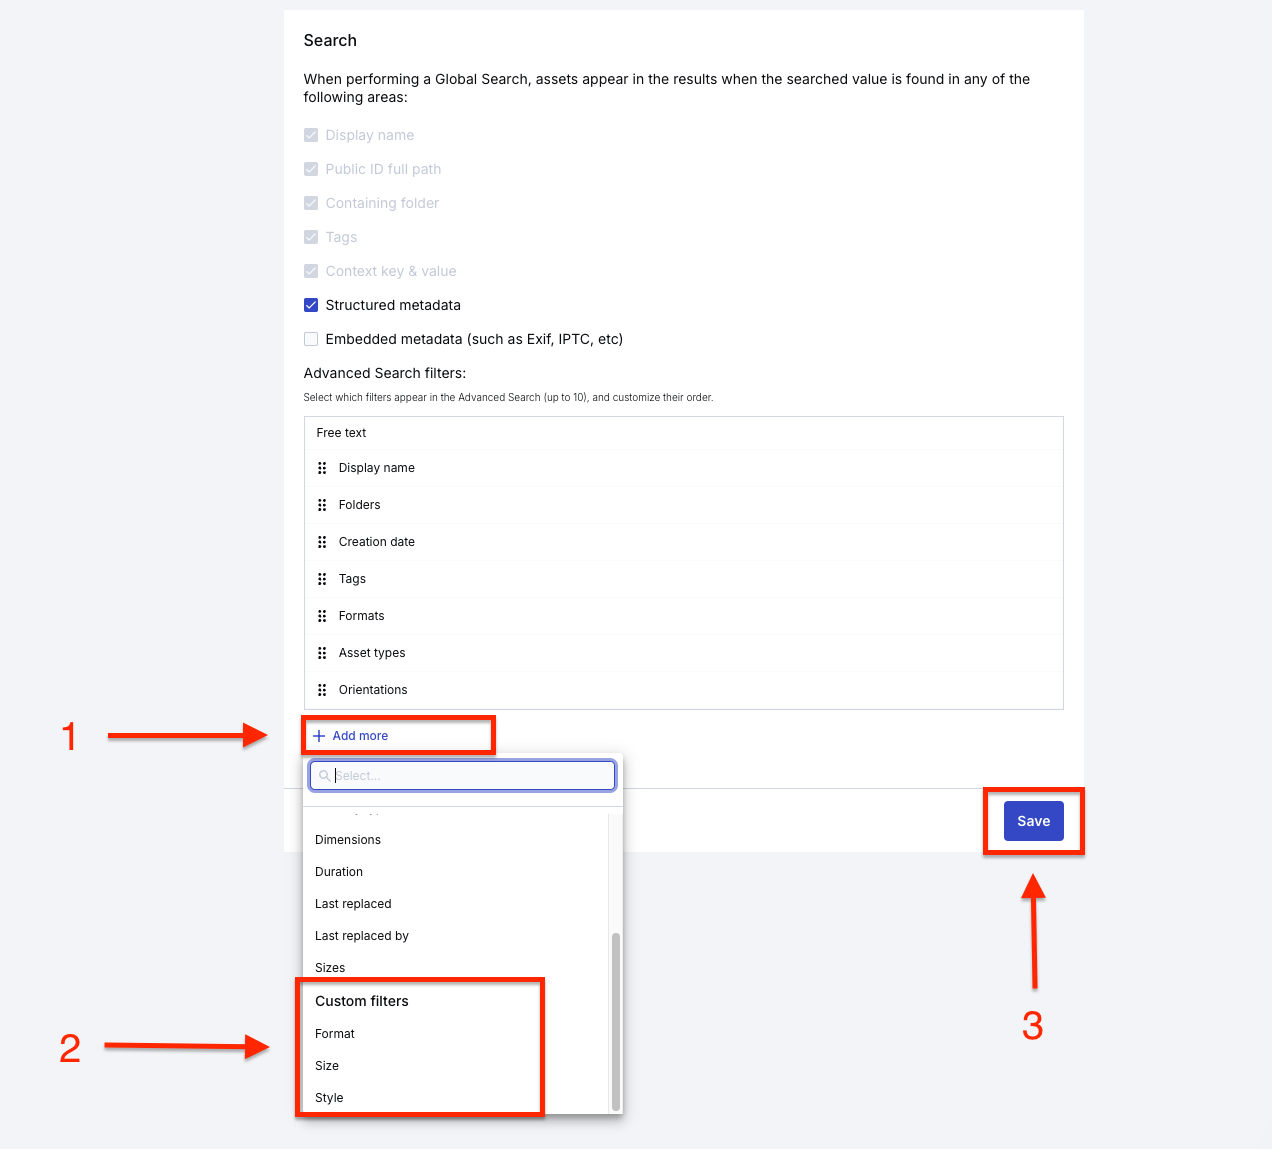
On your dashboard, navigate to the Search tab under the Preferences settings and add the metadata you created to it, as shown below.

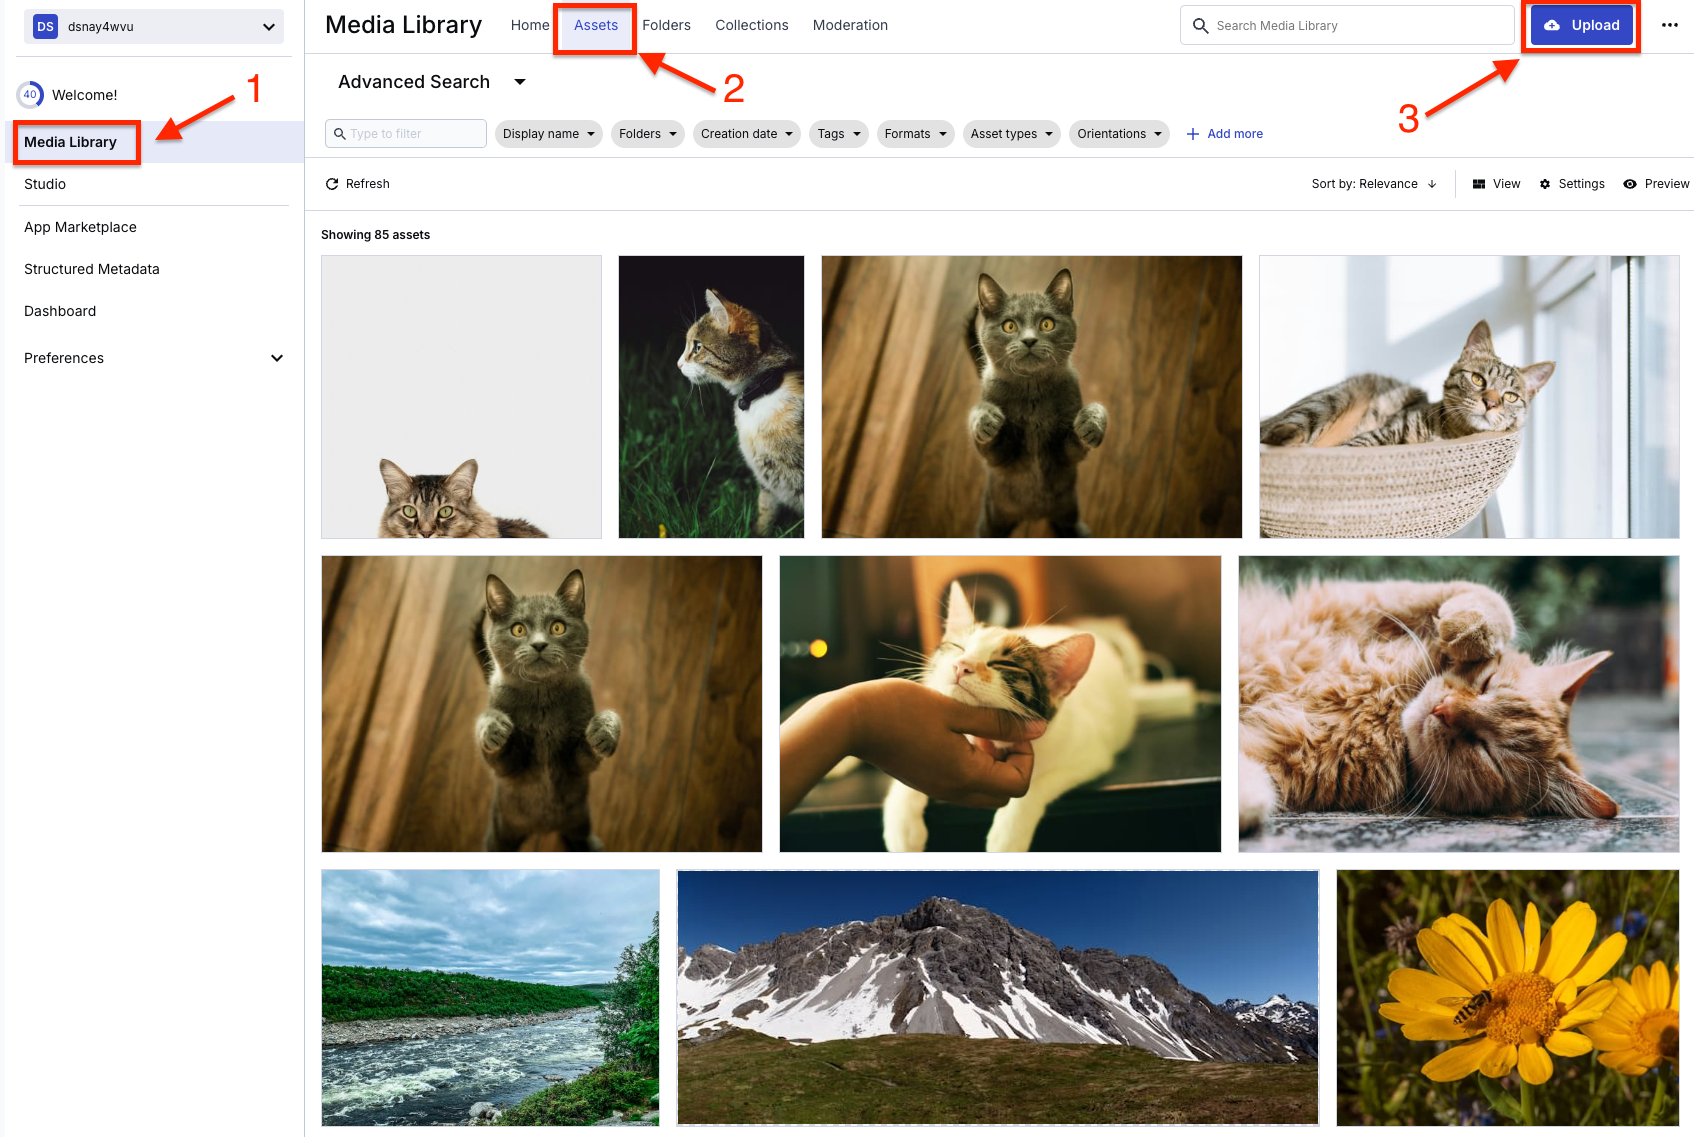
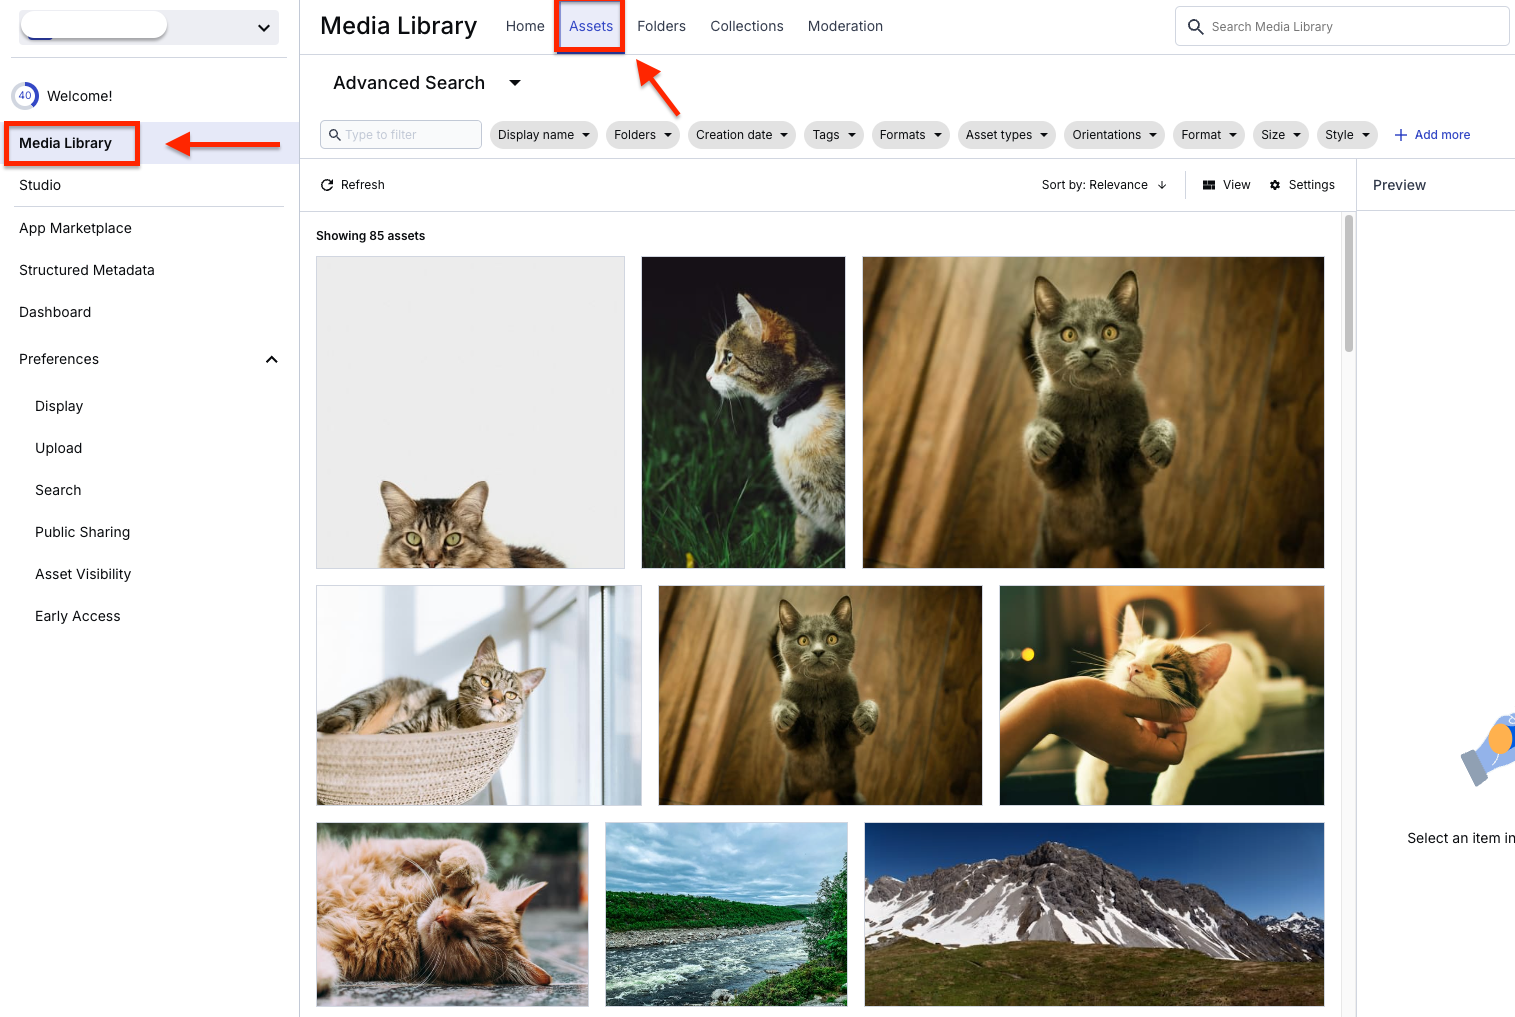
Go to the Media Library tab and tag your images with the metadata you created so that they function properly. Use the Media Library widget when searching for items and the filters related to your multivariate test. Then, click the Asset tab in your dashboard.
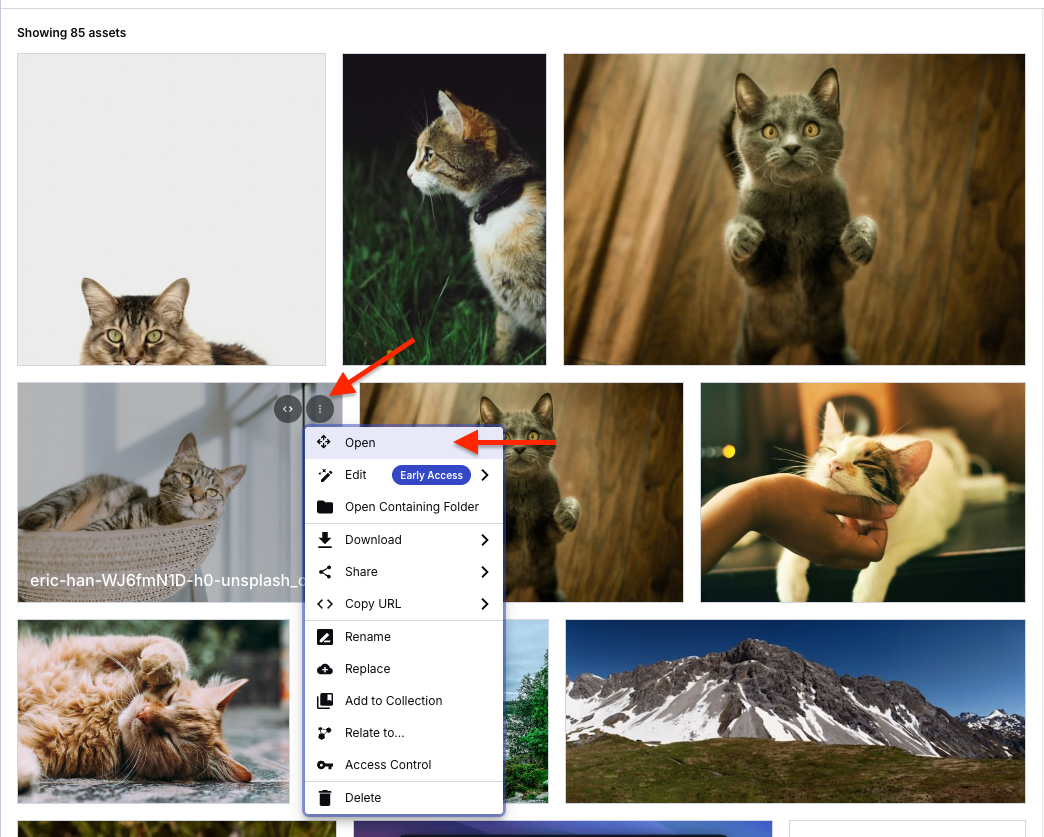
Next, click the image you want to tag and add the specified metadata, as shown below.
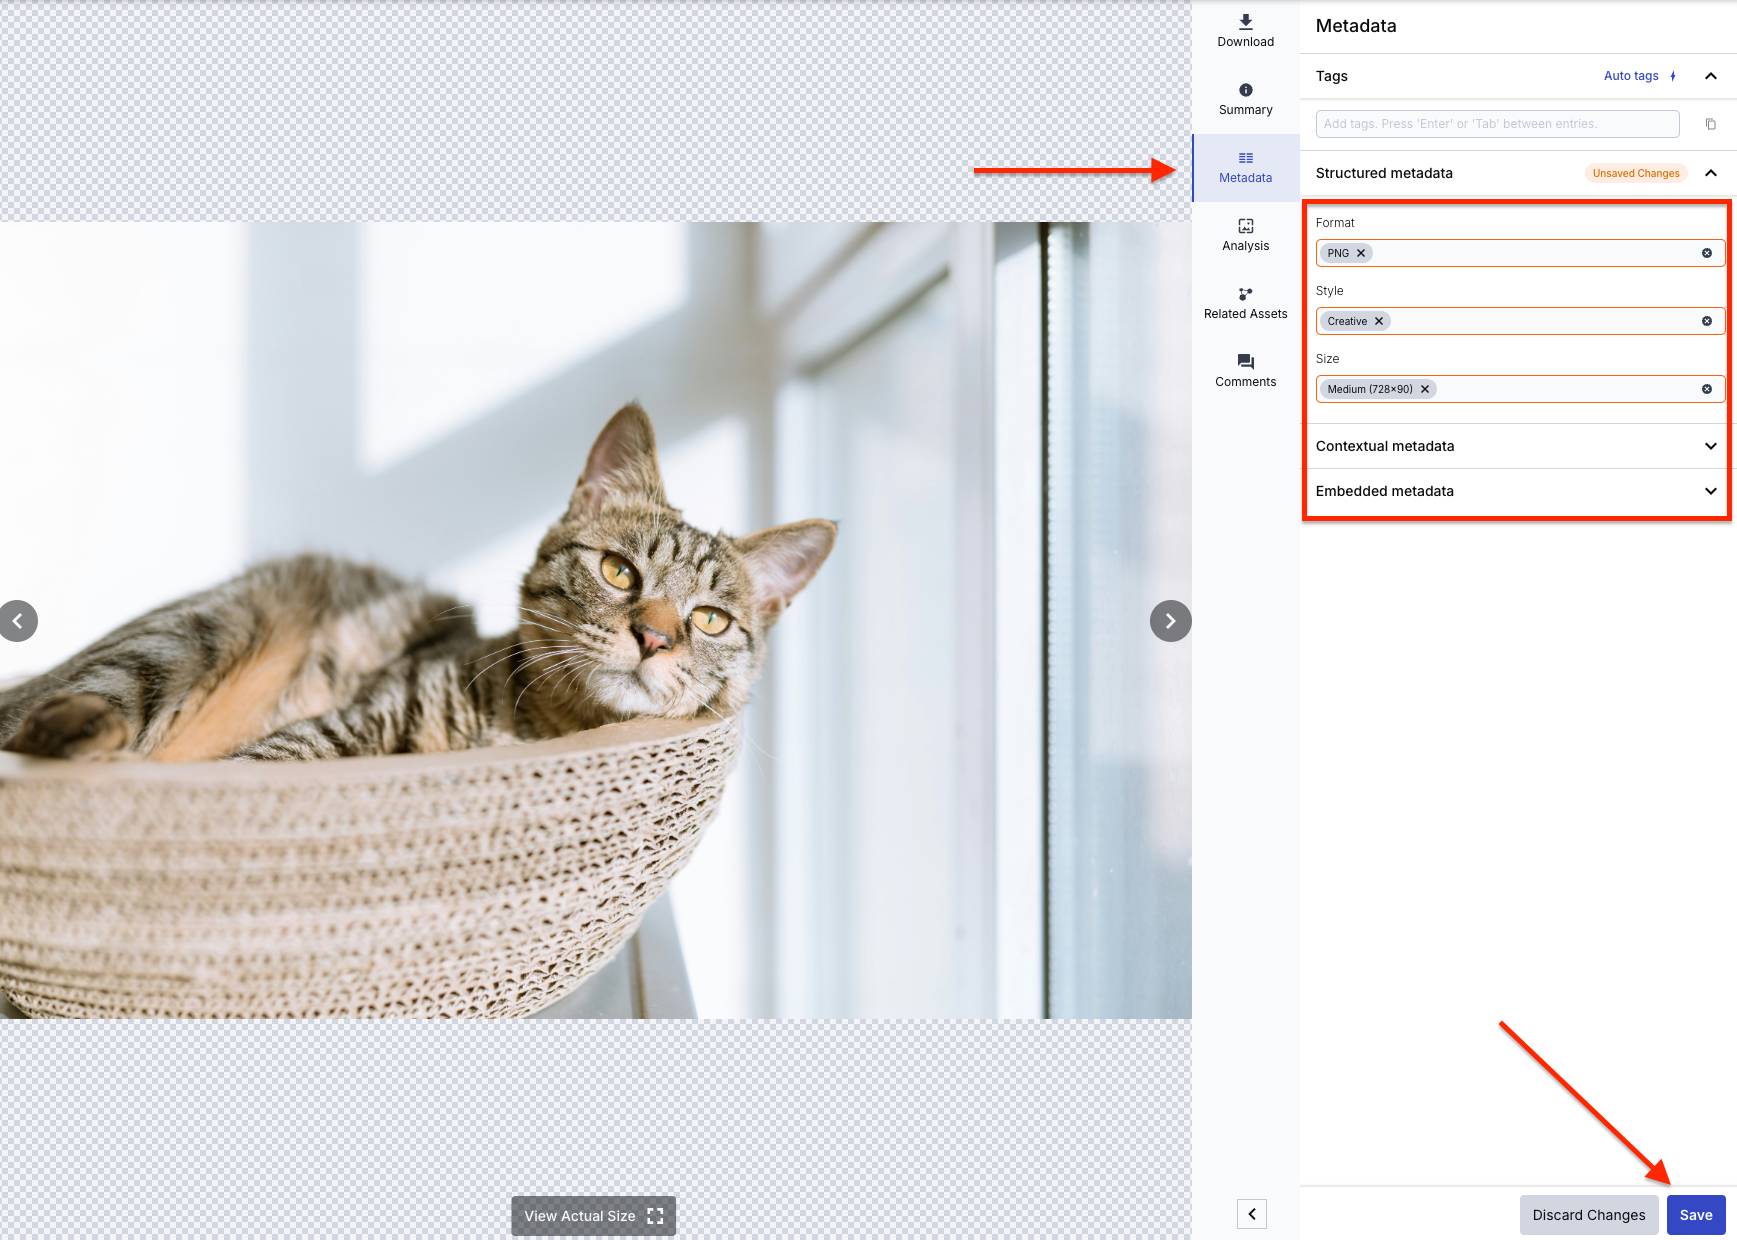
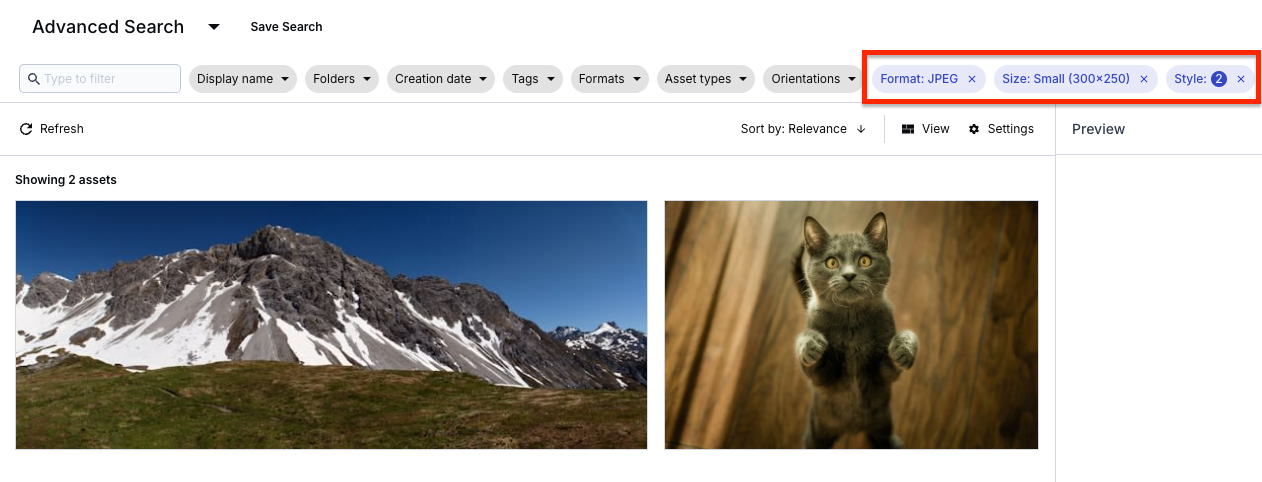
You’ve just done this for one image; you can replicate it for the others. Next, navigate back to the Media Library and filter by any of the metadata tags you created. You should see the search getting filtered with your metadata, similar to the one below.
Great! Your assets are now well-organized with metadata. However, manually processing each test variation can still be time consuming. This is where we’ll use MediaFlows to automate our testing workflow.
Managing multiple creative variations for testing can quickly become overwhelming. Cloudinary’s MediaFlows offers both no-code (EasyFlows) and low-code (PowerFlows) solutions to automate your testing workflows.
Marketing teams can create and manage workflows using EasyFlows’ no-code interface with natural language commands, while developers can leverage PowerFlows for more complex customizations. Democratizing workflow automation, combined with robust enterprise integrations, ensures that Cloudinary assets can be reused without teams relying on fragile synchronization processes.
Ready to see MediaFlows in action? Let’s create your first automated workflow. Don’t worry, it’s simpler than you might think.
Create an automated workflow for processing images, focusing on uploads, image duplication, and transformations. This is just an example; you can select any type of test for your images. Let’s walk through creating a basic workflow for your test:
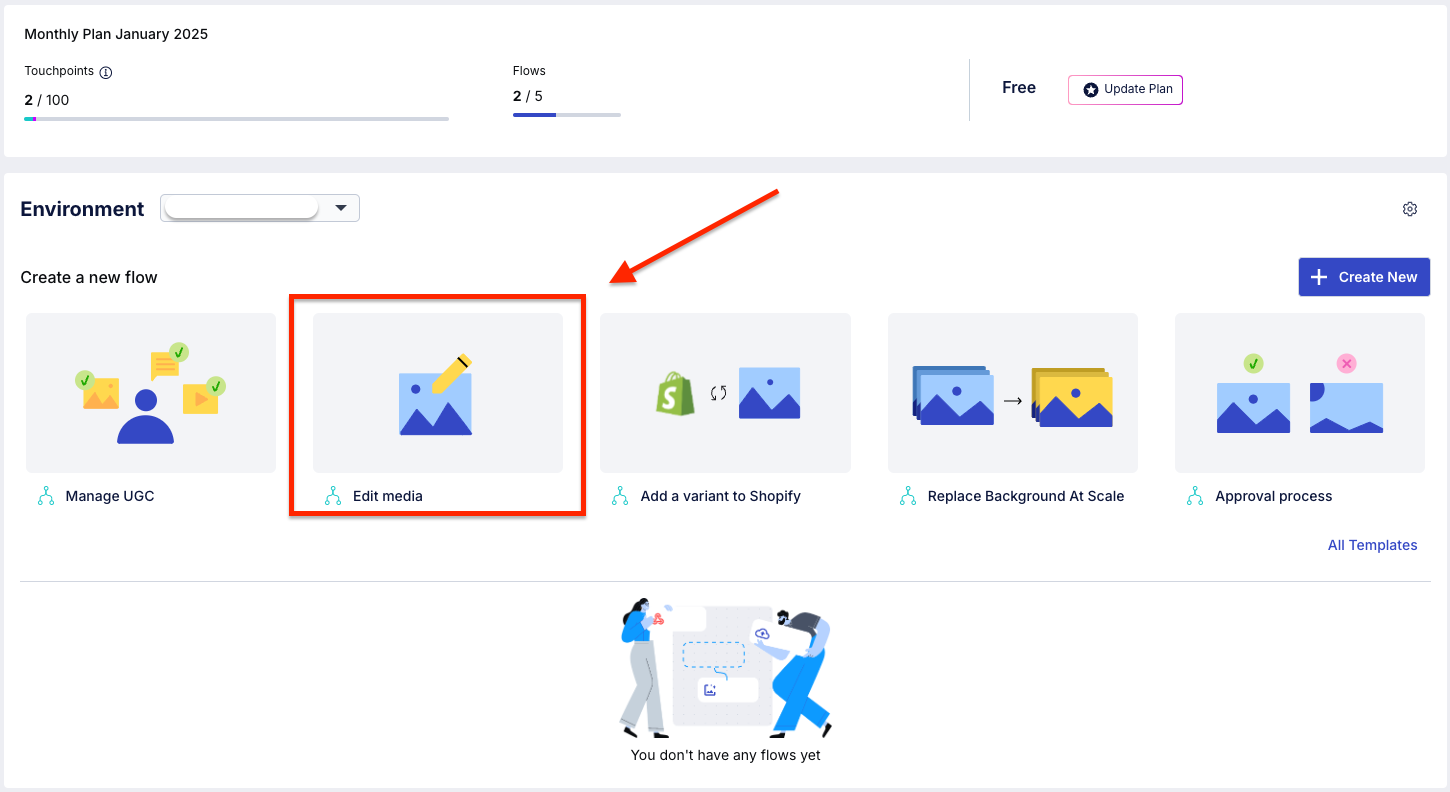
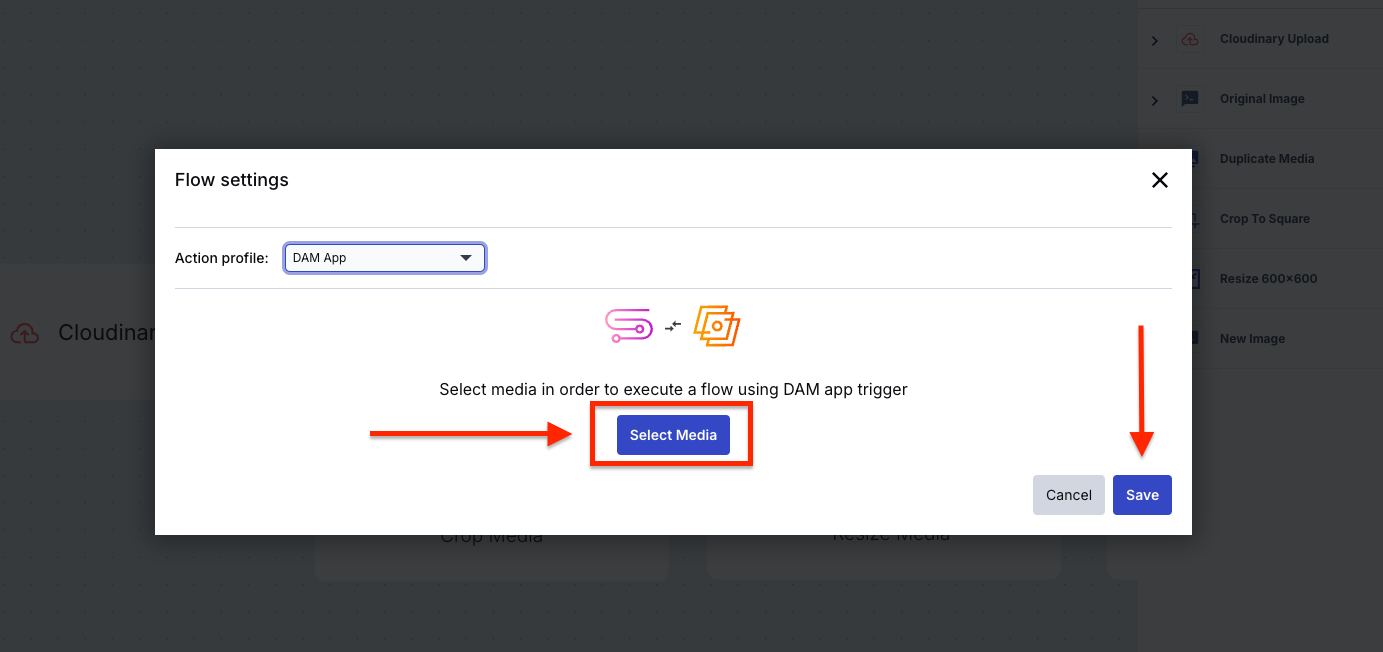
- Access the MediaFlows Console on your browser to begin building your workflow.
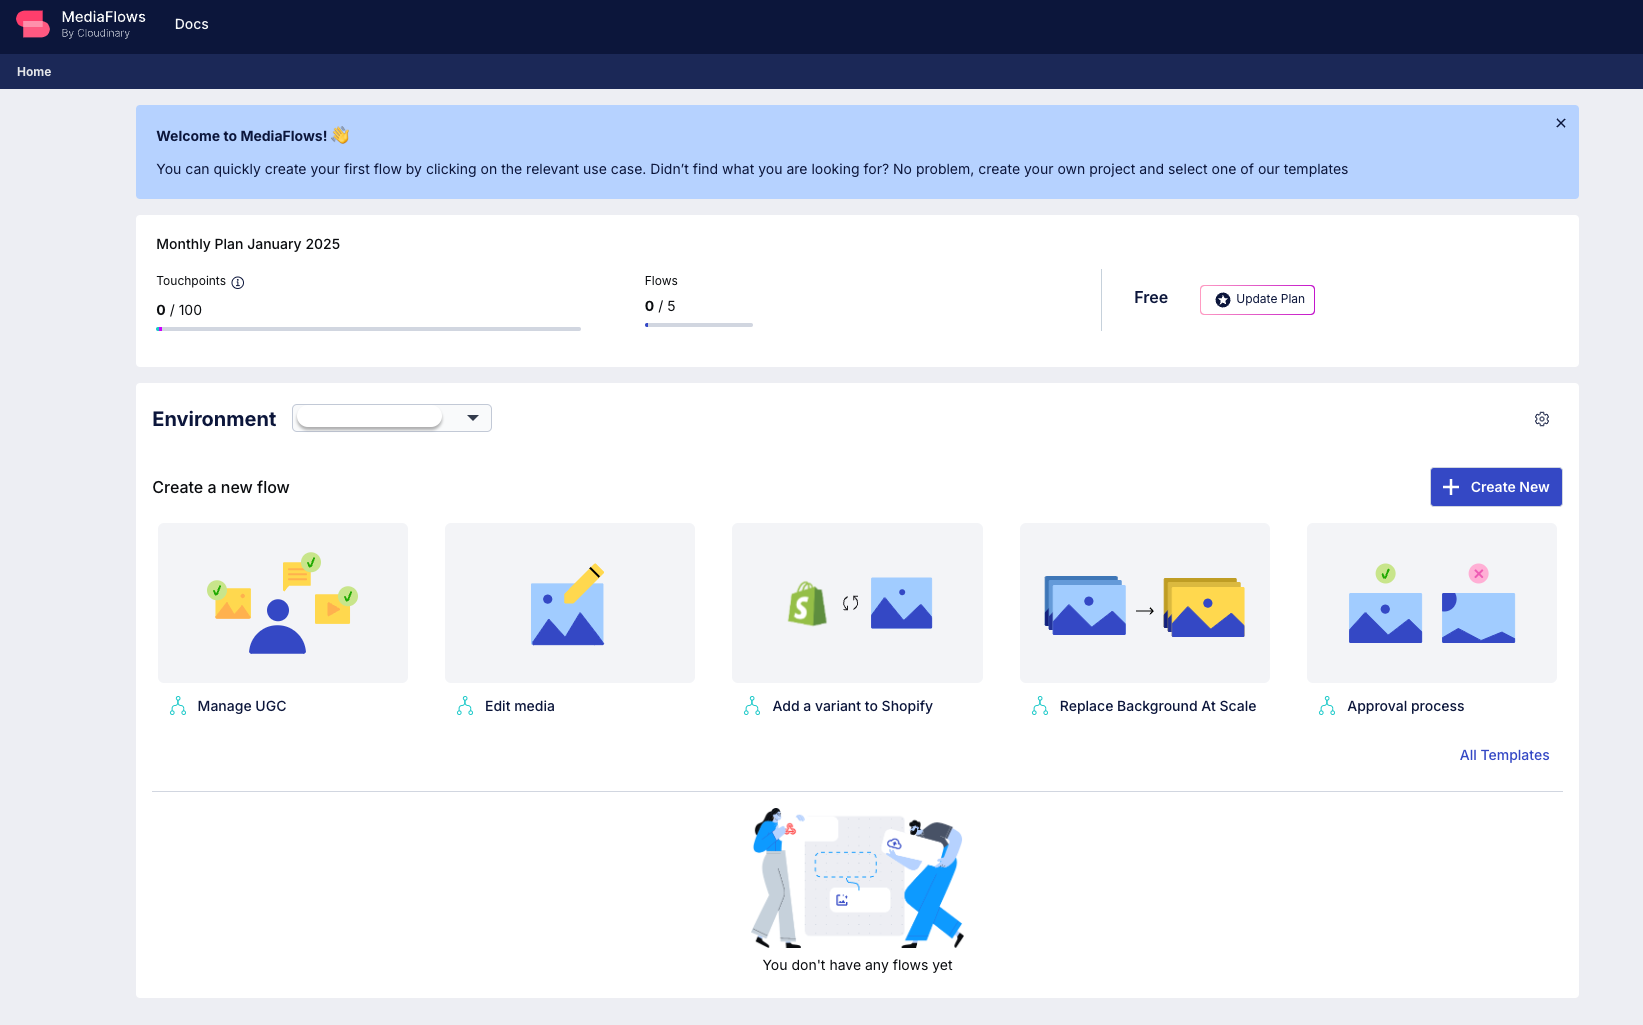
- MediaFlows offers various flow templates to save time. For this example, you’ll select the Edit media template, which already contains the required flow pieces for your test.
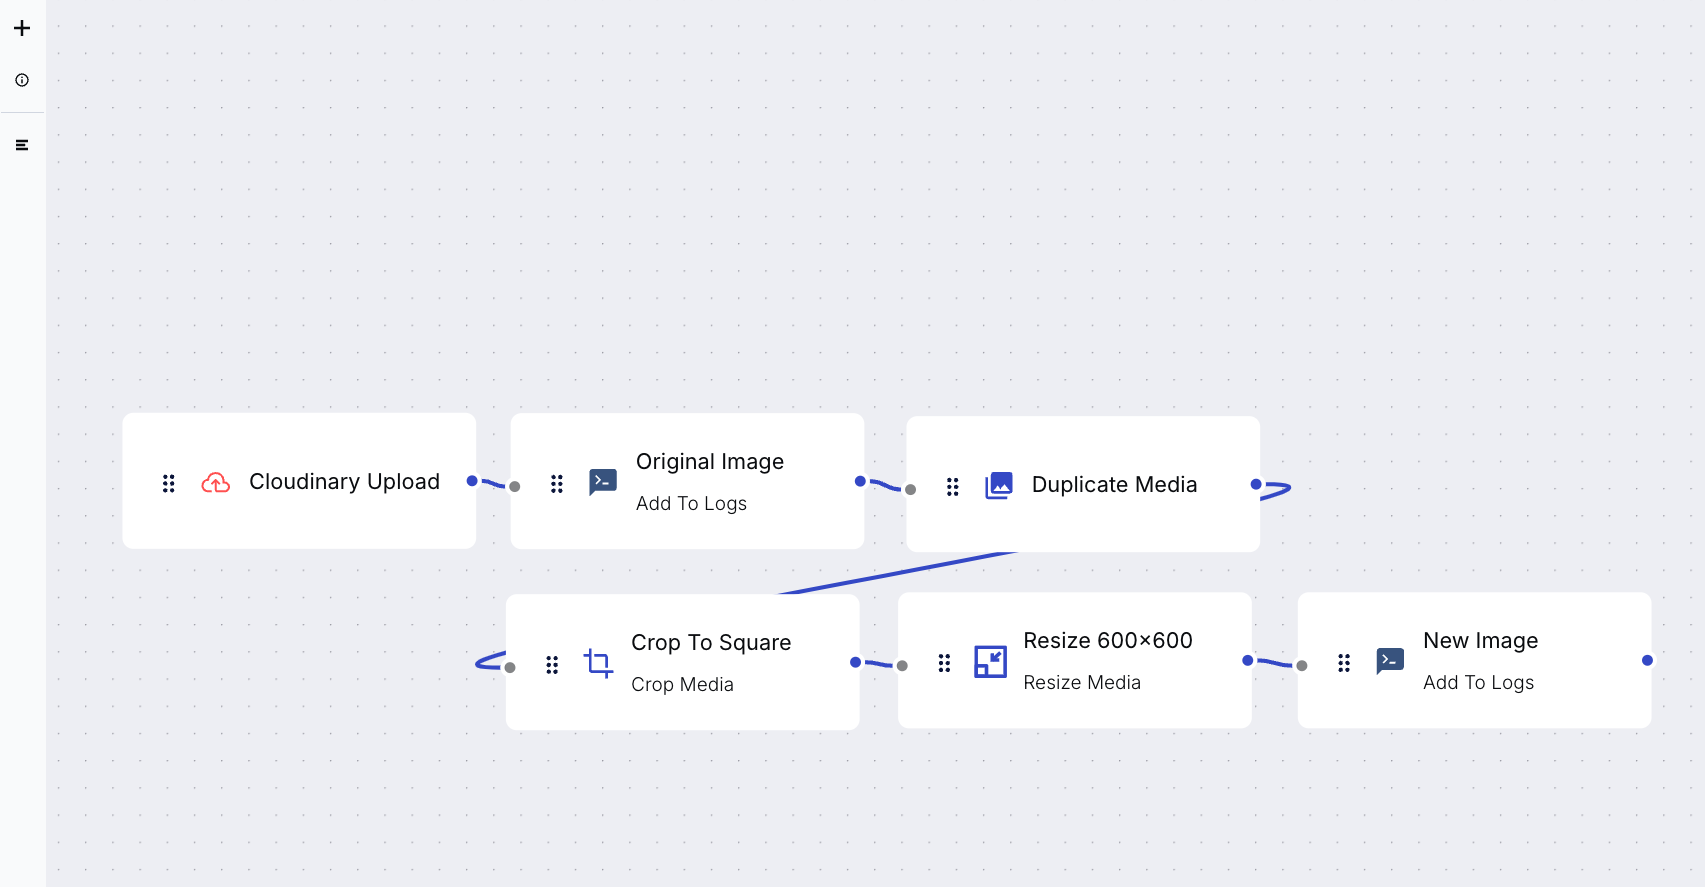
The block triggers listen for new uploads to Cloudinary, automatically duplicate images to preserve originals, apply your chosen crop transformations, and resize images to maintain repository consistency. You can customize these templates by choosing different trigger types, such as DAM app events or scheduled triggers, to match your specific automation needs.
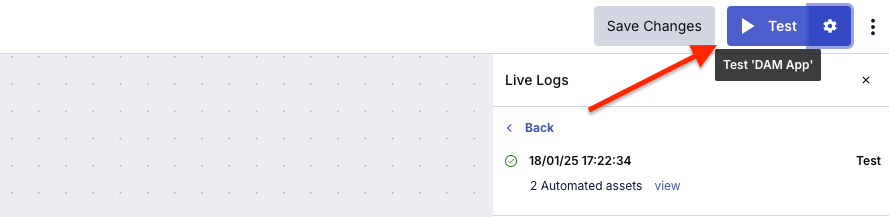
- Click the Test button as shown below to save and test the flow and ensure everything works fine going live.
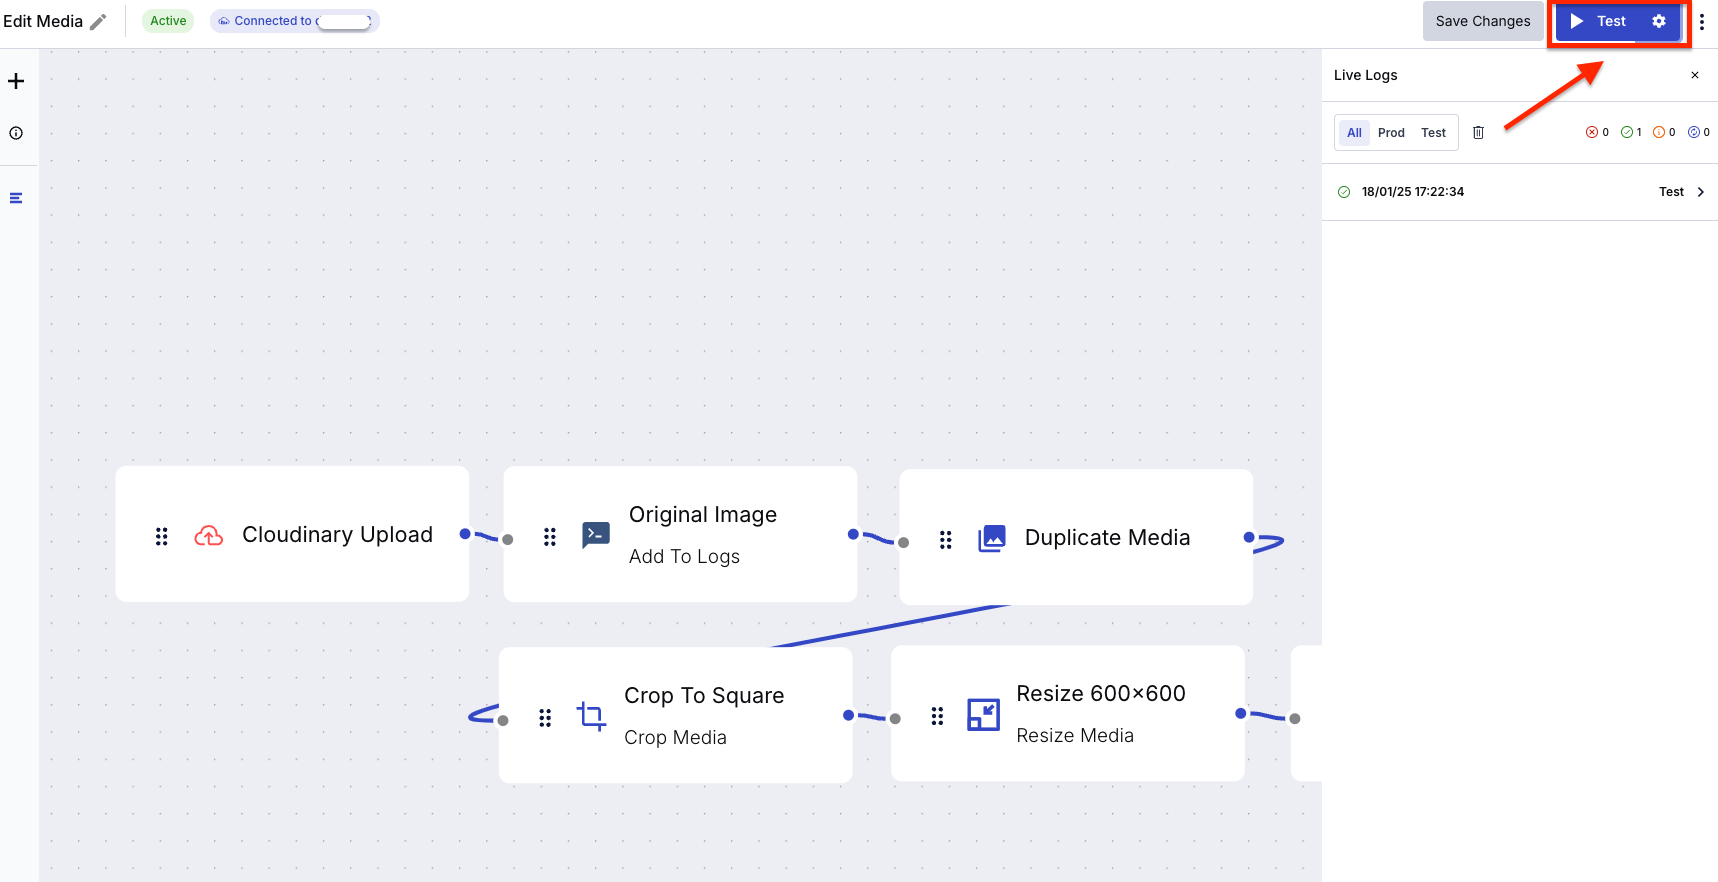
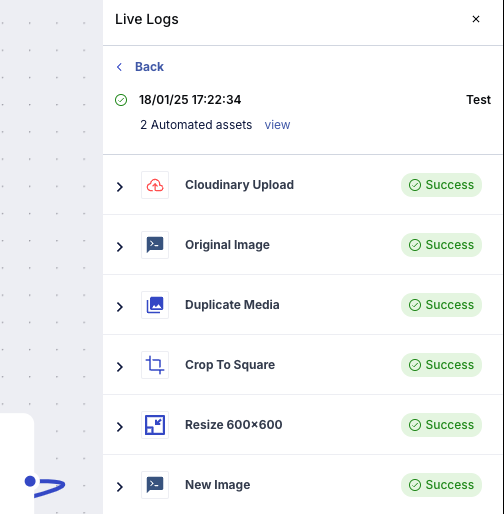
You should see these live logs without any errors.
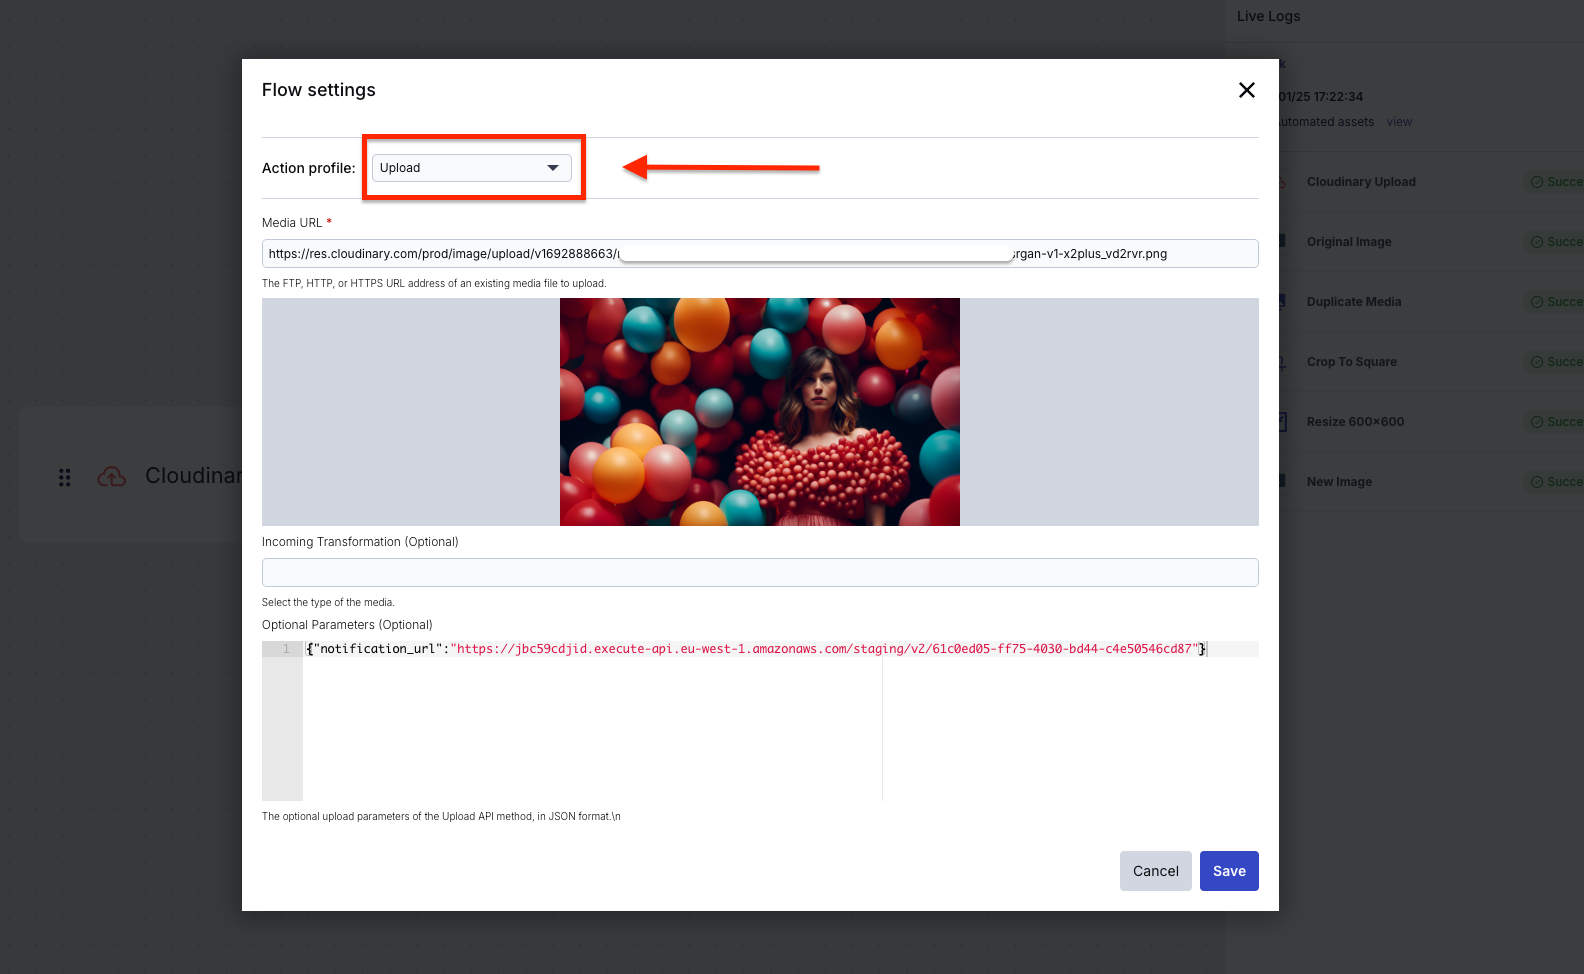
- Select an image from your DAM to test.
You’ve automated your workflow, but what about making sense of all these assets? Now we’ll use Cloudinary’s AI tagging for quick asset discovery.
Cloudinary’s AI Vision transforms how you organize and discover assets during multivariate testing by eliminating the manual work of tagging hundreds of test variations. This is valuable when managing campaigns where you have to keep track of visual elements across a large volume of asset variants.
Configure AI Vision by setting up custom tag definitions that match your testing parameters. For example, when testing product imagery, you might define tags for:
- Product characteristics (size, color, positioning).
- Background elements (style, lighting, context).
- Visual hierarchy (primary focus, secondary elements).
- Emotional attributes (playful, professional, energetic).
The system then automatically analyzes your assets and applies relevant tags based on your definitions.
Here’s a practical example: When testing an e-commerce banner, AI Vision can automatically identify and tag elements like product placement, color schemes, and promotional text, all without manual intervention. Automated tagging becomes invaluable when quickly filtering through variants or analyzing performance patterns across similar creative elements.
Next, let’s try out an example: This image shows accessories, shoes, bags, and clothes. You’ll utilize the AI tagging feature to generate tags for this asset.
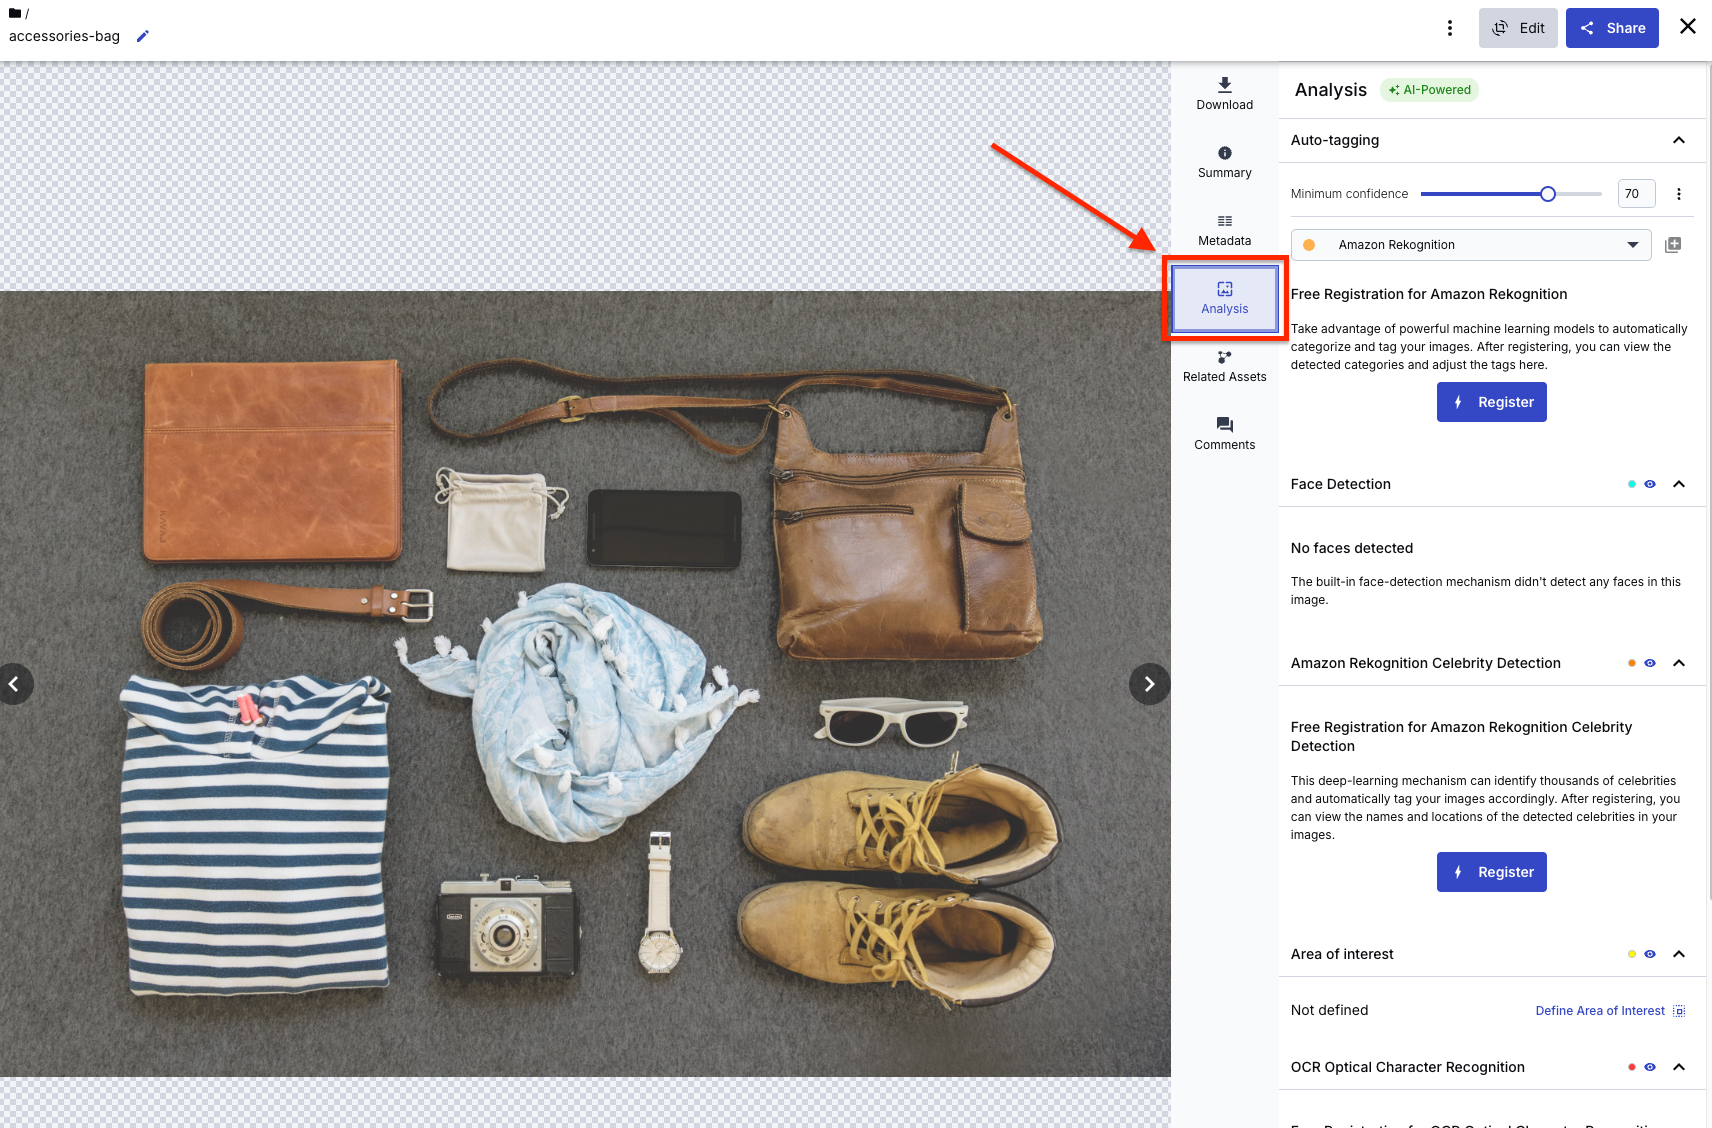
You can select an AI tool of your choice, but for the purpose of this guide, the default will be set to Amazon Rekognition. Then click Register.

Next, click the Run now button.
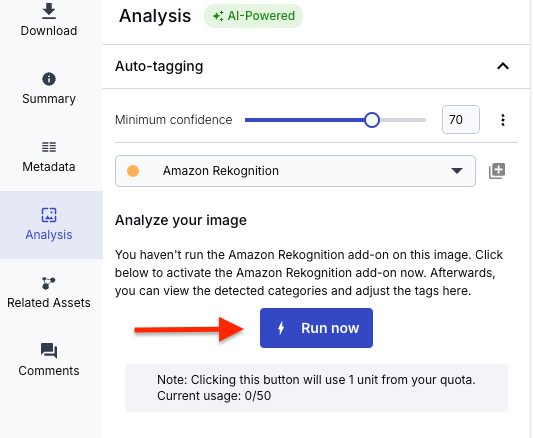
You should see something similar to what is shown below.
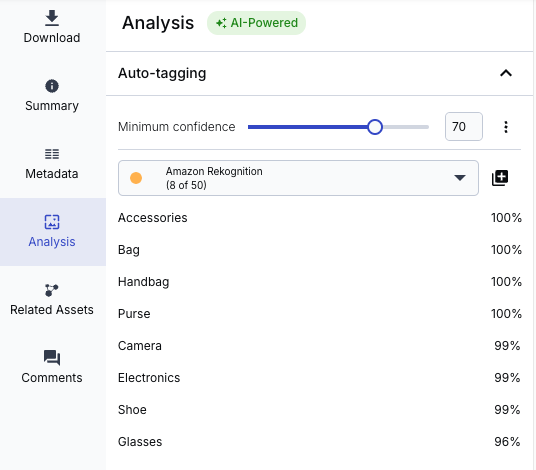
You can now see all the generated tags that correctly match what you can see in the image. This helps to identify assets faster than doing hundreds of images, one after the other.
Next, click to add the tags.
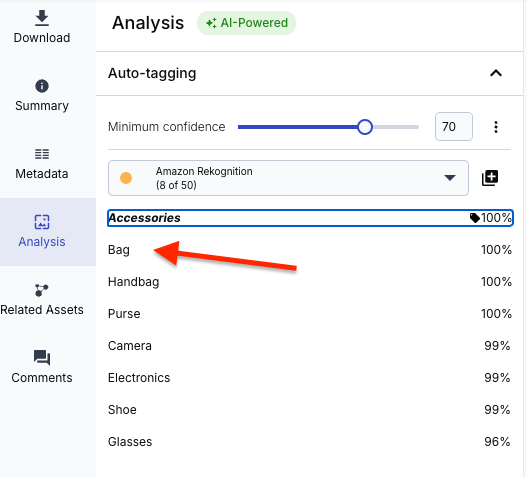
If you think it doesn’t match the suggested tag, you can choose not to add it, as you noticed a percentage score on the right side of the result.
Cloudinary Assets, MediaFlows, and Cloudinary AI enable you to organize, process, and analyze your creative assets, freeing you to focus on creating engaging content that resonates with your audience.
Get insights faster for more successful campaigns with Cloudinary. Contact us today.
Resources: