
Indisputably, visual presentations of events, places, people, and even intangible things make deeper impressions and linger in our minds for longer than words or any other communication medium, hence the meteoric rise through the ages of transmitting ideas and promoting brands in the business sector through images. The recent discovery of the first image of a black hole has generated calls for techniques for enhancing digital images. Specifically, the clamor is for quality-oriented tweaks that would result in optimal display and increased visibility of slightly hidden yet important content.
This post shows you how to enhance images by setting intuitive and effective parameters on Cloudinary with a focus on several key aspects, including brightness, contrast, and sharpness. Also described are sophisticated enhancements you can add with Cloudinary add-on VIESUS and the simple steps for optimizing images on Cloudinary.
Adjusting the Brightness and Contrast
One of the image enhancement techniques you can utilize is to have Cloudinary automatically adjust the brightness and contrast of an image, set one of the following values for the effect parameter:
gamma, auto_brightness, auto_contrast, contrast, auto_color, fill_light, vibrance, and improve:outdoor.
In particular:
-
improve:outdoorenhances an image’s colors, contrast, and brightness, as in the code example below:<cl-image public-id="flower.jpg" > <cl-transformation effect="improve:outdoor"> </cl-transformation> </cl-image>Code language: HTML, XML (xml) -
contrastraises or reduces an image’s contrast level according to the value you specify. The default value is 0; the minimum value is -300; and the maximum value is +100.This code shows the syntax for a
contrastvalue of 50:<cl-image public-id="wardrobe.jpg" > <cl-transformation effect="contrast:50"> </cl-transformation> </cl-image>Code language: HTML, XML (xml)
But of course, sharp images make a world of a difference to the audience. To sharpen an image, set the sharpen value for the effect parameter, as in this example:
<cl-image public-id="front_face.jpg" >
  <cl-transformation effect="sharpen">
  </cl-transformation>
</cl-image>
Code language: HTML, XML (xml)
Furthermore, to specify the exact effect you desire, add one of the following values to sharpen, preceded by a colon, e.g., sharpen:blur:blur, blur_region, blur_faces, unsharp_mask, pixelate, pixelate_region, pixelate_faces, ordered_dither, vignette, gradient_fade, or tilt_shift.
Cloudinary offers numerous color-related values for the effect parameter, including the following:
hue, red, green, blue, negate, grayscale, blackwhite, saturation, colorize, assist_colorblind, simulate_colorblind, replace_color, recolor, tint, and auto_color
Try injecting your own image processing by using a custom function
As their names imply, by setting one of those effect values on an image, you can change its color intensity, correct its color imbalance, or apply colorization filters. You can also remove colors, replace them, or fix problems that pertain to colorblindness for accessibility.
This example specifies a saturation value with an intensity of 50 for an image:
<cl-image public-id="sample.jpg" >
  <cl-transformation effect="saturation:50">
  </cl-transformation>
</cl-image>
Code language: HTML, XML (xml)With Cloudinary, you can perform numerous basic tasks geared toward beefing up your images: image cropping, resizing images without losing quality, add overlays to them, remove their background, and so forth. For more advanced tasks, tap into Cloudinary’s add-on repository for the VIESUS capabilities that automate those tasks.
All you need to do is set the effect parameter to viesus_correct, after which VIESUS would elevate the visual quality of your image to the maximum. See the examples below.
-
On the Angular Framework
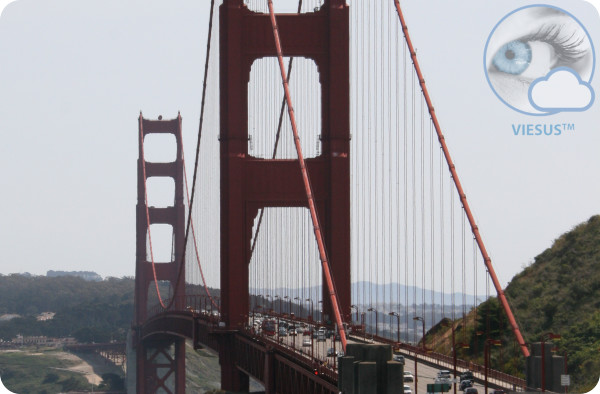
<cl-image public-id="gate.jpg" sign-url="true"> <cl-transformation effect="viesus_correct" width="350" crop="scale"> </cl-transformation> </cl-image>Code language: HTML, XML (xml) -
On the Node.js Runtime Environment
cloudinary.v2.uploader.upload("local_file.jpg", { public_id: "beach", eager: { effect: "viesus_correct", crop: "scale", width: 400 }}), function(error, result) {console.log(result, error); });Code language: JavaScript (javascript)
For an enlightening example, see the image below for its original version, followed by the VIESUS-enhanced version:

Optimization techniques for images abound on Cloudinary. Setting them up for automation opens up endless possibilities for transformations.
Below are two examples.
A simply way of leveraging q_auto is to specify the value auto for an image’s quality parameter, like this:
<cl-image public-id="man.jpg" >
  <cl-transformation quality="auto">
  </cl-transformation>
</cl-image>
Code language: HTML, XML (xml)
Afterwards, q_auto selects the optimal quality-compression level and encoding settings based on the content and format of the image, also the browser in which it is being displayed.
Alternatively, you can set a numerical value, e.g., 60, for the quality parameter, like this:
<cl-image public-id="train.jpg" >
  <cl-transformation quality="60">
  </cl-transformation>
</cl-image>
Code language: HTML, XML (xml)
Here are the value choices for q_auto:
-
q_auto:best: This is the least-aggressive setting, which compresses files as much as possible without compromising their visual quality. -
q_auto:good: This setting ensures an optimal balance between file size and visual quality, delivering relatively small files. -
q_auto:eco: This setting delivers smaller files at the cost of a slightly lower visual quality, detectable only on close inspection. -
q_auto:low: This is the most aggressive setting, which delivers the smallest files at the expense of lower visual quality.
Once specified for the fetch-format parameter of your images, as in the following example, f_auto selects the best format for delivering them.
<cl-image public-id="beach_huts.jpg" >
  <cl-transformation width="600" crop="scale">
  </cl-transformation>
  <cl-transformation quality="auto" fetch-format="auto">
  </cl-transformation>
</cl-image>
Code language: HTML, XML (xml)
For more details on image Optimization, see the related Cloudinary documentation.
Choices make for flexibility. Do try out the options described in this post and you’ll soon zero in on the ones that best meet your requirements. From then on, enhancing images would be a breeze.
- Website image optimization and fast delivery with Cloudinary
- The complete guide to PHP image compression and optimization
- Vue.js Tutorial: Images Optimization for Web Apps
- Python Image Optimization and Manipulation
- Image Optimization in Ruby
- Image Optimization for WordPress
- Learn about the pros and cons of JPEG 2000
- Adopting the WebP Image Format for Android on Websites Or Native Apps
- 10 Website Image Mistakes that Slow Load Times
- Automatically Reduce Image Size Without Losing Quality
- Automate Placeholder Generation and Accelerate Page Loads
- 3 Ways to Do Progressive JPEG Encoding