Artificial intelligence (AI) has transformed image creation, enabling us to design landscapes or dreamlike portraits with a few words. This newfound creativity comes with the challenge of managing a constantly growing library of images, as traditional cloud storages lack the features needed for efficient delivery and organization. There’s a need for a viable storage option to minimize development time while keeping the image library organized and easily accessible for technical and non-technical users.
This blog post shows how to build an AI image manager that leverages the power of AI image generation and Cloudinary’s storage capabilities. The complete source code of this project is on GitHub.
To get the most out of this blog post, you’ll need:
- A free Cloudinary account.
- A ChatGPT Plus account to get access to DALL-E 3.
- A basic understanding of Next.js and Typescript.
With your Cloudinary account ready, bootstrap a Next.js app with the command below:
<code>npx create-next-app@latest</code>Code language: HTML, XML (xml)You’ll receive prompts to set up the app. Select Typescript, Tailwind CSS, and App Router, as they’re needed. Then, install the necessary dependencies with the following command:
<code>npm install cloudinary react-copy-to-clipboard @types/react-copy-to-clipboard react-icons openai</code>Code language: HTML, XML (xml)The packages installed perform the following:
cloudinary. Provides an interface to interact with Cloudinary.react-copy-to-clipboard. Provides a React component that enables users to copy texts with a single click.@types/react-copy-to=clipboard. This is a type definition file for the react-copy-to-clipboard package.react-icons. Offers a collection of icons (like Font Awesome or Material UI) that can be easily integrated into your application.openai. Interacts with the OpenAI API.
Once done, go to the next.config.js file in the project’s root directory and add this code snippet to allow Next.js to display images generated from DALL-E 3:
/** @type {import('next').NextConfig} */

const nextConfig = {

  images: {

    formats: ["image/avif", "image/webp"],

    remotePatterns: [

      {

        protocol: "https",

        hostname: "oaidalleapiprodscus.blob.core.windows.net",

      },

    ],

  },

};

export default nextConfig;Code language: JavaScript (javascript)
This prioritizes AVIF and WEBP formats for image optimization. It also allows Next.js to display images served from the Azure Blob Storage endpoint that OpenAI’s API uses.
Running npm run dev should render your project at https://localhost:3000/ in your browser.
After you create a Cloudinary account, access the dashboard to find all the required credentials for this project. Copy and store them somewhere safe.

DALL-E 3 is an AI image generation model by OpenAI that generates realistic images based on text descriptions. DALL-E 3 is currently unavailable for free public use through the OpenAI API, as access is restricted to ChatGPT Plus, Team, and Enterprise customers.
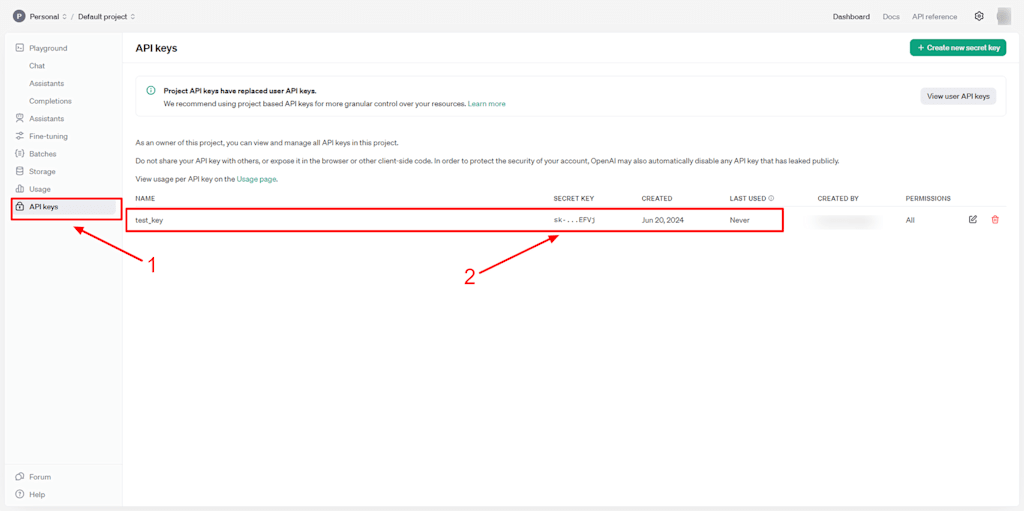
Next, navigate to the OpenAI API key page and create a new key, as shown below. The key allows us to interact with DALL-E 3. Also copy and store these somewhere safe.

Next, create a .env.local file in your project’s root folder to store the Open API key and Cloudinary credentials.
// .env.local

NEXT_PUBLIC_OPENAI_API_KEY=<openai_api_key>

NEXT_PUBLIC_CLOUDINARY_CLOUD_NAME=<cloudinary_api_key>

NEXT_PUBLIC_CLOUDINARY_API_KEY=<cloudinary_api_secret>

CLOUDINARY_API_SECRET=<cloudinary_cloud_name>Code language: HTML, XML (xml)Never share your credentials publicly.
The app’s main functionality is to generate, store, and manage AI-generated images. For the image generation, the app component accepts a user prompt and displays the generated image based on the prompt. To do this, navigate to the src/app/pages file, create an input to accept the user prompt, and include a button to send the prompt in a request to OpenAI API.
// src/app/pages

import { FaRegPaperPlane } from "react-icons/fa";

export default function Home() {

  const [value, setValue] = useState<string>("");

return (

<main className="flex min-h-screen flex-col items-center justify-between p-10">

        <h1 className="relative text-xl font-semibold capitalize ">

        AI image manager

      </h1>

        <div className="flex items-center justify-between">

          <input type="text" placeholder="Enter an image prompt" name="value"

onChange={(e) => { setValue(e.target.value) }} className="bg-gray-100 placeholder:text-gray-400 disabled:cursor-not-allowed border border-gray-500 text-gray-900 text-sm rounded-lg block p-3.5 mr-2 w-[600px]" required />

    <button className="text-blue-700 relative right-[3.5rem] font-medium p-5 rounded-lg text-sm transition-all sm:w-auto px-5 py-2.5 text-center">

            <FaRegPaperPlane />

          </button>

        </div>

    </main>

  )

}Code language: JavaScript (javascript)
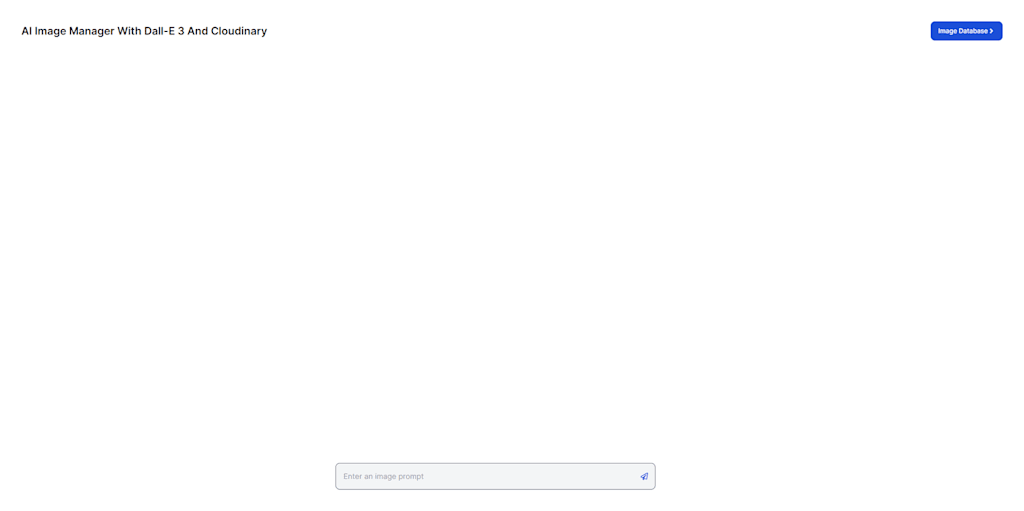
After applying the necessary configurations, the app should look like this:

Also, create a Loader component file, src/components/Loader.tsx, to give the user visual feedback on requests undergoing a process.
// src/components/Loader.tsx

import React from 'react'

export default function Loader({ size = 20 }) {

    return (

        <div className="flex justify-center items-center">

        <div className="spinner" style={{ width: `${size}px`, height: `${size}px` }}>

          </div>

        </div>

      );

}Code language: JavaScript (javascript)
Then, navigate to the global.css file and add the Loader component’s CSS style.
//src/app/global.css

@keyframes spinner {

  0% {

    transform: rotate(0deg);

  }

  100% {

    transform: rotate(360deg);

  }

}

.spinner {

  border: 4px solid #f3f3f3;

  border-top-color: #3498db; /* Adjust color as desired */

  border-radius: 50%;

  animation: spin 1s linear infinite;

}

@keyframes spin {

  0% { transform: rotate(0deg); }

  100% { transform: rotate(360deg); }

}Code language: PHP (php)In this step, you’ll use Next.js’ API routes to send the user prompt as a POST request parameter to OpenAI’s API. The response, containing the generated image URL based on the prompt, will then be retrieved and processed.
First, you’ll send the text value to the API route, /api/dalle3. Create a pages/api folder and add a file named dalle3.ts. This file will act as the API endpoint for your POST request. Then, add the code snippet below in the dalle3.ts file:
//src/pages/api/dalle3.ts

import type { NextApiRequest, NextApiResponse } from 'next';

import OpenAI from "openai";

const openai = new OpenAI({ apiKey: process.env.NEXT_PUBLIC_DALL_E_3_API_KEY });

export default async function handler(req: NextApiRequest, res: NextApiResponse) {

  try {

    const { prompt } = req.body; // Extract the prompt from the request body

    const uploadResponse = await openai.images.generate({

      model: "dall-e-3",

      prompt: prompt,

      n: 1,

      size: "1024x1024",

    });

    const image_url = uploadResponse.data[0].url;

    res.status(200).json({ image_url });

  } catch (error: any) {

    console.error(error);

    res.status(500).json({ message: error.message });

  }

}Code language: JavaScript (javascript)
Let’s break down the actions taken in each section of the code snippet above:
- Lines 1-3. Imports the necessary components from Next.js to handle the request and response structure and create a new client specifically for interacting with the OpenAI API.
- Line 6. Extracts the user’s prompt (text value) from the data sent in the request.
- Lines 7-12. This section makes an asynchronous call to the
OpenAI.images.generatemethod. It instructs the method to use Dall-E 3, takes the extracted prompt as the image basis, creates a single image, and sets the size to 1024×1024 pixels. - Lines 13-14. If successful, it extracts the image URL from the response and sends a JSON object with the URL.
- Lines 15-17. It includes an error catch block to handle potential API communication issues.
Now, you’ll send the user’s prompt to your server-side endpoint. Create a function called handlePrompt within the src/app/pages file, then link it to the app’s button. Inside this function, you’ll convert the value stored in the state variable (containing the prompt) into a JSON object. This JSON object will then become the body of the request sent to the server.
// src/app/pages

import { FaRegPaperPlane } from "react-icons/fa";

export default function Home() {

  const [url, setUrl] = useState<string>("");

  const [loading, setLoading] = useState<boolean | undefined>(false);

  const [value, setValue] = useState<string>("");

  const handlePrompt = async (e: any) => {

    e.preventDefault()

    setLoading(true)

    setUrl("")

    try {

      const response = await fetch('/api/dalle3', {

        method: 'POST',

        headers: { 'Content-Type': 'application/json' },

        body: JSON.stringify({ prompt: value }), // send the string as a JSON object

      });

      // Handle success, such as updating UI or showing a success message

      if (response.ok) {

        const data = await response.json();

        setUrl(data.image_url)

      }

    } catch (error) {

      // Handle network errors or other exceptions

      console.error('Error uploading file:', error);

    }

  };

return (

    <main className="flex min-h-screen flex-col items-center justify-between p-10">

    ... // App Title

      <div className="flex items-center justify-between">

          <input type="text" placeholder="Enter an image prompt" name="value"

onChange={(e) => { setValue(e.target.value) }} className="bg-gray-100 placeholder:text-gray-400 disabled:cursor-not-allowed border border-gray-500 text-gray-900 text-sm rounded-lg block p-3.5 mr-2 w-[600px]" required />

<button className="text-blue-700 relative right-[3.5rem] font-medium p-5 rounded-lg text-sm transition-all sm:w-auto px-5 py-2.5 text-center" onClick={handlePrompt}>

          <FaRegPaperPlane />

        </button>

      </div>

    </main>

  )

}Code language: JavaScript (javascript)
To handle the OpenAI API response, the application state was updated with the generated image URL by storing the URL in a state variable named url.
Next, you’ll display the generated image from OpenAI API only when the server successfully processes the request. To achieve this, you’ll conditionally render the image based on the value of the url state variable. If the url has a value (meaning the image retrieval was successful), you’ll display the image and hide the loading indicator using the onLoadingComplete prop.
// src/app/pages

import Image from "next/image";

import { useState } from "react";

export default function Home() {

  const [url, setUrl] = useState<string>("");

  const [loading, setLoading] = useState<boolean | undefined>(false);

  const [value, setValue] = useState<string>("");

return (

  <main className="flex min-h-screen flex-col items-center justify-between p-10">

    ... //App Title

       {url &&

         <div className="flex flex-col items-center justify-center">

             <Image src={url} onLoadingComplete={() => setLoading(false)} width={500} height={500} alt="ai image" />

        </div>

         }

      ... // prompt input and button

</main>

  )

}Code language: JavaScript (javascript)
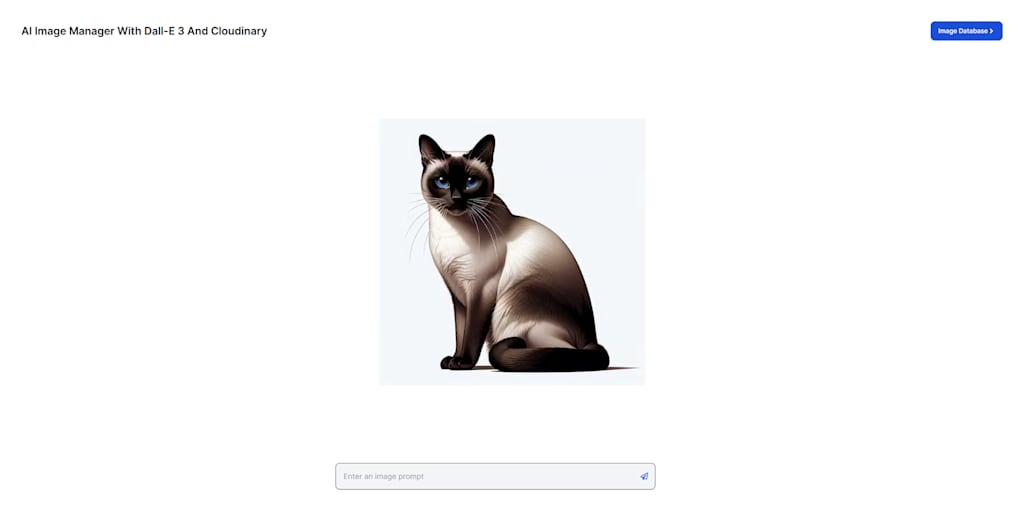
The app should look like this:

Once you display the generated image, you can upload it to Cloudinary and get the upload URL. To do this, you’ll create a new file named cloudinary.ts inside the pages/api folder. This file will act as an API route for your upload request.
// pages/api/cloudinary.ts

import type { NextApiRequest, NextApiResponse } from 'next';

import { v2 as cloudinary } from 'cloudinary';

cloudinary.config({

    cloud_name: process.env.NEXT_PUBLIC_CLOUDINARY_CLOUD_NAME,

    api_key: process.env.NEXT_PUBLIC_CLOUDINARY_API_KEY,

    api_secret: process.env.CLOUDINARY_API_SECRET,

});

export default async function handler(req: NextApiRequest, res: NextApiResponse) {

    try {

      const image_url = req.body.url; // Extract the image URL from the request body

      const timestamp = req.body.value  + ' ' + Math.floor((Math.random() * 100) + 1);

      const trimmedString = timestamp.trim();

      const publicId = trimmedString.replace(/\s+/g, '-');

        const response = await cloudinary.uploader.upload(image_url, {

            transformation: [

                {border: "10px_solid_blue"},

                {radius: 50},

                {color: "#FFFFFF69", overlay: {font_family: "Arial", font_size: 100, font_weight: "bold", text_align: "left", text: "CG"}},

                {flags: "layer_apply", gravity: "north_west", x: 20, y: 40}

                ],

            resource_type: 'image',

            public_id: `${publicId}`,

        });

        const uploadResponse = response.secure_url;

        res.status(200).json({ uploadResponse });

    } catch (error: any) {

        console.error(error);

        res.status(500).json({ message: error.message });

    }

}Code language: JavaScript (javascript)
Let’s break down what the code snippet above does:
- Line 1. Imports the necessary components from Next.js to define the data structure for requests and responses.
- Lines 2-7. Imports the Cloudinary Node.js SDK (version 2) and configures it using previously set environment variables, which include the Cloudinary account details.
- Line 10. Extracts the image URL from the data sent in the request, corresponding to the DALL-E 3 generated image.
- Lines 11-14. This section extracts the image URL and user’s prompt from the request. The prompt is then used to create a unique identifier for the uploaded image. To ensure uniqueness, the code combines the prompt with random numbers, removes whitespace, and replaces spaces with hyphens for a valid Cloudinary ID.
- Lines 15- 24.This block transforms and uploads the image to Cloudinary. The upload also specifies the content as an image resource and assigns a unique public ID on the user’s prompt. The image is transformed using these presets:
{border: "10px_solid_blue"}. Adds a blue 10-pixel border around the image.{radius: 50}. Applies a rounded corner effect to the image with a radius of 50 pixels.{color: "#FFFFFF69", overlay: {...}}. Creates a semi-transparent text overlay on the image, defining its background color, font family, size, weight, alignment, and text, which serves as a watermark.{flags: "layer_apply", gravity: "north_west", x: 20, y: 40}. Aligns the text overlay’s position by treating it as a separate layer, anchoring it to the top-left corner (“north_west”) and then offsetting it by 20 pixels horizontally and 40 pixels vertically.
- Lines 25 and 26. Upon successful upload, this part extracts the upload URL from Cloudinary’s response and sends it back as a successful response in JSON format.
- Lines 27-30. Includes an error catch block to handle any potential issues during the upload process.
- You can apply whatever transformations you prefer on your generated images. We used the sample above to demonstrate Cloudinary’s capabilities.
Next, you’ll need to send data to the API route. To handle this, create a function named saveImageToCloudinary within the src/app/pages file. Inside this function, you’ll set the user prompt and generated image URL from OpenAI API as the body of a POST request to your Cloudinary API route. You’ll also include a button to trigger the saveImageToCloudinary function, which only renders if there’s an image to be saved.
import Image from "next/image";

import { useEffect, useState } from "react";

  interface Item {

   id: number;

   text: string;

  }

export default function Home() {

   const [url, setUrl] = useState<string>("");

   const [value, setValue] = useState<string>("");

   const [loading, setLoading] = useState<boolean | undefined>(false);

   const [save, setSave] = useState<boolean | undefined>(false);

   const [saveStatus, setSaveStatus] = useState(false);

   const [items, setItems] = useState<Item[]>([]);

  useEffect(() => {

   const savedImages = localStorage.getItem("myImages");

   if (savedImages) {

     setItems(JSON.parse(savedImages));

   }

  }, []);

  const handleSave = (newItem: Item) => {

     const newItems = [...items, newItem];

     setItems(newItems);

     localStorage.setItem('myImages', JSON.stringify(newItems));

   };

   const saveImageToCloudinary = async (e: any) => {

     e.preventDefault()

     setSave(true)

     try {

       const response = await fetch('/api/cloudinary', {

         method: 'POST',

         headers: { 'Content-Type': 'application/json' },

         body: JSON.stringify({ url, value }), // send the string as a JSON object

       });

       // Handle success, such as updating UI or showing a success message

       if (response.ok) {

         const data = await response.json();

         handleSave(data.uploadResponse); // Add to items array

        setSave(false);

        onSaveImage()

      }

    } catch (error) {

      console.error("Error sending prompt:", error);

    }

  }

  const onSaveImage = () => {

    setSaveStatus(true);

    setTimeout(() => setSaveStatus(false), 2000); // Reset status after 2 seconds

  };

  const handlePrompt = async (e: any) => {

  ...

  }

return (

  <main className="flex min-h-screen flex-col items-center justify-between p-10">

    ... //App Title

{url &&

        <div className="flex flex-col items-center justify-center">

            <Image src={url} onLoadingComplete={() => setLoading(false)} width={500} height={500} alt="ai image" />

        </div>

        {!loading &&

            <div>

      <button type="submit" onClick={saveImageToCloudinary} className="flex justify-center text-white border bg-blue-700 hover:bg-blue-800 font-medium relative rounded-lg text-xs px-2.5 py-2.5 text-center mt-3">

                  {save ? <Loader /> : "Save image"}

                </button>

                {saveStatus && <p className="text-center">Image saved!</p>}

             </div>

            }

        }

      ... // prompt input and button

</main>

  )

}Code language: JavaScript (javascript)
Upon a successful upload, the upload URL from Cloudinary is stored in the browser storage. The browser storage serves as a database to store multiple image URLs a user saves over time. Then, a state variable named items is created using the useState hook to manage an array of image objects. For the browser storage, localStorage is used to store the current items array (containing all saved image data) as a JSON string under the myImages key.
While this project uses browser storage (localStorage) to save the image URL, consider using a proper database like MongoDB or Firebase for a more robust and scalable solution, especially if the project contains many users or values.
The items state variable is initialized as an empty array. On component mount, the useEffect hook retrieves items (saved images) from the localStorage and updates the items state. Then, a function, handleSave, is created to update the component state and localStorage whenever a new image is added. This way, even if the user refreshes the page, the saved images, including the latest one, will still be there. This approach allows the code to access and utilize previously saved images stored in localStorage during component initialization.
This implementation currently focuses on saving the image URL. However, it can be enhanced by storing additional image metadata, such as creation date, tags, or descriptions, which can improve image organization and searchability.
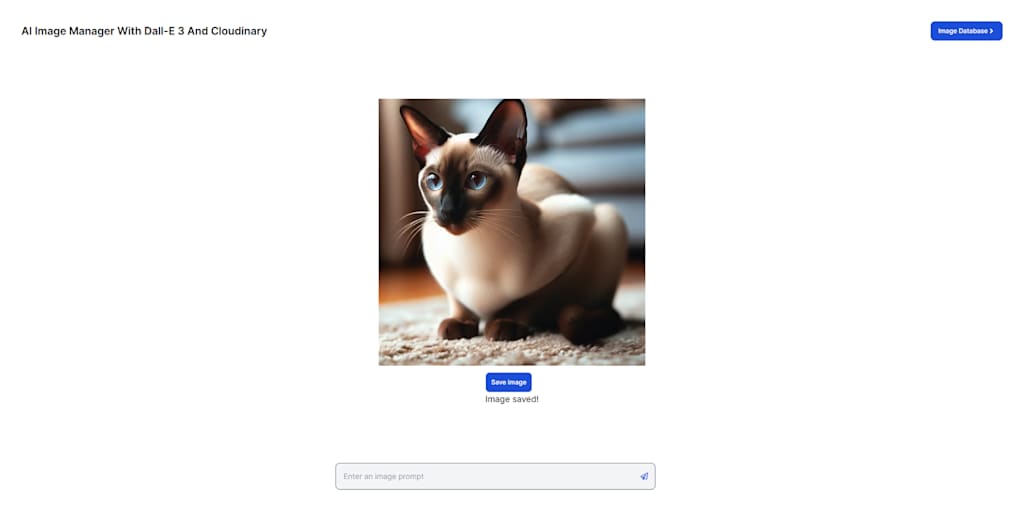
An onSaveImage function is also created. This function conditionally displays a message indicating the image has been saved upon a successful response from Cloudinary. To store images, the page should look like this:

Now, you’ll need an image manager to show, delete, and copy the image URL of your saved images. To create the image manager, navigate to the src/pages folder, create a new folder called images, and add a new file, page.tsx. The file will serve as an image manager to display the saved images. Then, head back to the src/app/pages file and create a button to navigate to the images/page.tsx file as shown below.
// src/app/pages.tsx

export default function Home() {

  ... // hooks and functions

return (

<main className="flex min-h-screen flex-col items-center justify-between p-10">

<div className="flex items-center justify-between w-full">

        <h1 className="relative text-xl font-semibold capitalize ">

          AI image manager with Dall-E 3 and Cloudinary

        </h1>

       <Link className="flex items-center justify-center capitalize text-white bg-blue-700 hover:bg-blue-800 font-medium rounded-lg text-xs px-3.5 py-2.5" href="/images/page">

         <span>image database</span>

            <FaAngleRight size={14} />

        </Link>

      </div>

      ... // image and upload button

      ... // prompt input and button

</main>

  )

}Code language: JavaScript (javascript)
In the images/page.tsx file, you’ll use the useEffect hook to automatically load the saved images from the browser storage and display them, with the newest appearing first.
To display the image with the delete and copy functionality, you’ll first create a deleteImage function to remove a selected image from the displayed list, update the application state, and synchronize the saved images in browser storage.
You’ll iterate through the images state array, generating two buttons for each image:
- Delete button. This button lets users delete the image from the browser storage.
- Copy URL button. This button, wrapped in a
CopyToClipboardcomponent, lets users copy the image URL to their clipboard. TheCopyToClipboardcomponent handles the copy functionality and accepts two props:text={img}. Defines the text to be copied, which is the image URL stored in theimgvariable.onCopy={onCopyText}. A function that triggers upon successful copying.
The function onCopyText will display a visual confirmation message once a user copies the URL.
Update the images/page.tsx file as shown below.
After applying the necessary changes above, the app should look like this:
To test the app, enter a prompt, DALL-E 3 will generate a unique image based on the input, then click Save to store it in Cloudinary and place the returned URL in local storage. The images will appear in a gallery where the user can delete them or copy their URLs. The application will look like this.
This blog post provides a step-by-step guide to building an AI image manager using DALL-E 3 and Cloudinary. The project can be enhanced by integrating image editing functionalities, search capabilities based on image metadata, and user authentication for private image storage. Sign up for a free Cloudinary account today to handle all your image management and transformation needs.
And if you found this post helpful and would like to learn more, feel free to join the Cloudinary Community forum and its associated Discord.
