
Live streaming events have become more of the norm these last years. They give a sense of urgency to your content, boost online interaction between you and your users, and help reach a wider audience.
This tutorial will walk through handling video player events by building a live event simulator in Next.js.
The live event simulator mimics live events where we want to play a video starting from a specified time. The video starting position for the user is adjusted based on how much time has passed since the actual video started. For example, a video that is 1 hour long but that started 45 minutes ago, would have any new user that visits the page automatically start at the 45 minute mark in the video time.
Also when the recorded video is done, we want an overlay with the text ‘This stream has ended’ and our native player controls hidden.
This project was completed in a Codesandbox. To get started quickly, fork the codesandbox or run the project.
GitHub Repository
https://github.com/Iheanacho-ai/live-event-simulator
To get the most out of this tutorial, we need the following:
- A basic understanding of CSS and React.
- Node and it’s package manager,
npm. Run the commandnode -v&&npm -vto verify we have them installed, or install them from here. - Alternatively, we can use another package manager, Yarn.
- Understanding Next.js would help us follow through with this tutorial quicker, but it is not a necessity.
Next.js is an open-source React framework that enables us to build server-side rendering, static web applications. With built-in CSS, Sass, and any CSS-in-JS library support, Next.js allows us to create web applications easily.
To create our Next.js app, we go to our terminal or command prompt, using the git cd command, we navigate to the directory we want our app to be created in.
    cd <name of the directory>
Code language: HTML, XML (xml)
Next we run:
    npx create-next-app
    # or
    yarn create next-app
Code language: PHP (php)
We then change directory to the app we just created and run it.
    cd < name of our app >
    npm run dev
Code language: HTML, XML (xml)
To see our app in our browser, go to http://localhost:3000/
In this section of the tutorial we will install React Player to handle our video and video player events.
React Player React Player is a React component for playing a variety of URLs. React Player allows us to create and personalize our video player with callback props for almost every player event. It also offers an excellent media experience in web applications.
To install React Player in our app, we run the command.
    npm install react-player
    # or
    yarn add react-player
Code language: PHP (php)To create our video player, we first create a component folder in the root of our app. In this folder we will create our video-player.jsx file.
To use the ReactPlayer component, we import it from the react-library into our video-player.jsx file.
    import React from 'react'
    import ReactPlayer from 'react-player'
Code language: JavaScript (javascript)
This ReactPlayer component allows us to use a wide range of props. We then pass values into these props to personalize our player.
In the next piece of code, we use the url prop, the controls prop, and finally the playing prop.
The url prop takes in a value that points to the media path we are looking to play. To display the native player controls, we use the controls prop. This prop takes in a boolean value. When the controls prop set to true, the controls are displayed, and hidden when set to false.
Next, we have the playing prop. The playing prop plays or pauses the media when set to true or false, respectively.
The ReactPlayer component also allows us to set the width and height of the player using the width and height prop, respectively.
Failing to do so sets our video player to this default dimensions width: 640px; height: 360px; which we will use in this tutorial.
    import React from 'react'
    import ReactPlayer from 'react-player'
    const VideoPlayer = () => {
        return(
            <div className="video-player">
                <ReactPlayer
                url= 'https://res.cloudinary.com/amarachi-2812/video/upload/v1630370229/videoplayback_1_pr2hzi.mp4'
                playing = {true}
                controls = {true}
                />
            </div>
        )
    }

    export const MemoizedVideoPlayer = React.memo(VideoPlayer);
Code language: JavaScript (javascript)
We memoized the video player component to prevent any re-rendering triggered by its parent component, except a dependency changes.
<!— It looks like you are missing ‘/>’ closing the <reactplayer> div —>
Setting our playing and controls prop to true, our video player plays our video as it renders on our screen and displays our native player controls.
Next, we import our video player to our index.js file to see our video player in our browser.
    import Head from 'next/head'
    import styles from '../styles/Home.module.css'
    import { MemoizedVideoPlayer } from '../component/video-player';

    const Home = () => {
      return(
        <div className={styles.container}>
          <Head>
            <title>Live Simulator</title>
            <meta name="description" content="Live Event Simulator Created by Nextjs" />
            <link rel="icon" href="/favicon.ico" />
          </Head>
          <main className={styles.main}>
            <div className= 'live-event-container'>
              <MemoizedVideoPlayer/>
           </div>
          </main>
        </div>
      )
    }
    export default Home;
Code language: JavaScript (javascript)
With that we have our video player set up.
To create a live simulation in our app, we start by importing React and the useState hook in our index.js file.
The useState hook allows our functional component to have states in them.
    import React, { useState } from 'react';
Code language: JavaScript (javascript)
Next, using the useState hook, we create pieces of state to control different properties of our video player, in a Home component.
<!— Can you please mention to place this and the next piece of code within the home constant before return (..) —>
const Home = () => {
  const [startTime, setStartTime] = useState(1633538276355);
  const [controls, setControls] = useState(true);
  const [ended, setEnded] = useState(false);
  const [duration, setDuration] = useState(null);
  const [playing, setPlaying] = useState(true);

  return (
    <div className={styles.container}>

    </div>
  );
};

export default Home;
Code language: JavaScript (javascript)-
startTime: Set to an initial value of 1630430724714, this is the time in milliseconds we want our ‘live event’ to start (we shall discuss how to find the time in milliseconds in the functions section of this tutorial below). -
controls: Set to an initial value of true, this property sets thecontrolsprop on theReactPlayercomponent. -
ended: Set to an initial value of false. It would be set to true when the video ends. We will use theendedvariable to conditionally render our overlay. -
duration: Stores the duration of the video we are playing in seconds. -
playing: Controls when our video starts or stops playing, it will be set to an initial value oftrueas we want our video to be playing when it mounts, unless the video has ended.
Next, our control functions.
    let date = new Date();
    let currentTime = date.getTime()
    let timePlayed = ( currentTime - startTime ) % 1000;

    const endVideo = () => {
      if (controls === false && ended === true) {
        if (playing === false) {
          return;
        } else {
          setPlaying(false);
        }
      } else {
        setControls(false);
        setEnded(true);
        setPlaying(false);
      }
    };

    const videoDuration = num => {
        setDuration( num )
      }

    if (timePlayed > duration){
        endVideo()
    }

     const restartLive = () => {
      let newDate = new Date();
      let newStartTime = newDate.getTime();
      setStartTime(newStartTime);
      setEnded(false);
      setPlaying(true);
      setControls(true);
    };

Code language: JavaScript (javascript)The date variable in the code block above gets the current date using the JavaScript new Date() method. We then get the current time in milliseconds using the JavaScript getTime() method, and store it in the currentTime variable. The timePlayed variable gets the difference between the time our ‘live event’ started and the current time in seconds, this variable will be used to tell our video player what time in the player we want to seek to.
What happens when our video ends?
The endVideo function will get called when our video ends, even long after. The endVideo function has an if else block. This if else conditional checks if the controls variable is already false and the ended variable true, if they are, we go further to check if the playing variable is false, if our code passes all these checks, we want to return from the function.
If, however, our code does not pass all these checks, we want to set
-
playingto false to stop playing the video -
controlsto false to hide the native player controls.
We created a videoDuration function that takes in a num parameter, this parameter represents the duration of the media. This videoDuration function uses the num parameter to update the duration state variable.
Next, we have an if block of code, this checks if the timePlayed variable (containing how much time has passed since the start of the live) is greater than the duration. If it is, we run the endVideo function.
Restarting the video
The restartLive function is used to restart the live event simulation.
The newDate variable gets the date the restartLive function ran, and the newStartTime variable stores the exact time in milliseconds this function ran. We pass in the newStartTime to the setStartTime function to reset the startTime variable.
Finally, we set our ended variable to false, as we just started our simulation over again.
Next, we add a button to run this restartLive function, with the onClick event handler.
    <button className= 'reset-button' onClick = {restartLive}>Restart Live Simulation</button>
Code language: HTML, XML (xml)
Our index.js file should like this.
The module imports and methods
    import Head from "next/head";
    import React, { useState } from "react";
    import { MemoizedVideoPlayer } from "../component/video-player";
    import styles from "../styles/Home.module.css";

    const Home = () => {
      const [startTime, setStartTime] = useState(1633538276355);
      const [controls, setControls] = useState(true);
      const [ended, setEnded] = useState(false);
      const [duration, setDuration] = useState(null);
      const [playing, setPlaying] = useState(true);

      let date = new Date();
      let currentTime = date.getTime();
      let timePlayed = (currentTime - startTime) % 1000;


      const endVideo = () => {
        if (controls === false && ended === true) {
          if (playing === false) {
            return;
          } else {
            setPlaying(false);
          }
        } else {
          setControls(false);
          setEnded(true);
          setPlaying(false);
        }
      };

      const restartLive = () => {
        let newDate = new Date();
        let newStartTime = newDate.getTime();
        setStartTime(newStartTime);
        setEnded(false);
        setPlaying(true);
        setControls(true);
      };

      const videoDuration = (num) => {
        setDuration(num);
      };

      if (timePlayed > duration) {
        endVideo();
      }
Code language: JavaScript (javascript)
The rendered component
    return (
        <div className={styles.container}>
          <Head>
            <title>Live Simulator</title>
            <meta
              name="description"
              content="Live Event Simulator Created by Next.js"
            />
            <link rel="icon" href="/favicon.ico" />
          </Head>
          <main className={styles.main}>
            <div className="live-event-container">
              {/* Our VideoPlayer component */}
              <MemoizedVideoPlayer
                ended={ended}
                timePlayed={timePlayed}
                controls={controls}
                endVideo={endVideo}
                playing={playing}
                videoDuration={videoDuration}
              />
            </div>
            {/* Our Restart button */}
            <button className="reset-button" onClick={restartLive}>
              Restart Live Simulation
            </button>
          </main>
        </div>
      );
    };

    export default Home;
Code language: JavaScript (javascript)
See the complete code block in this Github Gist here.
We pass our timePlayed variable, controls variables, endVideo function and our videoDuration function to the MemoizedVideoPlayer component housing our ReactPlayer component.
    <MemoizedVideoPlayer timePlayed ={timePlayed} controls={controls} endVideo={endVideo} playing={playing} videoDuration={videoDuration} />
Code language: HTML, XML (xml)
In our video-player.jsx file, we define a player variable, we use this variable later to set the ref on our ReactPlayer, we do this to reference the component.
Next we pass the variables we received to their respective props, the controls variable, to the controls prop and the playing variable, to the playing prop.
The ReactPlayer component allows us to use an onEnded callback prop which runs the function passed into it when the video ends, so we pass in the endVideo function.
The onStart callback prop takes in a function that runs when the video is mounted and ready to play. We use this, to call the getDuration() method on the player object we get from the ReactPlayer component. This method is used to get the duration of the video in seconds.
Next we write another function using the seekTo() method on the player object. The seekTo() method takes in a time parameter in seconds that indicates where we want to skip to in the video. We then pass the timePlayed variable (the difference between the current time and the start time in seconds) as the time parameter into the seekTo() method.
Our video-player.jsx should look like this.
    import React from "react";
    import ReactPlayer from "react-player";
    let player;
    const VideoPlayer = ({
      endVideo,
      timePlayed,
      controls,
      playing,
      videoDuration
    }) => (
      <div className="video-player">
        <ReactPlayer
          ref={(ref) => {
            player = ref;
          }}
          url="https://res.cloudinary.com/amarachi-2812/video/upload/v1630370229/videoplayback_1_pr2hzi.mp4"
          playing={playing}
          controls={controls}
          onStart={() => {
            videoDuration(player.getDuration);
            player.seekTo(timePlayed);
          }}
          onEnded={endVideo}
        />
      </div>
    );
    export const MemoizedVideoPlayer = React.memo(VideoPlayer);
Code language: JavaScript (javascript)To make our overlay, we create a video-overlay.jsx file in the components folder.
For our overlay, we use a div element, a header and a p tag.
    import React from 'react';
    const VideoOverlay = () => (
        <div className = 'video-overlay'>
            <h2>Live Event has finished</h2>
            <p>Click the button below to restart simulation</p>
        </div>
    );
    export default VideoOverlay;
Code language: JavaScript (javascript)
In the styles folder, there is a global.css stylesheet. In this, we write the styling for our app with the following content:
    .video-overlay{
      width: 640px;
      height: 360px;
      position: absolute;
      top: 18.5%;
      bottom: 0;
      background-color: rgba(0,0,0, 0.6);
      color: #fff;
      font-family: 'Nunito Sans', sans-serif;
      text-align: center;
    }
Code language: CSS (css)
The video-overlay div has a height of 640px and a width of 360px. These are the measurement of the video player. Next, we give the overlay a position property of ‘absolute’, setting its position relative to its parent.
The top and bottom properties tell us the distance we want our element to start. This tutorial has our properties top to 18.5% and bottom set to 0, indicating that we wish our overlay to begin at the top of our video player and end at the bottom.
We give the overlay a background-color property background-color: rgba(0, 0, 0, 0.6). This value gives us a light black background. The color property indicates what text color we want in our overlay, font-family indicates what font we want and the text-align: center to move our text to the center of the overlay.
We also style our reset button with:
    .reset-button{
      width: 250px;
      height: 30px;
      border-radius: 5px;
      background-color: #111;
      outline: none;
      color: #fff;
    }
Code language: CSS (css)In the Home component we render the VideoOverlay component with:
import VideoOverlay from "../component/video-overlay";
// other imports go in here

const Home = () => {
  // state and method definitions

  return (
    <div className={styles.container}>
      {/* Head component */}

      <main className={styles.main}>
        <div className="live-event-container">
          {/* Our VideoPlayer component */}

          <MemoizedVideoPlayer
            ended={ended}
            timePlayed={timePlayed}
            controls={controls}
            endVideo={endVideo}
            playing={playing}
            videoDuration={videoDuration}
          />
          {ended ? <VideoOverlay /> : null}
        </div>

        {/* Our Restart button */}
      </main>
    </div>
  );
};

export default Home;
Code language: JavaScript (javascript)
In the block of code above, we use a ternary operator to render our overlay depending on if the value of the ended variable is true.
With that, we have created our Live Event Simulator.
Here was it looks like :
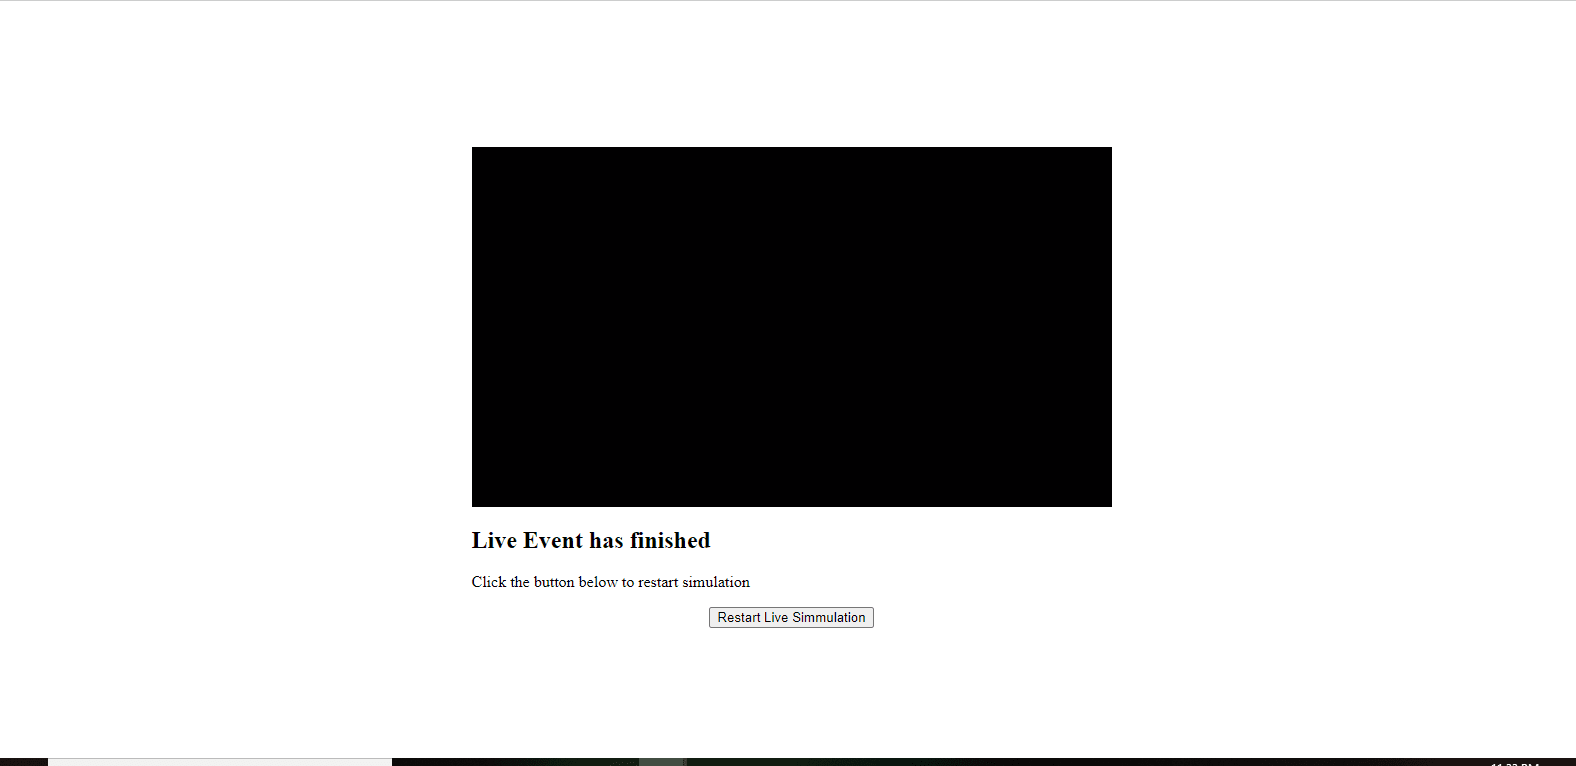
In this article, we created a video player and handled player events with React Player. We specified what should happen when a user starts watching the ‘live video’ and how to place them at a specific point of the video depending on how much time has passed since the video began. Try to modify the video’s start time relative to your current time and see how far into the live video you get.
You may also find these resources helpful.