
Personalized video converts 8x better than generic content. What the stats don’t mention is that manually customizing hundreds of videos can inflate production timelines and spend.
I’ll guide you through building a system that delivers tailored video content to thousands of customers, all without having to open a video editor or source new files.
You’ll learn how to transform video by using:
- Dynamic text overlays for names and coupon codes.
- Logo swapping for partner co-branding.
- Conditional rendering based on user data.
- Real-time generation via transformation URLs.
Personalized video overlays are dynamic elements, such as text, images, or graphics, added to videos in real time based on viewer data. It’s like Netflix’s “Top Pick for [Your Name]” or a sales video that displays your company’s logo in the corner.
Creating these overlays, traditionally, is manual and expensive. Your team exports hundreds of video variations, each with different names or logos baked in. File management can be a nightmare, storage costs explode, and making changes means re-rendering everything.
By using dynamic overlays, you can eliminate manual editing after the initial setup. You’ll serve infinite variations from one master video, generate personalized content in real time via URL parameters, and update all the variations instantly without re-uploading.
The impact on campaign velocity is substantial. Teams using dynamic overlays launch personalized video campaigns in hours instead of weeks. Next, you’ll learn how Cloudinary handles dynamic overlays and how you can use it for product transformation.
Cloudinary’s architecture treats personalization as a transformation chain applied at request time.
With Cloudinary, the process is simple:
- Upload once. Add your master video to Cloudinary.
- Define transformations. Use
l_textorl_image parametersfor overlays. - Generate URLs. Create unique links with personalization data.
- Deliver instantly. Cloudinary renders personalized versions on demand.
Behind the scenes, you’re creating transformation instructions that Cloudinary applies when someone requests the video, which means you can serve millions of personalized videos without storing millions of files.
The transformation chain works like this:
Base Video → Apply Overlay → Position/Style → Deliver Personalized Version
Each transformation parameter builds upon the previous one, allowing you to compose complex personalizations from simple building blocks. With this transformation chain in place, you need to choose the right overlay type and its placement:
- Text overlays
(l_text). This is perfect for names, coupon codes, or dynamic messages:
- Font family and size using Google Fonts or custom uploads.
- Color and opacity for brand consistency.
- Stroke and shadow for readability over video.
- Animation effects like fade-in or typewriter.
- Image overlays
(l_image). This is ideal for logos, badges, or profile pictures:
- Relative sizing to maintain proportions.
- Opacity control for watermark effects.
- Chroma key for transparent backgrounds.
- Multiple overlays for complex compositions.
- Video overlays
(l_video). For picture-in-picture or animated logos:
- Trimming controls to show specific segments.
- Audio mixing options.
- Synchronized playback with the master video.
- Placement Control. For placement control, you can position overlays by using:
- Gravity (
center,north_east,south_west, etc.). - X/Y offsets in pixels or percentages.
- Relative positioning based on video dimensions.
- Face detection for smart placement around subjects.
One of the benefits of using Cloudinary for personalized video is that you can extend the implementation to create infinite variations via URLs. We’ll look into that in the following section.
You don’t need to write a single line of code to start personalizing your videos. Cloudinary’s transformation URLs work like templates; you change the parameters to create different variations.
You should have:
- A Cloudinary account (free tier works).
- A sample video uploaded to Cloudinary (or use Cloudinary demo assets).
- Basic understanding of how URLs work.
You need environment credentials from your Cloudinary dashboard to use Cloudinary video transformations and create optimized video delivery.
Log in to your Cloudinary dashboard to retrieve your cloud name.

Every Cloudinary video URL follows this pattern:
https://res.cloudinary.com/<your_cloud_name>/video/upload/<transformations>/<video_id>.mp4Code language: HTML, XML (xml)<your_cloud_name>. Your Cloud name from Cloudinary Dashboard.<transformations>. Replace with your transformation parameters.<video_id>. Replace with the video ID.
To add personalization, you insert transformation parameters in the middle. That’s it, no rendering, no editing software, just Cloudinary transformations that can be applied in real time.
Start with your base video URL, for example:
https://res.cloudinary.com/demo/video/upload/docs/walking_talking.mp4Code language: JavaScript (javascript)To add an overlay with the viewer’s name, like “Hello Sarah!”, insert these transformation parameters:
<code>https://res.cloudinary.com/demo/video/upload/           // Your base video URL</code>
<code>l_text:arial_200:Hello%20Sarah!,co_white,g_north,y_50   // Transformation</code>
<code>/docs/walking_talking.mp4 /// Video ID</code>Code language: HTML, XML (xml)
This is the transformation syntax:
l_text:arial_200:Hello%20Sarah!adds text in Arial font, size 200.co_whitemakes the text white.g_northpositions at top center.y_50is 50 pixels from the top edge.
To try it yourself, copy the Cloudinary transformation URL, replace “Sarah” with any name, and paste it into your browser. The video will instantly show the new name with infinite variants from one master video.
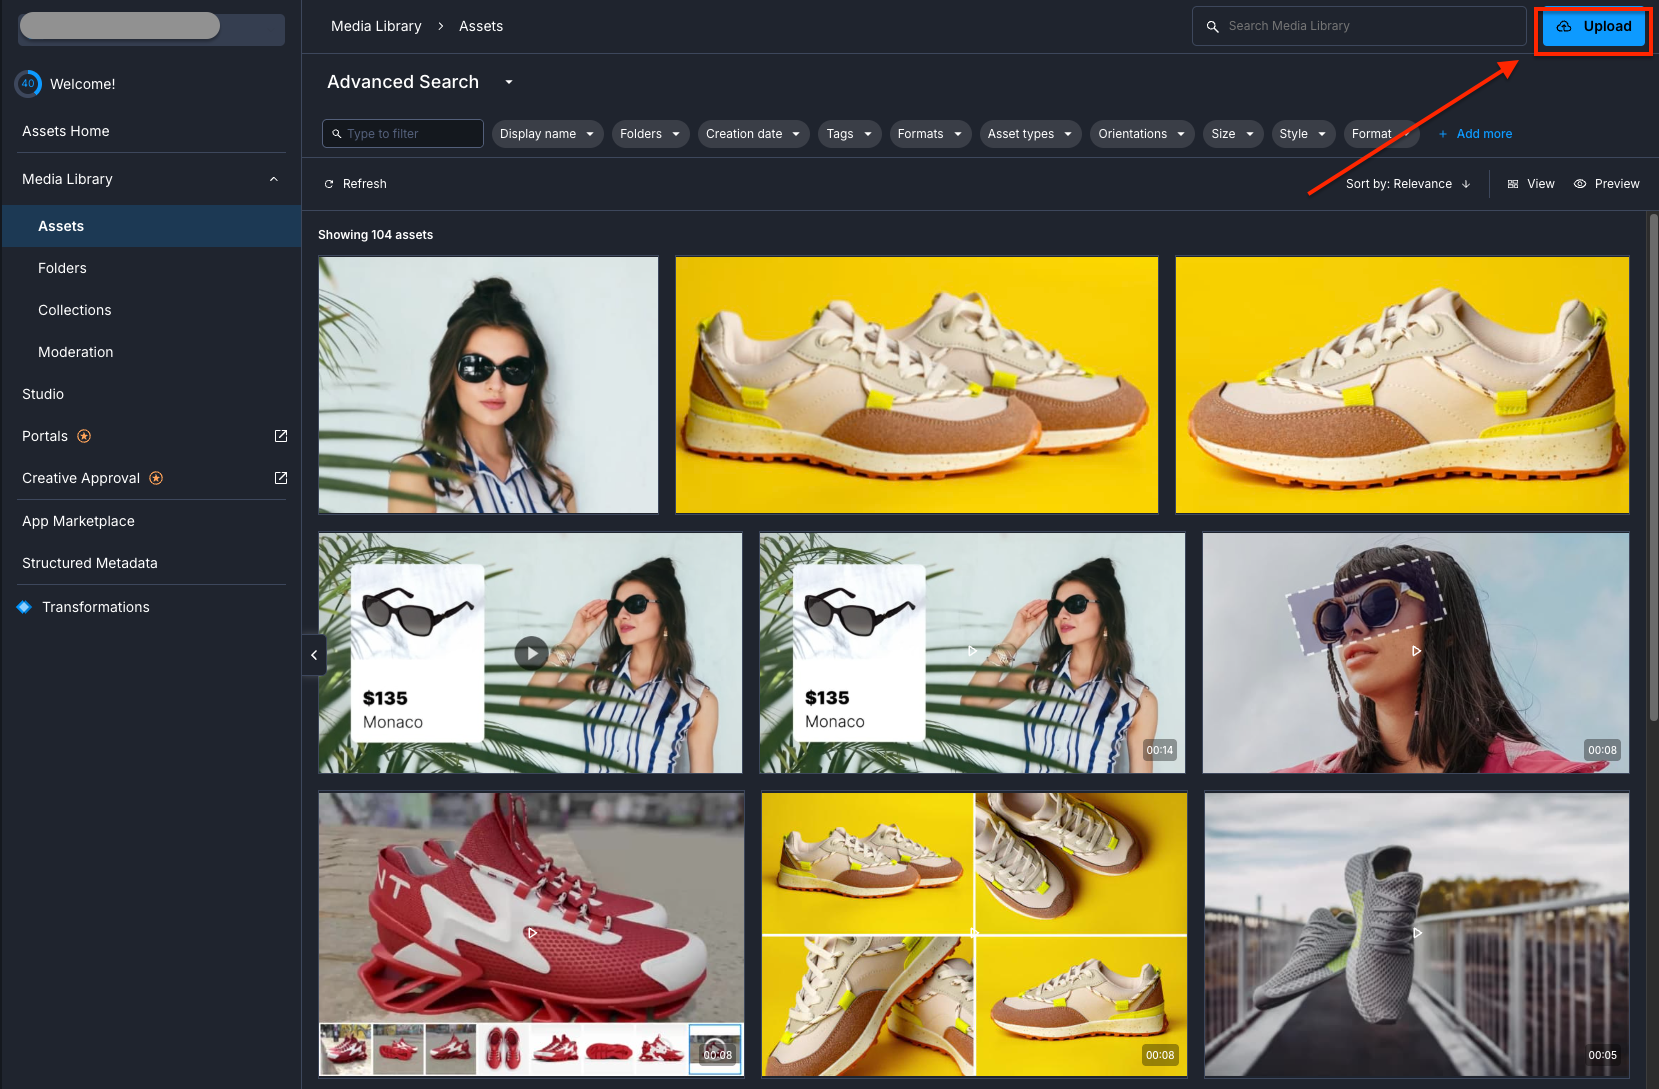
First, upload logos to your Cloudinary account using consistent names like:
`adidas-logo`

`nike-logo`

`amc-logo`Code language: JavaScript (javascript)
To upload the logos, navigate to your Cloudinary dashboard and click the Upload button shown below:
Next, add a logo to any video by inserting:
<code>https://res.cloudinary.com/<your_cloud_name>/video/upload/        // Your base video URL</code>
<code>l_Onyx___Linen-white_lnu8yj,w_550,g_north_east,x_30,y_30,o_80/ // Transformation</code>
<code>v1763034720/8344923-uhd_3840_2160_25fps_echink.mp4</code>Code language: HTML, XML (xml)
The transformation explained:
l_adidas-logooverlays the adidas logo.w_150sets width to 150 pixels.g_north_easttop-right corner.x_30,y_30is 30 pixels from edges.o_80is 80% opacity for subtle branding.
You should obtain a result similar to the one shown below.
Add both name and logo by chaining transformations with fl_layer_apply:
https://res.cloudinary.com/<your_cloud_name>/video/upload

l_text:montserrat_200_bold:New%20Collection,co_white/

fl_layer_apply,g_south_west,x_40,y_60/

l_Onyx___Linen-white_lnu8yj/w_450/fl_layer_apply,g_north_east,x_30,y_30/

v1763034720/8344923-uhd_3840_2160_25fps_echink.mp4Code language: PHP (php)
Each forward slash (/) and fl_layer_apply adds another personalization layer. This declarative API-driven approach means no manual video editing, just URL parameters.
For example, you can show special offers or greetings only at the beginning of a video for a personalized experience:
https://res.cloudinary.com/<your_cloud_name>/video/upload

<code>l_text:arial_120:Special%20Offer%20for%20You!,co_rgb:ffcc00,g_center,so_0,eo_5/</code>
<code>v1763034720/8344923-uhd_3840_2160_25fps_echink.mp4</code>Code language: HTML, XML (xml)
New timing parameters:
so_0: Start overlay at 0 seconds.eo_5: End overlay at 5 seconds.
Make overlays scale with video dimensions using fl_relative:
https://res.cloudinary.com/<your_cloud_name>/video/upload

l_Onyx___Linen-white_lnu8yj/c_scale,fl_relative,w_0.15/

fl_layer_apply,g_north_east,o_70,x_0.05,y_0.05/

v1763034720/8344923-uhd_3840_2160_25fps_echink.mp4Code language: HTML, XML (xml)
The fl_relative flag makes:
w_0.15: Logo width is 15% of video width.x_0.05,y_0.05: Position 5% from edges.
This ensures your overlays look perfect on any screen size. Next, you’ll create a simple personalization tool that is typically used for campaigns.
For campaign operations teams, here’s how to manage personalization at scale using just a spreadsheet:
1. Create a spreadsheet with these columns:
- Column A: Customer Name
- Column B: Company
- Column C: Coupon Code
- Column D: Generated Video URL
- Add this formula in Column D2 (adjust for your cloud name):
<code>=CONCATENATE( "<a href="https://res.cloudinary.com/yourcloud/video/upload/" target="_blank" rel="noreferrer noopener">https://res.cloudinary.com/<your_cloud_name>/video/upload/</a>", IF(A2<>"", "l_text:arial_60:Hi%20" & ENCODEURL(A2) & ",co_white,g_north,y_50/", ""), IF(B2<>"", "fl_layer_apply,l_logos:" & LOWER(B2) & ",w_100,g_north_east,x_30,y_30/", ""), IF(C2<>"", "fl_layer_apply,l_text:arial_45:Code%3A%20" & C2 & ",co_yellow,g_south,y_60,so_8/", ""), "campaign_video.mp4" )</code>Code language: HTML, XML (xml)- Fill in your data, and the formula automatically generates personalized URLs.
- Copy URLs to your email platform or CRM.
This approach can efficiently handle hundreds of personalization variants. In the following section are some use cases and transformation syntax for you to create a declarative, personalized experience.
Let’s explore how you can create a declarative personalization experience for users.
This is a perfect use case for onboarding videos or campaigns for returning customers. The greeting appears briefly at the start, then disappears to let your main content shine through.
Personalized welcome message URL:
<code>https://res.cloudinary.com/demo/video/upload/l_text:montserrat_80_bold:Welcome%20back%20Jane!,co_white,e_shadow:50,g_north,y_100,so_1s,eo_6s/docs/walking_talking.mp4</code>Code language: HTML, XML (xml)Let’s break it down.
https://res.cloudinary.com/demo/video/upload

l_text:montserrat_80_bold:Welcome%20back%20Jane!,  // Large, bold greeting

co_white,                                           // White text for contrast

e_shadow:50,                                        // Shadow effect for readability

g_north,                                            // Position at top center

y_100,                                              // 100 pixels from top edge

so_1,eo_6                                          // Show from 1-6 seconds only

/docs/walking_talking.mp4Code language: JavaScript (javascript)Ideal for promotional campaigns where you need the discount code to be easily visible. The background opacity (dd in rgb:000000dd) can be adjusted from 00 (transparent) to ff (opaque) based on your video content, while the timing parameter (so_10) controls when your offer appears for maximum impact.
Coupon overlay transformation URL:
<code>https://res.cloudinary.com/demo/video/upload/l_text:arial_65_bold:Code%3A%20SAVE30,co_rgb:ffff00,b_rgb:000000dd,r_20,g_south,y_150,so_10,w_350,h_80/docs/walking_talking.mp4</code>Code language: HTML, XML (xml)Here’s how each parameter works:
https://res.cloudinary.com/demo/video/upload

l_text:arial_65_bold:Code%3A%20SAVE30,  // Bold text with "Code: SAVE30"

co_rgb:ffff00,                          // Bright yellow for urgency

b_rgb:000000dd,                         // Semi-transparent black background

r_20,                                    // 20px rounded corners for modern look

g_south,                                 // Position at bottom center

y_150,                                   // 150 pixels from bottom

so_10                                    // Appear after 10 seconds (perfect timing)

/docs/walking_talking.mp4Code language: JavaScript (javascript)This type of personalization is ideal for account-based marketing or partner campaigns that need to reflect both individual and company-specific details. Each layer appears at strategic moments to maximize engagement without overwhelming the viewer.
Multi-layer personalization URL:
<code>https://res.cloudinary.com/demo/video/upload/l_text:arial_80_bold:Welcome%20Sarah,co_white,g_north,y_100,so_0,eo_4/fl_layer_apply,l_text:arial_60_bold:IBM%20Partner%20Discount,co_rgb:ffcc00,g_south,y_100,so_8/docs/walking_talking.mp4</code>Code language: HTML, XML (xml)Understanding the layer structure:
https://res.cloudinary.com/demo/video/upload

l_text:arial_80_bold:Welcome%20Sarah,   // Personal greeting layer

co_white,                                // Clean white text

g_north,y_100,                          // Top position, 100px down

so_0,eo_4/                              // Shows 0-4 seconds, then disappears

fl_layer_apply,                         // Apply first layer, then add next

l_text:arial_60_bold:IBM%20Partner%20Discount,  // Business context layer

co_rgb:ffcc00,                         // Yellow for the offer

g_south,y_100,                          // Bottom position (no overlap)

so_8                                    // Appears at 8 seconds for CTA

/docs/walking_talking.mp4Code language: JavaScript (javascript)
Each parameter is declarative; you’re describing what you want, not how to render it. Cloudinary handles complex video processing, delivering infinite variants from a single master video in real-time.
So what should you consider, and what does this actually mean for your campaigns? Let’s look at some best practices and their benefits.
1. Use reliable naming conventions. Create consistent patterns for your overlay assets to prevent broken personalizations:
<code>/overlays/logos/partner_[company-name].png /overlays/badges/tier_[level].png /overlays/watermarks/campaign_[id].png</code>Code language: HTML, XML (xml)This structure makes dynamic references predictable and reduces 404 errors.
2. Sanitize input for text overlays. Always clean user-generated content before adding to URLs. Replace special characters that break transformations:
BAD: Hi Sarah's Team! // Apostrophe breaks URL

GOOD: Hi Sarah Team! // Clean and safe

BAD: Welcome, John & Jane // Special characters cause issues

GOOD: Welcome John and Jane // Works perfectlyCode language: HTTP (http)
For names with special characters, use URL encoding twice and %2527 for apostrophes.
3. Monitor your transformation quota. Each dynamic request uses transformation credits. To optimize usage:
- Cache frequently used personalizations for 24 hours.
- Pregenerate URLs for your top 100 customers.
- Use CDN caching for repeated requests.
4. Implement smart caching. Store generated URLs to reduce repeated transformations:
Spreadsheet approach:

Column A: Customer Name

Column B: Generated URL (cached)

Column C: Expiry Date (24 hours)Code language: JavaScript (javascript)
Only regenerate when URLs expire or data changes.
5. Build fallback logic. If a logo doesn’t exist, show a default:
Primary: l_logos:acme_corp
Fallback: l_logos:default_partner
If personalization data is missing:
- Name missing → Use “Valued Customer”
- Logo missing → Show generic branding
- Code missing → Display general offer
6. Test edge cases before launch. Before going live, verify these scenarios:
- Names with apostrophes (O’Brien, D’Angelo).
- Very long names (more than 30 characters).
- Missing personalization data.
- Non-Latin characters.
- Different video resolutions.
The shift to dynamic overlays delivers measurable business value:
- No manual editing after setup. Skip the tedious cycle of opening your video editor, swapping out names, adjusting logos, waiting for renders, and managing export queues for every single personalization.
- Unlimited variants from a single video. Generate millions of personalized videos from a single master file. Create platform-specific versions (square for Instagram, 16:9 for YouTube, vertical for Stories), localize for different regions with translated text overlays, customize for each customer segment with relevant offers, and even run A/B tests with different CTAs. You can do all of this without creating new video files.
- Consistent branding. Your logos always appear in the correct position. Typography standards maintain themselves across all variations. Brand guidelines apply programmatically.
- Faster campaign turnaround. Launch personalized campaigns in hours, not weeks, and test different personalization strategies quickly.
- Lower asset management load. One video file instead of hundreds means reduced storage costs, simplified version control, and easier compliance tracking. Your digital asset management (DAM) no longer explodes with variations.
You’ve just built a comprehensive video personalization system that transforms a single video into an infinite number of variations. Instead of editing hundreds of files and managing storage chaos, you can now use simple URL transformations to deliver personalized content at any scale. Every name, logo, and discount code is applied on demand through transformation URLs, without rendering or waiting, for instant personalization.
Start with your highest-value campaigns, such as welcome videos, product demos, or seasonal promos. Test a small segment, use the Google spreadsheet method, then measure the increase in engagement and scale with developer tools if needed.
Sign up for Cloudinary today to transform your video campaigns with dynamic personalization that scales.
Resources: